• Just a reminder that you won't be able to start new posts or reply to existings posts in the Archive forum.

    This is where all the old posts go so they can still be used for reference and searched.
  • Welcome to ClassicBroncos! - You are currently viewing the forums as a GUEST. To take advantage of all the site features, please take a moment to register. It's fast, simple and absolutely free. So please join our community today!
    If you have problems registering or can't log into your account, please contact Admin.

Project: Rockin' Horse

OP
OP
TAWL_BOY

TAWL_BOY

Sponsor/Vendor
Jr. Member
Joined
May 26, 2013
Messages
336
Loc.
Friendswood, TX
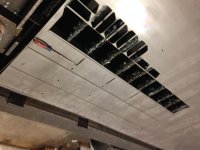
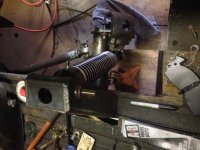
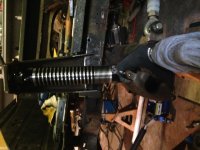
Notched the TMR Strut towers to mount them in a way to give good angles and provide plenty of room to be able to mount a rear seat
IMG_2467.jpg

IMG_2468.jpg

IMG_2491.jpg
I will be fabricated a boxed in gusset from the top of the frame to the back of the tower.
I've been scratching my head about making a removable tube connecting the 2 that can be used for attaching rear lap belts.

Ultimately, I want plenty of room for gear(ice chest, tools, and stuff) when not running a rear seat.
_____
Pic are fine on my computer. I don't know why the orientation is off when posting on the forums.

Any ideas?
 
OP
OP
TAWL_BOY

TAWL_BOY

Sponsor/Vendor
Jr. Member
Joined
May 26, 2013
Messages
336
Loc.
Friendswood, TX
I don't known what pics are posting upside-down all the sudden. They're fine in the Photos app on my Mac

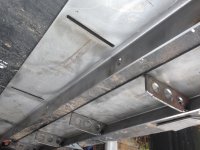
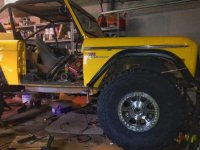
I've got a buddy with a plasma table and a CNC press brake.

So I made some parts.

Y'all know what it is?
IMG_2746.jpg

IMG_2744.jpg

IMG_2747.jpg

IMG_2775.jpg

IMG_2776.jpg
 
OP
OP
TAWL_BOY

TAWL_BOY

Sponsor/Vendor
Jr. Member
Joined
May 26, 2013
Messages
336
Loc.
Friendswood, TX
CrawlTunes Cyber Week Deals End Tomorrow at midnight. Plus sharing our video post off our Facebook enters you in a Roll Cage Quick Mount Giveaway

Check out our video. Pleas like, share, and subscribe. It really helps get the word out.

https://www.youtube.com/watch?v=u0bIgI2YdxI

The bigger we get, the more products we'll come out with and the crazier our builds will get.

Thanks for all y'all done for us.
 
OP
OP
TAWL_BOY

TAWL_BOY

Sponsor/Vendor
Jr. Member
Joined
May 26, 2013
Messages
336
Loc.
Friendswood, TX
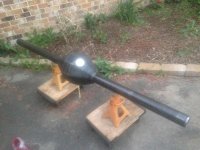
Got a Trail Gear Rock Assault 9 axle housing
IMG_3045.jpg
-Went with TG for the 3" 3/8" wall axle tubes so I can use Duff radius arm wedges.

This is as tight as I can tuck it up against the oil pan.
IMG_3055.jpg
-This is 1.5" forward from stock.

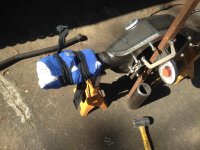
Threw the Solid inner c's in the oven at 500*
IMG_3060.jpg

And threw my ice pack(for all my ailments) around the end of the axle tube
IMG_3058.jpg
-C's slid right on, but I wasn't quick enough setting caster on the first one before it cooled. It's at 4 and I was shooting for 6*.
I'll use a torch and hammer later to readjust.
 
OP
OP
TAWL_BOY

TAWL_BOY

Sponsor/Vendor
Jr. Member
Joined
May 26, 2013
Messages
336
Loc.
Friendswood, TX
Mocked up the James Duff Extended Radius Arms
IMG_3079.jpg

This is as high as I can move the axle up right now, due to clearance issues.
IMG_3078.jpg
-'Bout 2"s from where I want full bump.

The radius arms are contacting the frame.
IMG_3081.jpg
-I plan to notch the bottom of the frame just where I need to and box it back in.
 
OP
OP
TAWL_BOY

TAWL_BOY

Sponsor/Vendor
Jr. Member
Joined
May 26, 2013
Messages
336
Loc.
Friendswood, TX
Custom All-Thread high steer

IMG_3129.jpg
-trying to mockup where the Artec Steering arms would be(they should be arriving soon)

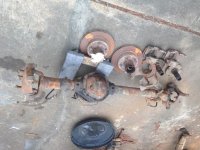
Scored a free Dana 60, with missing shafts and carrier, for the knuckles from a good buddy.
IMG_3130.jpg
-so I've got a some GM 8 on 6.5 hubs and rotors for sale

This was becoming quite the cluster
IMG_3131.jpg
-I couldn't get close to the bump height I was shooting for

So the process to move the steering box forward 2" began.
IMG_3132.jpg
-had to make room behind the grill

IMG_3133.jpg
-and clearance the body mount to for the base of the box. I'll be boxing it in and bracing it.
 
OP
OP
TAWL_BOY

TAWL_BOY

Sponsor/Vendor
Jr. Member
Joined
May 26, 2013
Messages
336
Loc.
Friendswood, TX
'mother angle
IMG_3134.jpg

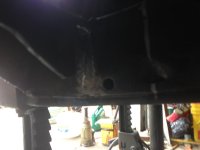
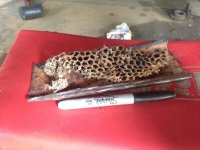
Found this in the frame rail. Really glad it wasn't occupied.
IMG_3135.jpg

After moving the steering box forward. I had to cut the bottom off the front x-member. I'll probably cut out the whole thing and make something with a lower profile out of tube.
IMG_3136.jpg
-ignore the butt spliced drag link. I just put together something for mockup.
 
OP
OP
TAWL_BOY

TAWL_BOY

Sponsor/Vendor
Jr. Member
Joined
May 26, 2013
Messages
336
Loc.
Friendswood, TX
I've spent a lot of time raising the axle back and forth from full bump to ride and and measuring and adjusting and using scrap to try and achieve the lowest bump height I could, have the draglink and pan hard parallel to the ground(and each other) at ride height, and have them equal length.

Full hydro would have been so much easier.

I completely cut out the engine x-member, I'll make a new one out of tube.

While waiting on tires and wheels, I wanted to make sure I had the tire clearance to go lock to lock at full bump.

So I modified my mockup 40, and fired up the plasma.
IMG_3227.jpg

IMG_3228.jpg

IMG_3229.jpg

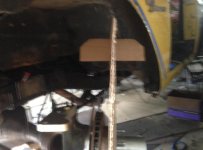
The front body mounts at the core support are in the way. But I will be pulling the inner fenders out and doing a tube core support that will connect to my cage through the firewall and I'll have to fab some new front mounts.

Got in my 40" ProComp MT2s and one 17" Raceline Monster Beadlock.
I wanted to make sure the backspacing was gonna work before I committed to 5 that I might have to pay to ship back.

IMG_3379.jpg

IMG_3381.jpg
This should be ride height with 5" of up travel on 14" ORI STXs.
 
Top