• Welcome to ClassicBroncos! - You are currently viewing the forums as a GUEST. To take advantage of all the site features, please take a moment to register. It's fast, simple and absolutely free. So please join our community today!
    If you have problems registering or can't log into your account, please contact Admin.

Roacher's Colorado Build is FINISHED!!

The Roacher

Newbie
Joined
Sep 3, 2015
Messages
35
3 Years later and 3X's the money initially allocated...She's done!!

I will be sharing a couple pics every few days so you can all enjoy the long and satisfying journey it went through...also, I prefer delayed gratification..

Enjoy!!

Week 1 Pics...In PO's back yard... and finally in my shop...
 

Attachments

  • IMG_1362.jpg
    IMG_1362.jpg
    70.3 KB · Views: 306
  • IMG_1400.JPG
    IMG_1400.JPG
    102 KB · Views: 236
  • IMG_1380.JPG
    IMG_1380.JPG
    116.3 KB · Views: 219
  • IMG_1377.JPG
    IMG_1377.JPG
    94 KB · Views: 212
  • IMG_1376.JPG
    IMG_1376.JPG
    114.6 KB · Views: 271
  • IMG_1375.JPG
    IMG_1375.JPG
    129.8 KB · Views: 245
  • IMG_1365.jpg
    IMG_1365.jpg
    83.4 KB · Views: 236

Fireball05

Bronco Guru
Joined
Oct 7, 2012
Messages
1,822
3x the money originally allocated is pretty much ON BUDGET for a bronco build!

Will look forward to following along.
 
OP
OP
The Roacher

The Roacher

Newbie
Joined
Sep 3, 2015
Messages
35
Step 2...

After getting her home, tearing down the easy stuff and removing not one, but TWO! layers of residential carpet, I realized just how wrong I was the day I bought it and said to myself..."Oh Yeah!! That body in in GREAT shape!!";D
 

Attachments

  • IMG_1430.jpg
    IMG_1430.jpg
    70.5 KB · Views: 117
  • IMG_1439.jpg
    IMG_1439.jpg
    78 KB · Views: 115
  • IMG_1482.jpg
    IMG_1482.jpg
    80.9 KB · Views: 124
  • IMG_1432.jpg
    IMG_1432.jpg
    112.3 KB · Views: 119
  • IMG_1431.jpg
    IMG_1431.jpg
    130 KB · Views: 124
  • IMG_1427.jpg
    IMG_1427.jpg
    138.8 KB · Views: 120
  • IMG_1428.jpg
    IMG_1428.jpg
    102.5 KB · Views: 120
  • IMG_1425.jpg
    IMG_1425.jpg
    89.9 KB · Views: 120
  • IMG_1436.jpg
    IMG_1436.jpg
    95.8 KB · Views: 111
  • IMG_1437.jpg
    IMG_1437.jpg
    122.6 KB · Views: 110
OP
OP
The Roacher

The Roacher

Newbie
Joined
Sep 3, 2015
Messages
35
Step 3...

Yank the old 302 out of there and get her freshened up!!

Pull the body off the frame and get ready to clean 40 years of grime off of it!!

Side Note: If anyone asks you if its possible to pull the engine, tranny and transfer case out all at the same time...by yourself...the answer is yes:eek:

With air tools, a torch and grinder, taking everything apart was fun, fast and easy......once the body was off the frame, however, I thought about how its all going to go back together one day...

It was at this point that I realized I have no idea what I am doing...;D
 

Attachments

  • IMG_1729.jpg
    IMG_1729.jpg
    106.1 KB · Views: 93
  • IMG_1681.jpg
    IMG_1681.jpg
    160.2 KB · Views: 99
  • IMG_1680.jpg
    IMG_1680.jpg
    180.2 KB · Views: 93
  • IMG_1679.jpg
    IMG_1679.jpg
    178.7 KB · Views: 96
  • IMG_1487.jpg
    IMG_1487.jpg
    110.4 KB · Views: 97
  • IMG_1494.jpg
    IMG_1494.jpg
    129.4 KB · Views: 92
  • IMG_1573.jpg
    IMG_1573.jpg
    128.7 KB · Views: 99
  • IMG_1600.jpg
    IMG_1600.jpg
    117.2 KB · Views: 85
  • IMG_1730.jpg
    IMG_1730.jpg
    112.2 KB · Views: 111

1strodeo

Contributor
Squirrel Watcher
Joined
Sep 15, 2016
Messages
3,597
Loc.
Wisconsin
It was at this point that I realized I have no idea what I am doing...;D

That's a great feeling aint it?? Scary and exciting at the same time, I'll be watching for more pics

....did anyone else try to cheat by going to his Garage pics??? ;D:(
 

bamabaja

Contributor
Sr. Member
Joined
Mar 25, 2012
Messages
729
Loc.
The Shoals
Looks like great Bones for ur rebuild. Trust me, tear down is the easy and fast part. Have a detailed, written plan; create a shop plan for ID and storage of ur parts (storage location in ur shop); list of new and used parts; photos and videos of disassembly for future reference. And store ur photos on a several platforms, the cloud (read probably Me) lost some photos. I have critical photos printed at CVS and put in folder by systems, ie steering, front axle, etc; keep a list of work completed. We think we will remember all these things, but months later u may not. And this info is priceless for reassembly, repairs and upgrades, and documentation for future sale. Have fun and good luck !
 
OP
OP
The Roacher

The Roacher

Newbie
Joined
Sep 3, 2015
Messages
35
Step 4...not really a step....

If you wield the "Trident of the Ancient Ford Gods" (Steering Column)...You also hold the power to control all sorts of beasts!!...Case in point: Nala & Auggie being good girls... (if you look close there are 2 pups there:cool:)
 

Attachments

  • IMG_1597 3 (2).jpg
    IMG_1597 3 (2).jpg
    94.5 KB · Views: 164

1strodeo

Contributor
Squirrel Watcher
Joined
Sep 15, 2016
Messages
3,597
Loc.
Wisconsin
Just did and saw a guy and a dog stuck to the ceiling.

If you wield the "Trident of the Ancient Ford Gods" (Steering Column)...You also hold the power to control all sorts of beasts!!...Case in point: Nala & Auggie being good girls... (if you look close there are 2 pups there:cool:)

Yeah I’ve seen many 3-legged dogs in my time, but I figured a 5-legger was a stretch ;D
 

sprdv1

Contributor
REBEL
Joined
Mar 8, 2007
Messages
81,875
If you wield the "Trident of the Ancient Ford Gods" (Steering Column)...You also hold the power to control all sorts of beasts!!...Case in point: Nala & Auggie being good girls... (if you look close there are 2 pups there:cool:)

LOL. I see one hiding over there.
 
OP
OP
The Roacher

The Roacher

Newbie
Joined
Sep 3, 2015
Messages
35
Steps 5,6,7,8 and 9...

When I started this project, I thought I could get away with a Gas Monkey Garage style overhaul...just throw in a new drive train, big disc brakes, some paint and your all set!!...quick and easy right?...

Well, the further I got into it, and the more I let my buddies convince me I'm getting in too deep to not "Do it right", the 3 month project I had in my head quickly turned into a full blown frame off Restomod, every nut and bolt eventually got pulled apart, scrubbed and/or replaced... Every inch of her had to be perfect now...I fought the idea for a while because I really just wanted to drive it ASAP...but I couldn't be happier that I took the time and $ to "Do it Right":cool:

Here are some Engine/Tranny/T-Case pics....
 

Attachments

  • IMG_1852 (2).jpg
    IMG_1852 (2).jpg
    138.4 KB · Views: 50
  • IMG_1851 (2).jpg
    IMG_1851 (2).jpg
    137.7 KB · Views: 52
  • IMG_1850 (2).jpg
    IMG_1850 (2).jpg
    132.4 KB · Views: 54
  • IMG_1846 (3).jpg
    IMG_1846 (3).jpg
    137.2 KB · Views: 56
  • IMG_1842.jpg
    IMG_1842.jpg
    96.9 KB · Views: 53
  • IMG_1840.jpg
    IMG_1840.jpg
    85.9 KB · Views: 52
  • IMG_1838.jpg
    IMG_1838.jpg
    123.3 KB · Views: 50
  • IMG_1837.jpg
    IMG_1837.jpg
    109.6 KB · Views: 60
  • IMG_1872.jpg
    IMG_1872.jpg
    96.1 KB · Views: 65
  • IMG_1874.jpg
    IMG_1874.jpg
    119.7 KB · Views: 54
  • IMG_1873.jpg
    IMG_1873.jpg
    111.3 KB · Views: 53
  • IMG_1853 (2).jpg
    IMG_1853 (2).jpg
    93.6 KB · Views: 54
Last edited:
OP
OP
The Roacher

The Roacher

Newbie
Joined
Sep 3, 2015
Messages
35
Step 10...Blasting, Body and Bracing...Oh My!!

Took her down to my local blasting shop where they did a combination of sand and soda blasting, depending on the surface...(thanks to everyone here for letting me know the differences and when to use them!!)

I welded a few braces in the door jams for added rigidity...(another tip from ClassicBroncos.com)...the body would have 100% folded up on itself if I hadn't...

They did the tub, underbelly and the frame as well(every inch)...and they did a great job!!

Got her home and got to see all of the previous work that had been done on the body... there was ALOT to see....the upper inner fenders were both shot...and I replaced the tunnel and pans in the driver/passenger area...

Some of it was obvious and I was expecting to see small issues, but the work they did on the lower rear fenders was done so well, I was shocked to see what was lurking under there all the while!!:eek:

Next Stop, Patch her back up!!
 

Attachments

  • IMG_2360.jpg
    IMG_2360.jpg
    76.4 KB · Views: 76
  • IMG_2351.jpg
    IMG_2351.jpg
    75.7 KB · Views: 76
  • IMG_1861.jpg
    IMG_1861.jpg
    102.5 KB · Views: 79
  • IMG_1864.jpg
    IMG_1864.jpg
    72.3 KB · Views: 83
  • IMG_1863.jpg
    IMG_1863.jpg
    103.5 KB · Views: 79
  • IMG_1862.jpg
    IMG_1862.jpg
    86.5 KB · Views: 79
  • IMG_1860.jpg
    IMG_1860.jpg
    104.7 KB · Views: 85
  • IMG_2353.jpg
    IMG_2353.jpg
    76.9 KB · Views: 73
  • IMG_2359.jpg
    IMG_2359.jpg
    65.6 KB · Views: 76
  • IMG_2356 (2).jpg
    IMG_2356 (2).jpg
    94.6 KB · Views: 83
  • IMG_2355.jpg
    IMG_2355.jpg
    76.8 KB · Views: 83
  • IMG_2354.jpg
    IMG_2354.jpg
    77.9 KB · Views: 84
OP
OP
The Roacher

The Roacher

Newbie
Joined
Sep 3, 2015
Messages
35
Big Step Today!!

I have fond memories of this day...

Got to put the drive train back on the frame...

The frame got new leafs, bushings all around, body mounts, 2 1/2 in lift kit from WH I believe...I eventually discovered that I needed to shim the rear axle to get the correct driveshaft angle,

I also had to the same to the front axle (I used 7 degree bushings) to get enough caster...
**This made SO much difference in the handling**highly recommended if you rig feels a bit squirrely

Believe it or not, the engine ran VERY smooth and quiet when I bought it... so I didn't do hardly a thing to the block, but literally every component that attaches to it was restored to perfect, or purchased new(and upgraded) if it was available...

After what seemed like hundreds of hours of elbow grease up to this point, lost of bloody knuckles and a few cusses....seeing this base come together and having it ready to build off of was extremely gratifying to say the least!!:cool:

my buddy (who built muscle cars for a living for years) said he will never forgive me for all the different colors I put on the drive train...he's a "Satin Black" guy

At least I stuck w Ford Blue!!(kind of :p)
 

Attachments

  • IMG_1924.jpg
    IMG_1924.jpg
    118.3 KB · Views: 68
  • IMG_1923.jpg
    IMG_1923.jpg
    116.4 KB · Views: 67
  • IMG_1925.jpg
    IMG_1925.jpg
    128.4 KB · Views: 60
  • IMG_1909.jpg
    IMG_1909.jpg
    123.8 KB · Views: 61
  • IMG_1907.jpg
    IMG_1907.jpg
    108.6 KB · Views: 62
  • IMG_1906.jpg
    IMG_1906.jpg
    134.4 KB · Views: 63
  • IMG_1908.jpg
    IMG_1908.jpg
    133.4 KB · Views: 61
  • IMG_1910.jpg
    IMG_1910.jpg
    123.1 KB · Views: 66
  • IMG_1928.jpg
    IMG_1928.jpg
    129.2 KB · Views: 76
  • IMG_1927.jpg
    IMG_1927.jpg
    142.3 KB · Views: 65
  • IMG_1926.jpg
    IMG_1926.jpg
    139.6 KB · Views: 68

sprdv1

Contributor
REBEL
Joined
Mar 8, 2007
Messages
81,875
Love all the pics bud, thanks for sharing...

I hope you get lots of enjoyment out of it
 
OP
OP
The Roacher

The Roacher

Newbie
Joined
Sep 3, 2015
Messages
35
Practicing Patience Provides Plentiful Peroids of Persistant Pain!!

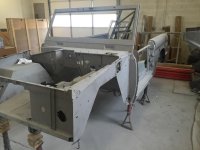
The ONE thing that I was unable to do on my own during this process was the Body and Paint...?:?

Since this was something that I had never done, I did a ton of research about body work over the months leading up to this step and ultimately came to the conclusion that it would be best to sub it out.(and I'm glad I did)

I could have bought all the tools and spent all the time in the world in an attempt to tackle this myself, but in the end I knew this was out of my skill set and need a seasoned pro to do her justice.

That being said, once I got a shop to agree to take it on.... Well, lets just say their idea of a quick turn around vs mine were a weee bit different...

That was the longest 8 weeks of my life...

...waiting... checking in...stopping by to check progress...waiting...more waiting...I felt like a high schooler sitting by the phone waiting for his crush to call...it was excruciating...

But alas, the sun did rise and set again...and eventually, I headed down with my trailer(and a large handful of cash) and got to take her back home...WITH FRESH PAINT ON IT!!!;D;

I could not have been happier!!

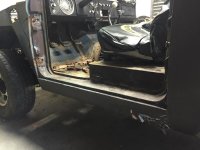
They NAILED everything... the prep, the color, the line-x, the seams...everything looked awesome!!

But you'll have to wait until Monday to see all that..heheh…

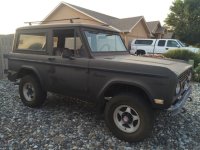
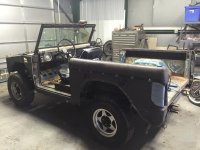
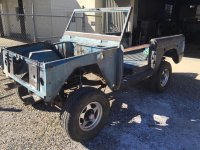
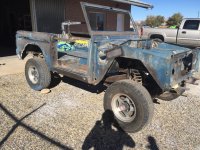
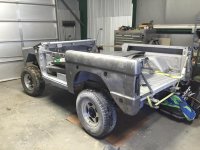
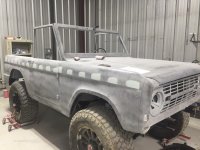
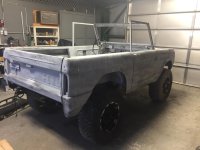
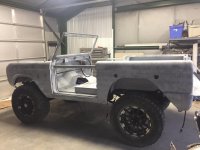
I slapped some 35's on it to see how it looked with my 2 1/2" lift...spoiler alert..I ended up going w 33's on some new badass 18" wheels...(not shown here)..these are the old 35's on 18's

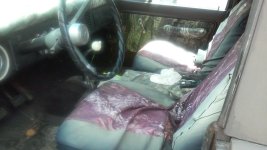
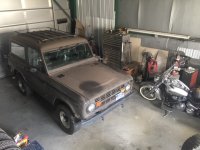
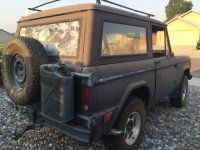
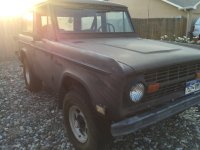
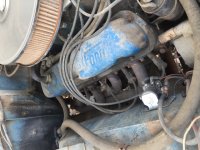
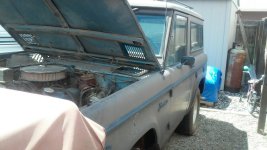
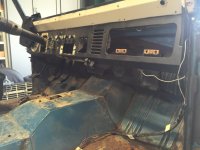
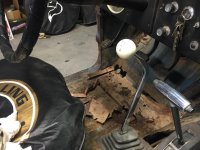
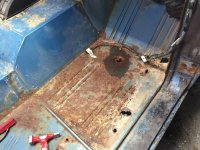
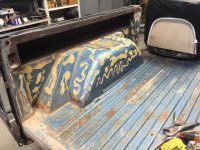
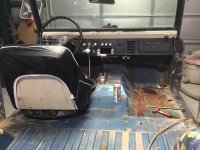
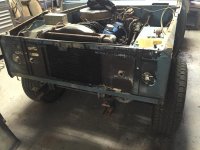
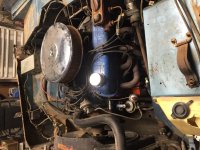
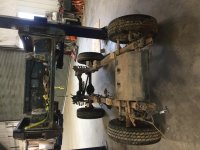
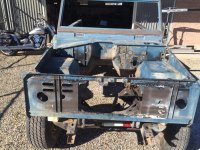
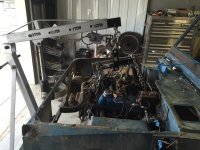
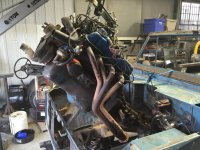
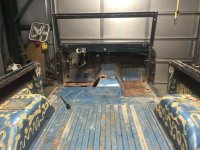
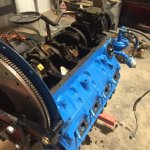
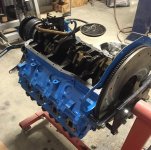
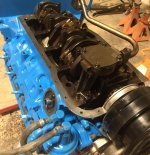
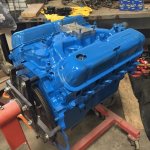
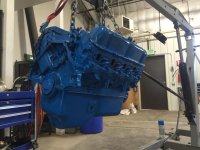
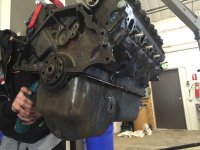
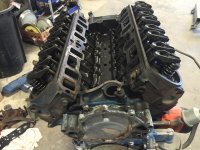
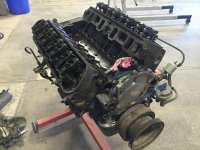
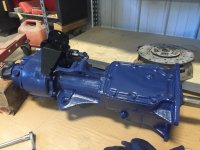
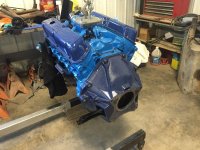
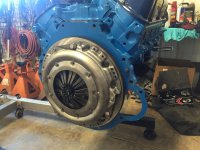
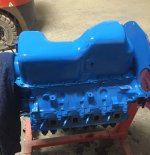
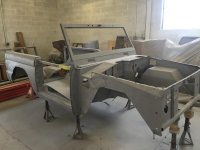
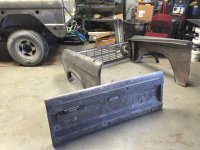
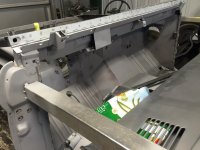
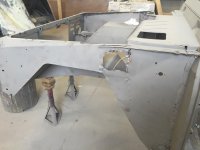
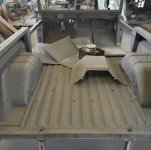
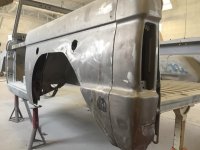
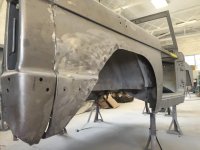
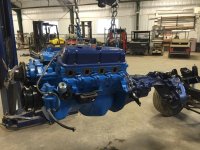
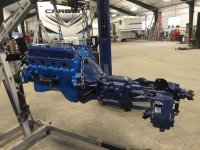
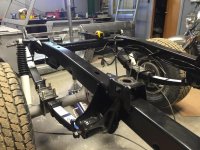
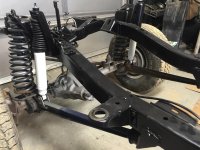
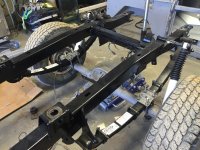
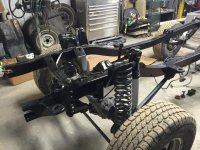
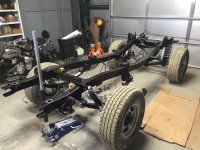
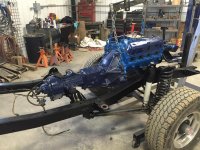
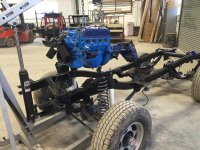
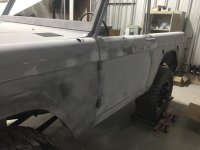
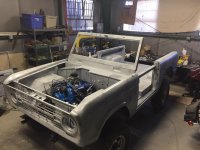
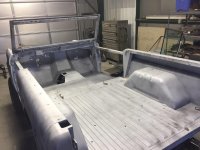
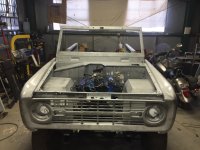
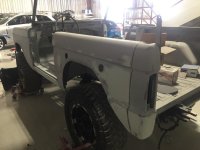
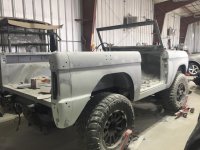
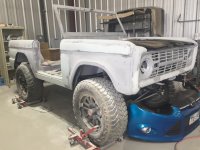
Here are some in process pics:cool:
 

Attachments

  • IMG_3760.jpg
    IMG_3760.jpg
    63.7 KB · Views: 60
  • IMG_3759.jpg
    IMG_3759.jpg
    98.2 KB · Views: 74
  • IMG_2517.jpg
    IMG_2517.jpg
    77.3 KB · Views: 68
  • IMG_2465.jpg
    IMG_2465.jpg
    78.2 KB · Views: 70
  • IMG_2462.jpg
    IMG_2462.jpg
    99.6 KB · Views: 65
  • IMG_2461.jpg
    IMG_2461.jpg
    93.8 KB · Views: 66
  • IMG_2459.jpg
    IMG_2459.jpg
    92.2 KB · Views: 70
  • IMG_2458.jpg
    IMG_2458.jpg
    101.2 KB · Views: 67
  • IMG_4038.jpg
    IMG_4038.jpg
    74.7 KB · Views: 59
  • IMG_4039.jpg
    IMG_4039.jpg
    102 KB · Views: 61
  • IMG_4040.jpg
    IMG_4040.jpg
    104.1 KB · Views: 78
Top