• Just a reminder that you won't be able to start new posts or reply to existings posts in the Archive forum.

    This is where all the old posts go so they can still be used for reference and searched.
  • Welcome to ClassicBroncos! - You are currently viewing the forums as a GUEST. To take advantage of all the site features, please take a moment to register. It's fast, simple and absolutely free. So please join our community today!
    If you have problems registering or can't log into your account, please contact Admin.

The orange beast isn't very orange anymore

OP
OP
K

kuch68

Jr. Member
Joined
Aug 8, 2001
Messages
135
Loc.
Waterford, MI
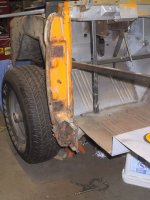
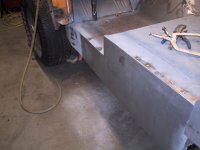
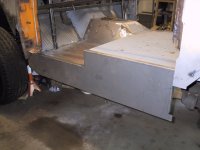
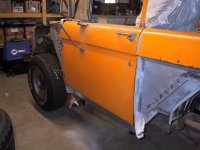
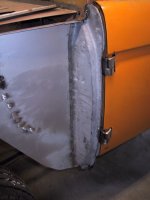
More progress from a very busy Sunday. I did finish the last of the rear wheel well and front filler neck cover, and moved onto the door area. The wheel wells will have to be reinforced once the tub is taken off the frame since it is hard to reach from under the vehicle.

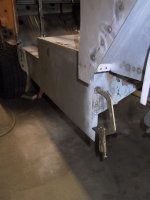
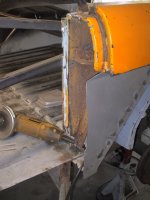
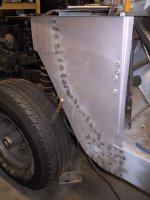
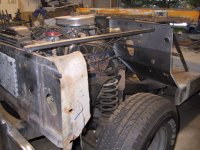
From lessons learned on the passenger side door, I took many extra measurements and continued to measure each time a new piece was being set up in the door area. I was able to cut out the old striker post, rocker panel, and inner rocker panel. I then prepped the support channels and floor pans and got most of the inner rocker welded in.

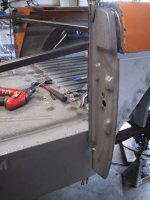
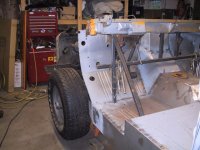
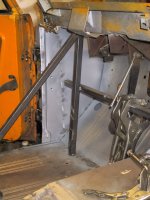
I line up the new striker post and it needs a little tweaking before welding. If all goes well I could be working on the kick panel, door post, and cowl panels by the end of next weekend, that is as long as I stay motivated.
 

Attachments

  • Large_IMG_2200.jpg
    Large_IMG_2200.jpg
    140 KB · Views: 17
  • Large_IMG_2211.jpg
    Large_IMG_2211.jpg
    69.8 KB · Views: 16
  • Large_IMG_2210.jpg
    Large_IMG_2210.jpg
    96.3 KB · Views: 11
  • Large_IMG_2207.jpg
    Large_IMG_2207.jpg
    112 KB · Views: 18
  • Large_IMG_2205.jpg
    Large_IMG_2205.jpg
    71.2 KB · Views: 14
  • Large_IMG_2202.jpg
    Large_IMG_2202.jpg
    129.3 KB · Views: 12
  • Large_IMG_2201.jpg
    Large_IMG_2201.jpg
    128.6 KB · Views: 17
OP
OP
K

kuch68

Jr. Member
Joined
Aug 8, 2001
Messages
135
Loc.
Waterford, MI
I was able to take some big steps over the last couple days. First and foremost, I was able to remove nearly all of the bracing in the vehicle. It has been quite some time since the Bronco was able to stand by itself. The only bracing left in the vehicle is up under the cowl to make sure the new pieces will go in straight.

After the bracing was taken out, I turned my attention to the drivers door post/kick panel. I cut everything out, lined up the new kick panel and door post and test fitted the door with everything screwed together. Due to diligent measuring, the door fit perfectly except the gap at the striker post was too narrow. Hopefully that can be fixed by some shims inside the door. I welded it together and the door closes effortlessly. Then I took on the passenger side door to get rid of the small sag after opening. A shim behind the lower hinge and it is cured. The doors never closed this well!

While I was cutting the bracing out, I used it to brace the firewall to the core support and cut out both inner fenders and wheel wells. Finally, I sat the new seats in the front to see how everything is coming together. These were probably the best deal of all. Two (brand new) seats for less than a pair of jeans. One of my buddies had a connection that retrofits GM Topkicks with new interiors, we got the last pairs.
 

Attachments

  • Large_IMG_2246.jpg
    Large_IMG_2246.jpg
    84.3 KB · Views: 8
  • Large_IMG_2244.jpg
    Large_IMG_2244.jpg
    81.5 KB · Views: 12
  • Large_IMG_2243.jpg
    Large_IMG_2243.jpg
    62.8 KB · Views: 9
  • Large_IMG_2240.jpg
    Large_IMG_2240.jpg
    77.9 KB · Views: 13
  • Large_IMG_2223.jpg
    Large_IMG_2223.jpg
    108 KB · Views: 9
  • Large_IMG_2224.jpg
    Large_IMG_2224.jpg
    95.4 KB · Views: 11
  • Large_IMG_2218.jpg
    Large_IMG_2218.jpg
    82 KB · Views: 9
  • Large_IMG_2245.jpg
    Large_IMG_2245.jpg
    94.2 KB · Views: 10
Top