Ok I've been asked numerous times for a build thread. I don't have a lot of pics but will share what I have and as many details as I can come up with.
As many of you know as a hobby I build competitive rock buggies, and other extreme hard core stuff. For the last 8 years I've had at least 1 chassis being beat on by the top drivers in the nation and has never finished under 5th place in the nation. Those that are interested in what that segment is like just google "Kenny Blume rock crawling" or "Kenny Blume roll overs" . That's enough about some of my back ground, lets get on with the build.
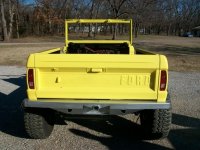
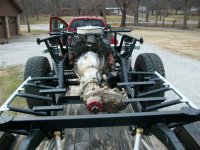
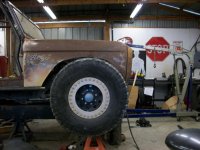
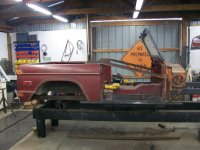
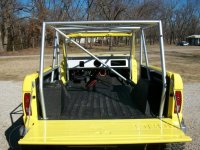
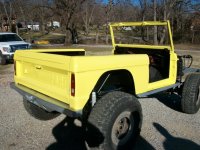
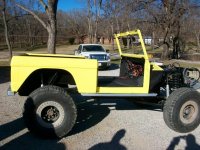
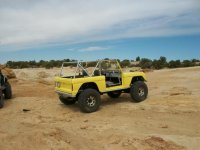
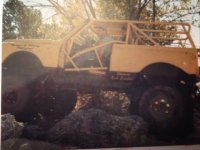
A little back ground on the rig, I had a complete K-5 Blazer that was 1 tonned and linked in the front that I killed the chassis on. I enjoyed the truck but it had its limitations and I obviously had pushed it harder than I thought and harder than it was going to accept. So I had a complete drive train and some other parts to put to another build. The idea was to take all of my experierence building buggies and build a full bodied early Bronco on a shoe string budget with spare parts and some creativity. If you see something and ask yourself "why did he use that?" more than likely the answer will be I had it laying around. The final goal wasn't so much a pristine EB but a highly functional buggy that has a complete (OK mostly complete) EB dress. I think it came out well.
I do have to give some special thanks where they are do. If it wasn't for Gordon Bailie it would not be pretty, it would be just as functional but not quite as refined. GatorHyde truck bed coating in Wagoner OK for spraying the bed liner inside and underneath. Kenny Blume for moral support and the occational, he hold this. Inphobic for inspiring me to build a bronco. And most importantly my wife for being a shop widow for a many months and always saying yes with a true happy smile.
He's some of the highlights for stuff:
TBI 350 (Since been swapped for a warmed up all aluminum 5.3 LS)
700r4
241 C (since been swapped for an 3.0:1 Atlas)
14 bolt rear
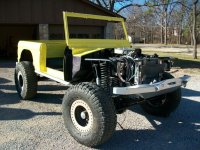
GM Dana 60 font
Jeep TJ steering box
Jeep CJ poly fuel tank
AFI wiring harness and computer for the TBI motor
Rebel Wire wiring harness
Raceline wheels 17x9-1/2 with 5" of backspacing, currently BTR 17x8 with 4-1/2” of back spacing.
5-1/2" BC Bronco coils (thank you INPHOBIC)
Bailie Bilt bumpers and tool trays
BDS shocks for a the rear of a lifted 1/2 ton chevy 11" stroke.
As many recycled parts as humanly possible.
I'm sure you've noticed a theme, no blue oval parts, I work on very few if any Fords in the shop so consequently no parts other than what were pruchased or aquired specifically for this project, Hence the name Broncno.
I
As many of you know as a hobby I build competitive rock buggies, and other extreme hard core stuff. For the last 8 years I've had at least 1 chassis being beat on by the top drivers in the nation and has never finished under 5th place in the nation. Those that are interested in what that segment is like just google "Kenny Blume rock crawling" or "Kenny Blume roll overs" . That's enough about some of my back ground, lets get on with the build.
A little back ground on the rig, I had a complete K-5 Blazer that was 1 tonned and linked in the front that I killed the chassis on. I enjoyed the truck but it had its limitations and I obviously had pushed it harder than I thought and harder than it was going to accept. So I had a complete drive train and some other parts to put to another build. The idea was to take all of my experierence building buggies and build a full bodied early Bronco on a shoe string budget with spare parts and some creativity. If you see something and ask yourself "why did he use that?" more than likely the answer will be I had it laying around. The final goal wasn't so much a pristine EB but a highly functional buggy that has a complete (OK mostly complete) EB dress. I think it came out well.
I do have to give some special thanks where they are do. If it wasn't for Gordon Bailie it would not be pretty, it would be just as functional but not quite as refined. GatorHyde truck bed coating in Wagoner OK for spraying the bed liner inside and underneath. Kenny Blume for moral support and the occational, he hold this. Inphobic for inspiring me to build a bronco. And most importantly my wife for being a shop widow for a many months and always saying yes with a true happy smile.
He's some of the highlights for stuff:
TBI 350 (Since been swapped for a warmed up all aluminum 5.3 LS)
700r4
241 C (since been swapped for an 3.0:1 Atlas)
14 bolt rear
GM Dana 60 font
Jeep TJ steering box
Jeep CJ poly fuel tank
AFI wiring harness and computer for the TBI motor
Rebel Wire wiring harness
Raceline wheels 17x9-1/2 with 5" of backspacing, currently BTR 17x8 with 4-1/2” of back spacing.
5-1/2" BC Bronco coils (thank you INPHOBIC)
Bailie Bilt bumpers and tool trays
BDS shocks for a the rear of a lifted 1/2 ton chevy 11" stroke.
As many recycled parts as humanly possible.
I'm sure you've noticed a theme, no blue oval parts, I work on very few if any Fords in the shop so consequently no parts other than what were pruchased or aquired specifically for this project, Hence the name Broncno.
I
Last edited: