Tech article by Viperwolf1
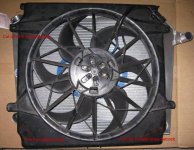
While gathering parts for my 5.0 EFI install I happened across a two speed electric fan from a 2004 Jeep Liberty, part number 55037669AE. This Liberty did not have the towing package. With the towing package the Liberty will have a different electric and a mechanical fan. The shape looked simple enough to make fitment easy and the depth was only about 4 ½” which was as short as I have seen any others.

After comparing it to my Ron Davis radiator I found that only minor trimming would be required to seal it to the radiator. Other Bronco radiators would probably have a similar fit.

Here’s a little more detailed view. Some minor trimming was also required at the upper radiator mount areas.
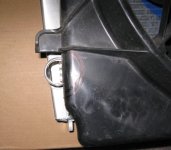
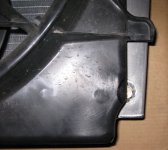
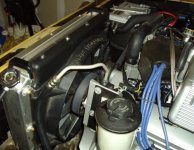
As you can see the fan shroud completely covers the radiator core with about ¼” to ½” extra over the tanks. This will prevent the fan from rubbing holes into the core tubes.
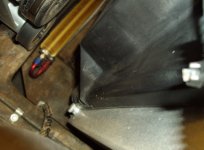
To mount the fan I used the radiator’s shroud mounting flanges at the top and bottom along with some ½” x ½” aluminum angle and some ¼”-20 bolts and locknuts . These photos show the bottom mounting.


The top is similar but the angle is reversed. I found it necessary to use captive speed nuts on the top four bolt holes. Can’t get to the inside once the fan is on the radiator.

I didn’t have the mating plug for the fan connector so I replaced it with a 3-pin Weatherpack connector. If you get the fan from a wrecking yard be sure to grab the other side of the connector also. The fan side of the connector is at the top. The black wire gets connected to ground and 12 volts on either of the blue wires will provide low speed. 12 volts on both blue wires will give you high speed.

I mounted two relays and a terminal strip on the inner fender just behind the battery to power the fan. The 12V control wires for the relays both run inside to a control panel.

I made a control panel for the fan and mounted it in the speaker opening of the dash. The amber LED will light if the fan is off (disabled). The green LED lights when the fan is actually running. No lights are on when the fan is enabled in automatic mode but not running. The LEDs are from Radio Shack, part numbers 276-272 and 276-271, $1.99 each I’ve wired it so automatic mode will only operate with the key on, manual mode will operate at any time.
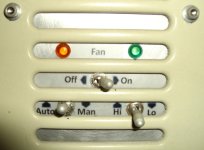
Wiring for the switch panel is shown here. You’ll need two DPDT ON-ON miniature switches and one SPDT ON-ON miniature switch. I used some switches that I’ve been holding on to for years but Newark has part number 98K4949 for $1.46 each and 98K4963 at $1.10 each.

In order to have an automatic mode I needed to install a temperature controlled switch. I used an adjustable thermostat (upper thermostat) from an electric water heater. I found it at Lowes for about $14, item #: 26358. I removed the unneeded upper portion of the thermostat and used an ohmmeter to determine which contacts to use. You want the normally open contacts that close as temperature exceeds the set point. I mounted the thermostat on the lower radiator hose close to the radiator.
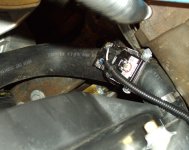
The thermostat works surprisingly well during most driving conditions and is easily adjustable for turn-on temperature. It does have some time delay between when the upper engine reaches temperatures above normal and when the switch closes. This will cause my engine temp to swing between 190 degrees (195 degree thermostat) and 215 degrees during very steep uphill climbs or prolonged idling. During these conditions I can select the manual fan mode and the fan will run continuously, keeping the temperature at a steady 190 degrees. Eventually I will go to a top mounted fan switch to prevent this hysteresis. This will only involve installation of the new switch and re-routing of the existing thermo-switch wiring. I have not found it necessary to use the high speed setting yet even during strenuous off-roading sessions on hot days. On the flat, open road the fan does not switch on at speeds over 35 mph. Also the fan is so quiet that I can’t hear it with the engine running from inside. I should also add that in automatic mode the fan speed is determined by the position of the Hi-Lo switch.
Installed, I have 3/16” clearance between the fan and the explorer serpentine water pump snout. It is possible to trim the plastic back of the fan housing a small amount to provide another ¼” of clearance if needed. I haven’t done this and don’t see that it’s necessary for my application.
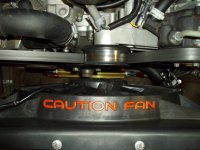
The top, bottom and sides fit very nicely to the radiator tanks and overall it looks like factory fit. After a month of testing this fan and control circuitry I am very pleased with the operation of it. I’ve taken it on some very steep 4-low crawling hill climbs and it has performed flawlessly.


While gathering parts for my 5.0 EFI install I happened across a two speed electric fan from a 2004 Jeep Liberty, part number 55037669AE. This Liberty did not have the towing package. With the towing package the Liberty will have a different electric and a mechanical fan. The shape looked simple enough to make fitment easy and the depth was only about 4 ½” which was as short as I have seen any others.

After comparing it to my Ron Davis radiator I found that only minor trimming would be required to seal it to the radiator. Other Bronco radiators would probably have a similar fit.


Here’s a little more detailed view. Some minor trimming was also required at the upper radiator mount areas.


As you can see the fan shroud completely covers the radiator core with about ¼” to ½” extra over the tanks. This will prevent the fan from rubbing holes into the core tubes.
To mount the fan I used the radiator’s shroud mounting flanges at the top and bottom along with some ½” x ½” aluminum angle and some ¼”-20 bolts and locknuts . These photos show the bottom mounting.


The top is similar but the angle is reversed. I found it necessary to use captive speed nuts on the top four bolt holes. Can’t get to the inside once the fan is on the radiator.

I didn’t have the mating plug for the fan connector so I replaced it with a 3-pin Weatherpack connector. If you get the fan from a wrecking yard be sure to grab the other side of the connector also. The fan side of the connector is at the top. The black wire gets connected to ground and 12 volts on either of the blue wires will provide low speed. 12 volts on both blue wires will give you high speed.

I mounted two relays and a terminal strip on the inner fender just behind the battery to power the fan. The 12V control wires for the relays both run inside to a control panel.

I made a control panel for the fan and mounted it in the speaker opening of the dash. The amber LED will light if the fan is off (disabled). The green LED lights when the fan is actually running. No lights are on when the fan is enabled in automatic mode but not running. The LEDs are from Radio Shack, part numbers 276-272 and 276-271, $1.99 each I’ve wired it so automatic mode will only operate with the key on, manual mode will operate at any time.

Wiring for the switch panel is shown here. You’ll need two DPDT ON-ON miniature switches and one SPDT ON-ON miniature switch. I used some switches that I’ve been holding on to for years but Newark has part number 98K4949 for $1.46 each and 98K4963 at $1.10 each.

In order to have an automatic mode I needed to install a temperature controlled switch. I used an adjustable thermostat (upper thermostat) from an electric water heater. I found it at Lowes for about $14, item #: 26358. I removed the unneeded upper portion of the thermostat and used an ohmmeter to determine which contacts to use. You want the normally open contacts that close as temperature exceeds the set point. I mounted the thermostat on the lower radiator hose close to the radiator.

The thermostat works surprisingly well during most driving conditions and is easily adjustable for turn-on temperature. It does have some time delay between when the upper engine reaches temperatures above normal and when the switch closes. This will cause my engine temp to swing between 190 degrees (195 degree thermostat) and 215 degrees during very steep uphill climbs or prolonged idling. During these conditions I can select the manual fan mode and the fan will run continuously, keeping the temperature at a steady 190 degrees. Eventually I will go to a top mounted fan switch to prevent this hysteresis. This will only involve installation of the new switch and re-routing of the existing thermo-switch wiring. I have not found it necessary to use the high speed setting yet even during strenuous off-roading sessions on hot days. On the flat, open road the fan does not switch on at speeds over 35 mph. Also the fan is so quiet that I can’t hear it with the engine running from inside. I should also add that in automatic mode the fan speed is determined by the position of the Hi-Lo switch.
Installed, I have 3/16” clearance between the fan and the explorer serpentine water pump snout. It is possible to trim the plastic back of the fan housing a small amount to provide another ¼” of clearance if needed. I haven’t done this and don’t see that it’s necessary for my application.

The top, bottom and sides fit very nicely to the radiator tanks and overall it looks like factory fit. After a month of testing this fan and control circuitry I am very pleased with the operation of it. I’ve taken it on some very steep 4-low crawling hill climbs and it has performed flawlessly.


