• Welcome to ClassicBroncos! - You are currently viewing the forums as a GUEST. To take advantage of all the site features, please take a moment to register. It's fast, simple and absolutely free. So please join our community today!
    If you have problems registering or can't log into your account, please contact Admin.

Project: 76, Orange Special Decor

OP
OP
gnsteam

gnsteam

Contributor
Bronco Guru
Joined
Jan 29, 2010
Messages
3,558
Loc.
Lincoln NE
I too am a Remflex fan as I see JD is. But there are other factors to insure a long leak free header installation. First is to make sure that the exhaust port surface is clean and flat. Second is to make sure the same is true of the header flange. Test fitting w/o a gasket and checking for gaps between the surfaces is hard to do but necessary. In your current situation, this will be very easy.
For fasteners I only use the ARP header studs. With their fine threaded 12-point nuts, you can get a more even and consistent torque on them.
The key is the maintenance of the torque on the header bolts/nuts. I retorque after the first 2 to 6 heat cycles. Then it becomes a once a week check until finding that I'm not adding anything to them. Then I recheck every oil change. Over time you learn what they want and can retorque as you feel it is needed.
I've followed this Technik multiple times and have zero leaks. My current '96 Bronco has the original header gaskets installed since 2017 and 80k miles. It now has become part of the annual maintenance cycle.
Everything is looking great, and I can't wait to hear it!
Thanks for the suggestions. After posting the question about the gaskets and bolts. I discovered the Remflex gaskets and bolts in with the exhaust kit. The bolts have the torque lock style washers with them. Wednesday, a co-worker gave me a set of Stage 8 header bolts. So I bolted up the driver side last night. So I will give these a try.

If I get more time to work on the Bronco this week I will invite you over. After this week, it will be all about Christmas prep. We are going to our daughter's home for the holidays and granddaughter's birthday.
 
OP
OP
gnsteam

gnsteam

Contributor
Bronco Guru
Joined
Jan 29, 2010
Messages
3,558
Loc.
Lincoln NE
In my last post I mention a trip to my daughter's home for the holidays. Unfortunately, I came down with Covid again. So, we had to postpone the trip until after the first of the year. Even though Christmas was a bit of a bust. But I still have the time off. So whats a better way to quarantine than working in the garage on the Bronco.

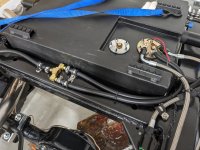
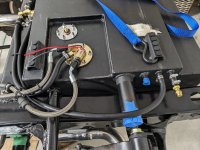
So continue where I left off. Mocking up the duel exhaust. Knowing that I need to make some adjustments to the passenger side header due to tight clearance issues. I moved to the driver side. It didn't take long to find issues with the drivers side fitment. First issue is the placement of the fuel and brake line. I had mount them in the original location on side of the frame. So not liking the close proximity of the lines to the exhaust. Sorry no pictures of the issue to share. So I decided it best to relocate the lines to the top of the frame. That was my project for yesterday. Luckily I was able to reshape the BC Broncos EFI fuel line kit and still use it. Not having a tube bending tool, I think it came out pretty good. Here are some picture of yesterdays effort. I will be back at it today.
 

Attachments

  • PXL_20231227_234105019.jpg
    PXL_20231227_234105019.jpg
    145.3 KB · Views: 91
  • PXL_20231227_234458201.jpg
    PXL_20231227_234458201.jpg
    241.5 KB · Views: 82
  • PXL_20231227_234312234.jpg
    PXL_20231227_234312234.jpg
    152.2 KB · Views: 74
  • PXL_20231227_234536018.jpg
    PXL_20231227_234536018.jpg
    219.9 KB · Views: 81
  • PXL_20231227_234052594.jpg
    PXL_20231227_234052594.jpg
    177.7 KB · Views: 79
  • PXL_20231227_234507932.jpg
    PXL_20231227_234507932.jpg
    231.5 KB · Views: 71
  • PXL_20231227_234002335.jpg
    PXL_20231227_234002335.jpg
    220.6 KB · Views: 71
  • PXL_20231227_234453479.jpg
    PXL_20231227_234453479.jpg
    240.3 KB · Views: 72
  • PXL_20231227_234523652.jpg
    PXL_20231227_234523652.jpg
    218.5 KB · Views: 74
  • PXL_20231227_234152537.jpg
    PXL_20231227_234152537.jpg
    147.9 KB · Views: 89

ssray

Full Member
Joined
Apr 19, 2010
Messages
593
Loc.
South Central NE
Not having a tube bending tool, I think it came out pretty good. Here are some picture of yesterdays effort. I will be back at it today.
Maybe you’ve done this but a v-belt pulley can work to bend tubing . Need the right width to fit the tube and of course diameter determines the bend radius. Also depends on what you might have laying around. Lol
 

stupidboy

Contributor
My wifes porn star.
Joined
Dec 29, 2009
Messages
5,789
Loc.
Morrisdale Pa.
Whose anti spring wrap device is that? I’m adding wh wrap trap but feel it may need some type of shackle at the frame.
 
OP
OP
gnsteam

gnsteam

Contributor
Bronco Guru
Joined
Jan 29, 2010
Messages
3,558
Loc.
Lincoln NE
Maybe you’ve done this but a v-belt pulley can work to bend tubing . Need the right width to fit the tube and of course diameter determines the bend radius. Also depends on what you might have laying around. Lol
V-belt pulley, never thought of that. Good suggestion. I used a few different diameters of pipe I had laying around.
 
OP
OP
gnsteam

gnsteam

Contributor
Bronco Guru
Joined
Jan 29, 2010
Messages
3,558
Loc.
Lincoln NE
Today was more work on the fuel system. I have the Tom's Off Road, 23 gallon efi tank, with the in tank fuel pump. Following the instructions. I installed the fuel pump and sending unit. It took several tries rotating the pumps position in the tank. To find a workable position that worked with the fittings that I had on hand. I plan on installing a few more tubing and hose, hold down, clamps.
 

Attachments

  • PXL_20231228_214329005.jpg
    PXL_20231228_214329005.jpg
    223.9 KB · Views: 48
  • PXL_20231228_214338152.jpg
    PXL_20231228_214338152.jpg
    198.9 KB · Views: 48
  • PXL_20231228_224705589.jpg
    PXL_20231228_224705589.jpg
    240.2 KB · Views: 45
  • PXL_20231228_224732417.jpg
    PXL_20231228_224732417.jpg
    134.8 KB · Views: 46
  • PXL_20231228_224717782.jpg
    PXL_20231228_224717782.jpg
    185.3 KB · Views: 43
  • PXL_20231228_224724658.jpg
    PXL_20231228_224724658.jpg
    166 KB · Views: 47
OP
OP
gnsteam

gnsteam

Contributor
Bronco Guru
Joined
Jan 29, 2010
Messages
3,558
Loc.
Lincoln NE
Good afternoon Bronco lovers,

It has been a while from my last post. I have been working on the Bronco but have not posted much. Because I ran into quite a few fitment issues with the Duff's duel exhaust kit. The fitment issues led me down a rabbit hole of other issues that needed looked at.

At this point in the chassis build. The torque tammer cross member is not located in its final position. As well as the rear sway bar links. It is recommended that theses items needed to be located with the full weight of the Bronco on the suspension. I do not have the luxury of having that weight right now. But I would like to install as many, under body parts as possible. Before the body goes back on. I also felt having the torque tammer cross member in its final location. Would help with the exhaust install, fitment wise. So I searched all the threads that I could find, on this subject. And rear sway bar link location.

Luckily for me, I had installed the suspension lift and drove on it for a few months, before starting the restoration. I also had the before and after, bumper height dimensions for the added lift. So what I did was remove the front coils and unbolt the rear leafs at the rear shackle mounts. Then I set the frame on jack stands, at the recorded bumper heights dimensions I have. Just for the record. The increase in bumper height without the body is approximately 2.750". Plus or minus .5" at the four corners of the front and rear bumpers.

So at this point I located the tammer cross member and rear end links. One thing to note. The final position of the tammer cross member, was with in a .25", of the dimensions found in the Duff's install instructions. So good enough for me.
Here are a few pictures.
 

Attachments

  • PXL_20240127_220937164.jpg
    PXL_20240127_220937164.jpg
    226.2 KB · Views: 49
  • PXL_20240127_220809040.jpg
    PXL_20240127_220809040.jpg
    133.5 KB · Views: 49
  • PXL_20240127_220818530.jpg
    PXL_20240127_220818530.jpg
    185.3 KB · Views: 52
OP
OP
gnsteam

gnsteam

Contributor
Bronco Guru
Joined
Jan 29, 2010
Messages
3,558
Loc.
Lincoln NE
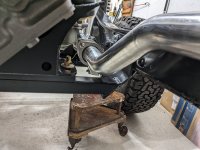
My next issues with the fitment of the exhaust. Are the the mid pipes(header to muffler) and the passenger header clearance at the frame rail.
1. Header, there is less than an 1/8", between the header and frame.
2. Driver mid pipe is very cose to transfer case. And when connected to the muffler. The pipe and muffler was going up hill to the rear, which I felt is to much.
3. Passenger mid pipe hits the transmission cross member. It is designed to go over the cross member.

While I struggled over these issues. I took some time to looked at other exhaust system installs on the forum and a few YouTube videos I could find. After the research, I decided to work on the position of the mufflers. Then I would look into having the mid pipes, bends, adjusted or new ones fabricated at a local shop.

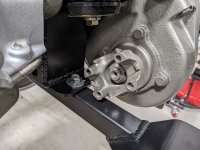
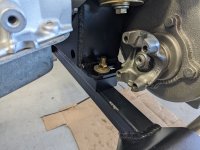
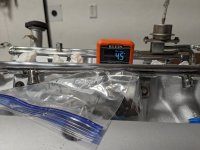
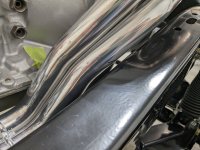
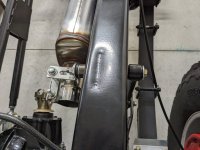
On an afternoon a few days later. My son stopped in to use a shop tool of mine and he was watching over my work on the exhaust. He questioned the clearance between the front, transfer case, output shaft yoke and the cross member below it. Will the front drive shaft, clear the front edge of the cross member? PXL_20221127_230650712.jpg I'm glad he questioned the issue. Indeed the drive shaft was not able to drop low enough to come into alignment with the front axle yoke. So we removed the cross member to transmission/transfer case bolts, and jacked up the tranfer case. Until we had clearance for the shaft and a little extra. I figure the clearance will increase a little more with the full weight of the body back on. I settled on making a 1" spacer between the transmission/transfer case and cross member. PXL_20240127_221021817.jpg You see where the paint was distributed by the drive shaft. I was concerned with adding the spacer. Raising the tranfer case increases the ujoint angles. I also checked the engine angle at the intake and found it to be at 4.5 degrees. So actually it was probably greater than 4.5 degrees before the spacer. My garage floor slope is a touch more than 1 degree. So the engine angle is more like 3.5 degree. PXL_20240127_032926387.jpg So I will leave the spacer in for now and hope for the best. Because, the 1" spacer, magically fixed almost all of the fitment issue with the header and mid pipes. A slight crush, on one side of the driver side pipe at the tranfer case. Was all that was needed to clear everything. What a relief! PXL_20240127_032622541.jpg PXL_20240127_032457568.jpg PXL_20240127_032709184.jpg So with the clearance issue resolved. I was able to mount up the mufflers with the supplied exhaust hangers. You will see in the pictures. I was able to use the sway bar link, upper bolt position for the rear muffler mount. I used a 1" long piece of pipe to make a spacer over the the sway bar link nut and attache the hanger to threads of a longer sway bar link bolt. PXL_20240127_032951890.jpg PXL_20240127_032808351.jpg So pleased to be this far. The tail pipe sections, looks like everything will fit without any issues.
 
OP
OP
gnsteam

gnsteam

Contributor
Bronco Guru
Joined
Jan 29, 2010
Messages
3,558
Loc.
Lincoln NE
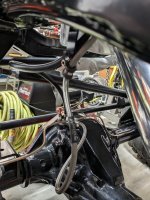
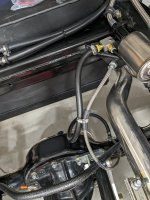
Thought I would add a few more pictures. Showing the driver side exhaust and fuel/break lines, with all the clamps in place.
 

Attachments

  • PXL_20240127_032239975.jpg
    PXL_20240127_032239975.jpg
    162.8 KB · Views: 42
  • PXL_20240127_032402353.jpg
    PXL_20240127_032402353.jpg
    167.3 KB · Views: 42
  • PXL_20240127_032336175.jpg
    PXL_20240127_032336175.jpg
    213.7 KB · Views: 37
  • PXL_20240127_032257067.jpg
    PXL_20240127_032257067.jpg
    174.9 KB · Views: 34
  • PXL_20240127_032216744.jpg
    PXL_20240127_032216744.jpg
    207.1 KB · Views: 32
  • PXL_20240127_032511309.jpg
    PXL_20240127_032511309.jpg
    183.7 KB · Views: 32
  • PXL_20240127_032252163.jpg
    PXL_20240127_032252163.jpg
    163.3 KB · Views: 31
  • PXL_20240127_032302810.jpg
    PXL_20240127_032302810.jpg
    196.9 KB · Views: 30
  • PXL_20240127_032202113.jpg
    PXL_20240127_032202113.jpg
    230.3 KB · Views: 31
  • PXL_20240127_032230660.jpg
    PXL_20240127_032230660.jpg
    177.4 KB · Views: 43
OP
OP
gnsteam

gnsteam

Contributor
Bronco Guru
Joined
Jan 29, 2010
Messages
3,558
Loc.
Lincoln NE
I stopped by the body shop today for and update on the body work. They are working on the final prep for paint. If they could commit to working on it full time. It would finished in a month. So I am guessing I may get it back by early spring. Here are a few pictures.
 

Attachments

  • PXL_20240130_213618007.jpg
    PXL_20240130_213618007.jpg
    226.4 KB · Views: 43
  • PXL_20240130_213741494.jpg
    PXL_20240130_213741494.jpg
    170.4 KB · Views: 41
  • PXL_20240130_213752292.jpg
    PXL_20240130_213752292.jpg
    198.9 KB · Views: 41
  • PXL_20240130_213715247.jpg
    PXL_20240130_213715247.jpg
    176.6 KB · Views: 43
  • PXL_20240130_213630996.jpg
    PXL_20240130_213630996.jpg
    184.1 KB · Views: 39
  • PXL_20240130_213756000.jpg
    PXL_20240130_213756000.jpg
    207.5 KB · Views: 29
  • PXL_20240130_213759731.jpg
    PXL_20240130_213759731.jpg
    164.2 KB · Views: 29
  • PXL_20240130_213611689.jpg
    PXL_20240130_213611689.jpg
    207 KB · Views: 32
  • PXL_20240130_213651324.jpg
    PXL_20240130_213651324.jpg
    195.8 KB · Views: 39

Bruners4

Newbie
Joined
Jul 22, 2019
Messages
34
Loc.
1/2 way to everywhere
Yours is looking to be coming along very nicely! I just love the chassis pictures and the little details. Mine is drivable and just about ready to get kicked out of the shop. Waiting for the correct VIN tag to arrive and then start registration process.
 
OP
OP
gnsteam

gnsteam

Contributor
Bronco Guru
Joined
Jan 29, 2010
Messages
3,558
Loc.
Lincoln NE
Hi Dave, thank you and glad to hear that yours is very close. Looking forward to seeing you and the 68 soon.
 
OP
OP
gnsteam

gnsteam

Contributor
Bronco Guru
Joined
Jan 29, 2010
Messages
3,558
Loc.
Lincoln NE
Finally finished the exhaust install. We'll, almost. Still have to attach the exhaust tips. I will address that once the body is back on, so I can adjust the overall length of the tailpipe. Here are a bunch of pictures,enjoy.
 

Attachments

  • PXL_20240210_174450419.jpg
    PXL_20240210_174450419.jpg
    246.7 KB · Views: 33
  • PXL_20240210_174502301.jpg
    PXL_20240210_174502301.jpg
    239.5 KB · Views: 27
  • PXL_20240210_174435108.jpg
    PXL_20240210_174435108.jpg
    222.2 KB · Views: 27
  • PXL_20240210_174442292.jpg
    PXL_20240210_174442292.jpg
    181.2 KB · Views: 28
  • PXL_20240210_174456886.jpg
    PXL_20240210_174456886.jpg
    247.8 KB · Views: 29
  • PXL_20240210_174508877.jpg
    PXL_20240210_174508877.jpg
    276.3 KB · Views: 29
  • PXL_20240210_174407706.jpg
    PXL_20240210_174407706.jpg
    217.2 KB · Views: 26
  • PXL_20240210_174444674.jpg
    PXL_20240210_174444674.jpg
    194.1 KB · Views: 27
  • PXL_20240210_174447158.jpg
    PXL_20240210_174447158.jpg
    233.8 KB · Views: 28
  • PXL_20240210_174427769.jpg
    PXL_20240210_174427769.jpg
    222.7 KB · Views: 33
OP
OP
gnsteam

gnsteam

Contributor
Bronco Guru
Joined
Jan 29, 2010
Messages
3,558
Loc.
Lincoln NE
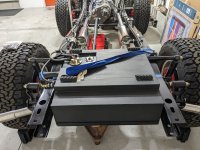
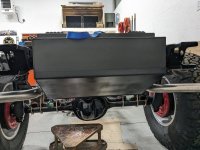
Hello everyone. It has been some time since my last updates of my build. I have been very busy working on the chassis. After the exhaust install. I proceeded with the final install of the 23 gallon fuel tank. PXL_20240227_025333454.jpg PXL_20240227_025307759.jpg Instead of using the factory mounting locations for the tank retaining strap bolts. I drilled into the frame directly above the tank strap. This gave me more room for routing the exhaust along the tank. The strap bolts is secured in the frame with a self locking nut inside the frame and a jam nut against the outside of the frame. PXL_20240227_025302375.jpg Here are a couple pictures of the in tank pump, sender, fuel and vent lines. PXL_20240227_025135643.jpg PXL_20240227_025126486.jpg Next on my list was breather lines from the front and rear differentials, transfer case and transmission. I purchased an ARB breather kit to install at the firewall, that will accept up to four breather lines. Here is the front diff line. PXL_20240313_020010181.jpg
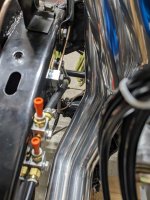
The rear diff line. PXL_20240313_015955157.jpg And the termination blocks blocks (the blocks with the orange plugs)on the frame near the engine bay. PXL_20240313_020019584.jpg
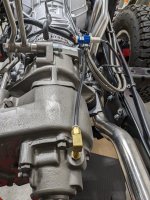
Lines will be connected from these fittings to the ARB breather in the engine bay. Here is the connection and line to the transfer case. PXL_20240313_015931314.jpg
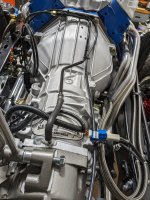
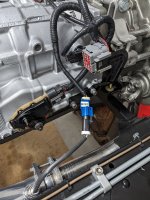
And the breather line connection for the transmission. PXL_20240313_015934962.jpg In this same image you can see that I use a portion of the factory 4r70w solid vent line. Securing the transfer case line to this solid line, routing both lines to the back of the engine, For future connection to the ARB breather.
 
OP
OP
gnsteam

gnsteam

Contributor
Bronco Guru
Joined
Jan 29, 2010
Messages
3,558
Loc.
Lincoln NE
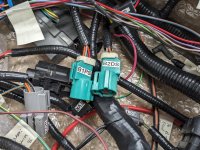
Continuing with my build update. I installed the O2 sensor in the headers and the 4r70w wiring harness.
. PXL_20240313_015905542.jpg
When installing the harness. I tried to plug the O2 sensor into this harness. But the driver side plug did not match the harness plug. Through investigation, and with the help of several CB members. The O2 sensors do not plug into the transmission harness. They plug into the "green" plugs on the engine harness.
PXL_20240313_020147312.jpg
The "blue" plugs are used for the after catalytic converts O2 sensors. Which will not be used for my build.
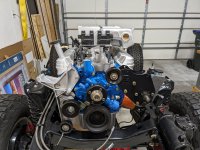
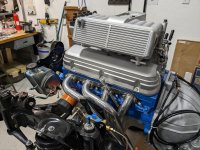
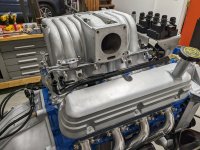
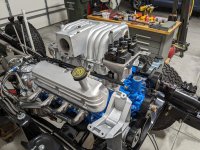
My current project is test fitting the front appliances, and idler pulleys. Also the fuel rails, heater water line and upper intake.
PXL_20240321_015609634.jpg PXL_20240321_015648502.jpg PXL_20240321_015624090.jpg PXL_20240321_015616607.jpg
I still need to rework the coil pack bracket, to reduce the height buy an inch or so. I don't have a welder, so I'm looking at all my options with this bracket. Or designing and building something from scratch. Using my machining skills and machine tools.
 
OP
OP
gnsteam

gnsteam

Contributor
Bronco Guru
Joined
Jan 29, 2010
Messages
3,558
Loc.
Lincoln NE
One more post for the day. I made a stop at the body shop this week. They are very close to painting the body. The body work is complete, a little old paint sanding in the interior to accept the primer and they are ready for full primer. Then full block sanding, priming, sanding again and paint. Here are a few pictures from the shop.
 

Attachments

  • PXL_20240321_205356741.jpg
    PXL_20240321_205356741.jpg
    184.5 KB · Views: 27
  • PXL_20240321_205311698.jpg
    PXL_20240321_205311698.jpg
    237.7 KB · Views: 27
  • PXL_20240312_210506361-1.jpg
    PXL_20240312_210506361-1.jpg
    176.6 KB · Views: 26
  • PXL_20240312_210512331-1.jpg
    PXL_20240312_210512331-1.jpg
    159.4 KB · Views: 26
  • PXL_20240312_210521421-1.jpg
    PXL_20240312_210521421-1.jpg
    140.3 KB · Views: 28

Speedrdr

Contributor
Learning Member
Joined
Nov 27, 2017
Messages
1,289
Loc.
Paris, MS
Dang, @gnsteam, that’s a mighty slick looking chassis you have there. If ONLY I had realized just how far I’m having to disassemble my rig, would have been easier to have done a frame off. Too far in now to backtrack as my spouse keeps asking “when are you going to be finished?” Lol. Don’t have the guts to tell her probably never.

Randy
 
OP
OP
gnsteam

gnsteam

Contributor
Bronco Guru
Joined
Jan 29, 2010
Messages
3,558
Loc.
Lincoln NE
Dang, @gnsteam, that’s a mighty slick looking chassis you have there. If ONLY I had realized just how far I’m having to disassemble my rig, would have been easier to have done a frame off. Too far in now to backtrack as my spouse keeps asking “when are you going to be finished?” Lol. Don’t have the guts to tell her probably never.

Randy
Thank you Randy. I'm into it a lot farther than I intended. My Bronco was needing a transmission rebuild, all new suspension components, electrical wiring and everything else was leaking fluids. So my initial plan was to lift off the body. Rebuild the 302, trans., transfer case axles and clean up the frame. Install a new suspension and wiring harness. Then just put the original paint body back on, due to the cost of having body work and paint done. But as time went by, my wonderful wife and I decided to go all in. No matter how much. So at this point the chassis is nearing completion. And I'm at $35K with the body work. Paint should happen next month so another $5-10K to go. Good thing I'm old enough to to take withdrawals from my 401K. Not a good idea, but I can still retire in 28 months. You know the saying. You only live once and you can't take it with you.
 

904Bronco

Contributor
Bronco Guru
Joined
Sep 28, 2004
Messages
5,778
Loc.
San Martin, CA
The mounting bracket for the large grey Trans plug may contact the body when you put things back together... You should leave it loose from the trans. I believe I had to have to modify all of mine even with the 1" body lift. Some were just simple bends, two were shortened. Just an FYI...

Great work by the way ;)
 
Top