• Welcome to ClassicBroncos! - You are currently viewing the forums as a GUEST. To take advantage of all the site features, please take a moment to register. It's fast, simple and absolutely free. So please join our community today!
    If you have problems registering or can't log into your account, please contact Admin.

New Name Build Thread: from "Obscure Machine" to "Bayou Hazard"

OP
OP
ObscureMachine

ObscureMachine

Seatbelt Orifice Officer
Joined
Sep 28, 2006
Messages
3,998
Loc.
World Headquarters
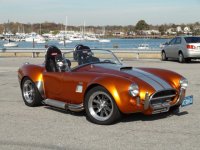
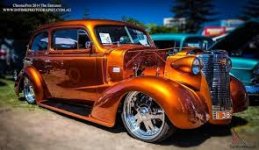
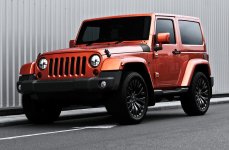
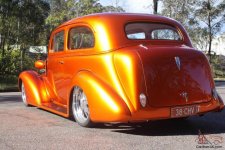
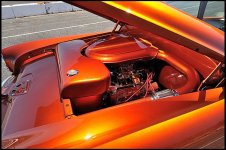
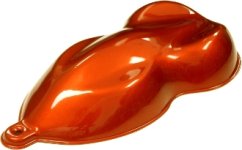
Haven't started any real work today, but did research on paint and colors. I've gone back and forth between Black (original color), the current maroon, Radiator Fluid Green, Matte Black, Gun Metal Blue and a few others. But I've decided to go with a color I've loved since I first got on this site. I always thought of it as a copper, but it's a sunburst orange, or Mango Tango, or "copper head"(like stacey david's truck). But I think I'm going to go with a color like this, specifically the cobra, which is PPG Orange Glow over stirling silver. No, this is not going to be a rock crawler or heavy off-roader
 

Attachments

  • DSC00102.jpg
    DSC00102.jpg
    82.3 KB · Views: 32
  • images.jpg
    images.jpg
    11.6 KB · Views: 20
  • c3fac53b15d2c47b12b030622e95dce0.jpg
    c3fac53b15d2c47b12b030622e95dce0.jpg
    151.9 KB · Views: 22
  • ebay142305174181296.jpg
    ebay142305174181296.jpg
    116.7 KB · Views: 18
  • stripe2_187.jpg
    stripe2_187.jpg
    73.6 KB · Views: 19
  • an111313.jpg
    an111313.jpg
    225.5 KB · Views: 24
  • HTB1VMjfFVXXXXXWXXXXq6xXFXXXl.jpg
    HTB1VMjfFVXXXXXWXXXXq6xXFXXXl.jpg
    69.4 KB · Views: 19
  • 14556843814611504697471.jpeg
    14556843814611504697471.jpeg
    37.3 KB · Views: 23
OP
OP
ObscureMachine

ObscureMachine

Seatbelt Orifice Officer
Joined
Sep 28, 2006
Messages
3,998
Loc.
World Headquarters
The Build Has A NEW NAME. As it was known as The Obscure Machine, which is the old name that had all the ButtStank on it - It needs a new name. And, In the Bible, when someone received a calling, many times they were given a new name (Jacob to Israel, Simon to Peter, Saul to Paul, Abram to Abraham). So the Obscure Machine will be receiving a new name. Not sure what yet. But the build is now "Project Redemption"

The latest:

  • The Trans Tunnel Cover was all banged up and I thought I could save it with little work. After 2 hours (since I've never really done sheet metal) - I realized 1) A new one is cheap and 2) Since I'm now replacing pretty much all the interior sheet metal, it's stupid to leave one old ButtStank piece. Since it's now Project Redemption, It's going to be redeemed. "All things made new again." I should have done a frame off, but I didn't.


  • Got the FJ Cruiser Mirrors in. Don't judge.

Depending on when the Trans Tunnel arrives, Today I'll be

  • Putting in all new LED lights (not headlights)
  • Drilling and tapping the door mount plates
  • Rebuilding both doors and window tracks
  • Installing Neutral Safety Switch (which the plug on the wiring harness is half missing.
  • Installing floor pans.
 
OP
OP
ObscureMachine

ObscureMachine

Seatbelt Orifice Officer
Joined
Sep 28, 2006
Messages
3,998
Loc.
World Headquarters
Lots going on. Pictures and update soon.

Lesson learned Saturday. Make sure the gas tank is opened up on your welder before using. Sure, the gauges looked set when I went to start, but that was just leftover pressure from earlier use. No gas looks like disappointment.
 
OP
OP
ObscureMachine

ObscureMachine

Seatbelt Orifice Officer
Joined
Sep 28, 2006
Messages
3,998
Loc.
World Headquarters
Remember - this is supposed to be a drive while rebuilding project. Not a show truck, but one that is done right (anti-Buttstank).

1. I ordered a new #2 crossrail brace. Mine was wonky and had been re-welded multiple times. So buying a new one is no big deal. (I have a butt ton of $$ from selling my Mustang to put into this).

2. A guy offered me the use of his rotisserie but I turned it down because I was going to get the floor pans in within a week and didn't want to go into a whole frame-off thing. (that was a mistake)

3. #3 crossrail was bent towards the rear and so the seat platform was high but the bed floor would have been low. So I jacked up the back lip until the rail was level, and now I'll be able to weld in the seat platform with it level front to back.

4. Was cutting a hole in the passenger kick panel to change the lower door hinge mounting plate and upon digging around, I found a rusted passenger side inner rocker panel. :mad: :mad: :mad: So I ordered a new one and now have to wait for that to move forward. Which means removing the #3 rail which means welding in braces across the bed and door openings.

All this because one floor pan was obviously rusted. And I haven't even started on the bed yet. And I'm under a time crunch.

Feeling discouraged.

EDIT: Also discovered that the J shift mount was missing a bolt into the T-Case, AND the other bolt was unbelievably loose. The BUTTSTANK "Complete Restoration" never ceases to amaze!
 

Attachments

  • IMG_4422.jpg
    IMG_4422.jpg
    100.5 KB · Views: 44
  • IMG_4421.jpg
    IMG_4421.jpg
    117.2 KB · Views: 44
Last edited:

rydog1130

Sponsor/Vendor
Bronco Guru
Joined
Jun 19, 2014
Messages
4,079
Remember - this is supposed to be a drive while rebuilding project. Not a show truck, but one that is done right (anti-Buttstank).

1. I ordered a new #2 crossrail brace. Mine was wonky and had been re-welded multiple times. So buying a new one is no big deal. (I have a butt ton of $$ from selling my Mustang to put into this).

2. A guy offered me the use of his rotisserie but I turned it down because I was going to get the floor pans in within a week and didn't want to go into a whole frame-off thing. (that was a mistake)

3. #3 crossrail was bent towards the rear and so the seat platform was high but the bed floor would have been low. So I jacked up the back lip until the rail was level, and now I'll be able to weld in the seat platform with it level front to back.

4. Was cutting a hole in the passenger kick panel to change the lower door hinge mounting plate and upon digging around, I found a rusted passenger side inner rocker panel. :mad: :mad: :mad: So I ordered a new one and now have to wait for that to move forward. Which means removing the #3 rail which means welding in braces across the bed and door openings.

All this because one floor pan was obviously rusted. And I haven't even started on the bed yet. And I'm under a time crunch.

Feeling discouraged.

Can O Worms brother jim... don't worry you'll get it done...my truck was the same way!....remember that assembled floor pan ??? If youre on a time crunch get it and return/sell your sheet metal you have! Plopit in and be done !
 
OP
OP
ObscureMachine

ObscureMachine

Seatbelt Orifice Officer
Joined
Sep 28, 2006
Messages
3,998
Loc.
World Headquarters
Can O Worms brother jim... don't worry you'll get it done...my truck was the same way!....remember that assembled floor pan ??? If youre on a time crunch get it and return/sell your sheet metal you have! Plopit in and be done !

That would be great, but I already have a new driver's floor pan, and I've already drilled the trans tunnel and the upper seat platform. It'll just be more work, but I'll get it done. Just wish I had some local bronco brothers to hang out and keep me going.
 

Skiddy

Bronco Guru
Joined
Oct 8, 2003
Messages
11,560
hang in there buddy your making good progress, even if it doesn't seem like it;)
 
OP
OP
ObscureMachine

ObscureMachine

Seatbelt Orifice Officer
Joined
Sep 28, 2006
Messages
3,998
Loc.
World Headquarters
Some New Pics!

Tricked Ya! Took a couple of days off to go to Cape Kiwanda on the Oregon Coast. Meanwhile, packages were piling up outside the house! Which is never a bad thing. This trip helped me relax, refocus and rework my to-do list for the Bronco. Someone tell Gene (Half Cab) that this looks just like Mississippi!
 

Attachments

  • IMG_4596.jpg
    IMG_4596.jpg
    126.1 KB · Views: 30
  • IMG_4561.jpg
    IMG_4561.jpg
    127.5 KB · Views: 24
  • IMG_4512.jpg
    IMG_4512.jpg
    57.5 KB · Views: 26
  • IMG_4466.jpg
    IMG_4466.jpg
    133.4 KB · Views: 28
  • IMG_4608.jpg
    IMG_4608.jpg
    95 KB · Views: 45
Last edited:
OP
OP
ObscureMachine

ObscureMachine

Seatbelt Orifice Officer
Joined
Sep 28, 2006
Messages
3,998
Loc.
World Headquarters
Today I welded in braces at the top of the door posts to keep everything straight. Used a piece of left over square tubing across the bed, bolted down - to keep it straight.

Started cutting into the inner rocker to see what's what and luckily I think I can patch most of the rot with the new inner rocker I got - without having to tear the whole thing out.

Lastly, I installed all the LED lights except the tail lights. Blinkers aren't working again, so I have to figure that out.

Lastly, I just noticed for the first time that one door interior has chrome trim, and one is painted black! Only Buttstank! "Complete Restoration!" :D ;D %) ;D
 

Attachments

  • IMG_4653.jpg
    IMG_4653.jpg
    103.1 KB · Views: 50
  • IMG_4656.jpg
    IMG_4656.jpg
    73.2 KB · Views: 46
  • IMG_4657.jpg
    IMG_4657.jpg
    84.2 KB · Views: 45
  • IMG_4654.jpg
    IMG_4654.jpg
    95.6 KB · Views: 51

bronkenn

Contributor
Bronco Guy
Joined
Apr 27, 2017
Messages
2,675
Loc.
Southeast Ohio
Today I welded in braces at the top of the door posts to keep everything straight. Used a piece of left over square tubing across the bed, bolted down - to keep it straight.

Started cutting into the inner rocker to see what's what and luckily I think I can patch most of the rot with the new inner rocker I got - without having to tear the whole thing out.

Lastly, I installed all the LED lights except the tail lights. Blinkers aren't working again, so I have to figure that out.

Lastly, I just noticed for the first time that one door interior has chrome trim, and one is painted black! Only Buttstank! "Complete Restoration!" :D ;D %) ;D
Might need a different flasher with those LED lights. Ken
 

West Tn Dawg

BULLDOG
Joined
Nov 1, 2013
Messages
1,809
Loc.
Kenton
Tricked Ya! Took a couple of days off to go to Cape Kiwanda on the Oregon Coast. Meanwhile, packages were piling up outside the house! Which is never a bad thing. This trip helped me relax, refocus and rework my to-do list for the Bronco. Someone tell Gene (Half Cab) that this looks just like Mississippi!

Beautiful pics, but I'm from Mississippi too, and there is nothing in MS that resembles this!;D
 
OP
OP
ObscureMachine

ObscureMachine

Seatbelt Orifice Officer
Joined
Sep 28, 2006
Messages
3,998
Loc.
World Headquarters
Mrs. ObscureMachine took the old Denno diamond plate door covers, added a thin layer of foam and then covered them in leather. Not bad for $3!

We just brought the doors in and she is going to take them apart and rebuild them. New channels, new felt, new glass holding channel, new locking mechanism, and then new armrests, paddles and window cranks.

I think she wants me to get finished so we can build her an FJ - 40! :eek: :eek: :eek:

Today is cutting and welding passenger inner rocker, adding a C - channel support to the "A" crossrail. Installing the B crossrail. Then eating cheese.
 

Attachments

  • IMG-4671.jpg
    IMG-4671.jpg
    117.4 KB · Views: 24
Top