


Tech article by Duncan (Cougar)
This is my write up for the Stone Crusher steering system. This system replaces the inferior stock tie rod and drag link set up with with stronger components that can handle the modern uses of our modified Broncos...especially for those who are running and using larger tires. The kit does not include any tools. However, most people will have all of the needed tools to complete the install already in their garage. If not, they can be easily obtained at almost any hardware store. The kit gives the specifics of the install by providing instructions for various configurations. It also tells you how to do a rough alignment. If there are any specific questions, contact the manufacturer to meet your needs. I found them to be quite helpful and willing to respond in a timely manner.
After reading the instructions, becoming familiar with the parts and getting a firm understanding of what will be required for the install, you are ready for the install. The next step is to secure the vehicle from rolling and to dismantle the older components. I did this by chocking the rear tires and implementing the parking brake.
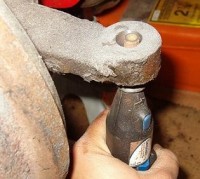
With the vehicle safely secured, I was then able to loosen the lugs on the front tires. Later the front end will be lifted to make access easier to the spindles. I then broke the tie rods by using a tie rod fork and some WD-40. My drag link simply separated from the pitman arm once the bolts were loosened. Once this was done, I jacked up the front end, removed the front set of tires, and set it back down on a pair of jack stands. I then removed the tie rods and the drag link from the vehicle.
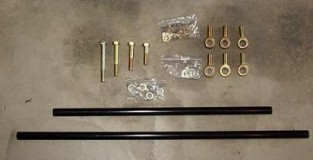
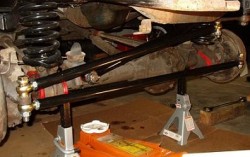
With the vehicle ready to accept the new components, it was time to assemble the kit and get it ready for assembly. The kit is high quality. The new rods are beefy and come powder coated for long lasting protection. Cadmium plated heims joints and grade 8 hardware along with washers and bushings round out the kit. An extra set of heims joints are also included in case a repair needs to be made on the trail.

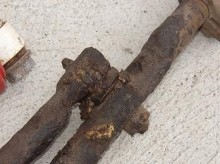
When you compare the old with the new it's easy to see the difference. The old components are worn out and are the cause for sloppy and even possibly dangerous steering.
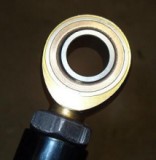
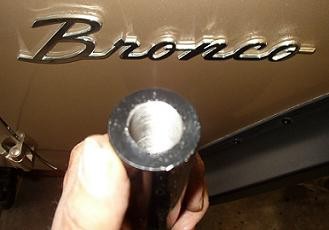
Before you can actually start to bolt the kit up, the pitman arm and spindle holes need to be enlarged with a 3/4" drill bit. The holes are originally tapered, but need to be straightened out to accept the new bolts.I pulled my pitman arm and drilled it out on a drill press. However, all of the drilling can be done on the vehicle. Just take your time and remember to use low RPM's and lots of cuttig oil.


After the drilling was done I cleaned it up by using a Dremel tool and a polishing stone. I wanted to make sure the area was smooth and free of any burrs.
Since the kit comes with instructions explaining how to assemble it either in the stock position or in the tie rod over position to give you more clearance on the trail, I won't go into specifics on bolting it up and how or where bushings and etc. need to be placed.

With the linkage in place I drilled an 1/8" hole through the retaining nuts and bolts to slip a cotter pin in place to keep everything locked together. The kit doesn't include them, but I also bought some grade 8 split washers for added security.
The entire install took me about four hours with the largest time consuming part being the drilling. However, the kit was relatively easy to put on and looks great.
This is my write up for the Stone Crusher steering system. This system replaces the inferior stock tie rod and drag link set up with with stronger components that can handle the modern uses of our modified Broncos...especially for those who are running and using larger tires. The kit does not include any tools. However, most people will have all of the needed tools to complete the install already in their garage. If not, they can be easily obtained at almost any hardware store. The kit gives the specifics of the install by providing instructions for various configurations. It also tells you how to do a rough alignment. If there are any specific questions, contact the manufacturer to meet your needs. I found them to be quite helpful and willing to respond in a timely manner.
After reading the instructions, becoming familiar with the parts and getting a firm understanding of what will be required for the install, you are ready for the install. The next step is to secure the vehicle from rolling and to dismantle the older components. I did this by chocking the rear tires and implementing the parking brake.
With the vehicle safely secured, I was then able to loosen the lugs on the front tires. Later the front end will be lifted to make access easier to the spindles. I then broke the tie rods by using a tie rod fork and some WD-40. My drag link simply separated from the pitman arm once the bolts were loosened. Once this was done, I jacked up the front end, removed the front set of tires, and set it back down on a pair of jack stands. I then removed the tie rods and the drag link from the vehicle.
With the vehicle ready to accept the new components, it was time to assemble the kit and get it ready for assembly. The kit is high quality. The new rods are beefy and come powder coated for long lasting protection. Cadmium plated heims joints and grade 8 hardware along with washers and bushings round out the kit. An extra set of heims joints are also included in case a repair needs to be made on the trail.


When you compare the old with the new it's easy to see the difference. The old components are worn out and are the cause for sloppy and even possibly dangerous steering.

Before you can actually start to bolt the kit up, the pitman arm and spindle holes need to be enlarged with a 3/4" drill bit. The holes are originally tapered, but need to be straightened out to accept the new bolts.I pulled my pitman arm and drilled it out on a drill press. However, all of the drilling can be done on the vehicle. Just take your time and remember to use low RPM's and lots of cuttig oil.


After the drilling was done I cleaned it up by using a Dremel tool and a polishing stone. I wanted to make sure the area was smooth and free of any burrs.

Since the kit comes with instructions explaining how to assemble it either in the stock position or in the tie rod over position to give you more clearance on the trail, I won't go into specifics on bolting it up and how or where bushings and etc. need to be placed.

With the linkage in place I drilled an 1/8" hole through the retaining nuts and bolts to slip a cotter pin in place to keep everything locked together. The kit doesn't include them, but I also bought some grade 8 split washers for added security.
The entire install took me about four hours with the largest time consuming part being the drilling. However, the kit was relatively easy to put on and looks great.
