• Welcome to ClassicBroncos! - You are currently viewing the forums as a GUEST. To take advantage of all the site features, please take a moment to register. It's fast, simple and absolutely free. So please join our community today!
    If you have problems registering or can't log into your account, please contact Admin.

rust repair

markatherton

Sponsor/Vendor
Bronco Guru
Joined
Aug 11, 2004
Messages
1,978
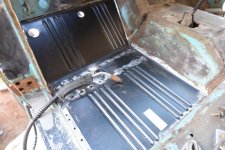
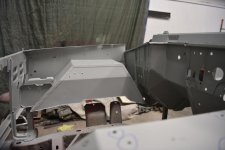
Drivers side floor, 2 outer rockers, inner aprons, core support… now off to the sandblaster. Mark in San Diego; Beach City Broncos

 

Attachments

  • 68.jpg
    68.jpg
    125.7 KB · Views: 363
  • DSC_6942.jpg
    DSC_6942.jpg
    93 KB · Views: 323
  • DSC_6941.jpg
    DSC_6941.jpg
    92.8 KB · Views: 362
  • DSC_6940.jpg
    DSC_6940.jpg
    100.3 KB · Views: 381
  • DSC_6939.jpg
    DSC_6939.jpg
    119.5 KB · Views: 380
  • DSC_6933.jpg
    DSC_6933.jpg
    105.1 KB · Views: 396
  • DSC_6934.jpg
    DSC_6934.jpg
    113.9 KB · Views: 421
OP
OP
M

markatherton

Sponsor/Vendor
Bronco Guru
Joined
Aug 11, 2004
Messages
1,978
Just back from sandblasting with a coat of etching primer. I am pretty pleased with the body. Now just a bunch of screw holes to weld up and body work and paint. I now have a vision for this one. Original peacock blue paint, small lift , new slotted mag wheels on 32's; power steering, power disk brakes, automatic rans and air conditioning with hardtop; Pretty stock looking other than rear flares; Mark in San Diego, Beach City Broncos
 

Attachments

  • DSC_6959.jpg
    DSC_6959.jpg
    70.9 KB · Views: 192
  • DSC_6958.jpg
    DSC_6958.jpg
    56.8 KB · Views: 195
  • DSC_6957.jpg
    DSC_6957.jpg
    61.5 KB · Views: 202
  • DSC_6956.jpg
    DSC_6956.jpg
    68.4 KB · Views: 198
  • DSC_6955.jpg
    DSC_6955.jpg
    60.9 KB · Views: 221
  • DSC_6954.jpg
    DSC_6954.jpg
    69.1 KB · Views: 210

Rustytruck

Bronco Guru
Joined
Feb 24, 2002
Messages
10,872
Man dont forget the parking brake nubbin on the drivers side floor board.
 
OP
OP
M

markatherton

Sponsor/Vendor
Bronco Guru
Joined
Aug 11, 2004
Messages
1,978
Body work on the 68 tub is almost complete. Next will be raptor liner. Peacock blue original color. Mark in San Diego; Beach City Broncos.
 

Attachments

  • DSC_6961.jpg
    DSC_6961.jpg
    81.2 KB · Views: 211
  • DSC_6962.jpg
    DSC_6962.jpg
    85.2 KB · Views: 173
  • DSC_6963.jpg
    DSC_6963.jpg
    84.1 KB · Views: 180
OP
OP
M

markatherton

Sponsor/Vendor
Bronco Guru
Joined
Aug 11, 2004
Messages
1,978
The 68 is progressing nicely; After raptor lining the inside and undercarriage with peacock blue it was removed from the rotisserie and back on the chassis; The doors are aligned with good door gaps; Next are the fenders and hood. We will try to paint the exterior tub this week; Mark in Sn Diego, Beach City Broncos
 

Attachments

  • DSC_6972.jpg
    DSC_6972.jpg
    80.9 KB · Views: 174
  • DSC_6973.jpg
    DSC_6973.jpg
    67.5 KB · Views: 169
  • DSC_6974.jpg
    DSC_6974.jpg
    74.4 KB · Views: 169

NicksTrix

Bronco Guru
Joined
Aug 1, 2001
Messages
6,409
I read the post. I am asking why not blast it first then put your repair panels in vs doing it afterwards.
 

elan

Sr. Member
Joined
May 27, 2015
Messages
541
Loc.
s
I read the post. I am asking why not blast it first then put your repair panels in vs doing it afterwards.

I would be guessing, but, if you blast first and install new panels, don't they need to be etched or blasted again for the coating to adhere? So that would be two trips to the blast shop. On the other hand, if blasted first, the weldor has fresh steel to weld to. Ahhh fifty fifty, what the hell do I know?
 

NicksTrix

Bronco Guru
Joined
Aug 1, 2001
Messages
6,409
new panels don't need to be blasted. you can give them a light scuff to get a bit of finger on the coatings that are on them if they have a coating.
 
OP
OP
M

markatherton

Sponsor/Vendor
Bronco Guru
Joined
Aug 11, 2004
Messages
1,978
68

Just a timing issue. We knew we had a couple of panels to replace. Sandblaster wasn't ready for it yet.
 
Top