• Welcome to ClassicBroncos! - You are currently viewing the forums as a GUEST. To take advantage of all the site features, please take a moment to register. It's fast, simple and absolutely free. So please join our community today!
    If you have problems registering or can't log into your account, please contact Admin.

3G conversion wiring diagrams

Viperwolf1

Contributor
electron whisperer
Joined
Aug 23, 2007
Messages
24,346
The 1-wire instructions are for use with a 1-wire alternator. If you don't have that use the other instructions.
 

badandy73

Contributor
Broncoholic
Joined
Jul 18, 2007
Messages
176
Just went through this after my 1-wire finally gave out after almost 10yrs. Picked up a 3G from autozone pn# 7734-6-11 (94 mustang) and hooked it up same as my one wire. Alt. wasn't getting a signal to excite and therefore wasn't charging the system. Re-read my painless manual and bought napa pn# VRC441. Hooked it up accordingly, large yellow/white to constant 12v(BC's shows this looped into charge cable conn. instead of fed from the harness), white/black looped back into stator connection on back, green/red to switched 12v. Hope this saves someone the frustration I went through.
 
OP
OP
bronconut73

bronconut73

Bronco Guru
Joined
Aug 7, 2012
Messages
9,918
Just went through this after my 1-wire finally gave out after almost 10yrs. Picked up a 3G from autozone pn# 7734-6-11 (94 mustang) and hooked it up same as my one wire. Alt. wasn't getting a signal to excite and therefore wasn't charging the system. Re-read my painless manual and bought napa pn# VRC441. Hooked it up accordingly, large yellow/white to constant 12v(BC's shows this looped into charge cable conn. instead of fed from the harness), white/black looped back into stator connection on back, green/red to switched 12v. Hope this saves someone the frustration I went through.


Thank you for the Napa part #VRC441.
Went there today and grabbed it.
 
OP
OP
bronconut73

bronconut73

Bronco Guru
Joined
Aug 7, 2012
Messages
9,918
See attached photo.

According to the BC wiring diagram the green/red wire off the 3G Alternator wiring harness needs a 12 volt (run) power wire.

After I remove the (stock) "old" voltage regulator from the fire wall will any of those wires from the (stock) "old" alternator wiring harness still work?
....Can I pick up a 12 volt/run power wire from that original alternator harness after I remove the old regulator...?

Also....

How do I unhook the amp meter so it doesn't cook from the increased amperage?
 

Attachments

  • 0809161921.jpg
    0809161921.jpg
    84.9 KB · Views: 254
Last edited:
OP
OP
bronconut73

bronconut73

Bronco Guru
Joined
Aug 7, 2012
Messages
9,918
Bump.....

I know we've discussed this....just didn't see this specifically,

For example....I know the amp meter will not like the 3G....just not sure I heard what we do to fix that. I already have an Autometer Volt meter, just never unhooked the amp meter.

Also...for example,

I know there is a 12 volt/run power wire in the stock '73 alternator wiring harness but I am not sure it Will still be hot when I remove the oem voltage regulator....


Thanks Guys.
I love this bar....
 

thegreatjustino

Contributor
Red Head Grease Monkey
Joined
Jan 23, 2002
Messages
16,008
Loc.
Stockton, CA
I just did this using a Painless 3G alternator harness. Three wire plug - white and black goes to the single plug on the alternator. Green and red off of the three wire plug goes to the green and red wire that used to go to your voltage regulator. Yellow wire off of the three wire plug goes to the yellow wire that used to go to your voltage regulator.

I have no idea in your picture why you have a wire from the three terminal plug going to the power hookup. Every 3G wiring diagram you can download shows that being a 6 gauge wire hooking to the battery with a mega fuse. Even in the stock Ford applications that was a 6 gauge power wire. A wire from the three plug connector DOES NOT connect there.

Look at page 4 of the Painless instructions below
 

Attachments

  • 3G.pdf
    277.1 KB · Views: 101
OP
OP
bronconut73

bronconut73

Bronco Guru
Joined
Aug 7, 2012
Messages
9,918
I just did this using a Painless 3G alternator harness. Three wire plug - white and black goes to the single plug on the alternator. Green and red off of the three wire plug goes to the green and red wire that used to go to your voltage regulator. Yellow wire off of the three wire plug goes to the yellow wire that used to go to your voltage regulator.

I have no idea in your picture why you have a wire from the three terminal plug going to the power hookup. Every 3G wiring diagram you can download shows that being a 6 gauge wire hooking to the battery with a mega fuse. Even in the stock Ford applications that was a 6 gauge power wire. A wire from the three plug connector DOES NOT connect there.

Look at page 4 of the Painless instructions below


I have a 4 gauge wire for that spot.

But the BC diagram shows it that way.
It wouldn't let me save the image the other day but they have two....a one wire and a three wire diagram.
 

Attachments

  • 0809162234.jpg
    0809162234.jpg
    77 KB · Views: 120
OP
OP
bronconut73

bronconut73

Bronco Guru
Joined
Aug 7, 2012
Messages
9,918
This is that BC diagram.
 

Attachments

  • 3G 3 wire with water mark.pdf
    270.4 KB · Views: 116
Last edited:
OP
OP
bronconut73

bronconut73

Bronco Guru
Joined
Aug 7, 2012
Messages
9,918
Do I need to do anything to make sure my amp meter doesn't cook from the increased amperage.

At the bottom of the BC diagram referenced above there is a note with a line pointing to the starter relay. Wondering if there is a wire there I will be removing? and if I do will it effect anything else?

Sorry...my eb is a little tore down right now or I would just go by trial and error, but can't crank it right now.

Justin has me straightened out on the 3G wiring now.

I just do not want to smoke test my dash wires because the amp meter cooks.
 

Viperwolf1

Contributor
electron whisperer
Joined
Aug 23, 2007
Messages
24,346
See attached photo.

According to the BC wiring diagram the green/red wire off the 3G Alternator wiring harness needs a 12 volt (run) power wire.

After I remove the (stock) "old" voltage regulator from the fire wall will any of those wires from the (stock) "old" alternator wiring harness still work?
....Can I pick up a 12 volt/run power wire from that original alternator harness after I remove the old regulator...?

Also....

How do I unhook the amp meter so it doesn't cook from the increased amperage?

The hot-in-run wire you need will be going to the old voltage regulator plug. It's not really in the alternator harness, it's in the body harness. It's the green-red wire. Connect this wire to the green-red wire at the alternator plug.

You will need to do something with the old alt charge wire (10g black or black-yellow). It is connect directly to the battery (always hot). You won't be using this 10g wire path for the 3G because it will cause a fire. The 4 or 6g wire in the BC diagram replaces it and sends the alt current directly to the battery. You can connect the old 10g wire to the battery side of the starter solenoid but you should use a fusible link on it. Just having it connected to the battery doesn't mean it will be carrying significant current like the alt wire.

Your ammeter will no longer work after you install the 4 or 6g wire.

I just did this using a Painless 3G alternator harness. Three wire plug - white and black goes to the single plug on the alternator. Green and red off of the three wire plug goes to the green and red wire that used to go to your voltage regulator. Yellow wire off of the three wire plug goes to the yellow wire that used to go to your voltage regulator.

I have no idea in your picture why you have a wire from the three terminal plug going to the power hookup. Every 3G wiring diagram you can download shows that being a 6 gauge wire hooking to the battery with a mega fuse. Even in the stock Ford applications that was a 6 gauge power wire. A wire from the three plug connector DOES NOT connect there.

Look at page 4 of the Painless instructions below

The purpose of the yellow wire is to measure battery voltage. It tells the internal regulator how much to charge. It doesn't matter much if it's sensing that voltage at the back of the alternator or at the starter solenoid, as long as all the wiring is good and short.
 
OP
OP
bronconut73

bronconut73

Bronco Guru
Joined
Aug 7, 2012
Messages
9,918
Up late tinkering on the eb.

It is so nice to look over and see my Buddies Viperwolf and thegreatjustino hooking me up with the wicked eb knowledge....
Yea...I'm tired...
Thank you Fellers.
 

Steve83

Bronco Guru
Joined
Jul 16, 2003
Messages
9,128
Loc.
Memphis, TN, USA, Earth, Milky Way
just not sure I heard what we do to fix that.
You follow that wiring diagram I posted.
...I am not sure it Will still be hot when I remove the oem voltage regulator.
If you follow that diagram, the necessary wires will work correctly. If you want to understand why, compare it to the stock diagram which is linked in that one's caption.
Do I need to do anything to make sure my amp meter doesn't cook from the increased amperage.
If you ran 1,000A through it, it might damage it. But you can't because its induction loop isn't big enough for an insulated wire large enough to withstand 1,000A. So the meter isn't the issue - it's the factory WIRE that passes through the meter's induction loop that's the problem. That's why it MUST be eliminated from the alternator output circuit, and replaced by one that can handle the 3G's output. All you have to do is what that diagram shows...
I just do not want to smoke test my dash wires because the amp meter cooks.
The ammeter is independent of the other gauges - no matter what happens either way, they don't affect each other. But since it's an inductive ammeter (as opposed to a full-current ammeter), it doesn't carry the load that it's measuring.
 
OP
OP
bronconut73

bronconut73

Bronco Guru
Joined
Aug 7, 2012
Messages
9,918
You follow that wiring diagram I posted.If you follow that diagram, the necessary wires will work correctly. If you want to understand why, compare it to the stock diagram which is linked in that one's caption.If you ran 1,000A through it, it might damage it. But you can't because its induction loop isn't big enough for an insulated wire large enough to withstand 1,000A. So the meter isn't the issue - it's the factory WIRE that passes through the meter's induction loop that's the problem. That's why it MUST be eliminated from the alternator output circuit, and replaced by one that can handle the 3G's output. All you have to do is what that diagram shows...The ammeter is independent of the other gauges - no matter what happens either way, they don't affect each other. But since it's an inductive ammeter (as opposed to a full-current ammeter), it doesn't carry the load that it's measuring.


Good Stuff Steve!

As always, THANK YOU.

Love this bar.
 
OP
OP
bronconut73

bronconut73

Bronco Guru
Joined
Aug 7, 2012
Messages
9,918
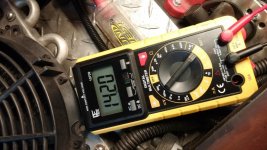
It started at 12.2 volts, after about 4 minutes of idling it was at 14.20.
So it's charging...

Thank you guys for all the responses.

Steve83

Viperwolf

And my favorite used parts supplier,

The Great Justino

This place wouldn't be the same without you fellers.
 

Attachments

  • 0810161955b.jpg
    0810161955b.jpg
    96.5 KB · Views: 62
OP
OP
bronconut73

bronconut73

Bronco Guru
Joined
Aug 7, 2012
Messages
9,918
Horrible belt squeal though...
Sigh.....
Working on it...


Update.

Quality belt (important).
Properly adjusted.
And all you hear is a slight chirp when cranking it.
Once started you "cannot" make the belt squeal now.
One thing that helped was I hit up eBay for a nice heavy duty alternator pulley. It was even sort of rough where the belt makes contact.

No need for double pulleys/ belts.

Very pleased. Super good charging.

Fans spin faster at idle, lights are brighter at idle, etc...
And I had no issues with any of these items they are just noticeably improved.

For some reason the eb turns over faster too. Fired up quicker as well.
I think some of that "removed" stock wiring was hurting me and I didn't know it.

Anyway,
Very happy.
Highly recommended.

Cheap, powerful upgrade. Well worth your time.
 
Last edited:
Top