• Just a reminder that you won't be able to start new posts or reply to existings posts in the Archive forum.

    This is where all the old posts go so they can still be used for reference and searched.
  • Welcome to ClassicBroncos! - You are currently viewing the forums as a GUEST. To take advantage of all the site features, please take a moment to register. It's fast, simple and absolutely free. So please join our community today!
    If you have problems registering or can't log into your account, please contact Admin.

1969 bronco rebuild

OP
OP
BroncoBernie

BroncoBernie

Sr. Member
Joined
Feb 6, 2005
Messages
367
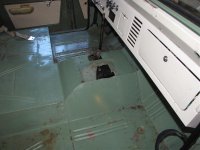
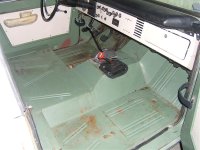
hole

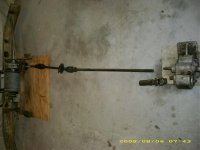
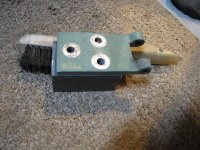
Here is a hole that was cut at sometime, The pto shifter was there I removed it and sold the complete winch, was a v8 set-up on a six cyl truck, the shaft on the v8 is longer. I sold it because it does not fit into my plans for this bronco. The shifter would hit the bench seat when engaged.
 

Attachments

  • IMG_0252.jpg
    IMG_0252.jpg
    77.9 KB · Views: 189
  • 2004_01011969stock0012.jpg
    2004_01011969stock0012.jpg
    105 KB · Views: 209
  • DSCI0501.jpg
    DSCI0501.jpg
    73.9 KB · Views: 197
  • DSCI0502.jpg
    DSCI0502.jpg
    95.7 KB · Views: 185
  • IMG_0253.jpg
    IMG_0253.jpg
    78.4 KB · Views: 175

Dan's73

Bronco Guru
Joined
Oct 17, 2006
Messages
1,117
The '72 must be pretty close to what my '73 looked like new! Very nice! I love the ginger brown (if that's what it's called) & hounsdtooth interiors; plan to keep mine as intact as-is possible despite whatever I do to the rest of the EB. Since you've gone down the LUBER path, then I understand wanting a lifted, cut EB.....if the '72 is any indication of the quality you're going to put into the new one I'm sure it will be sweeeeet either way.
 
OP
OP
BroncoBernie

BroncoBernie

Sr. Member
Joined
Feb 6, 2005
Messages
367
tub removal

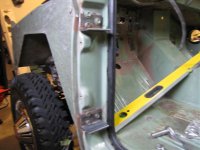
Well got back to work on the Bronco. I am building a jig to remove the tub over kill but wanted to play around with new welder. Started with 2x2x1/4 angel cut a 3.0 in piece used door hinge to line up holes to drill,mounted to post cut 3.5 inch piece to to weld to angle iron that in mounted to full cab holes
and another that comes down at 90 to door hinges. The hinges are not at 90 to the angle iron so use the 3.5 inch piece to flush up and tack
 

Attachments

  • IMG_0312.jpg
    IMG_0312.jpg
    118 KB · Views: 201
  • IMG_0311.jpg
    IMG_0311.jpg
    89.1 KB · Views: 169
  • IMG_0309.jpg
    IMG_0309.jpg
    57.1 KB · Views: 152
  • IMG_0305.jpg
    IMG_0305.jpg
    92.3 KB · Views: 156
  • IMG_0295.jpg
    IMG_0295.jpg
    83.9 KB · Views: 179
  • IMG_0293.jpg
    IMG_0293.jpg
    86.8 KB · Views: 149
  • IMG_0292.jpg
    IMG_0292.jpg
    163.3 KB · Views: 139
  • IMG_0291.jpg
    IMG_0291.jpg
    80.8 KB · Views: 143
Last edited:
OP
OP
BroncoBernie

BroncoBernie

Sr. Member
Joined
Feb 6, 2005
Messages
367
The tub is off

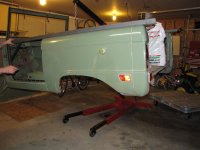
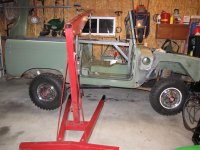
Removed the tub last night, no problems very smooth the body is resting on pallet with wheels getting ready for frame work next.
 

Attachments

  • IMG_0351.jpg
    IMG_0351.jpg
    129.7 KB · Views: 212
  • IMG_0364.jpg
    IMG_0364.jpg
    111.3 KB · Views: 201
  • IMG_0363.jpg
    IMG_0363.jpg
    97.7 KB · Views: 200
  • IMG_0359.jpg
    IMG_0359.jpg
    89.3 KB · Views: 196
  • IMG_0362.jpg
    IMG_0362.jpg
    83.2 KB · Views: 196
  • IMG_0346.jpg
    IMG_0346.jpg
    134.8 KB · Views: 194
  • IMG_0341.jpg
    IMG_0341.jpg
    133.6 KB · Views: 201
  • IMG_0340.jpg
    IMG_0340.jpg
    125.7 KB · Views: 218

Mill KNOB

Bronco Guru
Joined
Jun 25, 2007
Messages
1,684
Loc.
Rock Hill, SC
Looking good. Keep up the progress. Just take your time and get every thing you want done to the frame done before you put the body back on. Keep the pictures coming...
 
OP
OP
BroncoBernie

BroncoBernie

Sr. Member
Joined
Feb 6, 2005
Messages
367
1969 Bronco

Well the restoration is moving very slow but progress is what it is. I spent the last two months pay off some tools, and searching for a dana 44. My oil well took a big hit with the purchase of a new compressor and welder and have been slowly saving money for the next big parts purchase...

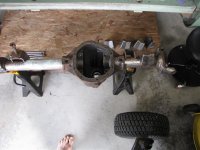
I picked up a dana 44 drum brake set up, and have been working on pulling it apart. The 44 was very rusted.. but was a good deal.. axles I think are shot but will see when I get to them. The inner knuckles had rust pits kind of like looking at the surface of the moon years of salt and use taking it's toll.
 

Attachments

  • IMG_0689.jpg
    IMG_0689.jpg
    102.7 KB · Views: 107
OP
OP
BroncoBernie

BroncoBernie

Sr. Member
Joined
Feb 6, 2005
Messages
367
Dana 44 C wedges

The C wedge Tabs were very worn.. could they be used yes.. but could not stand that they just looked worn they had to go... and where I am today doing a transplant
 

Attachments

  • IMG_0703.jpg
    IMG_0703.jpg
    109.7 KB · Views: 86
  • IMG_0695.jpg
    IMG_0695.jpg
    100.3 KB · Views: 77
Last edited:
OP
OP
BroncoBernie

BroncoBernie

Sr. Member
Joined
Feb 6, 2005
Messages
367
C Bushings

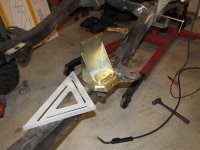
I ground the wedges to fit better they had large gaps....... I took some green chalk and rub it onto the axle tube, then rubbed the wedge back and forth on the chalk to give me some idea where to grind. worked great here are some photos.

The tack welds you see are me filling in small rust craters I will grind them out later. Photo of the tools ..... New welder that I love.. compressor is great also.

Photo of new c tab next to old.
 

Attachments

  • IMG_0710.jpg
    IMG_0710.jpg
    90.3 KB · Views: 106
  • IMG_0711.jpg
    IMG_0711.jpg
    101.5 KB · Views: 106
  • IMG_0713.jpg
    IMG_0713.jpg
    67.7 KB · Views: 113
  • IMG_0708.jpg
    IMG_0708.jpg
    104.5 KB · Views: 114
  • IMG_0714.jpg
    IMG_0714.jpg
    105 KB · Views: 144
  • IMG_0715.jpg
    IMG_0715.jpg
    99.1 KB · Views: 134
  • IMG_0704.jpg
    IMG_0704.jpg
    112.3 KB · Views: 120
OP
OP
BroncoBernie

BroncoBernie

Sr. Member
Joined
Feb 6, 2005
Messages
367
Motor mounts coil towers

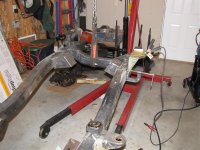
The new motor mounts are in and one coil tower.. should have the the other in tomorrow. Then off to get sandblasted Friday hopefully. Been a while since i updated the build mostly been collecting parts.
 

Attachments

  • IMG_1891.jpg
    IMG_1891.jpg
    109.3 KB · Views: 118
  • IMG_1894.jpg
    IMG_1894.jpg
    124.3 KB · Views: 117
  • IMG_1895.jpg
    IMG_1895.jpg
    102.8 KB · Views: 106
  • IMG_1892.jpg
    IMG_1892.jpg
    108.6 KB · Views: 117
  • IMG_1893.jpg
    IMG_1893.jpg
    102.1 KB · Views: 115
OP
OP
BroncoBernie

BroncoBernie

Sr. Member
Joined
Feb 6, 2005
Messages
367
coil tower

The new motor mounts are in and one coil tower.. should have the the other in tomorrow. Then off to get sandblasted Friday hopefully. Been a while since i updated the build mostly been collecting parts.

Got the other coil tower in today ordered up my 5.5 duff lift. Sand blast this week I hope.
 

Attachments

  • IMG_1897.jpg
    IMG_1897.jpg
    125.7 KB · Views: 124
  • IMG_1898.jpg
    IMG_1898.jpg
    105.7 KB · Views: 121
OP
OP
BroncoBernie

BroncoBernie

Sr. Member
Joined
Feb 6, 2005
Messages
367
James Duff Lift

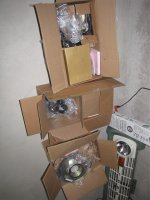
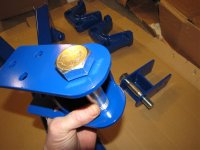
Big day today!!! The lift came in.. had to mock it up quick just to get a look. Have some pic, of the lift and new power disk brake set also pick up a gt-40 intake for the future. Thanks for checking out the build. Next on the list is the drive train things are moving slow but with the lift showing up today makes me feel like I am closer to getting this Bronco back together.:D
 

Attachments

  • IMG_1914.jpg
    IMG_1914.jpg
    92.7 KB · Views: 105
  • IMG_1909.jpg
    IMG_1909.jpg
    102.7 KB · Views: 112
  • IMG_1907.jpg
    IMG_1907.jpg
    75.6 KB · Views: 104
  • IMG_1911.jpg
    IMG_1911.jpg
    124.9 KB · Views: 109
  • IMG_1899.jpg
    IMG_1899.jpg
    83.4 KB · Views: 109
  • IMG_1902.jpg
    IMG_1902.jpg
    107.4 KB · Views: 101
OP
OP
BroncoBernie

BroncoBernie

Sr. Member
Joined
Feb 6, 2005
Messages
367
Frame is Done

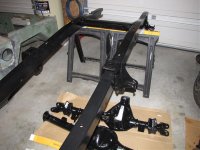
Well got the frame and some other parts back today... They were sand blasted primed and painted. Looks good happy with the work done. Here are some photos.
 

Attachments

  • IMG_2003.jpg
    IMG_2003.jpg
    107.8 KB · Views: 164
  • IMG_2014.jpg
    IMG_2014.jpg
    79.9 KB · Views: 170
  • IMG_2013.jpg
    IMG_2013.jpg
    96.5 KB · Views: 186
  • IMG_2012.jpg
    IMG_2012.jpg
    106.2 KB · Views: 198
  • IMG_2011.jpg
    IMG_2011.jpg
    104.3 KB · Views: 186
  • IMG_2010.jpg
    IMG_2010.jpg
    114.4 KB · Views: 186
  • IMG_2009.jpg
    IMG_2009.jpg
    118 KB · Views: 209
  • IMG_2008.jpg
    IMG_2008.jpg
    99.5 KB · Views: 204

NCSUWoj

Contributor
Sr. Member
Joined
Apr 8, 2002
Messages
557
Loc.
Lynchburg, VA
Man that thing is coming along! You gonna keep the original green color on the body?
 
Last edited:
OP
OP
BroncoBernie

BroncoBernie

Sr. Member
Joined
Feb 6, 2005
Messages
367
Paint

I haven't made up my mind on the paint yet, I think I am going to go with a green or some type of orange maybe blue. Was glad to get the frame done all the old parts off very messy grinding welding, but the cold weather is started and my heater just cant keep up any more picked up bronco parts instead of insulating and heating the garage .
 
OP
OP
BroncoBernie

BroncoBernie

Sr. Member
Joined
Feb 6, 2005
Messages
367
Back to work on the Bronco

Well it has finally warmed up some!! My heater can now keep up in the garage so back to work on the Bronco, winter was long..... I installed the leaf springs super shackles new bushings, and started on the rear shock mounts, also pressed the bearings on the 31 spline axles, new ford Nine inch 4.56 Detroit locker, v cut housing. Here are the action photos . ;D
 

Attachments

  • IMG_2247.jpg
    IMG_2247.jpg
    96.2 KB · Views: 153
  • IMG_2245.jpg
    IMG_2245.jpg
    101.3 KB · Views: 168
  • IMG_2243.jpg
    IMG_2243.jpg
    94.6 KB · Views: 144
  • IMG_2242.jpg
    IMG_2242.jpg
    79.4 KB · Views: 154
  • IMG_2239.jpg
    IMG_2239.jpg
    99.6 KB · Views: 149
OP
OP
BroncoBernie

BroncoBernie

Sr. Member
Joined
Feb 6, 2005
Messages
367
bronco

I will be cutting this Bronco. :cry: I will post viewer Discretion during this process.
 
OP
OP
BroncoBernie

BroncoBernie

Sr. Member
Joined
Feb 6, 2005
Messages
367
Bronco

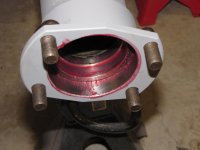
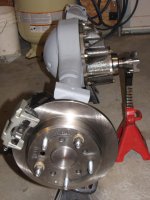
Well Got the nine inch in and sealed , Right side axle is in and disk brake right side installed... Try to get to the other side this week, waiting for my paint for the housing sent for it on Friday from eastwood, some more action photos:D
 

Attachments

  • IMG_2252.jpg
    IMG_2252.jpg
    60 KB · Views: 98
  • IMG_2254.jpg
    IMG_2254.jpg
    92.8 KB · Views: 104
  • IMG_2277.jpg
    IMG_2277.jpg
    91.6 KB · Views: 117
Top