• Just a reminder that you won't be able to start new posts or reply to existings posts in the Archive forum.

    This is where all the old posts go so they can still be used for reference and searched.
  • Welcome to ClassicBroncos! - You are currently viewing the forums as a GUEST. To take advantage of all the site features, please take a moment to register. It's fast, simple and absolutely free. So please join our community today!
    If you have problems registering or can't log into your account, please contact Admin.

1970 Build - For the Next Gen

OP
OP
Past_Miner

Past_Miner

Contributor
Bronco Guru
Joined
Oct 22, 2003
Messages
1,021
Heater and Wiper Motor

I used a heater blower motor from a '93 F250. The plastic blower wheel you see here disintegrated when I test ran it so I went with a metal replacement from NAPA for the same truck. It took some work but I was able to get the motor and wheel to clear everything inside without trimming the suction involute in the box. This thing probably blows twice as much air as the Chebby conversion in my Bronco. It should keep this one toasty in the winter around here. I installed a complete reseal kit and a new heater core too. The wiper motor just got a new plug and a drop bracket.
 

Attachments

  • DSC03325.JPG
    DSC03325.JPG
    229.2 KB · Views: 62
  • DSC03327.JPG
    DSC03327.JPG
    197.8 KB · Views: 65
  • DSC03328.JPG
    DSC03328.JPG
    228.7 KB · Views: 60
  • DSC03341.JPG
    DSC03341.JPG
    154.3 KB · Views: 63
  • DSC03340.JPG
    DSC03340.JPG
    206.5 KB · Views: 63
  • DSC03339.JPG
    DSC03339.JPG
    173.4 KB · Views: 65
  • DSC03338.JPG
    DSC03338.JPG
    198.3 KB · Views: 62
  • DSC03334.JPG
    DSC03334.JPG
    215.6 KB · Views: 62
  • DSC03329.JPG
    DSC03329.JPG
    230 KB · Views: 67
OP
OP
Past_Miner

Past_Miner

Contributor
Bronco Guru
Joined
Oct 22, 2003
Messages
1,021
Some Fabrications

It's probably obvious that these pictures are from a few months of time. We had to fab a few pieces along the way. We needed a license plate mount with a light since our gas cans cover up the stock one. We also couldn't find a washer fluid tank that would fit anywhere we had left so we made a stainless one. I did a really bad job of taking pictures of that one. There are only finished shots. The Sirius radio mount turned out nice but it turns out it will need modified for the cables to access it now that its powder coated so you can look forward to that coming up. We integrated the air compressor suction into the air cleaner connector. We tucked the rear speaker amp in the driver side quarter panel.
 

Attachments

  • DSC03257.JPG
    DSC03257.JPG
    216.3 KB · Views: 58
  • DSC03255.JPG
    DSC03255.JPG
    214.1 KB · Views: 57
  • DSC03305.JPG
    DSC03305.JPG
    242.4 KB · Views: 61
  • DSC03302.JPG
    DSC03302.JPG
    264.6 KB · Views: 66
  • DSC03251.JPG
    DSC03251.JPG
    211.7 KB · Views: 68
  • DSC03252.JPG
    DSC03252.JPG
    190.4 KB · Views: 59
  • DSC03266.JPG
    DSC03266.JPG
    205.8 KB · Views: 62
  • DSC03277.JPG
    DSC03277.JPG
    228.1 KB · Views: 62
  • DSC03311.JPG
    DSC03311.JPG
    184.8 KB · Views: 69
  • DSC03260.JPG
    DSC03260.JPG
    212.5 KB · Views: 67
  • DSC03259.JPG
    DSC03259.JPG
    215.4 KB · Views: 60
  • DSC03288.JPG
    DSC03288.JPG
    217.9 KB · Views: 66
OP
OP
Past_Miner

Past_Miner

Contributor
Bronco Guru
Joined
Oct 22, 2003
Messages
1,021
A New Toy Put to Use

We got a small plasma cutter. Just the thing to finish up a front bumper. I tried to go simple here so I hope it works out.
 

Attachments

  • DSC03291.JPG
    DSC03291.JPG
    245.9 KB · Views: 94
  • DSC03289.JPG
    DSC03289.JPG
    239.6 KB · Views: 98
  • DSC03287.JPG
    DSC03287.JPG
    258 KB · Views: 88
  • DSC03285.JPG
    DSC03285.JPG
    209.2 KB · Views: 77
  • DSC03284.JPG
    DSC03284.JPG
    249.7 KB · Views: 80
  • DSC03281.JPG
    DSC03281.JPG
    245.4 KB · Views: 86
  • DSC03280.JPG
    DSC03280.JPG
    204.1 KB · Views: 76
  • DSC03279.JPG
    DSC03279.JPG
    209.7 KB · Views: 80
  • DSC03301.JPG
    DSC03301.JPG
    205.3 KB · Views: 91
OP
OP
Past_Miner

Past_Miner

Contributor
Bronco Guru
Joined
Oct 22, 2003
Messages
1,021
Wiring Tests - Its Been a Long Weekend

I finished up the last few wire connections on Saturday morning and hooked the battery up. It was disappointing to say the least. Only one of the front marker lights would come on and only the other would blink. Neither headlight would work, the starter wouldn’t bump regardless of which gear it was in, the wiper motor wouldn’t budge, the brake lights wouldn’t come on and every wire in the column had 6 volts. That’s right, 6 volts. On a bright note, the horn wouldn’t stop blaring with the battery connected so at least I knew it worked. Needless to say, it wasn’t a very happy morning.

I finally found that the ground for my front light harness had somehow become a hot wire. I had originally wired the side lights to blink with the blinker and I figured I had just messed this up somehow. I finally rewired the passenger side back to stock and then, when I was working on the driver side I found that the two wires to the driver side blinker were melted through. After a little investigation I found that on of the blinkers had the wire colors reversed from the factory. (I also realized later that you can simply pull the boot and turn the assembly around) It looks like one of the wires that was supposed to be for turn in the system ended up connected to the park light circuit. I think that caused the wires to melt through and partially short to the body when the side light was trying to ground through the bulb. If I had found it sooner I probably could have just switched the wire and everything would have worked like it was supposed to. After rewiring everything settled down, I just don’t have blinking side lights anymore.
 

Attachments

  • DSC03361.JPG
    DSC03361.JPG
    172.3 KB · Views: 25
  • DSC03360.JPG
    DSC03360.JPG
    164.1 KB · Views: 30
  • DSC03356.JPG
    DSC03356.JPG
    225.5 KB · Views: 40
OP
OP
Past_Miner

Past_Miner

Contributor
Bronco Guru
Joined
Oct 22, 2003
Messages
1,021
Fixing the blinker short eliminated the 6 volt readings at the column and the world suddenly got better. The headlights worked as soon as the ground was fixed. The transmission connector on the shifter was loose. As soon as that was plugged in the starter would bump and the back-up lights also started working. The wiper motor couldn’t ground through the powder coated bracket. I added a ground wire between the motor body and the motor would run but would not park. I had bought this motor on eBay a long time ago and I figured it had just been modified for a Centec harness. I pulled it apart to check and found out it was not modified. It took me a good hour to get the brushes back in place and get the case put together. For some reason it works now. I’m not sure why but I decided I don’t care either. The intermittent switch works too. The brake light problem came down to a loose terminal in the column connector. I just didn’t quite get it all the way in when I put it together. The horn problem turned out to be a constant ground between the wire in the column and the horn button. I insulated the connector and it started working like it was supposed to.
 

Attachments

  • DSC03362.JPG
    DSC03362.JPG
    245.6 KB · Views: 52
  • DSC03363.JPG
    DSC03363.JPG
    235.9 KB · Views: 50
OP
OP
Past_Miner

Past_Miner

Contributor
Bronco Guru
Joined
Oct 22, 2003
Messages
1,021
I had to rework the satellite radio mount to get the wiring into it like I had planned. I had to burn the powder coat off and start over. I was able to get the wiring in like planned and even got a signal when I hooked up the stereo. By the end of the day today I had the cage back in and had all of the stereo working. I also tested all of the new circuits like the heater blower, air compresor and AC switches, antenna, etc. The dash lights and indicators all work. I will have to wait to see how the gauges work. Considering how bad it started out, things seem to be good now.
 

Attachments

  • DSC03352.JPG
    DSC03352.JPG
    213.4 KB · Views: 60
  • DSC03355.JPG
    DSC03355.JPG
    156.4 KB · Views: 42
  • DSC03351.JPG
    DSC03351.JPG
    159.5 KB · Views: 39
  • DSC03350.JPG
    DSC03350.JPG
    151.1 KB · Views: 36
  • DSC03348.JPG
    DSC03348.JPG
    154 KB · Views: 40
  • DSC03347.JPG
    DSC03347.JPG
    150 KB · Views: 39
  • DSC03344.JPG
    DSC03344.JPG
    206.7 KB · Views: 54
OP
OP
Past_Miner

Past_Miner

Contributor
Bronco Guru
Joined
Oct 22, 2003
Messages
1,021
Pulling Codes

The moment of truth for the wiring was just about an hour ago. I pulled out my trusty old code reader and did a KOEO test. The first run through dropped 12 trouble codes. After I looked them all up it turned out that seven of them were transmission codes. I found another loose connector on the transmission and ran them again. This time I only came up with five codes:

122 - TPS circuit below minimum 0.6 volts.
552 - Air management 1 circuit failure (AM1/TAB)
553 - Air management 2 circuit failure (AM1/TAD)
558 - EGR Vacuum Regulator circuit failure
565 - Canister purge circuit failure

I pulled all of the EGR and Thermactor gear so thats what the last four are. The TPS is a problem but its one I can find later when we get a chance to actually run the engine. It is either a missing wire or a bad sensor. All in all, I'm feeling pretty good about the wiring. At this point I believe everything is working. It looks like we can finally loom everything up and move on to the body work.
 

Attachments

  • DSC03365.JPG
    DSC03365.JPG
    214.2 KB · Views: 39

SpareParts

Bronco Guru
Joined
Nov 13, 2004
Messages
5,594
There's always small set-backs, if it worked the first time it wouldn't be any fun and everybody would do it!
 
OP
OP
Past_Miner

Past_Miner

Contributor
Bronco Guru
Joined
Oct 22, 2003
Messages
1,021
There were a few small details that we needed to finish to take it for a spin. My son graduated and is off to school and working full time. So much for getting this done for him to drive in school. With him not around to help things have gone a little slower. My daughter stepped up and made most of this killer hood prop. It's nice to ditch the broom handle after two years. I fabbed up an adapter for the throttle cable and cruise control cable. I forgot to put shoulder belt mounts on the back hoop of the cage so I found these tube clamps and made some removable ones. The last thing to put together was a new equalizer bar mount for the emergency brake.

I got my wife to help me bleed the brakes and fired it up! I took it on about 10 short trips over a couple of weeks and managed to get everything working. It's finally time to tear it back down and get some paint on it.
 

Attachments

  • DSC03395.JPG
    DSC03395.JPG
    213.1 KB · Views: 66
  • DSC03385.JPG
    DSC03385.JPG
    247.6 KB · Views: 61
  • DSC03380.JPG
    DSC03380.JPG
    235.2 KB · Views: 61
  • DSC03370.JPG
    DSC03370.JPG
    222.7 KB · Views: 63
  • DSC03369.JPG
    DSC03369.JPG
    260.7 KB · Views: 64
  • DSC03407.JPG
    DSC03407.JPG
    221.3 KB · Views: 57
  • DSC03404.JPG
    DSC03404.JPG
    234.9 KB · Views: 56
  • DSC03403.JPG
    DSC03403.JPG
    208.4 KB · Views: 65
  • DSC03396.JPG
    DSC03396.JPG
    203.7 KB · Views: 64
OP
OP
Past_Miner

Past_Miner

Contributor
Bronco Guru
Joined
Oct 22, 2003
Messages
1,021
I built a temporary paint booth so I wouldn't completely overspray everything in my garage. It's tight but it should work better than a plastic tent. I finally got the body back off of the chassis today. I have a couple of days of welding on the bottom of the bed to fill 40 years worth of extra holes and then we should be ready to shoot the first coat of primer. Hopfully I can get that started in a couple of weeks. Maybe I can get some loom on those wiring harnesses between now and then too.
 

Attachments

  • DSC03433.JPG
    DSC03433.JPG
    242.9 KB · Views: 90
  • DSC03432.JPG
    DSC03432.JPG
    223.7 KB · Views: 82
  • DSC03430.JPG
    DSC03430.JPG
    252.1 KB · Views: 69
  • DSC03414.JPG
    DSC03414.JPG
    151.2 KB · Views: 66
  • DSC03411.JPG
    DSC03411.JPG
    152.8 KB · Views: 64
  • DSC03410.JPG
    DSC03410.JPG
    213.9 KB · Views: 71
  • DSC03409.JPG
    DSC03409.JPG
    235.3 KB · Views: 64
  • DSC03434.JPG
    DSC03434.JPG
    227.4 KB · Views: 80

broncoitis

Bronco Guru
Joined
Jul 23, 2010
Messages
4,449
Lookin Good! Keep up the Hard Work and it will all pay off. Enjoying the build and attention to detail. Lets see some color now! ;D
 
OP
OP
Past_Miner

Past_Miner

Contributor
Bronco Guru
Joined
Oct 22, 2003
Messages
1,021
Still trying to get the last of patch work on the tub done before the weather turns cold. I was able to get a good weld on the emergency brake brackets that had to be relocated and got the extra holes in the bed welded up. I also added some plates and permenent nuts to the firewall to help in installing the e-brake bracket. It's basically impossible to reach between the block and firewall to put a nut on the bolts. About all that is left here is to add a set of welded nuts for the throttle pedal and seal up the old drain hole for the driver side vent. I will get that when I work on the driver side floorboard.
 

Attachments

  • DSC03462.JPG
    DSC03462.JPG
    222.8 KB · Views: 47
  • DSC03440.JPG
    DSC03440.JPG
    183.1 KB · Views: 49
  • DSC03439.JPG
    DSC03439.JPG
    177.9 KB · Views: 50
  • DSC03438.JPG
    DSC03438.JPG
    190 KB · Views: 48
  • DSC03437.JPG
    DSC03437.JPG
    207.6 KB · Views: 53
  • DSC03436.JPG
    DSC03436.JPG
    213.6 KB · Views: 56
  • DSC03435.JPG
    DSC03435.JPG
    206.8 KB · Views: 58
  • DSC03446.JPG
    DSC03446.JPG
    180.8 KB · Views: 51
  • DSC03447.JPG
    DSC03447.JPG
    198.5 KB · Views: 67
  • DSC03465.JPG
    DSC03465.JPG
    205.3 KB · Views: 59
OP
OP
Past_Miner

Past_Miner

Contributor
Bronco Guru
Joined
Oct 22, 2003
Messages
1,021
Floorboards... Again

At the very beginning of this project we fabbed up some new floorboards and thought we had them taken care of. When we sandblasted the tub we blew through a few spots in the passenger side that had originally looked good. A spot was also blown through the weld where I stitched the new driver side floorboard to the old one. I ordered a new passenger side panel and thought I could weld up the hole in the driver side. I got the passenger side replaced today but I was wrong about the driver side. I will just chase this one all the way across the floor and end up with a sloppy patch job. I decided to order a replacement for this side too and make sure the repair lasts as long as the rest of the floor. It looks like I will have to wait one more weekend to get started on the primer.
 

Attachments

  • DSC03455.JPG
    DSC03455.JPG
    199.6 KB · Views: 50
  • DSC03454.JPG
    DSC03454.JPG
    186.6 KB · Views: 56
  • DSC03453.JPG
    DSC03453.JPG
    180.8 KB · Views: 58
  • DSC03450.JPG
    DSC03450.JPG
    192.3 KB · Views: 56
  • DSC03449.JPG
    DSC03449.JPG
    178.7 KB · Views: 57
  • DSC03461.JPG
    DSC03461.JPG
    198.5 KB · Views: 70
  • DSC03460.JPG
    DSC03460.JPG
    194.6 KB · Views: 54
  • DSC03464.JPG
    DSC03464.JPG
    207 KB · Views: 53
  • DSC03458.JPG
    DSC03458.JPG
    211.6 KB · Views: 54
  • DSC03457.JPG
    DSC03457.JPG
    209.3 KB · Views: 54
  • DSC03456.JPG
    DSC03456.JPG
    223.9 KB · Views: 59

broncoitis

Bronco Guru
Joined
Jul 23, 2010
Messages
4,449
That Stinks! Fix one thing and something else shows its ugly head. Stick with it and you'll have it in primer soon enough.

You could be like me and LineX the interior and paint the exterior and then decide to make all kinds of changes. %)
 
OP
OP
Past_Miner

Past_Miner

Contributor
Bronco Guru
Joined
Oct 22, 2003
Messages
1,021
The Last of the Welding is Done

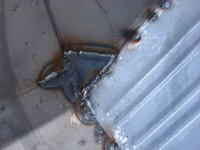
I finished up the driver side floorboard and the last of the remeining holes in the firewall. I also welded the original tire carrier holes closed. I hit the outer panels with a scuff pad to rough up the new panels and knock the surface rust off of the blasted panels. I used a two part epoxy seam sealer on the cowl and floorboards until the tube I had ran out.
 

Attachments

  • DSC03495.JPG
    DSC03495.JPG
    223.3 KB · Views: 51
  • DSC03488.JPG
    DSC03488.JPG
    197.1 KB · Views: 41
  • DSC03487.JPG
    DSC03487.JPG
    232.8 KB · Views: 44
  • DSC03481.JPG
    DSC03481.JPG
    234.5 KB · Views: 44
  • DSC03480.JPG
    DSC03480.JPG
    223.3 KB · Views: 40
  • DSC03479.JPG
    DSC03479.JPG
    188.7 KB · Views: 37
  • DSC03470.JPG
    DSC03470.JPG
    221.7 KB · Views: 38
  • DSC03468.JPG
    DSC03468.JPG
    198.2 KB · Views: 40
  • DSC03499.JPG
    DSC03499.JPG
    217.1 KB · Views: 55
  • DSC03497.JPG
    DSC03497.JPG
    207.1 KB · Views: 49
OP
OP
Past_Miner

Past_Miner

Contributor
Bronco Guru
Joined
Oct 22, 2003
Messages
1,021
Finally... Some Primer

I masked the rotisserie with a roll of saran wrap and a few pieces of masking tape and hit the bottom and inside of the tub with an epoxy sealer primer. These parts will get bed liner later. The outer panels got a couple of coats of epoxy sanding primer and sat over night. I went around the outside seams with a slow set sealer and tooled the joints the best that I could. I used the rest of the tube on the seams under the bed and in the quarters. I used self leveling sealer on the joint where inner and outer quarter weld together. Hopefully this plus the bed liner will keep this joint from rusting through for a very long time. I had intended to start smoothing the quarters and tail light corners with body filler but the seam sealer takes 12+ hours to set so I decided to wait so I didn't fill the seam with sanding dust.
 

Attachments

  • DSC03521.JPG
    DSC03521.JPG
    147.7 KB · Views: 78
  • DSC03518.JPG
    DSC03518.JPG
    137.5 KB · Views: 72
  • DSC03515.JPG
    DSC03515.JPG
    128.4 KB · Views: 76
  • DSC03514.JPG
    DSC03514.JPG
    184.4 KB · Views: 73
  • DSC03513.JPG
    DSC03513.JPG
    162.4 KB · Views: 64
  • DSC03510.JPG
    DSC03510.JPG
    160.5 KB · Views: 66
  • DSC03505.JPG
    DSC03505.JPG
    164.2 KB · Views: 66
  • DSC03503.JPG
    DSC03503.JPG
    219.1 KB · Views: 79
  • DSC03522.JPG
    DSC03522.JPG
    122.2 KB · Views: 73
OP
OP
Past_Miner

Past_Miner

Contributor
Bronco Guru
Joined
Oct 22, 2003
Messages
1,021
Thanks for the encouragement. It finally feels like I'm getting close here.

I had a set back this morning. The slow set seam sealer I used is supposed to set in 12 hours and cure fully in 24. It's still as soft as when I applied it this morning. I'm a little concerned that I will have to remove all of it somehow and replace it with something else.

Anybody know a way to try to force it to set up? If not, how about suggestions on the best way to remove it. I can't imagine that will be very easy without solvent and I'm afraid that will trash the primer coat.

Any ideas would be appreciated.
 
Top