- Joined
- Apr 3, 2022
- Messages
- 681
As some of you know, I purchased a 1972 and got started on it in October last year. I completely took it apart and started by working on the frame and drive train. Had the frame blasted and powder coated and I rebuilt the Dana 44 with 4:10 gears and LS and purchased a new 9" housing from WH and built it with 4:11 gears and Yukon axles. Had both the carriers PC'd as well. Installed four wheel disc brakes from WH and a 2.5" suspension lift Ran new brake and fuel lines, installed new WH PS unit, and put on American Racing wheels with 33x10.5x15 tires. I rebuilt the C4 (first ime attempting a rebuild on an automatic) but won't know if I did it right until its all in and running. Plan was to rebuild the 302 it came with but after engine examination, determined it was best to get a new motor. Went with the new Blueprint engine (brand new block) Cruiser that puts out 360+ HP. Still on back order until March or so. Went through the TC, that was very straight forward. Rebuilt the driveshafts with all new components which was a pretty easy job. Once I got the frame rolling, I put it aside and started on the body....uhgg!
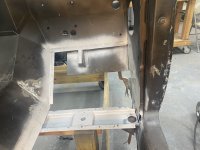
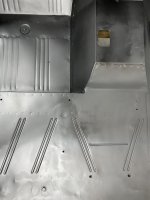
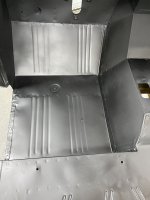
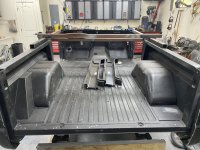
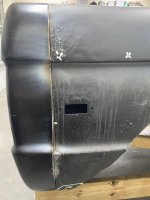
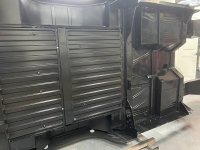
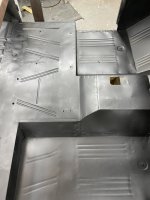
I built a cart for the body and had all sandblasted. As you can imagine, wayyy more rust issues than could be seen prior. Basically, the floors, rear cargo, rockers, and rear taillight housings were all toast. Several misc. parts were also cheese but some of them could be manufactured and/or restored by cutting out the bad metal. I have many, many hours of welding and grinding!! I sprayed the whole body top and bottom with two coats of epoxy primer. All the new metal came from Bronco Graveyard and went together surprisingly well. The floors were a dead on match, the rear taillight housings were very close and required almost no extra work, and the rear cargo floor was a perfect fit. Still have to install the rockers (fingers crossed on their fitment) but am going to mount the body back on the frame with new body mounts before installing them to make sure I have the door gaps right. I plan on setting up the entire body on the frame and ensure all gaps and lines are right. Once I am confident in the setup, I'll disassemble everything again, pull the body back off, and do the body work on the rolling cart.
I was able to build a half cage onto the body which allows me to easily turn the body on its side to work on the bottom. Today I turned it over, made a few final welds, ground down welds, hit everything with 80 grit, and applied seam sealer. Tomorrow I'll hit it all with a sealer coat of epoxy and the final top coat in satin black. Bottom of body will be done other than the Raptor liner that I will spray into each wheel well and the firewall forward. I'll do that after body work is done, just prior to paint.
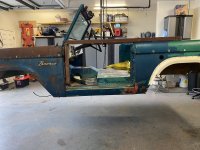
So, coming along. Figure I need a few good weeks of work to get the body ready for paint. Then I'll set up a paint booth, paint, cut and polish, and start assembly. Here are some pics:


