• Just a reminder that you won't be able to start new posts or reply to existings posts in the Archive forum.

    This is where all the old posts go so they can still be used for reference and searched.
  • Welcome to ClassicBroncos! - You are currently viewing the forums as a GUEST. To take advantage of all the site features, please take a moment to register. It's fast, simple and absolutely free. So please join our community today!
    If you have problems registering or can't log into your account, please contact Admin.

1972 Rust Repair

Was this helpful?

  • Yes!

    Votes: 5 100.0%
  • No.

    Votes: 0 0.0%

  • Total voters
    5
OP
OP
Bay0726

Bay0726

Sr. Member
Joined
Nov 12, 2010
Messages
491
Loc.
Woodstock GA
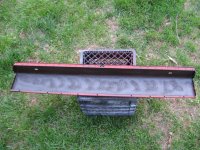
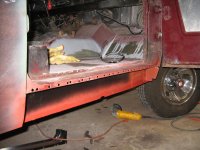
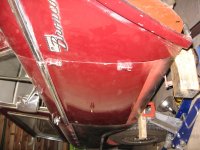
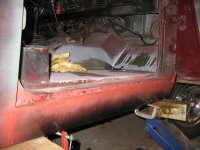
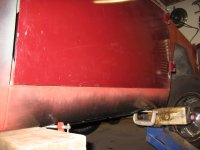
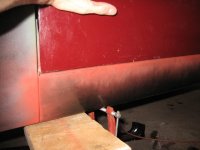
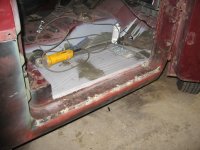
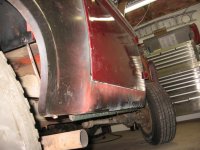
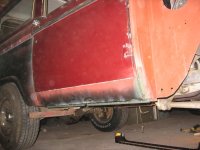
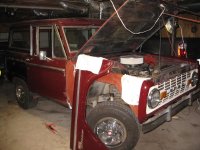
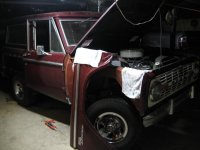
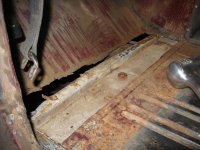
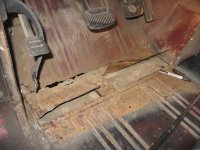
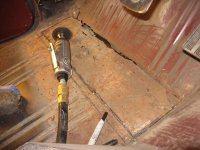
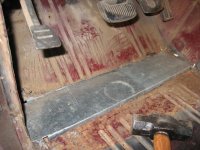
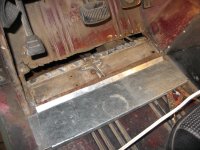
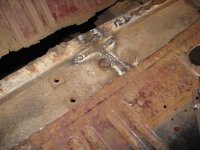
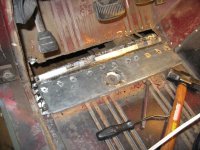
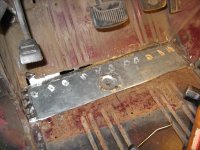
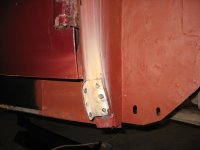
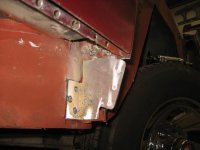
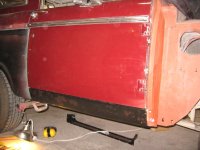
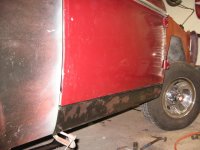
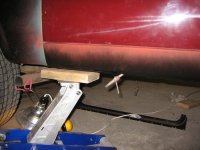
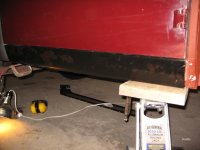
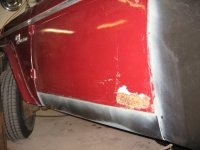
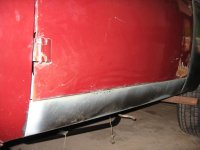
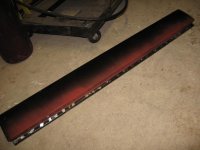
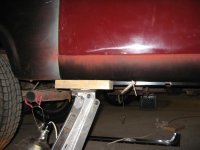
Just making sure everything lines up before welding, and checking gaps with the drivers side to make sure they all lok about the same.
 

Attachments

  • 2011 05 21_2983.jpg
    2011 05 21_2983.jpg
    56 KB · Views: 29
  • 2011 05 21_2984.jpg
    2011 05 21_2984.jpg
    66.4 KB · Views: 27
  • 2011 05 21_2985.jpg
    2011 05 21_2985.jpg
    86.5 KB · Views: 30
  • 2011 05 21_2986.jpg
    2011 05 21_2986.jpg
    105.4 KB · Views: 31
  • 2011 05 21_2990.jpg
    2011 05 21_2990.jpg
    84.8 KB · Views: 26
  • 2011 05 21_2989.jpg
    2011 05 21_2989.jpg
    73.4 KB · Views: 28
  • 2011 05 21_2988.jpg
    2011 05 21_2988.jpg
    79.5 KB · Views: 26
  • 2011 05 21_2987.jpg
    2011 05 21_2987.jpg
    75.8 KB · Views: 27
  • 2011 05 21_2994.jpg
    2011 05 21_2994.jpg
    81.2 KB · Views: 27
  • 2011 05 21_2993.jpg
    2011 05 21_2993.jpg
    89.6 KB · Views: 24
  • 2011 05 21_2992.jpg
    2011 05 21_2992.jpg
    90.5 KB · Views: 28
  • 2011 05 21_2991.jpg
    2011 05 21_2991.jpg
    75.9 KB · Views: 26
OP
OP
Bay0726

Bay0726

Sr. Member
Joined
Nov 12, 2010
Messages
491
Loc.
Woodstock GA
Rust proofing the inner rocker. Seam sealed everything. A feeling of accomplishment!:cool:
 

Attachments

  • 2011 05 21_2995.jpg
    2011 05 21_2995.jpg
    187.1 KB · Views: 43
  • 2011 05 21_2996.jpg
    2011 05 21_2996.jpg
    189.7 KB · Views: 40
  • 2011 05 21_2997.jpg
    2011 05 21_2997.jpg
    64.5 KB · Views: 34
  • 2011 05 21_2998.jpg
    2011 05 21_2998.jpg
    106.3 KB · Views: 34
  • 2011 05 21_3002.jpg
    2011 05 21_3002.jpg
    107.9 KB · Views: 31
  • 2011 05 21_3001.jpg
    2011 05 21_3001.jpg
    99.2 KB · Views: 32
  • 2011 05 21_3000.jpg
    2011 05 21_3000.jpg
    74.1 KB · Views: 32
  • 2011 05 21_2999.jpg
    2011 05 21_2999.jpg
    66.2 KB · Views: 33
  • 2011 05 21_3006.jpg
    2011 05 21_3006.jpg
    106.6 KB · Views: 41
  • 2011 05 21_3005.jpg
    2011 05 21_3005.jpg
    113.8 KB · Views: 37
  • 2011 05 21_3004.jpg
    2011 05 21_3004.jpg
    85.5 KB · Views: 34
  • 2011 05 21_3003.jpg
    2011 05 21_3003.jpg
    105 KB · Views: 35

RIbronco

Sr. Member
Joined
Jul 6, 2004
Messages
584
Loc.
Costa Mesa, CA
Awesome job!
This is exactly what mine needs for rust repair as well. I'll be using the same method of making patch panels instead of buying complete new pieces.
Thanks for the motivation.
 
OP
OP
Bay0726

Bay0726

Sr. Member
Joined
Nov 12, 2010
Messages
491
Loc.
Woodstock GA
Awesome job!
This is exactly what mine needs for rust repair as well. I'll be using the same method of making patch panels instead of buying complete new pieces.
Thanks for the motivation.

I'm glad to hear it. thats what I was looking for when I started the thread. Glad you could use it! If you need anything just shoot me a line.

Bernie
 
OP
OP
Bay0726

Bay0726

Sr. Member
Joined
Nov 12, 2010
Messages
491
Loc.
Woodstock GA
Some Tips

It's important to only cut one section of metal and repair one piece at a time as to not affect the rigidity of the body structure, always keep the doors on, and re-check for proper alignment after each cut and before each weld. If you see any sagging use a jack and a block of wood to try to find out where or what is causing it. I had a slight problem with the pass side and thought it was from the floor support, but it actually was coming from the door hinge post. You can brace it back into position before welding. Once you weld it's too late to go back so be careful take your time and make sure everything lines up before you weld.

Rockers, The aftermarket rockers fit good, you will have to cut a little notch of metal off the top of both sides to get them to fit into place about 1/8th to ¼ inch. They will also fit low below the doors, see the pictures where I was using a floor jack to get them to fit into place. Use your door bottom as a reference to where they should be. Again remember to take your time and make them fit perfect before you start welding, I think I wore out my door hinges by fitting them, closing the door , opening the door and fitting them some more… you get the point. If you start to get frustrated take a break and start over again tomorrow. Don’t be afraid to bang on things a little, you can always go over it with a little body filler later. I’d rather have a small dent then rockers that sit a couple inches lower than they should. If you plan on replacing the upper rocker then you will need to brace you body by welding angle iron or a pipe to bridge the door opening. Also remember to protect the metal on the inside of the rockers before installing them; they are not galvanized as the ones from the factory were. I used rust proof primer and rubber undercoating on mine.
 
OP
OP
Bay0726

Bay0726

Sr. Member
Joined
Nov 12, 2010
Messages
491
Loc.
Woodstock GA
My Avatar

To all you who are wondering, I've been asked this a few times... Here is a picture of my Avatar. It's Tasha my 10 year old Boxer taking a bubble bath. She is always trying to lick the soap, hence her tongue is out! lol Thanks for asking guys, :cool:
 

Attachments

  • tashabath.jpg
    tashabath.jpg
    29.6 KB · Views: 61

RG801

Jr. Member
Joined
Feb 7, 2011
Messages
144
Loc.
Oklahoma City
To all you who are wondering, I've been asked this a few times... Here is a picture of my Avatar. It's Tasha my 10 year old Boxer taking a bubble bath. She is always trying to lick the soap, hence her tongue is out! lol Thanks for asking guys, :cool:

Lol. I'm not sure I would have ever figured it out. Funny pic.
 
OP
OP
Bay0726

Bay0726

Sr. Member
Joined
Nov 12, 2010
Messages
491
Loc.
Woodstock GA
You guys are too funny. lol!

The last of my rust issues! Drivers floor
 

Attachments

  • 2011 05 23_3012.jpg
    2011 05 23_3012.jpg
    92.3 KB · Views: 55
  • 2011 05 23_3011.jpg
    2011 05 23_3011.jpg
    113.1 KB · Views: 51
  • 2011 05 23_3010.jpg
    2011 05 23_3010.jpg
    120.7 KB · Views: 52
  • 2011 05 23_3009.jpg
    2011 05 23_3009.jpg
    115 KB · Views: 58
  • 2011 05 23_3016.jpg
    2011 05 23_3016.jpg
    116.5 KB · Views: 67
  • 2011 05 23_3015.jpg
    2011 05 23_3015.jpg
    119.7 KB · Views: 54
  • 2011 05 23_3014.jpg
    2011 05 23_3014.jpg
    124.1 KB · Views: 56
  • 2011 05 23_3013.jpg
    2011 05 23_3013.jpg
    120.4 KB · Views: 51
  • 2011 05 23_3017.jpg
    2011 05 23_3017.jpg
    115.1 KB · Views: 60
  • 2011 05 23_3018.jpg
    2011 05 23_3018.jpg
    97.9 KB · Views: 60
  • 2011 05 23_3019.jpg
    2011 05 23_3019.jpg
    129.6 KB · Views: 64
  • 2011 05 23_3020.jpg
    2011 05 23_3020.jpg
    126.2 KB · Views: 65
OP
OP
Bay0726

Bay0726

Sr. Member
Joined
Nov 12, 2010
Messages
491
Loc.
Woodstock GA
I think it was actually more work to make the patch and weld it in then it would have been to just replace the whole floor. Note to self for next time!
 

Attachments

  • 2011 05 23_3020.jpg
    2011 05 23_3020.jpg
    126.2 KB · Views: 49
  • 2011 05 23_3021.jpg
    2011 05 23_3021.jpg
    132.1 KB · Views: 54

aaron6920

Sr. Member
Joined
Sep 26, 2010
Messages
405
Loc.
Dorchester, IA
This is the first thread I have seen that makes me want to repair some rust and give my bulldog a bubble bath :)

Nice work coming along nicely!
 
OP
OP
Bay0726

Bay0726

Sr. Member
Joined
Nov 12, 2010
Messages
491
Loc.
Woodstock GA
Thanks Aaron, I will be starting on a new project soon and posting a link to it here.
Good luck with your Bronco!
Bernie
 

Gunracer

Jr. Member
Joined
Dec 7, 2006
Messages
52
Loc.
Buford, GA
Hey Bernie,
Hope you got the top back to Woodstock in one piece. It was nice meeting you. Keep up the good work!
Roger
 
OP
OP
Bay0726

Bay0726

Sr. Member
Joined
Nov 12, 2010
Messages
491
Loc.
Woodstock GA
Hey Roger, Thanks! Made it in one piece! Any thoughts on paint for your Bronco? It will look great if you take it back to the original Grabber Orange...
 
Top