• Just a reminder that you won't be able to start new posts or reply to existings posts in the Archive forum.

    This is where all the old posts go so they can still be used for reference and searched.
  • Welcome to ClassicBroncos! - You are currently viewing the forums as a GUEST. To take advantage of all the site features, please take a moment to register. It's fast, simple and absolutely free. So please join our community today!
    If you have problems registering or can't log into your account, please contact Admin.

304 Stainless Exhaust in new Build (with pictures)

dirwin

New Member
Joined
Jul 12, 2009
Messages
133
Loc.
Tyler, Texas
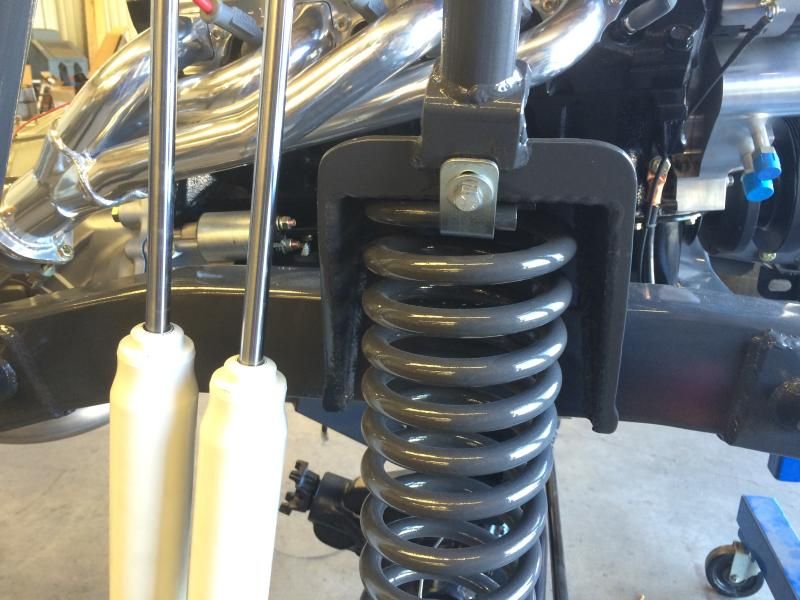
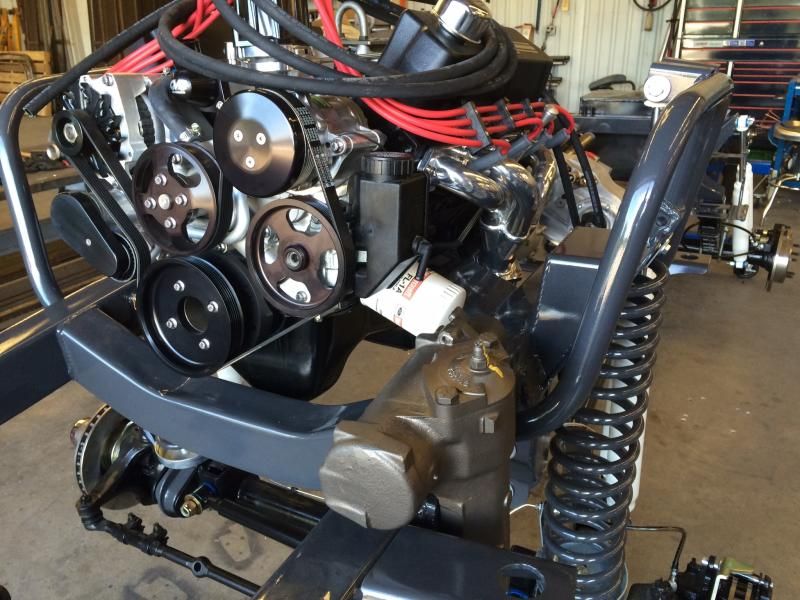
Just started getting going on the chassis of my 72. The frame was absolute crap so I went with a new JBG frame. With this one I decided to go with a 3.5" James Duff suspension, 2" body lift, 351/ZF/Atlas driveline and went with BC Bronco's headers.

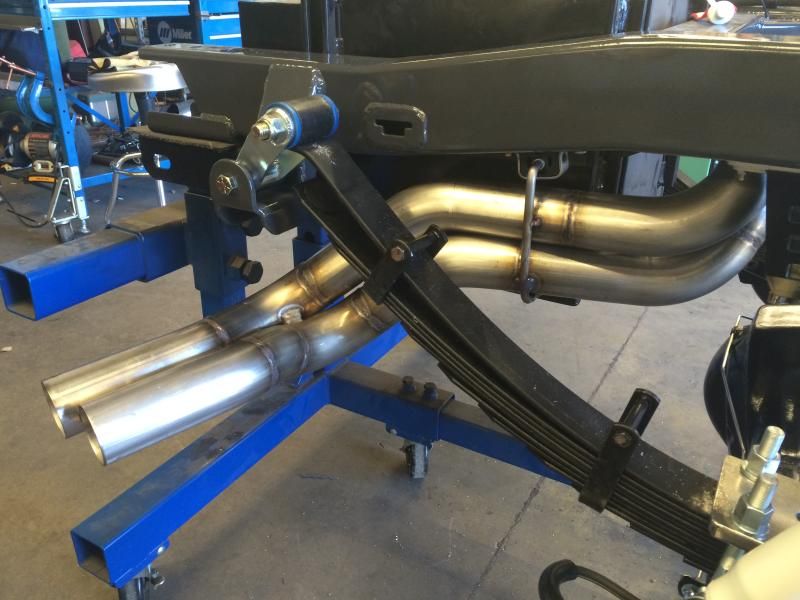
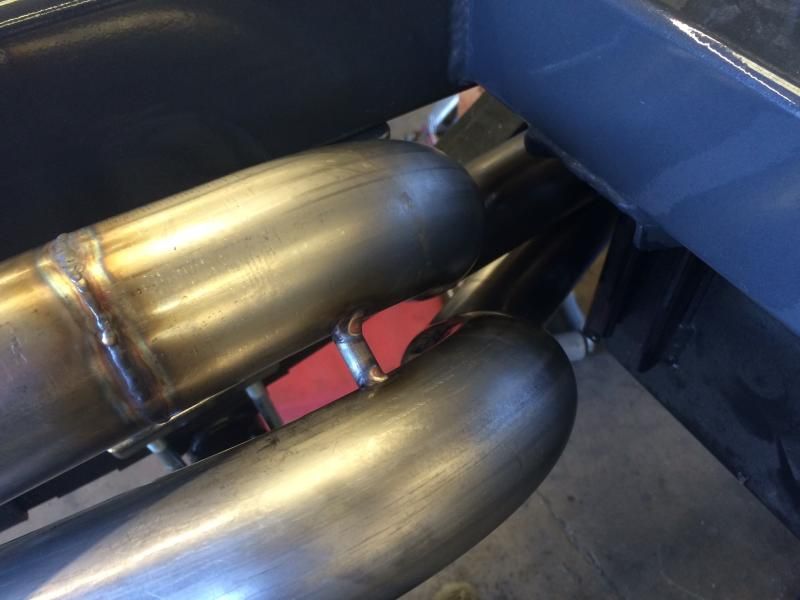
I've not really cared for the pre-bent exhaust that's out there, it's good and functional and all, I just don't care for the plain look and heaven knows I love to over complicate stuff for myself. So I decided to teach myself how to tig weld stainless and do a 2.5" mandrel bent, weld up exhaust myself. I'm an absolute amateur with the tig but I did decide to do a merge pipe and exhaust on my Mustang prior to taking on the Bronco. I've got to give props to another website here though, Jody at www.weldingtipsandtricks.com is absolutely a fantastic resource, his videos that he post for free are a great tool.

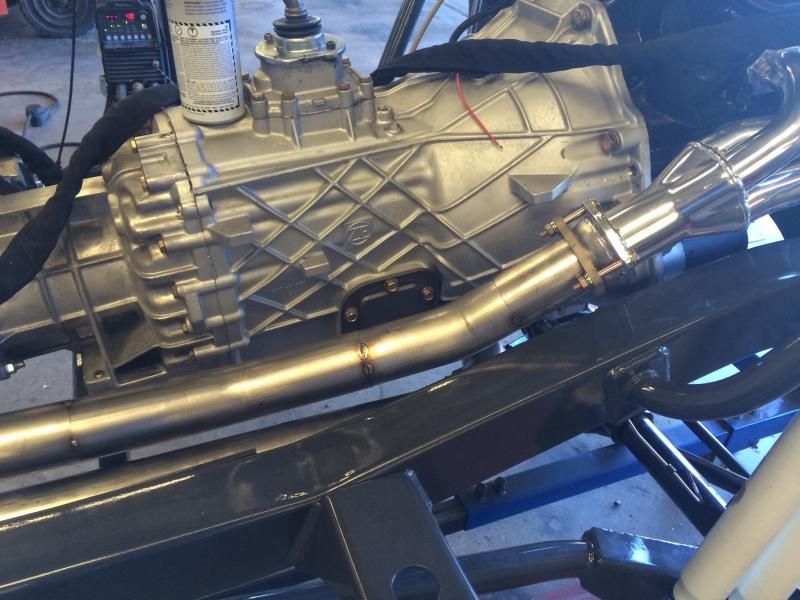
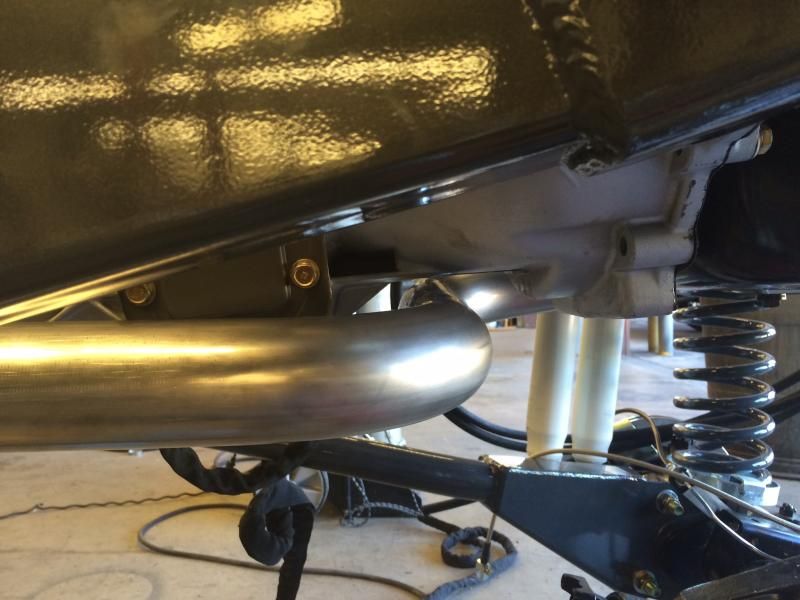
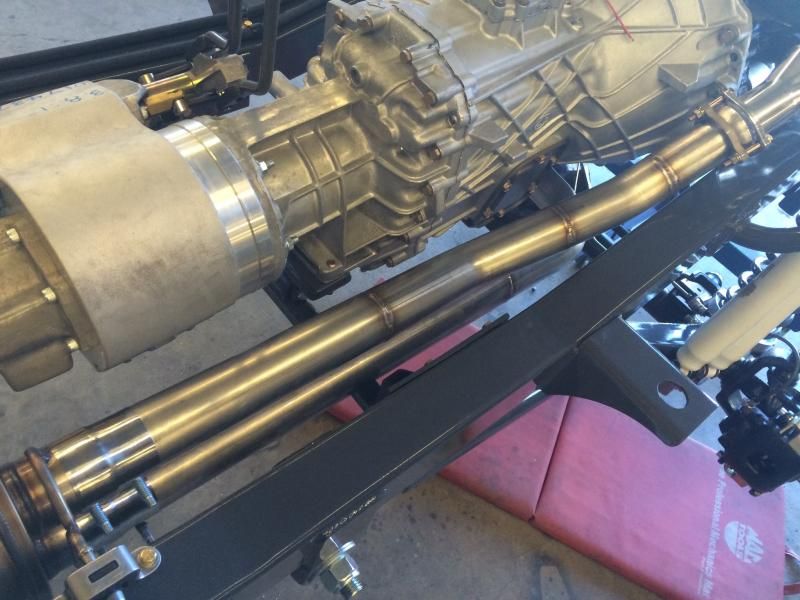
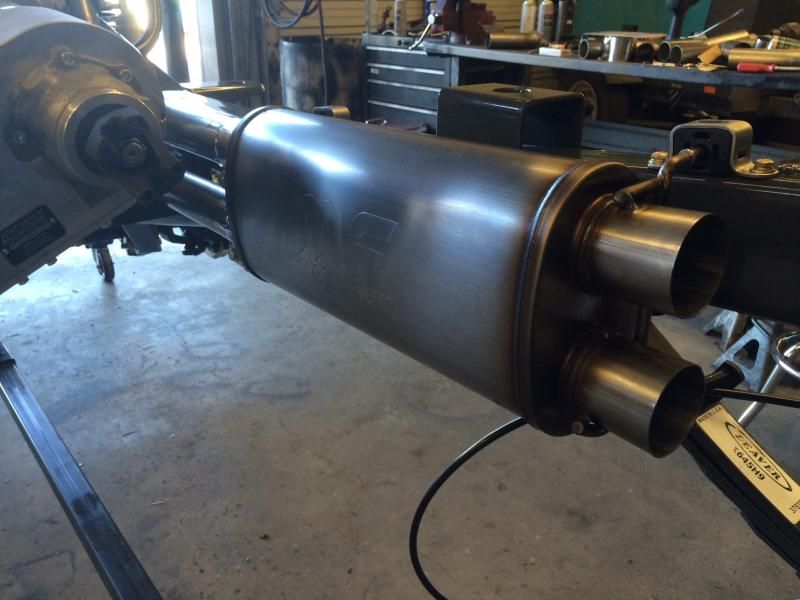
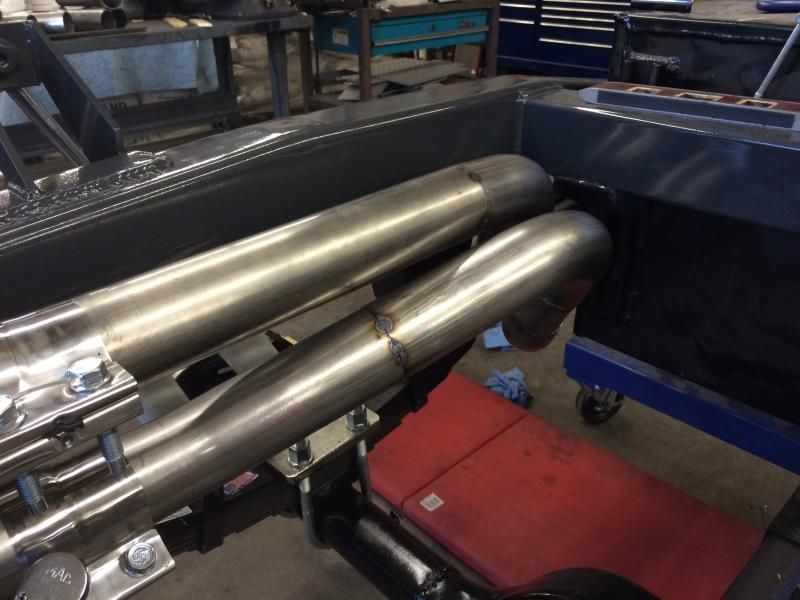
So, I ordered a bunch of 2.5" 16 gauge 304 stainless bends, 15, 30, 90 and 180 degree bends, one 2 in, 2 out Magnaflow muffler with the internal crossover and a new bimetal blade for the bandsaw and away I went. My goal was a single muffler dual setup that brought 2 pipes out the passenger side. Here is the photo trail of the work. All I lack is one hanger on the rear pipe section that I should be able to do tonight after work.

58E8AEFE-74C7-4323-933F-0503BA73FD96_zpsw1mkb2ml.jpg

4B7692FD-F84C-46E2-B5D1-D11FDA771B2A_zpsoabt2ecn.jpg

413F55E0-79F0-4CDD-9642-2CB20B4A2D25_zps3ihvqosb.jpg

E70FFDA6-9A60-4DFE-B208-D26EA66EF0D4_zpsgu0gxfk5.jpg

E01FFE31-46B8-4878-A887-8711715DEC17_zpszvmy9zir.jpg

D5BF36B4-170F-4BED-9D46-DB8E6A2FFD27_zpsmfd5nvsf.jpg

67FC12EC-9AD2-4FC9-979F-C7BA18DAF9F0_zpsfopwjmyo.jpg

4EFBE08E-EF1D-492F-A2CD-18AD97EE9CFD_zpsyw7twex3.jpg

5844A850-DB58-4A6A-89F5-BE99327DCEB2_zpse7pw42w2.jpg

B4701D86-EECB-4259-A78A-65ABF0286AF5_zps3gxipto1.jpg

A2A67860-9FE3-4D4D-91BF-791BAE5F0299_zpspc3fnw8g.jpg

A76F6199-9C42-43FF-A8C1-B1F30B121B91_zpsovc6swap.jpg

0AED3682-1F6B-4C07-AE16-0C5DC87F2EFF_zpsudekigzu.jpg

0FD81293-1E13-4B92-A24D-550BC52591AB_zpsapyus7jx.jpg

34358188-0E48-43CD-9EB4-DEC75B6416D2_zpsuhzw6nay.jpg

AE511A6B-993F-4FD3-B69C-A2303504B991_zps8sdmbsni.jpg

182B04EA-39EE-4DE1-9158-E5EFCD84DFB2_zps9kiwvbtu.jpg

CB404EA2-0AD0-44A6-9EE2-5645F6CAF9A5_zps9y8npknm.jpg

E0215E60-A682-46DC-AA9A-913BF0D46286_zpsilcwgubf.jpg

76BBF3E3-9CE4-4E0F-8C52-A780227C93A3_zpsnjqqal5a.jpg

CF5F3F8E-4745-4FCF-A6AD-20E6CFA0E098_zpseb8jeosq.jpg


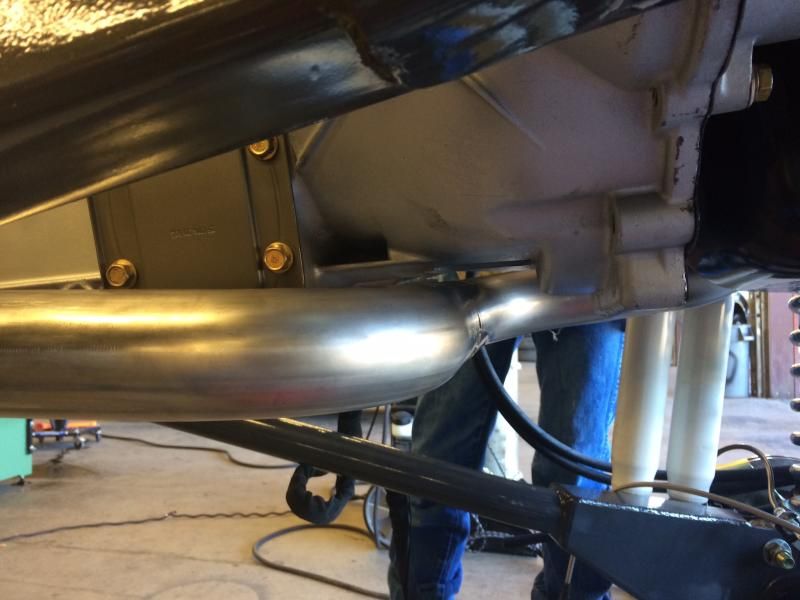
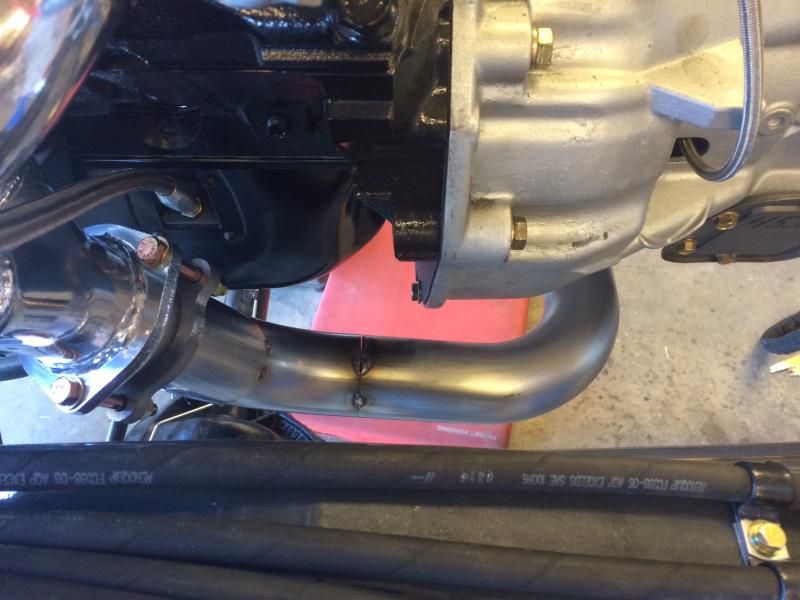
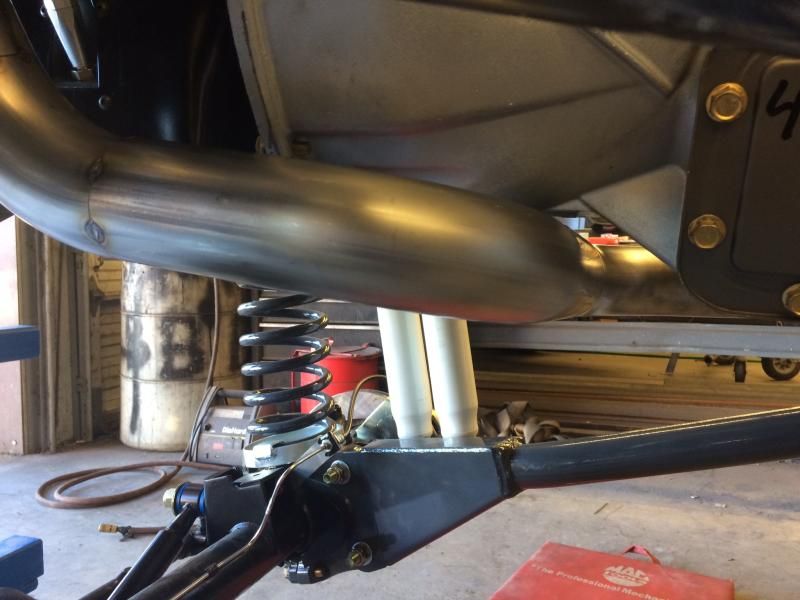
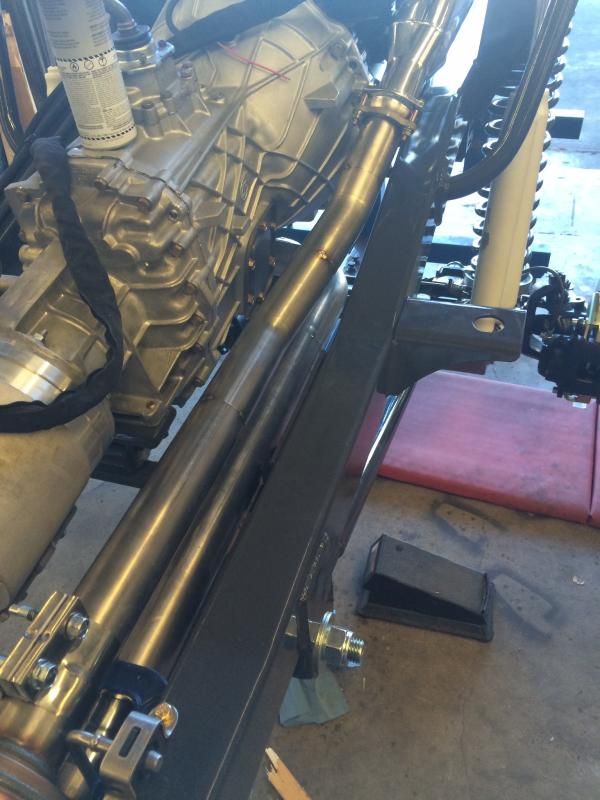
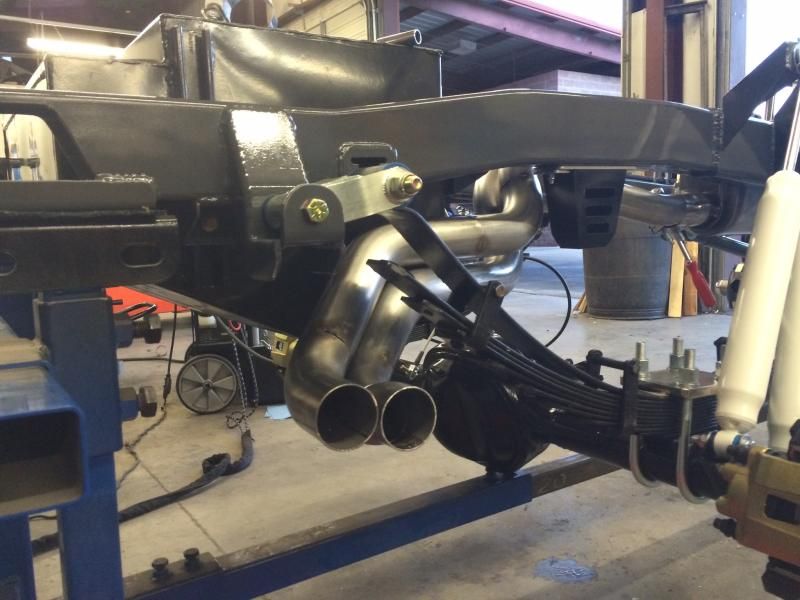
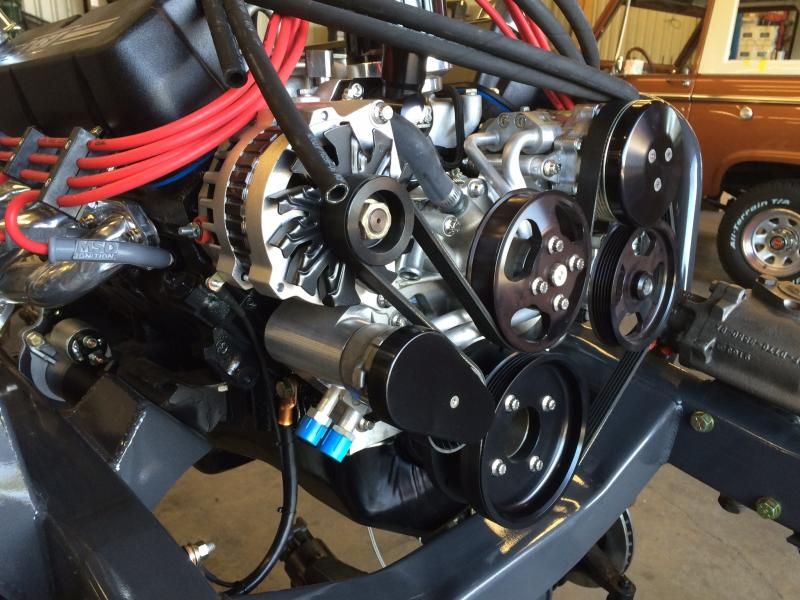
One observation I will make, I am very impressed with Chuck's headers, of all the headers I've used so far with the Broncos, these are by far the best.
 

WheelHorse

Bronco Guru
Joined
Nov 22, 2004
Messages
2,492
OK, now pull it all off and polish it to a chrome like finish LOL.

Looks really awesome.
 

stus70brc

Contributor
Sr. Member
Joined
Feb 5, 2008
Messages
387
Looks good! That's how I did mine up front going into my Magnoflow 2 into 1 muffler How do you like that new frame??
 
OP
OP
dirwin

dirwin

New Member
Joined
Jul 12, 2009
Messages
133
Loc.
Tyler, Texas
Michigan is a LONG way from Texas and there is no polishing in my future, LOL!

I love the frame, it is a very quality part. I had them build it without the front and rear shock mounts or the radius arm mounts so that I wouldn't have to cut anything off and made installing the JD stuff easier. I did have to trim the coil spring mounts to clear the dual front shocks but it would have worked perfect for the stock set up or putting a shock on each side of the coil spring. The whole deal is just stouter than stock and the coil mounts are bigger than stock. I was especially impressed with the welding. I know it's done by hand but it seriously looks automated. I had to sharpen up my Mig welding to try and match the welds they had done when I did the shock mounts, tank brackets, battery box and steering reinforcement. Purist might call it a Frankinbronco since the frame had to be replaced, but it is sure nicer than patching up the old one that had been chopped to hell and back by the previous owner.

I thought about doing the 2 into 1 set up and changed my mind. I have a Raptor and I really like the way the exhaust is done on that one so I kind of tried to duplicate it. I think it was worth it and all in all, I have about 14 hours and $400 in it so I think it was worth it just for the custom aspect alone.
 

68rustbucket

Jr. Member
Joined
May 1, 2006
Messages
226
Loc.
San Marcos,TX
Very nice job!
Where did you get the starter pipe that leave the header? When I had my first exhaust system built for my BC header, the exhaust guy had a hard time flaring a pipe big enough to fit the flange. Finishing up Atlas 4 install, will be having exhaust system #2 built. Wanna do mine in San Marcos? ;)
 

savage

Bronco Nut
Joined
Apr 18, 2007
Messages
2,483
Loc.
Renton
Nice job, I like the way you did the dual pipes, and how you exited them out the side.
 
OP
OP
dirwin

dirwin

New Member
Joined
Jul 12, 2009
Messages
133
Loc.
Tyler, Texas
I got all of the stuff from Columbia River Mandrel Bending.

Here is the link to the transition cones. They have just about everything you can imagine for exhaust or turbo plumbing. They also have the standard 3 hole flange that is used for the BC Bronco headers.

http://www.mandrel-bends.com/catalog/transitions-forms-45/transition-cones-211/

The flange is here.

http://www.mandrel-bends.com/catalog/2-50-3-bolt-universal-exhaust-flange-1-4-mild-steel-4241.html

Of all the places I've found, they are the most reasonable prices for stainless steel for sure. Hot rod shops will charge you out the nose and I'm pretty sure Columbia River is where they buy all the stuff they sell anyway. Mandrel machines start over 100K so there aren't many companies who have one.

Thanks, I really like the 2 out, it's unique and I haven't seen one done that way yet (not that there isn't one, I just haven't seen it).
 
OP
OP
dirwin

dirwin

New Member
Joined
Jul 12, 2009
Messages
133
Loc.
Tyler, Texas
Rear hanger is done, exhaust is now complete! Going to try and put the body on it tomorrow if I get time.

7F1C14CB-A88F-4757-B8B7-662FBE7E4B4B_zps8rvhkun5.jpg

1C9403EB-8C4A-44B6-BCF6-B6F7EFF8CF79_zpsdonyglc4.jpg


This it the section of the coil mount that I had to trim on the frame.

F3B6A12C-9AAB-44B8-B2F2-8A9BDFFDE561_zpsi3l7ccag.jpg


My best attempt at matching the welds when I welded the rear shock mounts. A little better with a MIG than the TIG...

7323872E-3E96-483C-9035-C25ABF8220BC_zpsrhdtvvgo.jpg
 

DirtDonk

Contributor
Bronco Guru
Joined
Nov 3, 2003
Messages
49,462
Extremely sanitary transitions there at the back, where most systems fall on their face. It's an awkward spot at best, but looks like you nailed it.
Do you know how far below the body the tubes will sit at the exit? If not, I guess you'll see tomorrow!
Definitely keep the pics coming. Looking forward to seeing more of this build.

And just what is that little pump-thingy under the alternator? Looks interesting. Got more pics of the engine area?

Thanks

Paul
 

ILikeBond

Sr. Member
Joined
Jan 27, 2009
Messages
908
Wow, very clean chassis overall and great job on the exhaust. Also can't wait to see how it looks with the body. Kudos.
 

Yeller

Contributor
Bronco Guru
Joined
Mar 27, 2012
Messages
6,890
Loc.
Rogers County Oklahoma
Impressive. Perhaps some of the finest work posted here. Faced with a similar project, and likely as much a perfectionist, curious how you make square cuts on the bends? Mine always seem to be off angle such that I end up with a gap.

I cut them with a band saw unless it will fit in my cold cut chop saw. Sometimes the metal will shrink or the bans saw with move out of square and cause a gap or i miss the angle just a bit. When that happens I dress the cut on a belt sander to square it up or adjust the angle some.

For doing this type of work a belt sander is priceless. I use it to clean fine tune and debur parts and to sharpen my tungston for the tig.

I know everyone cry's about fouling your tungston with contamination from the belt, which is true you do to a very, very minimal amount. I can promise not enough that you will ever know, you'll get more contamination from the dust in the air and surface of the material than from the tungston.
 
OP
OP
dirwin

dirwin

New Member
Joined
Jul 12, 2009
Messages
133
Loc.
Tyler, Texas
B15672E3-0931-4FD3-82A7-49741309B5C5_zpse1es2wc0.jpg

Under the alternator isn't a pump, it's how the Vintage Air Frontrunner exits the A/C lines.

This is the second Frontrunner setup I've used on an EB and I love it. No issues with radiator clearances using an electric fan and shroud.

295A82EB-4E5B-47C1-BA8D-B160467D0875_zpsruxm5dqy.jpg


The install of the body didn't go well at all. Finally got the opening for the ZF shifter right and was able to get the body bolts from the forward floorboard to the tailgat tight, the damn front clip was replaced and it lacks 3/4 inch to sitting down on the body mount, it's a damn mess. Looks like I'm going to have to cut the whole damn front clip off to get it lined up.

As for the exhaust, even after a ton of measuring on my 74, it's exiting 7 inches below the damn body, I knew it was going tobe a little lower but 7 inches looks like crap. SO, off will come the tail section of the exhaust and I'll have to cut it up, move the exit back and up a little, my goal is 2 inches below the bottom of the body. I'll post some pics, I just got pissed and walked away from it last night and didn't take any.
 

Yeller

Contributor
Bronco Guru
Joined
Mar 27, 2012
Messages
6,890
Loc.
Rogers County Oklahoma
Be sure to check fender and door alignment before getting to cutting on the front clip. Make sure the fenders and doors line up first. It looks like your frame is powder coated, I've had frames move during that process and create all kinds of issues. You may have to get creative shimming the body mounts if the body parts all line up, I've had all sorts of issues with the doors not lining up even though everything did prior to paint and coating.
 
OP
OP
dirwin

dirwin

New Member
Joined
Jul 12, 2009
Messages
133
Loc.
Tyler, Texas
That's the plan. I've got to fit the doors and fenders to make sure where I'm at first. I had to do some creative shimming on my 67 to get the doors to fit right as well. We'll see...
 
Top