BlackHorse
Sr. Member
- Joined
- Feb 17, 2002
- Messages
- 773
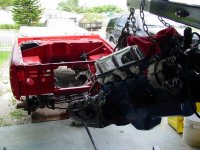
bsaunder said:As far as I knew all the windsor motors had the same mounting height too (302s and 351Ws). Not sure if I got an odd ball or not. After looking as many Bronco's, I'm not convinced that they all have the motor mounts on the frame in the same place either. From Bronco to Bronco I have seen almost a 1/2" variation of where the frame mounts have the engine sit in realtion to the bottom of the frame rail.
"Variation" Ladies and gentalmen let us not forget that our beloved steeds were produced at the point in time when the big three had serious quality issues. This is what allowed the imports to gain market share. This also explains why two people buy the same fender and one guy complains about the fit while the other claims it fits perfect. You have an 11 year run on this body style. Variation is the name of the game with these rigs. "Bolt on" that’s a good one. Look at the bright side we've got welders, grinders, files, and all kinds of great tools just to help make all the stuff we buy work. ;D