A4x4Junky
Sr. Member
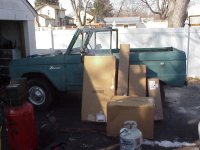
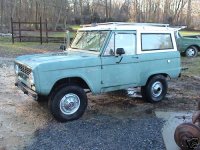
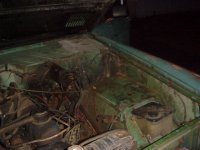
Picked up a 67 a couple weeks ago. I was very happy with the rust-to-cost ratio. I didn't have a lot to spend and this vehicle was very unmolested. I was sick of seeing vehicles with butchered wiring and botched bodywork.
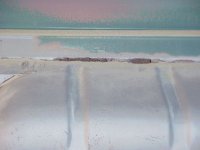
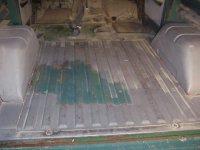
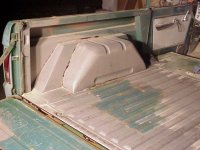
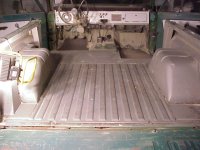
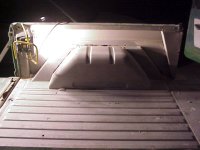
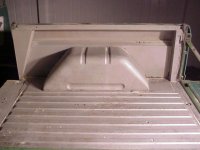
Now it is time to start working on the body. I removed the seats and top last night and will begin sandblasting the floor and inner parts of the bed tonight.
The problem is...I have no clue what I am doing. I have worked on a lot of trucks in the past. 78/79 Broncos, 84, 86, 87, 89 Bronco, 72 Blazer, 95 Heep Wragler but have limited myself to mechanical work only. This will be my first time with bodywork. I wont be paying someone else to do the work for me. This is a project and I will live with whatever the results of my work...but I am certainly not above asking for help and advice.
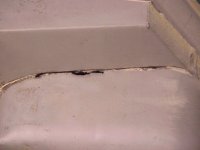
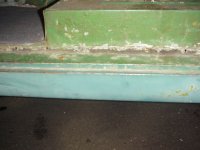
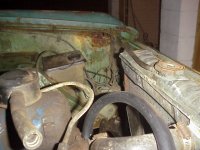
Some of the work I know I will be doing (attempting) is driver and passenger hinge posts, driver and passenger floor pans, driver and passenger striker posts, driver and passenger kick panels, passenger fender, driver inner fender, cowl, and will eventually replace the hood and tailgate.
Finally got my JGB metal ordered and eagerly await its arrival. Few things I would like to explain. I am a search junky...and have gone through build after build on these boards. I have seen some amazing work...but still have a few questions.
Some people use what the called spotweld cutters (like a drill bit...sorta). When I have gone to Napa, and any other stores I have been looked at like I am crazy. Any source for these, and if no source what would you recommend to replace this?
How do I locate all the spot welds on a particular panel? I have a lot of them to remove...but dont want to mess up the surrounding metal. Example is my striker posts. The quarter panel metal wraps around the corner...so how do I find and remove the striker post without messing up the quarter? Again, how do I remove the striker without messing up the rocker...which I assume I will have to remove anyway.
Of the panels I mentioned above, could someone recommend an order that would make the most sense both in terms of keeping the vehicle from sagging more than necessary as well as to minimize the amount of time this will take me?
Ill shut up for now since (in case you couldnt tell) I am too longwided.
Anthony
Now it is time to start working on the body. I removed the seats and top last night and will begin sandblasting the floor and inner parts of the bed tonight.
The problem is...I have no clue what I am doing. I have worked on a lot of trucks in the past. 78/79 Broncos, 84, 86, 87, 89 Bronco, 72 Blazer, 95 Heep Wragler but have limited myself to mechanical work only. This will be my first time with bodywork. I wont be paying someone else to do the work for me. This is a project and I will live with whatever the results of my work...but I am certainly not above asking for help and advice.
Some of the work I know I will be doing (attempting) is driver and passenger hinge posts, driver and passenger floor pans, driver and passenger striker posts, driver and passenger kick panels, passenger fender, driver inner fender, cowl, and will eventually replace the hood and tailgate.
Finally got my JGB metal ordered and eagerly await its arrival. Few things I would like to explain. I am a search junky...and have gone through build after build on these boards. I have seen some amazing work...but still have a few questions.
Some people use what the called spotweld cutters (like a drill bit...sorta). When I have gone to Napa, and any other stores I have been looked at like I am crazy. Any source for these, and if no source what would you recommend to replace this?
How do I locate all the spot welds on a particular panel? I have a lot of them to remove...but dont want to mess up the surrounding metal. Example is my striker posts. The quarter panel metal wraps around the corner...so how do I find and remove the striker post without messing up the quarter? Again, how do I remove the striker without messing up the rocker...which I assume I will have to remove anyway.
Of the panels I mentioned above, could someone recommend an order that would make the most sense both in terms of keeping the vehicle from sagging more than necessary as well as to minimize the amount of time this will take me?
Ill shut up for now since (in case you couldnt tell) I am too longwided.
Anthony
Attachments
-
 Driver Side.jpg51.7 KB · Views: 284
 -
 Driver Rocker.JPG43.7 KB · Views: 156
 -
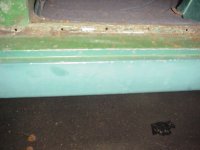 Passenger Rocker.JPG39.9 KB · Views: 133
 -
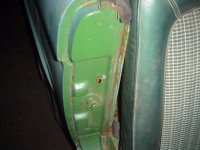 Passenger Striker Post.JPG51.8 KB · Views: 179
 -
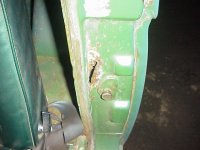 Driver Striker Post.JPG51.3 KB · Views: 174
 -
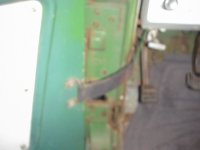 Driver Hinge Post.JPG24.3 KB · Views: 186
 -
 Driver Front Inner Wheel Well.JPG50 KB · Views: 232
 -
 Driver Front Inner Fender.JPG61.4 KB · Views: 175
Last edited:
")