












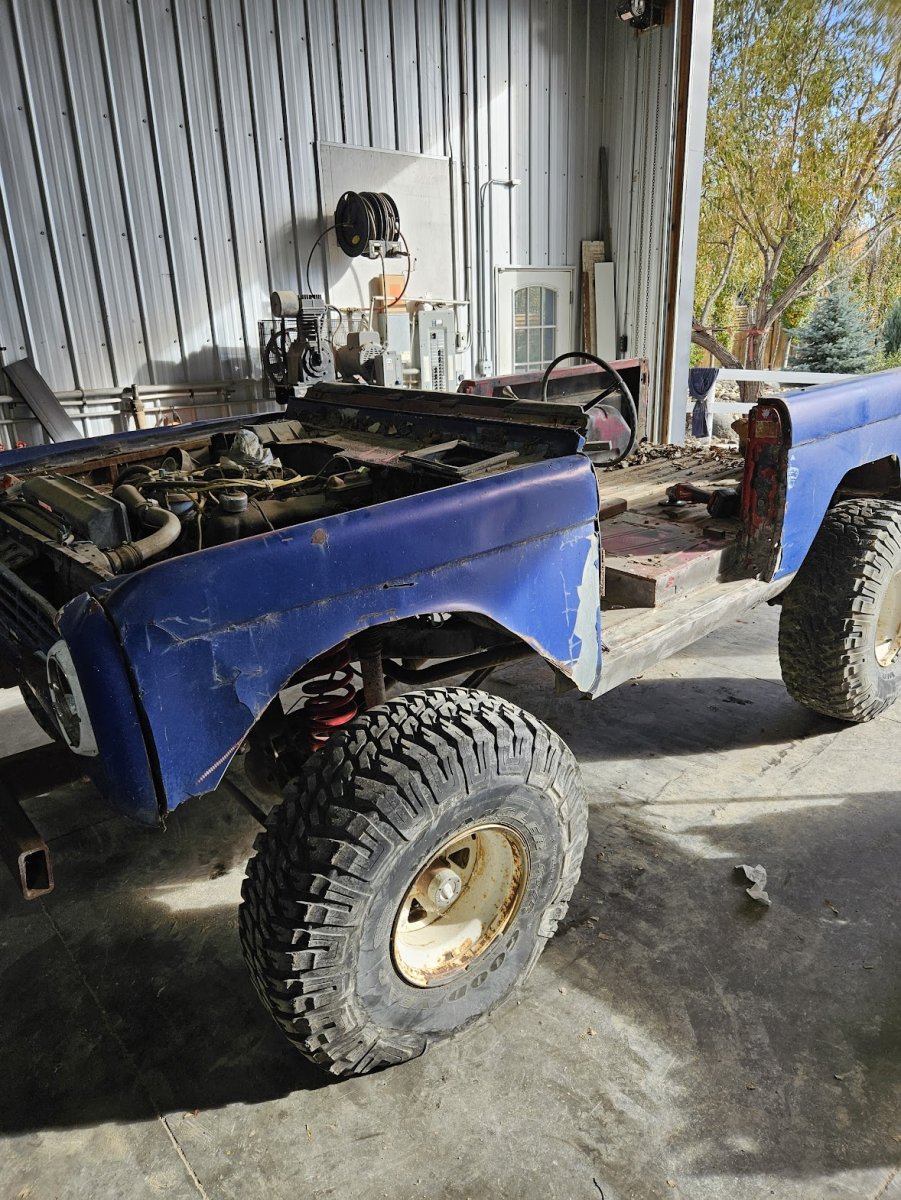
Far enough along that I thought I would post some details of this '73 build with coyote swap. My first Bronco build and first coyote swap, so I've been on a steep learning curve, but some buddies that are experts in the field have been a tremendous resource and pitched in alot. I did a ton of research on here and on YouTube before starting or buying anything, but you still end up encountering issues along the way that almost always inflate your budget, so expect that and delays. Here's a few things I encountered along the way and where I'm at:
1. My 351W was ceased, but was planning to go with that platform until a complete drivetrain for a 2019 F150 appeared in the classified at a price I couldn't resist nor rebuild my 351, so that was my first pivot knowing it would cost more but also knowing the market price should adjust and offset some or all of the higher costs. I reached out to Power by the Hour and Christian Papa was really good to work with as we built up what I would need for the swap. They are partnered with Toms Offroad, so I started off with their motor mounts and crossmember.
2. First issue - the frame. Canada is rough on Broncos and I knew most of the body was shot (all of it in the end aside from the dash) but thought the frame was salvagable until it was blasted and my buddy dropped it on its side accidentally while unloading it and it easily kinked the frame rail. That revealed mud caked on this inside and likely the strength compromised, so after alot of discussion, I eventually bit the bullet and ordered a frame from Throttle Down Kustoms - upside is they are a 5 hour drive from me and good to deal with - highly recommend. Upside is that now I had a wider frame to accomodate the coyote.
3. Once I had all the mods completed on the coyote with the PBH parts, we did a test fit and found another problem - my cross member was too narrow and the T-case was way too long with an output shaft I later learned is incompatible with most aftermarket drive shafts. Two companies were a valuable resource as I stressed over the Tcase and cross member. First, Emily Kincer from Kincer Chassis/Krawlers Edge provided alot of advice and eventually hooked me up with their cross member and talked me into using their motor mounts as the cross member and motor mounts sort of work in unison. I'm glad I did and as the mounts are super nice and sturdy. Patriot 4 x4 on here clued me into the fact that the Ranger Tcase provides the solution, so I lucked out and found one on Ebay with only 30,000 miles, so I bought that and paid for it by selling my tcase.
4. Third issue - clearance. Although the cross member and tcase were solved, the new motor mounts set the motor down enough that I had to notch our the frame cross member slightly to accomodate the AC compressor - not a big deal but worth noting.
Pics attached and with more updates to follow



1. My 351W was ceased, but was planning to go with that platform until a complete drivetrain for a 2019 F150 appeared in the classified at a price I couldn't resist nor rebuild my 351, so that was my first pivot knowing it would cost more but also knowing the market price should adjust and offset some or all of the higher costs. I reached out to Power by the Hour and Christian Papa was really good to work with as we built up what I would need for the swap. They are partnered with Toms Offroad, so I started off with their motor mounts and crossmember.
2. First issue - the frame. Canada is rough on Broncos and I knew most of the body was shot (all of it in the end aside from the dash) but thought the frame was salvagable until it was blasted and my buddy dropped it on its side accidentally while unloading it and it easily kinked the frame rail. That revealed mud caked on this inside and likely the strength compromised, so after alot of discussion, I eventually bit the bullet and ordered a frame from Throttle Down Kustoms - upside is they are a 5 hour drive from me and good to deal with - highly recommend. Upside is that now I had a wider frame to accomodate the coyote.
3. Once I had all the mods completed on the coyote with the PBH parts, we did a test fit and found another problem - my cross member was too narrow and the T-case was way too long with an output shaft I later learned is incompatible with most aftermarket drive shafts. Two companies were a valuable resource as I stressed over the Tcase and cross member. First, Emily Kincer from Kincer Chassis/Krawlers Edge provided alot of advice and eventually hooked me up with their cross member and talked me into using their motor mounts as the cross member and motor mounts sort of work in unison. I'm glad I did and as the mounts are super nice and sturdy. Patriot 4 x4 on here clued me into the fact that the Ranger Tcase provides the solution, so I lucked out and found one on Ebay with only 30,000 miles, so I bought that and paid for it by selling my tcase.
4. Third issue - clearance. Although the cross member and tcase were solved, the new motor mounts set the motor down enough that I had to notch our the frame cross member slightly to accomodate the AC compressor - not a big deal but worth noting.
Pics attached and with more updates to follow


