• Just a reminder that you won't be able to start new posts or reply to existings posts in the Archive forum.

    This is where all the old posts go so they can still be used for reference and searched.
  • Welcome to ClassicBroncos! - You are currently viewing the forums as a GUEST. To take advantage of all the site features, please take a moment to register. It's fast, simple and absolutely free. So please join our community today!
    If you have problems registering or can't log into your account, please contact Admin.

Bronco project, going back together, update 2-27-06

ricks77eb

Sr. Member
Joined
Sep 17, 2003
Messages
842
Loc.
Deer Park, Texas
Well I had been putting off starting this project on my Bronco until after OCBR then I did not get to go because of Hurricane Rita. So, I decided last week that I might as well go ahead and get started.

I needed to replace my frame since it was bent so I have been putting together some other things that I wanted to do while I had it apart. I found a really good frame just a couple of hours from my house (thanks to 66roadhorse). While I have it apart I have a 351W that I am going to put in, BC Broncos 24 gallon tank from the mass buy here at CB.com, a Centech harness that I bought using a coupon for $75 off that I won at last years OCBR, new radiator, and assorted other nicknacks. I may even try my hand at paint and body work (not sure yet).

I decided that I wanted to start my own thread so that I might have a place to come and vent my frustrations, as well as, celebrate any accomplishments. Along the way I will try to take pictures and post them up for anyone that might want to see what I am doing.

Rick

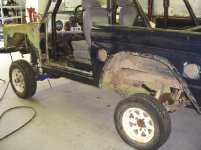
Here is what I started with:
 

Attachments

  • Bronco 4.jpg
    Bronco 4.jpg
    115.8 KB · Views: 249
Last edited:
OP
OP
ricks77eb

ricks77eb

Sr. Member
Joined
Sep 17, 2003
Messages
842
Loc.
Deer Park, Texas
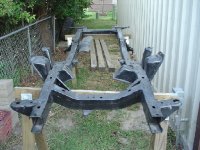
Here is the frame that I got from 66roadhorse, I have some modifications to make to it like cutting all of the shock mounts off because I run Duff hoops in the front and and an inboard hoop in the back. I also have to cut the radius arm mounts for my Duff extended arms, then I just need to take some little stuff off like the exhaust shield, exhaust hangers and steering stabilizer mounts. Then I am going to paint it with POR.

Rick
 

Attachments

  • Bronco rebuild 007.jpg
    Bronco rebuild 007.jpg
    245.5 KB · Views: 147
OP
OP
ricks77eb

ricks77eb

Sr. Member
Joined
Sep 17, 2003
Messages
842
Loc.
Deer Park, Texas
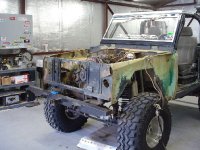
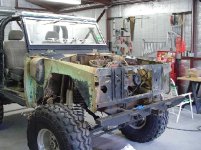
Here is a little bit of what I got taken off of it last week, pretty much just the front clip and some other little junk. I will be taking my time and lableing everything so that I might find it as I go back together.

Rick
 

Attachments

  • Bronco rebuild 004.jpg
    Bronco rebuild 004.jpg
    239 KB · Views: 175
  • Bronco rebuild 005.jpg
    Bronco rebuild 005.jpg
    236 KB · Views: 173

astark

Contributor
Bronco God
Joined
Jun 16, 2001
Messages
7,349
I will be watching this thread with great intrest Rick :cool:

And your friends sure look forward to seeing it in person next year ;)
 

66roadhorse

Sr. Member
Joined
Nov 17, 2003
Messages
380
Loc.
Houston
Rick, best of luck with your rebuild. Glad the frame is going to work out well. If you need a hand some weekend, just let me know and I will try to make it to DP to help.
 

YellowBronc

Bronco God
Joined
Jan 6, 2002
Messages
1,830
Glad you got an early start on it for OCBR 2006. Now the trick will be to get it finished by OCBR 2006!

Eager to see how the journey goes...........

Good luck Rick
 
OP
OP
ricks77eb

ricks77eb

Sr. Member
Joined
Sep 17, 2003
Messages
842
Loc.
Deer Park, Texas
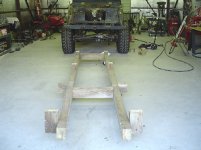
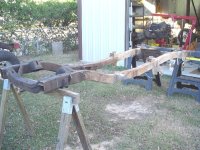
I do not have a rotiserie so I decided to build a mocked up version of my frame out of some old 4x6's that were next to my shop. I know it is not the best design but it should work. I used a scematic I have of the frame demensions to get my measurements.

Rick
 

Attachments

  • Bronco rebuild 008.jpg
    Bronco rebuild 008.jpg
    160.5 KB · Views: 196
OP
OP
ricks77eb

ricks77eb

Sr. Member
Joined
Sep 17, 2003
Messages
842
Loc.
Deer Park, Texas
How about these beatiful wheels and tires I put on so that we would not have to lift the body quite so high when we pull it off of the frame. I got them from a buddy of mine, he keeps them so that he can get is CJ in the garage when he works on it.

Rick
 

Attachments

  • Bronco rebuild 009.jpg
    Bronco rebuild 009.jpg
    200.7 KB · Views: 122
Last edited:
OP
OP
ricks77eb

ricks77eb

Sr. Member
Joined
Sep 17, 2003
Messages
842
Loc.
Deer Park, Texas
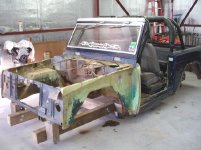
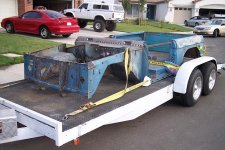
Believe it or not my tub fit on my wooden frame. When we picked it up off of the chassis the front fender section buckled a little at the fender wells. I guess I will have to look at replacing those now if I cannot repair them.

Rick
 

Attachments

  • Bronco rebuild 010.jpg
    Bronco rebuild 010.jpg
    230.2 KB · Views: 173

Labbster

Sr. Member
Joined
Nov 19, 2003
Messages
755
good work. I always try to focus on baby steps instead of the finish line. I get way less discouraged that way!
 
OP
OP
ricks77eb

ricks77eb

Sr. Member
Joined
Sep 17, 2003
Messages
842
Loc.
Deer Park, Texas
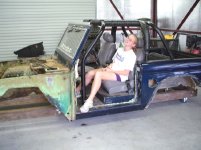
I even got a little help from my 13 year old daughter....she helped me hold the tub down by sitting in it once we put it on the cart.

Rick
 

Attachments

  • Bronco rebuild 016.jpg
    Bronco rebuild 016.jpg
    191.5 KB · Views: 248

crawln68

Bronco Guru
Joined
Oct 8, 2004
Messages
3,045
ricks77eb said:
Believe it or not my tub fit on my wooden frame. When we picked it up off of the chassis the front fender section buckled a little at the fender wells. I guess I will have to look at replacing those now if I cannot repair them.

Rick


Looking good Rick. This quote from your first post "While I have it apart" will have you replacing everything and WAY over budget. (LOL) ;D I can't even count how many times I said that same thing to myself.

Before you lift your body again, put some supports across your door way, up at the top. This will keep the body from buckling and prevent any more damage. You’re lucky the whole body didn't fold right in half! If you look close at this picture, you can see the 1 inch square tubing that used across my door opening. It worked great. Keep up the good work. It'll be fun.
 

Attachments

  • 100_0609.JPG
    100_0609.JPG
    81.8 KB · Views: 133
OP
OP
ricks77eb

ricks77eb

Sr. Member
Joined
Sep 17, 2003
Messages
842
Loc.
Deer Park, Texas
I thought leaving my 6 point cage mounted in the tub would keep the frame from buckling, do I still need to add some supports across the door???

Rick
 

YellowBronc

Bronco God
Joined
Jan 6, 2002
Messages
1,830
Looking good Rick. Now then, will the wood frame enhance the flex on the trail? ;D
 

broncow72

Village Idiot
Joined
Jun 5, 2005
Messages
2,174
Loc.
Spring,TX.
ricks77eb said:
I thought leaving my 6 point cage mounted in the tub would keep the frame from buckling, do I still need to add some supports across the door???

Rick
Yes, the cage will not help with the buckling...unless it is attached at the dash area
 
OP
OP
ricks77eb

ricks77eb

Sr. Member
Joined
Sep 17, 2003
Messages
842
Loc.
Deer Park, Texas
OK, I have gotten a few things done during the holidays so I thought I would post up a progress check (not that it is going too fast).

I think that I have gotten all that I can get off of my old frame so there is no place to go from here but up.

Hell, once I got everything off the frame the the plasma cutter thiefs showed up. One of them took my coil buckets off the old frame because he was 4-linking the back of his J@@p and wanted to use them for his coils. Then another one showed up and cut about a foot off of the front of the old frame so that he could scab them on to the back of his J@@p and strech his wheel base even further back.

Rick
 

Attachments

  • Bronco rebuild 019.jpg
    Bronco rebuild 019.jpg
    240.6 KB · Views: 91
Top