Build thread. Now that's funny. It goes something like this:
1. Buy a used Explorer engine from a local dismantler.
2. Disassemble and clean engine with Explorer front dress.
2.5 Install TFI distributor in Explorer cam phaser hole, and determine that you can't exactly adjust timing.
3. Remove and delete Explorer Serpentine front dress.
4. Change mind, and run v-belts. Buy conversion damper, and 50 oz-in flywheel.
5. Assemble engine with used saginaw power steering pump received as a gift. (more later...)
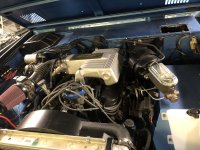
6. Install Fox Mustang valve covers, throttle body, but keep GT40 lower, and upper. Drill and tap bung for IAT sensor. Drill and tap bung for ECT sensor. Drill and tap all of the extra vacuum holes in the intake. Argue with yourself for a LONG time about whether the oil scavenging feature of the 2nd PCV pickup port is worth keeping in the upper plenum. Send plenum out for powdercoat.
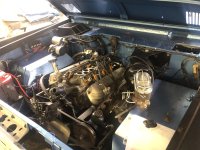
7. Assemble engine with Bronco accessories, and exhaust manifolds.
8. Build exhaust system.
9. Install TDZ / Ron Francis / RJM motorsports harness with used and dubious A9L mustang ECM.
10. Install 23 gallon fuel tank with internal EFI pump. Look all over the shop for some gasoline. Figure out that you used up all your gasoline, buy you still have about 1/2 gallon of lawnmower fuel available. Pour 1/2 gallon of gasoline into tank. (this will become important later...)
11. Install fuel lines, return lines, vacuum hoses, power steering, alternator, and a Centech chassis wiring harness.
12. Fire up engine. Disconnect SPOUT and Set initial timing. Listen for knock, noise, oil pressure, misfire, etc. Kinda noisy, but it runs.
12.5 Schedule appointment with paint shop for paint. Make plan to drop off in 3 days. Start to hurry up.
13. Try to restart. Won't start. Check spark, and fuel. check compression.
14. No compression on cylinder #4 &7 30 psi on cyl #1, 2, and 8, 60 psi on cyl 5,6 120 psi on cyl 3. Find aluminum shavings from step 6 on one spark plug. Determine that compression failure is due to aluminum shavings stuck under valve heads.
15. Remove cylinder heads. Check cylinder taper and ridge. Look for cross hatch marks on left bank. Assume right side is just as good.
16. Remove valves, find some debris, but not bad. Clean heads, Hand lap valves, install valve seals. Heads look good now.
17. Reinstall heads. Better hurry, getting dark. Only have 2 days to get to paint.
17.5 Did you know that 1996 Explorer 5.0s use Flanged Torque to Yield head bolts? Did you know that you can't re-use them? Did you know that I can, and did, and they are fine. But I did do an fairly thorough Young's' modulus and strain recovery analysis on carbon steel and determined that the number of allowable yield cycles for a long head bolt is "more than 1" and the number of allowable yield cycles for the short head bolt is "fewer." So yeah, pre-torque to 55 lb-ft and then an additional 70 degrees. Maybe 50 degrees next time. I have a couple of engineering degrees, so I allow myself to re-use the $45 TTY fasteners. Your results may vary...
18. Restart engine. No compression. Spins super easy. (Did I leave out the spark plugs?) Check compression. Same results as #14. UGH.
19. Check valve timing. Remove timing cover. Get mad, and decide to fire it up without a timing cover in place. See blowby escaping crankcase during crank.
20. Perform leak down test. Cannot make compression on cyl #7.
21. Still gotta hurry. Down to one day. Pray for rain. Pull heads AGAIN. Buy more head gaskets. Did you know that you can buy a Fel Pro head set cheaper than you can buy 2 individual head gaskets? Hope that you can salvage your new, but never fired head gaskets. Yeah...no. Buy more head gaskets.
22. Order rings, and a set of rod and main bearings. Pull pistons. Realize that you already rolled a set of bearings into this engine 3 months ago. (back when you swore you would never install another engine without putting bearings in it.)
23. Find collapsed rings on 7 cylinders. Find scored piston and melted crown on piston #4. Decide to risk it, and clean pistons. Break ring land cleaner on these thin metric rings. Clean pistons by hand with used piston ring ground down as a chisel. Bust ridge on Cyl #7, Glaze break all other cyls. Find scoring on cyl #4. Probably should bore it. Gotta hurry. Only one more day until paint. Get some heavy grit stones, and power hone cyl 4. Take out about .005. Feels OK. Reassemble with new rings, bearings, gaskets, etc. Throw in a new set of hydraulic roller lifters. Do this process "in-frame" because of step 12.5.
24. Fire up engine. Disconnect SPOUT. WOW, it runs great. But what is that KNOCKING?
25. Allow to reach temperature. Check all vitals. Burn off the quart of coolant that drained into the exhaust head pipe. Hope that knocking goes away. It doesn't . Rain has come. Painter calls and delays two weeks. Relief!
26. Get pissed off, perform cylinder balance test. Notice that knocking is reduced when #4 plug is defeated.
27. Go on internet. Find a shortblock Mustang 5.0 on Craigslist for $300. Drive to Vacaville. Buy engine. Condition unknown.
28. Put Mustang block on stand. Remove heads to check bore, wear, etc. Check bearings. Here we go again.
29. Remove Explorer engine from Bronco, with intent to use fresh GT40 heads on Mustang. Pull pistons and crankshaft. Harvest camshaft, bearings, rings, crank, and heads. Find collapsed skirt on piston #4. Out about .020.
30. Reassemble Mustang 5.0 with parts harvested from Explorer. Replace rear main seal, bearings, rings, heads. Try desperately to remove pilot bearing for the NV4500 from the Explorer crank. UGH! what to do? Destroy the pilot bearing? Swap crankshafts? Do you suppose that the 96 Explorer 5.0 crank is balanced to the same bobweight as an 89 Mustang 5.0 crank? Wait a minute, this Mustang has Forged TRW pistons in it. Those can't be the same weight as the cast pistons in an Explorer??? Destroy pilot bearing from Explorer crank. Find pilot bushing for Bronco. Machine bushing to .750 for NV4500 input. Use Mustang shortblock. Relieve area near bell bolt for clutch linkage bracket.
31. Reinstall engine. Fire it up. Runs GREAT! but what is this noise? Go back to step 5.
@toddz69 Remember that PS pump? Well, you have to keep it full, or else it makes noise. Fine, FIXED. Allow to run and idle, and get warm. Finally! It runs perfect. But then stumbles...and misfires, and stalls. Will not re-start. WTF??? (If you made it this far, you might remember step 10...) Yeah, I ran it out of fuel. Go to gas station, get 5 gallons of hi-test. Try again.
So that was the last 2 WEEKS. Who in the world would want this build thread, and who would want to follow that mess. My advice is now the same for auto repair, as for 4 wheeling. Do NOT follow me. You won't' make it, and you don't want to get there. The view is not worth the climb.