• Welcome to ClassicBroncos! - You are currently viewing the forums as a GUEST. To take advantage of all the site features, please take a moment to register. It's fast, simple and absolutely free. So please join our community today!
    If you have problems registering or can't log into your account, please contact Admin.

F250 7,3l 4 door 1/2 cab build

Qumanchew

Contributor
Jr. Member
Joined
May 16, 2018
Messages
236
Loc.
Kutztown PA
Somehow I missed this build till now. I love your plan , and it's looking great so far. Keep the updates coming!
 

79INA69

Jr. Member
Joined
Apr 30, 2018
Messages
169
.94 I'm going to run all the electrical down the center inside the cab,
Hi 791na I do have a 2" floor drop in front, the firewall I made complete pushed as far as I could.
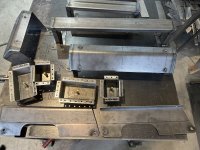
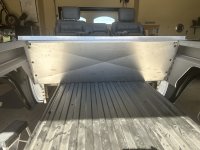
Got the front seat mounts almost done, mocked up the rear seats (will start on the mounts next week) going to extend the top into the bed at least 1" (the 1/2 cab side panel will be a bit wider) trying to keep as short as possible. My 4" lift springs just came in,
Love the comments. suggestions & questions {I'm in my garage about 8 hours a day by myself cut off from the real world). Rich
8hrs! Love it! Honestly I am very impressed with your progress. You are in a garage, with no lift or giant fab table (that I see) and you are doing very impressive work. I have a lot of guys younger than you tapping out already when it comes to working on hotrods themselves, let alone in the summer heat. Hats off! What brake master / hydro / booster are you planning on running? I have been looking at my engine side firewall for a while now and thinking I could push it back, and mount a large 11" booster down lower, mounted similar to a Jeep Tj.
 
OP
OP
ratbilt

ratbilt

Contributor
Jr. Member
Joined
Dec 29, 2019
Messages
152
Hi 79in I’m going to try and fit the vacuum booster from the truck master from a 14 f250
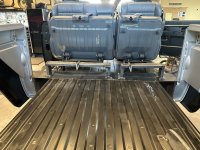
Got the front seats in almost have the rear seats done hopefully tomorrow. Rich
 

Attachments

  • IMG_1213.jpeg
    IMG_1213.jpeg
    198.9 KB · Views: 78
  • IMG_1208.jpeg
    IMG_1208.jpeg
    148 KB · Views: 69
  • IMG_1209.jpeg
    IMG_1209.jpeg
    251.8 KB · Views: 72
  • IMG_1210.jpeg
    IMG_1210.jpeg
    236.9 KB · Views: 68
  • IMG_1211.jpeg
    IMG_1211.jpeg
    210.7 KB · Views: 66
  • IMG_1215.jpeg
    IMG_1215.jpeg
    168.8 KB · Views: 67
  • IMG_1214.jpeg
    IMG_1214.jpeg
    231.8 KB · Views: 73
OP
OP
ratbilt

ratbilt

Contributor
Jr. Member
Joined
Dec 29, 2019
Messages
152
79in I am retired auto tech (45years) for about 8 yrs no racks all creeper work
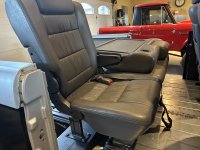
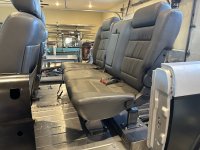
I use tape measures ,squares & plumb bobs , also eyeballs (yea no laser, no fab table ) just old school. Finally got the rear seats in they lay down & tumble ( seat install took for ever) not sure what next - figure that tomorrow have to look at my list ( I’m on my 6 or 7th list more than likely be at least 100 + list to finish) Rich
 

Attachments

  • IMG_1219.jpeg
    IMG_1219.jpeg
    239.6 KB · Views: 63
  • IMG_1220.jpeg
    IMG_1220.jpeg
    215.7 KB · Views: 59
  • IMG_1221.jpeg
    IMG_1221.jpeg
    184.5 KB · Views: 63
  • IMG_1222.jpeg
    IMG_1222.jpeg
    225.8 KB · Views: 62
  • IMG_1223.jpeg
    IMG_1223.jpeg
    170.8 KB · Views: 63
  • IMG_1224.jpeg
    IMG_1224.jpeg
    176.2 KB · Views: 58
  • IMG_1225.jpeg
    IMG_1225.jpeg
    171 KB · Views: 61

.94 OR

Contributor
Bronco Guru
Joined
Jul 5, 2009
Messages
1,800
Have you got enough rear angle to the rear seat bottom?
The backseat of my F150 crew feels good. Rode in the backseat of a newer Ram 1500 and felt like the seat would dump me on the floor if I unclenched.
 

79INA69

Jr. Member
Joined
Apr 30, 2018
Messages
169
79in I am retired auto tech (45years) for about 8 yrs no racks all creeper work
I use tape measures ,squares & plumb bobs , also eyeballs (yea no laser, no fab table ) just old school. Finally got the rear seats in they lay down & tumble ( seat install took for ever) not sure what next - figure that tomorrow have to look at my list ( I’m on my 6 or 7th list more than likely be at least 100 + list to finish) Rich
Yeah, fab work looks great! I have had my floor apart on my bronco for way too long now. Mine is sitting in my front driveway, direct sun and not on a level surface. I guess I can always shim my mistakes, haha. I did have some big set backs last year, still dealing with. I keep going fishing on my free time. Also have been splitting time on my 69 Mustang. I am also a mechanic, a mere 22yrs.
 
OP
OP
ratbilt

ratbilt

Contributor
Jr. Member
Joined
Dec 29, 2019
Messages
152
Hey .94 the sets are pretty comfortable the picture looks like it’s dipped in the front (it’s not) could use a little more angle but I’m out of room on the head rest to rear glass
Yea 79 your probably not retired big time difference I would level your bronco before going any further. Rich
 
OP
OP
ratbilt

ratbilt

Contributor
Jr. Member
Joined
Dec 29, 2019
Messages
152
Installed the rear panel extended 2 1/2” into the bed welded nuts under side & back side of pillers. Made. Some brackets for underside mounted the left AB pillar , cut 12 1/2” out of the left rear door & welded back together (need to move the Pilar forward a bit (will do tomorrow). Rich
 

Attachments

  • IMG_1258.jpeg
    IMG_1258.jpeg
    172 KB · Views: 64
  • IMG_1225.jpeg
    IMG_1225.jpeg
    171 KB · Views: 61
  • IMG_1261.jpeg
    IMG_1261.jpeg
    178.5 KB · Views: 62
  • IMG_1262.jpeg
    IMG_1262.jpeg
    241.3 KB · Views: 60
  • IMG_1259.jpeg
    IMG_1259.jpeg
    218.6 KB · Views: 54
  • IMG_1256.jpeg
    IMG_1256.jpeg
    155.8 KB · Views: 50
  • IMG_1255.jpeg
    IMG_1255.jpeg
    213.4 KB · Views: 50
  • IMG_1253.jpeg
    IMG_1253.jpeg
    169.2 KB · Views: 53
  • IMG_1251.jpeg
    IMG_1251.jpeg
    167.9 KB · Views: 49
  • IMG_1250.jpeg
    IMG_1250.jpeg
    207.6 KB · Views: 59
OP
OP
ratbilt

ratbilt

Contributor
Jr. Member
Joined
Dec 29, 2019
Messages
152
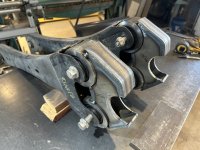
Had to go back to work for the last 3 months (shop lost a service writer) this is all I got done hopefully I’m retired again by the 1st of the year
Going to try & get a roller then back to the body
 

Attachments

  • IMG_1390.jpeg
    IMG_1390.jpeg
    281 KB · Views: 42
  • IMG_1391.jpeg
    IMG_1391.jpeg
    217.2 KB · Views: 43
  • IMG_1392.jpeg
    IMG_1392.jpeg
    185.3 KB · Views: 42
Top