• Just a reminder that you won't be able to start new posts or reply to existings posts in the Archive forum.

    This is where all the old posts go so they can still be used for reference and searched.
  • Welcome to ClassicBroncos! - You are currently viewing the forums as a GUEST. To take advantage of all the site features, please take a moment to register. It's fast, simple and absolutely free. So please join our community today!
    If you have problems registering or can't log into your account, please contact Admin.

How do you attack this rust?....74 Build Start

OP
OP
aaron6920

aaron6920

Sr. Member
Joined
Sep 26, 2010
Messages
405
Loc.
Dorchester, IA
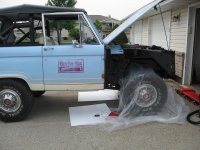
Hey arron are you going to keep the logo on the side of the door? Did it come that way? I had a bronco that came with a club sticker from so-cal it was mid 70s, had history.

Its going to be tough to keep the logo I want to paint it. I might actually try to get a new decal printed I like the history of the truck. It was a deer camp rig for years in Michigan. :)
 
OP
OP
aaron6920

aaron6920

Sr. Member
Joined
Sep 26, 2010
Messages
405
Loc.
Dorchester, IA
Got a new seat kit from MadeOne4You on Ebay. Outstanding quality and I got the back seat recovered. Didnt really do a good job taking pics.... %)

I have to get the front seats done yet, I also bought new foam for the front so it will be a little trickier. Looking forward to black seats. :cool::cool:
 

Attachments

  • IMG_1882.JPG
    IMG_1882.JPG
    68.4 KB · Views: 25
OP
OP
aaron6920

aaron6920

Sr. Member
Joined
Sep 26, 2010
Messages
405
Loc.
Dorchester, IA
Ok so I have welded a fair bit but have NEVER welded sheet metal. Needless to say I had to change my shorts I was so scared firing up that welder to weld on the bronco :-X. But I have some inner fender issues and I bought new front fenders so the show must go on. I moved around and only did one tack at a time, could have read a book in the time waiting to weld. Here is a patch panel I welded in the lower kick panel. It actually cleaned up pretty well with a flap disc and wire brush attachment. It had holes in it originally from when someone replaced the floor and got really hot welds.......
 

Attachments

  • IMG_1889.JPG
    IMG_1889.JPG
    88.5 KB · Views: 93
  • IMG_1890.JPG
    IMG_1890.JPG
    89.1 KB · Views: 85
  • IMG_1892.JPG
    IMG_1892.JPG
    70.2 KB · Views: 104
OP
OP
aaron6920

aaron6920

Sr. Member
Joined
Sep 26, 2010
Messages
405
Loc.
Dorchester, IA
I also had some major rust where the kick panel and the Inner fender meet together. I hit with a screwdriver to see how solid it was and the whole handle dang near went through. ;D
 

Attachments

  • IMG_1884.JPG
    IMG_1884.JPG
    81.6 KB · Views: 72
  • IMG_1897.JPG
    IMG_1897.JPG
    101.6 KB · Views: 73
  • IMG_1899.JPG
    IMG_1899.JPG
    79.4 KB · Views: 75
OP
OP
aaron6920

aaron6920

Sr. Member
Joined
Sep 26, 2010
Messages
405
Loc.
Dorchester, IA
Now I had to bust out my secret weapon for a perfect patch panel. :cool::cool:

I also had to eat two extra bowls of cereal....%)%)

The patch seems solid, I may have went a little overboard with 18 gauge in this area but oh well....
 

Attachments

  • IMG_1901.JPG
    IMG_1901.JPG
    82.3 KB · Views: 100
  • IMG_1900.JPG
    IMG_1900.JPG
    81.9 KB · Views: 74
OP
OP
aaron6920

aaron6920

Sr. Member
Joined
Sep 26, 2010
Messages
405
Loc.
Dorchester, IA
Forgot to mention, I got so excited about drilling holes that I drilled all up the side that doesn't spot weld to anything :-[

I guess they are "performance holes" now......
 
OP
OP
aaron6920

aaron6920

Sr. Member
Joined
Sep 26, 2010
Messages
405
Loc.
Dorchester, IA
I also had some rust holes in the front of the inner fender. I worked on that tonight. The right side is finally ready to go :)

I cut away the bad layer of inner fender and surprisingly below it was very solid. I gave it a pretty serious screwdriver hit test. :cool: 
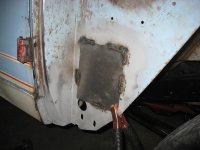
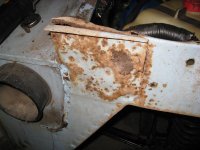
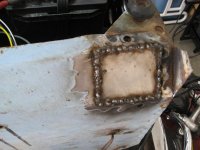
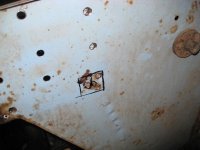
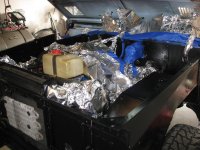
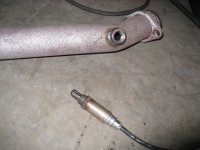
I used some rust encapsulator paint on it.
 

Attachments

  • IMG_1904.JPG
    IMG_1904.JPG
    67.9 KB · Views: 58
  • IMG_1906.JPG
    IMG_1906.JPG
    66.2 KB · Views: 57
OP
OP
aaron6920

aaron6920

Sr. Member
Joined
Sep 26, 2010
Messages
405
Loc.
Dorchester, IA
This sheet metal is really thin. I used 20 gauge for the patch panel and that was thicker than what I was welding into. I had never welded anything this thin and stumbled through it. It will be good for the inner fender.

Now to the otherside.........
 

Attachments

  • IMG_1909.JPG
    IMG_1909.JPG
    72.7 KB · Views: 75
  • IMG_1911.JPG
    IMG_1911.JPG
    73.7 KB · Views: 69

Stutsmo

Contributor
Bronco Guru
Joined
Jan 24, 2009
Messages
2,549
You are doing a good job welding the patch panels on. Your welds are much better than mine! keep the pics comming!!
 
OP
OP
aaron6920

aaron6920

Sr. Member
Joined
Sep 26, 2010
Messages
405
Loc.
Dorchester, IA
Well, got a little more done on the Bronco this weekend. I really have to kick it in the butt because my buddy and I are taking some time off the week of forth of July and he is helping me swap to EFI for some help with drywall. I need to get the fenders and grill back on this bad boy ;D

Got the inner fender off, more spot welds than I thought the first time I looked at it...... Good old Harbor Freight spot weld cutter is a trooper and still a going.
 

Attachments

  • IMG_1913.JPG
    IMG_1913.JPG
    83.3 KB · Views: 53
  • IMG_1914.JPG
    IMG_1914.JPG
    110.4 KB · Views: 56
OP
OP
aaron6920

aaron6920

Sr. Member
Joined
Sep 26, 2010
Messages
405
Loc.
Dorchester, IA
Got a hole patched and just clamped the new inner fender to take a look. I have to get that welded this week. I could have grinded that weld smoother but I figure for the inner fender leave a little "meat on the bones" of the weld. ;D
 

Attachments

  • IMG_1921.JPG
    IMG_1921.JPG
    59.4 KB · Views: 41
  • IMG_1916.JPG
    IMG_1916.JPG
    47.3 KB · Views: 37
  • IMG_1915.JPG
    IMG_1915.JPG
    59 KB · Views: 38
OP
OP
aaron6920

aaron6920

Sr. Member
Joined
Sep 26, 2010
Messages
405
Loc.
Dorchester, IA
It seems like more is done with the new inner fender clamped so I left it to impress the wife........ Real handy man :eek:
 

Attachments

  • IMG_1924.JPG
    IMG_1924.JPG
    73.2 KB · Views: 45
OP
OP
aaron6920

aaron6920

Sr. Member
Joined
Sep 26, 2010
Messages
405
Loc.
Dorchester, IA
Well my friend and I have put some pretty serious couple days yesterday and today and I figured I would update this thread.

This is from a couple weeks ago, got the inner fender welded in and painted the inner fenders and grill. Turned out pretty well I am happy so far.
 

Attachments

  • IMG_1929.JPG
    IMG_1929.JPG
    79.2 KB · Views: 46
  • IMG_1935.JPG
    IMG_1935.JPG
    85.9 KB · Views: 57
  • IMG_1936.JPG
    IMG_1936.JPG
    101.2 KB · Views: 55
OP
OP
aaron6920

aaron6920

Sr. Member
Joined
Sep 26, 2010
Messages
405
Loc.
Dorchester, IA
I masked off the engine to paint around the engine bay using mostly aluminum foil. It actually works well. Forms around hoses etc... to get a very nice cover for painting. I also prepped the front of the engine for a new coat of Ford Blue ;D

We tore into the Explorer GT40 intake and Mustang parts to turn my old 302 into fuel injection. The first day went well we were able to cruise with no major snags. I am using the RJM harness and that could not be any better put together.

I also am installing a new aluminum radiator I got off Ebay, it looks pretty quality. The previous owner had actually welded in the lower radiator bracket. :-X:-X A solid bead on both sides all the way is enough to make me cringe. I spent an over an hour grinding to get this mount off for the new one. Elephants could have played patty cake on that bracket.
 

Attachments

  • IMG_1950.JPG
    IMG_1950.JPG
    116.8 KB · Views: 53
  • IMG_1945.JPG
    IMG_1945.JPG
    93.5 KB · Views: 53
  • IMG_1943.JPG
    IMG_1943.JPG
    102 KB · Views: 54
OP
OP
aaron6920

aaron6920

Sr. Member
Joined
Sep 26, 2010
Messages
405
Loc.
Dorchester, IA
Day 2 of EFI swap was a little less productive, we ran into a snag with the springlock connector off of the fuel rail being 5/16 hose barb. I had bought 3/8 Summit Twist Tite hose and had to fabricate an adapter with 5/16 EFI line off the rail and then brass barb fittings to get to 3/8.

We did get the BC Broncos tank installed after some serious struggle. It was mostly self induced but we had to take the tank up and down about 3 times. Had some operator error on the measuring of the bracket the first time. Got the mustang computer mounted really solid in the glovebox but making two brackets out of 20 gauge.

Hopefully more progress tomorrow......
 

Attachments

  • IMG_1964.JPG
    IMG_1964.JPG
    92.5 KB · Views: 44
  • IMG_1965.JPG
    IMG_1965.JPG
    66.2 KB · Views: 42
  • IMG_1970.JPG
    IMG_1970.JPG
    50.3 KB · Views: 44
  • IMG_1968.JPG
    IMG_1968.JPG
    96.8 KB · Views: 38
OP
OP
aaron6920

aaron6920

Sr. Member
Joined
Sep 26, 2010
Messages
405
Loc.
Dorchester, IA
Day 3 of EFI swap, got the exhaust off and the O2 bungs welded in, what a bummer of a job %) I used the BC bronco kickdown and throttle cable kit but I am using an explorer throttle body instead of the mustang it is made for. Had to do some modifications to make this work but after some bracket welding on the bracket it came around :)

Almost got to try and start it today, just ran out of motivation towards the end of the day. Got the cold air intake and mass air ran and all that is left is hook up the BP sensor and put gas in.
 

Attachments

  • IMG_1974.JPG
    IMG_1974.JPG
    88 KB · Views: 27
  • IMG_1977.JPG
    IMG_1977.JPG
    104.5 KB · Views: 33
  • IMG_1981.JPG
    IMG_1981.JPG
    77.3 KB · Views: 30
Top