


Due to my dash reconfiguration and DOHC conversion I found my self a few inches short on 2 of my three heater controls. Based on this I decided to replace them with longer units.
On an early Bronco there are only two types of cables;
The first operate a baffle for defrost and the baffle for temperature control , The second control the fan speed by twist and the coolant valve in the engine compartment.
I replaced both types as follows.
I first measured the length of cable I needed and the appropriate throw required to actuate my setup. I then went to Ray's Auto Air & Heat http://www.rayeveritt.com/HeaterCables/HeaterCables.html
and ordered 2 cables in the LS (loop one end, Straight the other) configuration with my required throw. You are better measuring longer on the throw as you can shorten the cable to your requirements. If you order too short you have to shorten the cable cover to meet your needs.
The factory cables are constructed two ways to accomodate the push pull and twist functions.
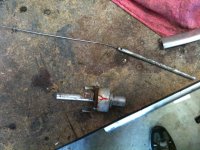
The first type the control rod is drilled down the center and the cable is crimped to the rod, the cable sheath is then slid into the control housing and crimped to it.
The second type the rod is drilled down the center, and a second hole twice the size of the cable is drilled perpendicular to the rod. The cable is then slid into the the control rod and a punch is used to create a flat spot in the cable. This allows the control rod to turn around the axis of the cable yet push and pull. Without this you could not turn the fan control without breaking the cable or at a minimum having the fan control snap back when you did turn it. Once again the sheath is crimped to the housing.
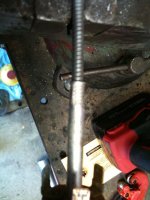
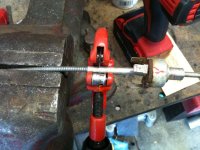
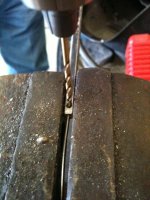
To modify them I simply used my pipe cutter to cut the housing just past the crimped part. I then used a small cutoff wheel to remove the cable from the control rod. I used a small drill bit the same size as the cable and re-drilled a new hole in the control rod.
Here is where I had problems,
The second cable (Push - Pull -Twist, I simply recreated the factory cable. A punch from ACE helped me peen the cable flat and a quick crimp and JB weld keep the sheath to the housing. If you do not want to buy to punches, you can take the flat end of a drill bit. I took my time peening it flat and it worked fine, (read many soft blows of a regular hammer rather than one or two hard blows with your sledge)
I took a bunch of pictures however I can not for the life of me find the pictures I took of the reassembly.
LMK if you have any questions.
Dennis
On an early Bronco there are only two types of cables;
- Push - Pull Only (Defrost and Temperature Control)
- Push - Pull - Twist (Fan/Heat Control)
The first operate a baffle for defrost and the baffle for temperature control , The second control the fan speed by twist and the coolant valve in the engine compartment.
I replaced both types as follows.
I first measured the length of cable I needed and the appropriate throw required to actuate my setup. I then went to Ray's Auto Air & Heat http://www.rayeveritt.com/HeaterCables/HeaterCables.html
and ordered 2 cables in the LS (loop one end, Straight the other) configuration with my required throw. You are better measuring longer on the throw as you can shorten the cable to your requirements. If you order too short you have to shorten the cable cover to meet your needs.
The factory cables are constructed two ways to accomodate the push pull and twist functions.
The first type the control rod is drilled down the center and the cable is crimped to the rod, the cable sheath is then slid into the control housing and crimped to it.
The second type the rod is drilled down the center, and a second hole twice the size of the cable is drilled perpendicular to the rod. The cable is then slid into the the control rod and a punch is used to create a flat spot in the cable. This allows the control rod to turn around the axis of the cable yet push and pull. Without this you could not turn the fan control without breaking the cable or at a minimum having the fan control snap back when you did turn it. Once again the sheath is crimped to the housing.
To modify them I simply used my pipe cutter to cut the housing just past the crimped part. I then used a small cutoff wheel to remove the cable from the control rod. I used a small drill bit the same size as the cable and re-drilled a new hole in the control rod.
Here is where I had problems,
- Solder will not hold the cable into the rod.
- Welding a cable with a wire feed welder with a cable size roughly 75% of the cable you are welding will quickly burn through your cable even on the lowest settings.
- JB weld alone will not hold the cable.
The second cable (Push - Pull -Twist, I simply recreated the factory cable. A punch from ACE helped me peen the cable flat and a quick crimp and JB weld keep the sheath to the housing. If you do not want to buy to punches, you can take the flat end of a drill bit. I took my time peening it flat and it worked fine, (read many soft blows of a regular hammer rather than one or two hard blows with your sledge)
I took a bunch of pictures however I can not for the life of me find the pictures I took of the reassembly.
LMK if you have any questions.
Dennis
Attachments
Last edited: