• Just a reminder that you won't be able to start new posts or reply to existings posts in the Archive forum.

    This is where all the old posts go so they can still be used for reference and searched.
  • Welcome to ClassicBroncos! - You are currently viewing the forums as a GUEST. To take advantage of all the site features, please take a moment to register. It's fast, simple and absolutely free. So please join our community today!
    If you have problems registering or can't log into your account, please contact Admin.

I'm making some progress on Frank!

Bronco Ben

Contributor
Jckofalltrdes master/none
Joined
Aug 9, 2003
Messages
2,356
Loc.
Coffeeville, Alabama
Finally making progress on Frank!!

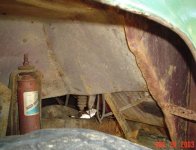
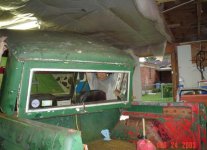
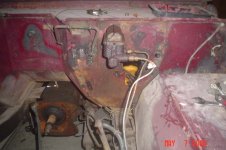
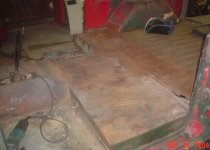
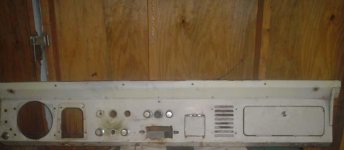
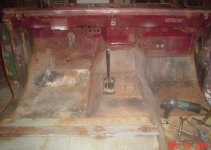
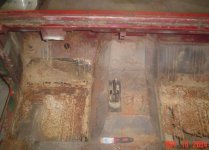
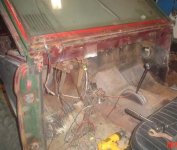
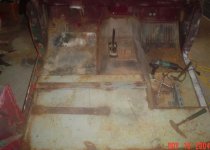
well i got the screws across the windsheild out, the wireing out from behind the dash, and finally the dash is out! Problem, is I have the shifter linkage unhooked, and the steering knuckle from the steering box, and the clamp loosed by the firewall. where do I go from here in removing the steering column. The U shaped bracket from under the dash is loose. Does it just pull out thru the dash area now or is there something else to unhook?
Bronco Ben


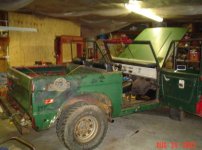
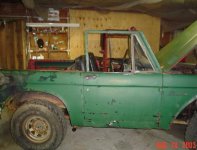
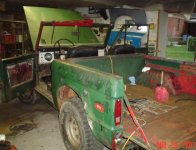
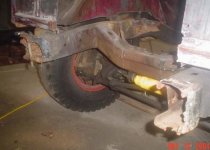
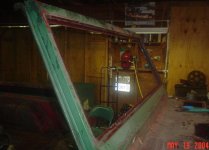
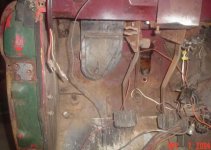
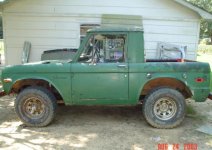
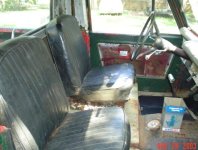
In the beginning, frank as it sat when I brought em home. Kinda rough isnt it!
 

Attachments

  • dsc00039.jpeg
    dsc00039.jpeg
    49 KB · Views: 141
  • dsc00043.jpeg
    dsc00043.jpeg
    49.6 KB · Views: 110
  • dsc00044.jpeg
    dsc00044.jpeg
    49.8 KB · Views: 118
Last edited:

feitctaj

FNG
Joined
May 3, 2003
Messages
4,319
Loc.
Group W Bench
Photos? My imagination aint what it used to be;) , wait it's coming to me, There is that rubber seal too Ben and then it should pop out, Mind is failing me now, I will go out to mine to refresh my mind.
 

2badrotties

Just a Bronco guy !
Joined
Sep 10, 2002
Messages
6,854
Loc.
Niskayuna N.Y.
That clamp on the fire wall has to be removed all the way. The entire triangle piece has to come off so the shift levers will pull through the firewall. The clamp under the dash also must be all the way off. Wiring harness must be unhooked before you can pull it out. Pull it back and turn it untill the shift levers come through. :)
 
OP
OP
Bronco Ben

Bronco Ben

Contributor
Jckofalltrdes master/none
Joined
Aug 9, 2003
Messages
2,356
Loc.
Coffeeville, Alabama
thanks guys, I went back and did a search and found that I needed to remove that U shaped 3 bolt bracket to remove it. Also I removed the Clamp by the firewall. Dash, steering wheel are out wiring is unhooked, and the column is almost out, dadgum T-ball game is puttin the stress to me, but after its over and after I take the wife out for our aniversery to eat supper, I'll be back at it! The dash and windsheild frame didnt look to bad. Still had origional shiny maroon paint under the windsheild frame rubber piece :).......those 7 screws were hell though, had to use a screwdriver and kinda chisel/unscrew em! it worked great thought I removed all 7 without breaking any of em!

the ignition switch wasnt much of a problem as I had remove some from some old 65 mustangs a long time ago, and as someone stated it came back to me, then the light switch wasnt to bad either. I'll post pictures tonight! thanks for the help
Bronco Ben

a few more pictures at "Frank" starts out,1). inner fender, 2).passenger side, and the 3).6 cylinder that came in it. the rest are more pictures of after the top was removed. I came back and added these photos not realizing that I had only posted one picture per post.....so I'll be coming back and filling in the voids where it doesnt look so bad. thanks for viewing
 

Attachments

  • dsc00046.jpeg
    dsc00046.jpeg
    46.4 KB · Views: 66
  • dsc00051.jpeg
    dsc00051.jpeg
    51.1 KB · Views: 63
  • dsc00052.jpeg
    dsc00052.jpeg
    53.5 KB · Views: 87
  • dsc00137.jpeg
    dsc00137.jpeg
    47.3 KB · Views: 75
  • dsc00136.jpeg
    dsc00136.jpeg
    45.2 KB · Views: 69
  • dsc00135.jpeg
    dsc00135.jpeg
    49.6 KB · Views: 68
  • dsc00134.jpeg
    dsc00134.jpeg
    47.3 KB · Views: 79
  • dsc00132.jpeg
    dsc00132.jpeg
    50 KB · Views: 85
Last edited:
OP
OP
Bronco Ben

Bronco Ben

Contributor
Jckofalltrdes master/none
Joined
Aug 9, 2003
Messages
2,356
Loc.
Coffeeville, Alabama
well the column is out.........heres a few photos of what I did today
 

Attachments

  • dsc01135.jpg
    dsc01135.jpg
    61.1 KB · Views: 578
  • floordriversside.JPG
    floordriversside.JPG
    30.5 KB · Views: 76
  • bumperarea.JPG
    bumperarea.JPG
    32.6 KB · Views: 68
  • dash.JPG
    dash.JPG
    19.1 KB · Views: 65
  • beer.JPG
    beer.JPG
    24.5 KB · Views: 49
  • driversfloor.JPG
    driversfloor.JPG
    46.2 KB · Views: 75
  • anotherfloor.JPG
    anotherfloor.JPG
    34.7 KB · Views: 75
  • abovefloorshot.JPG
    abovefloorshot.JPG
    44.3 KB · Views: 86
Last edited:
OP
OP
Bronco Ben

Bronco Ben

Contributor
Jckofalltrdes master/none
Joined
Aug 9, 2003
Messages
2,356
Loc.
Coffeeville, Alabama
I was wondering about those, did those come stock on broncos or are they aftermarket?......nevermind after investigating closer, there're tire treads epoxyed on the pedals lol..........they look good from a distance though LOL

Bronco Ben
 

Attachments

  • windsheildarea.JPG
    windsheildarea.JPG
    37 KB · Views: 54
  • we.JPG
    we.JPG
    36.9 KB · Views: 73
  • w.JPG
    w.JPG
    42.1 KB · Views: 81
  • tailgatepost.JPG
    tailgatepost.JPG
    42.4 KB · Views: 64
  • passengersidefloor.JPG
    passengersidefloor.JPG
    43.5 KB · Views: 61
  • notheranglefloor.JPG
    notheranglefloor.JPG
    33.7 KB · Views: 53
  • floorsstart.JPG
    floorsstart.JPG
    30.1 KB · Views: 65
  • windsheildframe.JPG
    windsheildframe.JPG
    29.5 KB · Views: 57
Last edited:

77TexasBronc

Bronco Guru
Joined
Jan 27, 2003
Messages
2,002
Loc.
Baytown Texas
Bronco Ben said:
I'll be removing more in the future, its gonna be slow but at least I'm working on it instead of just talking about it! :)
Bronco Ben

Ha! Very well put Ben. Glad to see your making some progress. Look forward to seeing more.
 
OP
OP
Bronco Ben

Bronco Ben

Contributor
Jckofalltrdes master/none
Joined
Aug 9, 2003
Messages
2,356
Loc.
Coffeeville, Alabama
I'll be doing more tonight, my wifes grandmother gave us a new frige to store in my shop ;D ....so I should have plenty of cold beverages while I work. I also cleaned out my shop yesterday and even put down some plywood for stroage in my shop loft! ;)
I didnt get my tub off but, I will be getting everything ready to do it soon. I'll keep the pics coming, since it's more interesting with photos!
Bronco Ben
 
OP
OP
Bronco Ben

Bronco Ben

Contributor
Jckofalltrdes master/none
Joined
Aug 9, 2003
Messages
2,356
Loc.
Coffeeville, Alabama
ok heres my delima! Since my two floor pans are rusted out at the firewall mounts, how do I support the tub for my body stand while getting it sand blasted? Would you
a) weld in new pans then put it on the body stand to have it blasted? if so what about the area where the floor pans attach (unblasted area under pan lip?)
b)weld in some temp support and go ahead and mount it on the body stand? then put the floor pans in after its blasted and epoxy primed?

I dont want to leave any areas unblasted, so when I prime it and get around to painting it, I dont have to "ever" worry about rusted out floor pans in my future! ya know? I may have to drill out the welds after all on the front end! Even though I dont want to. That sucks too!
thanks in advance
Bronco Ben
 

trailpsycho

Bronco Guru
Joined
Dec 11, 2003
Messages
4,856
I would cut out and weld in new pans, rockers, whatever it is you think (are pretty sure of at this point) that you will need to replace, then have it media blasted. YOu can clean up the contact areas where you will be welding with the grinder/brush to get your clean surfaces.
 
OP
OP
Bronco Ben

Bronco Ben

Contributor
Jckofalltrdes master/none
Joined
Aug 9, 2003
Messages
2,356
Loc.
Coffeeville, Alabama
what I had in mind before I saw these major holes in the floor, was to
1) build the stand
2) take it to the media blaster on the stand with my car trailer!
3) have it blasted and coated with epoxy primer (hardner) completely ALL OVER.....figured with it still on the stand not only could the guy blast it better on top and bottem but also the epoxy primer would cover "Everything" as well!

Then I could take each panel out (floor, bed,striker plate etc) one at a time as time and money permits until I get all the floor pan area replaced, the door striker area, and the bed floor. From there I may at some point replace the radiator core support (or just weld the piece back into the cut out area that is missing (I have that piece)., My goal is to have my tub sandblasted and epoxy primed by August......."FRANKS" 1 year Bring home date!!!
from there, I'm gonna take my time (no matter how long it takes) and put it back together RIGHT!

Bronco Ben

;D
 
OP
OP
Bronco Ben

Bronco Ben

Contributor
Jckofalltrdes master/none
Joined
Aug 9, 2003
Messages
2,356
Loc.
Coffeeville, Alabama
poor "Frank" sat alone last night! But today is a different story, I've taken off of my daughters 5th grade program, and as soon as its over will be starting to work on the EB again. Maybe today I can get the rear bumper off (that mamajama is welded on good)(lots of grinding with my 4 1/2" sidegrinder), and maybe purchase one of the engine stands that I plan to use as one of my "body stands". I'll be extending it at some point and purchasing some old pipe to tie them together. Wish me luck!
Bronco Ben
 

trailpsycho

Bronco Guru
Joined
Dec 11, 2003
Messages
4,856
Ben-

Why not do the body work, rattle can primer it along the way, then, when its perfect-except for the surface issues, take it to the media blaster? Its up to you, but I think that I would want the final durface cleaned, alot of stuff will get tweaked, parts changed, if money is tight why have it blasted and primered now and throw good money for bad, when the surfaces will most likely be altered along the way and you will have to d them again. If you are worried about the surfaces, go buy a cheap pressure can from Harbor Freight and a few bags of media and do each piece as you go, then you can go back over the fixed areas once it is complete or take it somewhere to have them blast the final time. Just my opinion, but I hate to see you undo all the dough, time and energy to load it up, haul it, pay for it, take it home, mess up the work you paid for and then need to do it all again in a few months....rattle cans are your friends for now, turn on them later.
 
Top