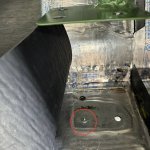
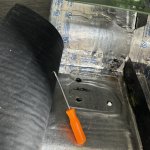
Ahhh much better, good eye and thank you for the suggestion!can you reroute the ground wire for the heater blower motor?
Community
Message Forum
Photo Gallery
Event Calendar
Book Reviews
Bronco Wallpaper
Bronco FAQ
Link Back to CB!
Photo Gallery
Event Calendar
Book Reviews
Bronco Wallpaper
Bronco FAQ
Link Back to CB!

Buy / Sell


Bronco Tech
3 Arm Wiper Setup
Fix Motor Mount
Roll Cage Braces
Throttle Body 65mm
Wheel Alignment
Heat Riser Replacement
Vent Window Repair
Center Console Mount
Straighten Bumper
Ford 6R80 6 spd
More Tech...
Fix Motor Mount
Roll Cage Braces
Throttle Body 65mm
Wheel Alignment
Heat Riser Replacement
Vent Window Repair
Center Console Mount
Straighten Bumper
Ford 6R80 6 spd
More Tech...

Install the app
-
Welcome to ClassicBroncos! - You are currently viewing the forums as a GUEST. To take advantage of all the site features, please take a moment to register. It's fast, simple and absolutely free. So please join our community today!If you have problems registering or can't log into your account, please contact Admin.
You are using an out of date browser. It may not display this or other websites correctly.
You should upgrade or use an alternative browser.
You should upgrade or use an alternative browser.
Meddle’s (interior) rebuild
- Thread starter Meddle
- Start date
- Joined
- Nov 3, 2003
- Messages
- 48,744
Relocated the gauge toggle to the useless hole under the steering column…
Nice use of available real estate. But you do realize, the holes are not really “useless“ unless you are lucky to never have to re-adjust or remove the steering column. But maybe that’s what you meant.Can you tell I hate holes in my dash? No more holes!
Shouldn’t be too difficult though , to remove the switches, should you ever need to access the two column clamp bolts.
Installed the sill plates which are quite beefy but my doors clear them no problem.

Yup........^^^^^^^^^^^But you do realize, the holes are not really “useless“ unless you are lucky to never have to re-adjust or remove the steering column
- Joined
- Mar 8, 2007
- Messages
- 81,964
Installed the sill plates which are quite beefy but my doors clear them no problem.
View attachment 925615
Looks nice
The center console and seat belts are going in!


That is the Classic Consoles HumpHugger from CJP (but other vendors sell as well) I was very impressed with the quality. It’s a nice kit if you don’t need a locking center console. Uses the factory seat belt bolts to attach to the floor. The front of the console is supposed to ride the front of the transmission tunnel hump but I couldn’t get the geometry to work and didn’t want it up that far anyway, so I fashioned some legs for the front. I also had to move the seats out just a smidge because I wanted the seats to clear the cup holders when they are all the way forward (like when my kids are climbing in and out of the back).Which center console is that
I’m moving on to the back, now that the front is just about done!
Upgraded the roll cage hardware to 7/16” grade 8 and added a bolt to each foot. The PO only had two 3/8” bolts per foot.
Laying the mat down, I found the easiest method to locate the bolt holes was to use a dowel centering pin in each hole which left an indent in the back of the mat, then poked through to the front with a pick and cut an x which allowed me to push the bolt through and trim off the excess with a razor blade.


What do your rollbar backer plates look like?
I haven’t bolted the cage down yet but the PO had 1/8 x 1-1/2” steel fender washers which seems inadequate to me. I was thinking about replacing with 3/16” thick, 6x6 steel plates, though there is not much room on the driver side due to the two tanks. I also want to avoid sizing the plates same/similar to the feet so it doesn’t create a stress line in the body. The feet are 4x5”. Open to suggestions!
What Sony head unit is this?Needs a trim plate but the head unit is all wired in. I really didn’t want to cut into the dash any more than the PO did. This Sony unit with wireless CarPlay fits single din pretty good.
View attachment 920154
XAV-AX6000 with wireless CarPlay.What Sony head unit is this?
Got the rear seat belts in and the tailgate is looking refreshed with new rubber, hold down hardware, and cable supports. Mounted the fire extinguisher on the roll cage. The seat cover, which has been a long time coming, may be ready this week!


Finally got the rear seat back from the upholsterer! Matches pretty well with the fronts. Kiddos will be excited!


that looks great!!!
Similar threads
- Locked
City: Tenino
Price: $1200
- Replies
- 3
- Views
- 532
City: Long Beach
Price: $425
- Replies
- 0
- Views
- 156
- Replies
- 0
- Views
- 132


