Sorry. I was thinking of another EB that was pictured with two different sizes of wheel/tires. Either way, I am just thinking to narrow the front a touch and build a rear end to match the width of the front. Just looking for your thoughts and wisdom. Thanks. J


Community
Buy / Sell


Bronco Tech
3 Arm Wiper Setup
Fix Motor Mount
Roll Cage Braces
Throttle Body 65mm
Wheel Alignment
Heat Riser Replacement
Vent Window Repair
Center Console Mount
Straighten Bumper
Ford 6R80 6 spd
More Tech...
Fix Motor Mount
Roll Cage Braces
Throttle Body 65mm
Wheel Alignment
Heat Riser Replacement
Vent Window Repair
Center Console Mount
Straighten Bumper
Ford 6R80 6 spd
More Tech...

-
Welcome to ClassicBroncos! - You are currently viewing the forums as a GUEST. To take advantage of all the site features, please take a moment to register. It's fast, simple and absolutely free. So please join our community today!If you have problems registering or can't log into your account, please contact Admin.
You are using an out of date browser. It may not display this or other websites correctly.
You should upgrade or use an alternative browser.
You should upgrade or use an alternative browser.
Money Pit - Phase III
- Thread starter KyleQ
- Start date
OP
OP
KyleQ
Bronco Guru
- Joined
- Apr 24, 2008
- Messages
- 5,480
The drive shaft does go over the the driver's side - the axle is just that wide. There is no avoiding it - my axle is PERFECTLY centered, within .125 tolerance. I've never had any issues with my front drive shaft binding or vibrating - not even at max articulation, I just never think about it.
The tires stick out so far because of the offset and the fact they are 10" wheels. I'm going to switch to an 8" wheel and see how it is, I need the clearance as well. My plan is to run 16" wheels and tuck them in more - I love the stability, but I want to fit on my trailer a bit better.
If I did it all over again I would probably have just built a bad ass D44 front or a 609. The CV shafts have really changed the game when it comes to strength - the D60 is heavy, wide and everything about it is expensive. It is handy that in stock form it can take one hell of a beating, but that is about it. I had to grind the hell out of my brakes to clear 15's and I still have issues with them occasionally. I'm thinking that 35 spline outers will help my axle last a bit longer - that and drive flanges.
I will say, my most favorite thing about having a D60 up front is that I never worry about breaking it, I never lift because I think something is going to break, I just hammer down through whatever
OP
OP
KyleQ
Bronco Guru
- Joined
- Apr 24, 2008
- Messages
- 5,480
Well, my other thread has lots of updates in it, but in case you missed it.
I went from this-

To this-

I did it for a right around $350 (way over budget) but I changed my mind through the build and decided that I didn't want to curt corners as bad as I originally intended.
I'm running what Wild Horses calls it's Extreme Power Steering setup (my bracket is the proto-type) and it worked great all weekend. I get the occasional hard steering, but it is something I can work through. My hood did rip the power steering cover off, but zip ties and a baggie took care of that. Taurus fan works perfect, my original upper radiator hose works and I'm using an 01 Powerstroke lower hose.
My Cage arms have bushings where the welded brackets meet the arms and they are shot, causing ungodly amounts of wheel hop all weekend long. I'm thinking about replacing them with steel, I don't need that happening again.
I never got around to adding another bolt to the clutch cross bar, with only one bolt it never gave me any trouble - which was a surprise.
More stuff to come -
OP
OP
KyleQ
Bronco Guru
- Joined
- Apr 24, 2008
- Messages
- 5,480
My last wheeling event was a blast, but wheel hop was killing me - very annoying when I found it to be from the front end...


Pictures here - I need to edit up my Go-Pro video and get it uploaded...
So I went through some boxes and I found an extra set of bushings (I love hoarding parts for this reason) and last night I starting taking crap apart.

One thing I noticed is the shock only went down ~5-6" last the arm before it maxed out - which I now know is REALLY limiting travel.

The other side was a bit more difficult, due to where the Atlas sits I could not get the 1" bolt out to drop the arm, so I had to leave that side in tact. I popped the bolts out and used a crowbar to move the axle away from the arm ever so slightly to clear the bushings.
Out with the junk-

In with the new-

I used the jack on the front axle as it would pull up AND away, giving me room to get the arm back on. I then used a come-a-long to get the bolts to line up (it was very easy, pulled in an inch)

It took me roughly an hour a side - and I mess with some brake and hiem joint stuff as well. This is what came out -


Replacing those bushings made an obvious difference - I still want to lock it up solid, I think I'll achieve that when I use the winch to suck down the front suspension a bit...
OP
OP
KyleQ
Bronco Guru
- Joined
- Apr 24, 2008
- Messages
- 5,480
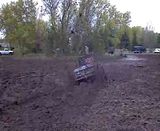
I did a little wheeling at a friends farm this weekend - I ended up bumping the timing up a bit to get more power out of it, didn't start for shit though, but it was worth it.
https://www.youtube.com/watch?v=OjuS-xIuW-Y&feature=youtube_gdata_player
https://www.youtube.com/watch?v=SllV7RHKIyA&feature=youtube_gdata_player
https://www.youtube.com/watch?v=_5UKnTm4NPw&feature=youtube_gdata_player
https://www.youtube.com/watch?v=2s87g4uSRNI&feature=youtube_gdata_player.
I can't get them to imbed, I can only get a white box to show up...
G's Baja Bronco
Bronco Guru
nice project, I am definitely following it! keep up the good work and pics!
OP
OP
KyleQ
Bronco Guru
- Joined
- Apr 24, 2008
- Messages
- 5,480
Thanks - it's been some time since I updated this thread, a few things have happened.
I figured out why the truck didn't have much power until I advanced the timing, which killed my hard starting capabilities. There was a 12V crank only power wire that I hooked to constant power as I was running out of time, and well, it started and ran, so I forgot about it.
Well it turns out that retards the timing while cranking, makingit easier to start. So this whole time I had been advancing the timing when the ECU was retarding it - no bueno. I put that wire on 12v start and bumped up the timing and WOW - lots more power and it starts much easier.
I did some shock measuring last night - my Dad's new rig conviently worked as an RTI ramp too
With the front tires hanging I have 11" of shock showing -

With the truck twisted up to around 95% capacity I've got the same exact 11" showing - so I'm not limited by the shocks as I've got ~3" of shock travel left.


As for the rears - I've got some superduty shocks laying around and mounting them off the factory mount and putting tabs on top of the old leaf spring pads I will only slightly limit travel - I might loose a half inch of travel in either direction, big deal. I've never lifted a tire anyway...

Last weekend I noticed I was about to loose a u-joint cap, so I took everything apart, cleaned and rebuilt the joint, ground the shafts for full circle snap rings and then tack welded each cap in four places to ensure nothing comes apart again. I've already killed a stub shaft and as soon as I get a wrap bar on the truck I fear that I'l start exploding parts again...
The Bronco/Pickup flatbed was a sweet buy - it has a 400 with ~20hrs on it topped with a nice Edelbrock intake and carb. The D44/9" combo has a L/S up front and a full spoll and Moser axles out back - 4.56 gears and 35" tires that are tubed. Full hydro steering and a fuel cell (installed last night) make this one hell of a ride. Now fi he can just keep this one shiny side up...
MPG_Bronco
Jr. Member
auto vs manual
KyleQ,
Awesome Bronco, that is a fun build.
Not to hi-jack but wanted your perspective on what you might have lost and gained when you swapped to a manual trans. what was the end reason you chose to go manual instead of rebuilding the auto? do you see any cons in the manual or auto? and what pros did you see from the swap?
I'm in the decision of choosing auto or manual for off roading and wanted input from someone who has driven both.
OP
OP
KyleQ
Bronco Guru
- Joined
- Apr 24, 2008
- Messages
- 5,480
Well, the C4 auto I had started off in great condition and slowly deteriorated over time. It was an easy way to wheel, but the first time out in the 4 speed I immediately noticed WAY more power and driveability. I am having much more fun with the 4 speed, I am now wheeling in high range (which wasn't an option with the C4) and I have much more control over how I put the power to the ground.
I'm not a fan of neutral drops in autos, but with a manual you can rock the truck up and out of things much easier. I also enjoy being able to shift the transfer case whenever I want to - with the C4 I had to shift it in N to shift as opposed to pushing in the clutch. I am also happy to get rid of the automatic/torque converter sponge feeling you have compared to a tight 11" clutch.
I will say some of the funnest wheeling I've had has been behind a deeply geared truck with a 4R70W... but the 4 speed sure is fun for banging gears with a grin reaching from ear to ear.
OP
OP
KyleQ
Bronco Guru
- Joined
- Apr 24, 2008
- Messages
- 5,480
I cut out my own shock tabs this weekend and got them welded up -


The shocks are for a F350 and are stiff, but the extreme angle takes the efficiency out of them - I have yet to test drive it, but it does extremely well on the bounce test.


The shocks are for a F350 and are stiff, but the extreme angle takes the efficiency out of them - I have yet to test drive it, but it does extremely well on the bounce test.
OP
OP
KyleQ
Bronco Guru
- Joined
- Apr 24, 2008
- Messages
- 5,480
Here is what is left of that yolk...

I've got a feeling that whatever came on this Atlas was crap, I've now exploded the front and the rear yolks on this case - which is beyond belief to me...

Destroyed the drive shaft too
I have yet to take the CV apart, but I'm hoping just the outer piece broke and the guts are ok. I've got a CV rebuild kit in the mail so I can rebuild the ball, spring and seal - but I did have a friend who had a NP203 laying around and it had two (what I hope are) 1310 CV yolks and a CV head that the J/Y torched the tube off of. I should be able to get everything back together for nothing, but I'm going to seriously consider putting both of these original Spicer yolks on the Atlas so I don't destroy and more drive shafts.
Whatever is on that case is unmarked, and my opinion, JUNK.
Regardless, I've got some mud to clean up

OP
OP
KyleQ
Bronco Guru
- Joined
- Apr 24, 2008
- Messages
- 5,480
I went to the biggest junk yard so far locally and was happy to see 50+ Taurus's there to pick over. I wanted so badly to pull a drive shaft from an Explorer but I couldn't get the bolts off the front drive shaft - stupid things, I couldn't get a socket on the bolt and the wrenches we had just slipped off.
I was able to score a newer radiator out of a 4.0 Explorer and we pulled a total of four Taurus fans - check out how nice the Taurus fan fits on the Explorer 4.0 radiator.
I just have to do a little trimming and I'm home free-


My radiator is fawked - so it's time for a new one.

I was able to score a newer radiator out of a 4.0 Explorer and we pulled a total of four Taurus fans - check out how nice the Taurus fan fits on the Explorer 4.0 radiator.
I just have to do a little trimming and I'm home free-


My radiator is fawked - so it's time for a new one.

OP
OP
KyleQ
Bronco Guru
- Joined
- Apr 24, 2008
- Messages
- 5,480
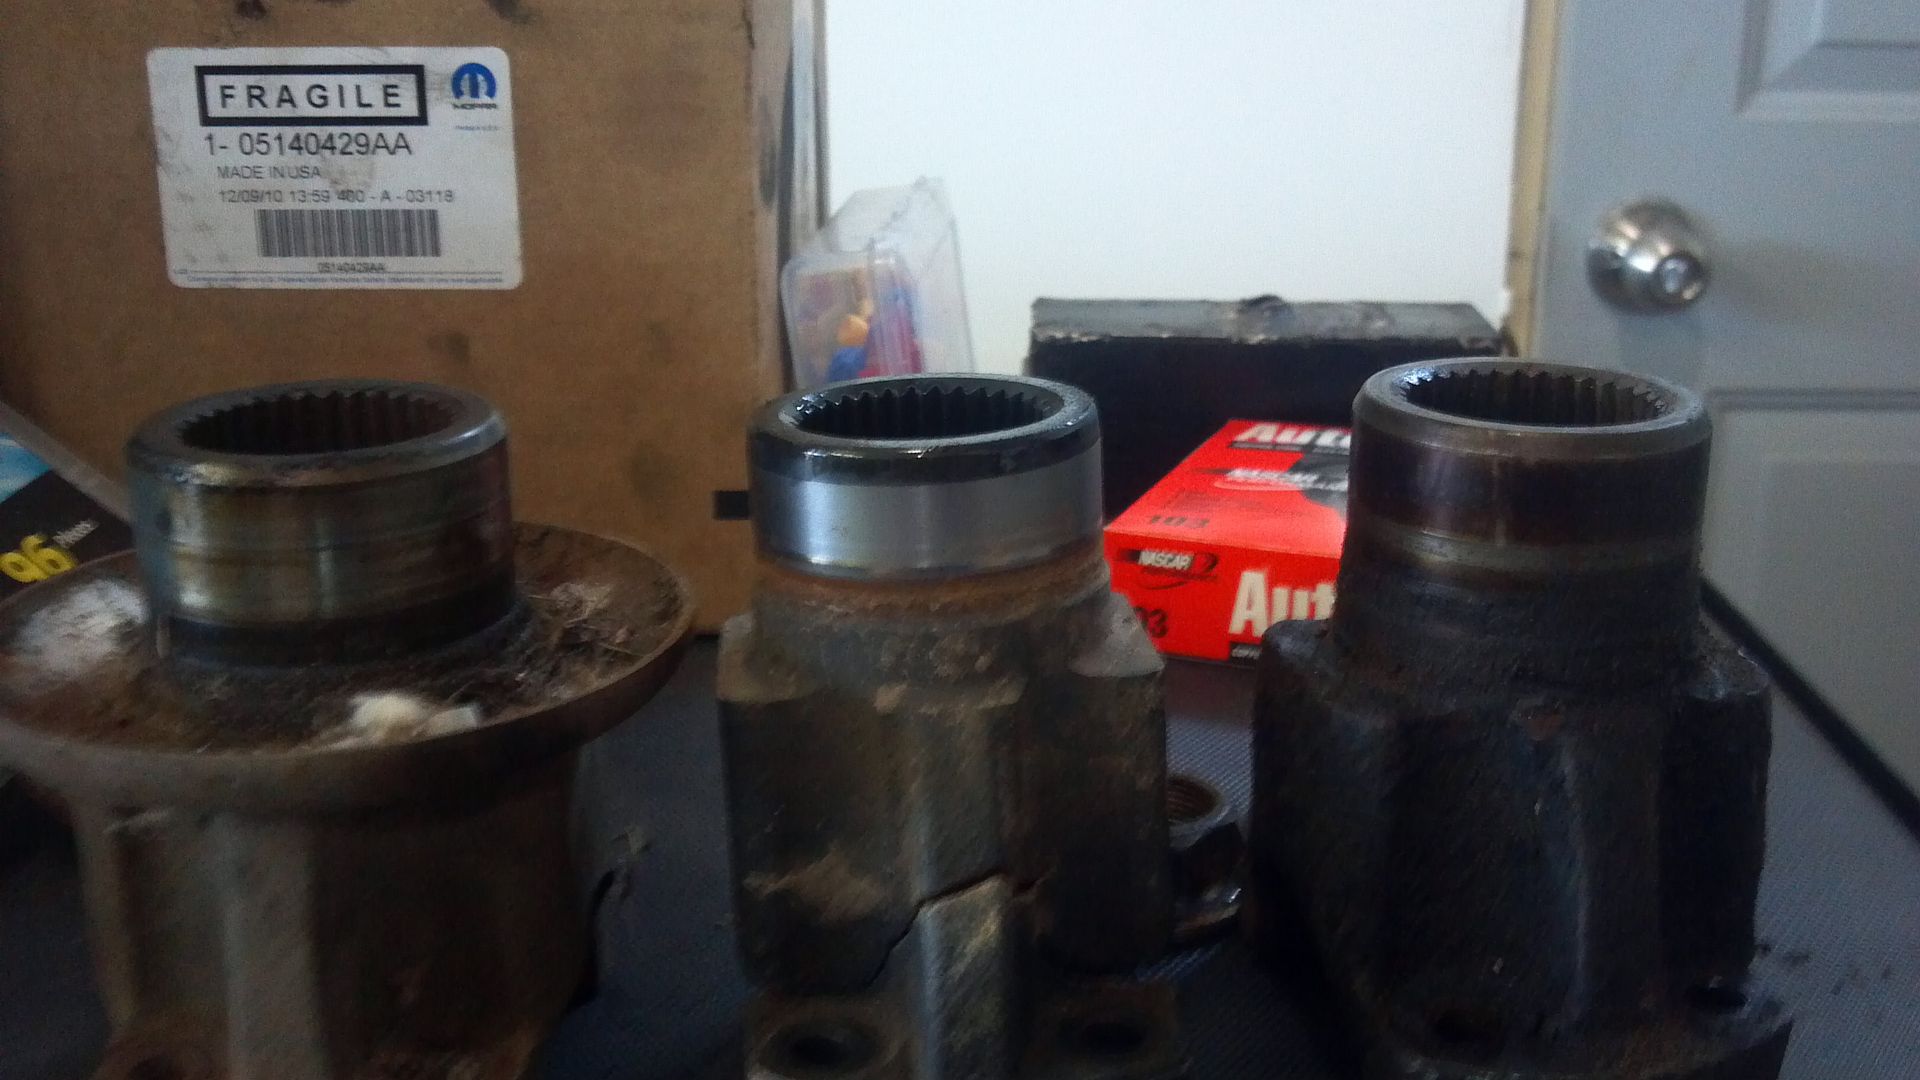
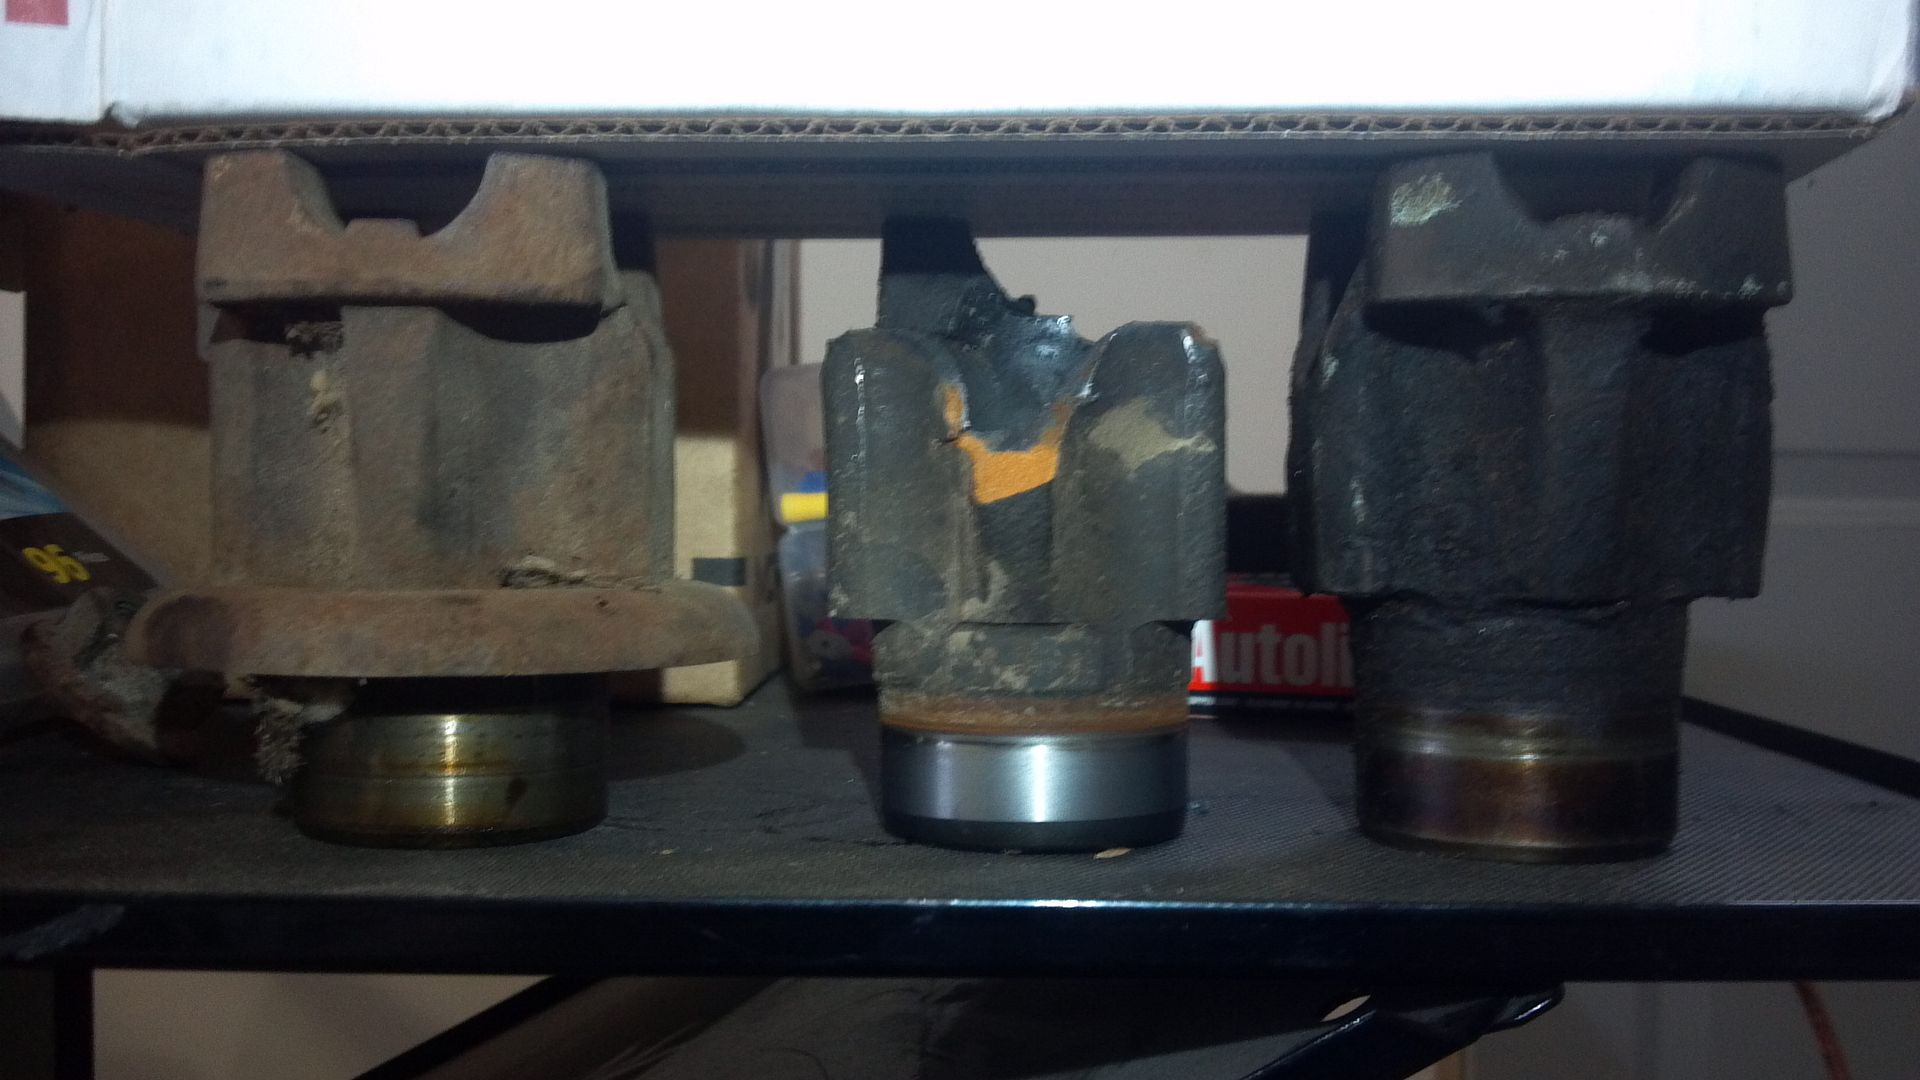
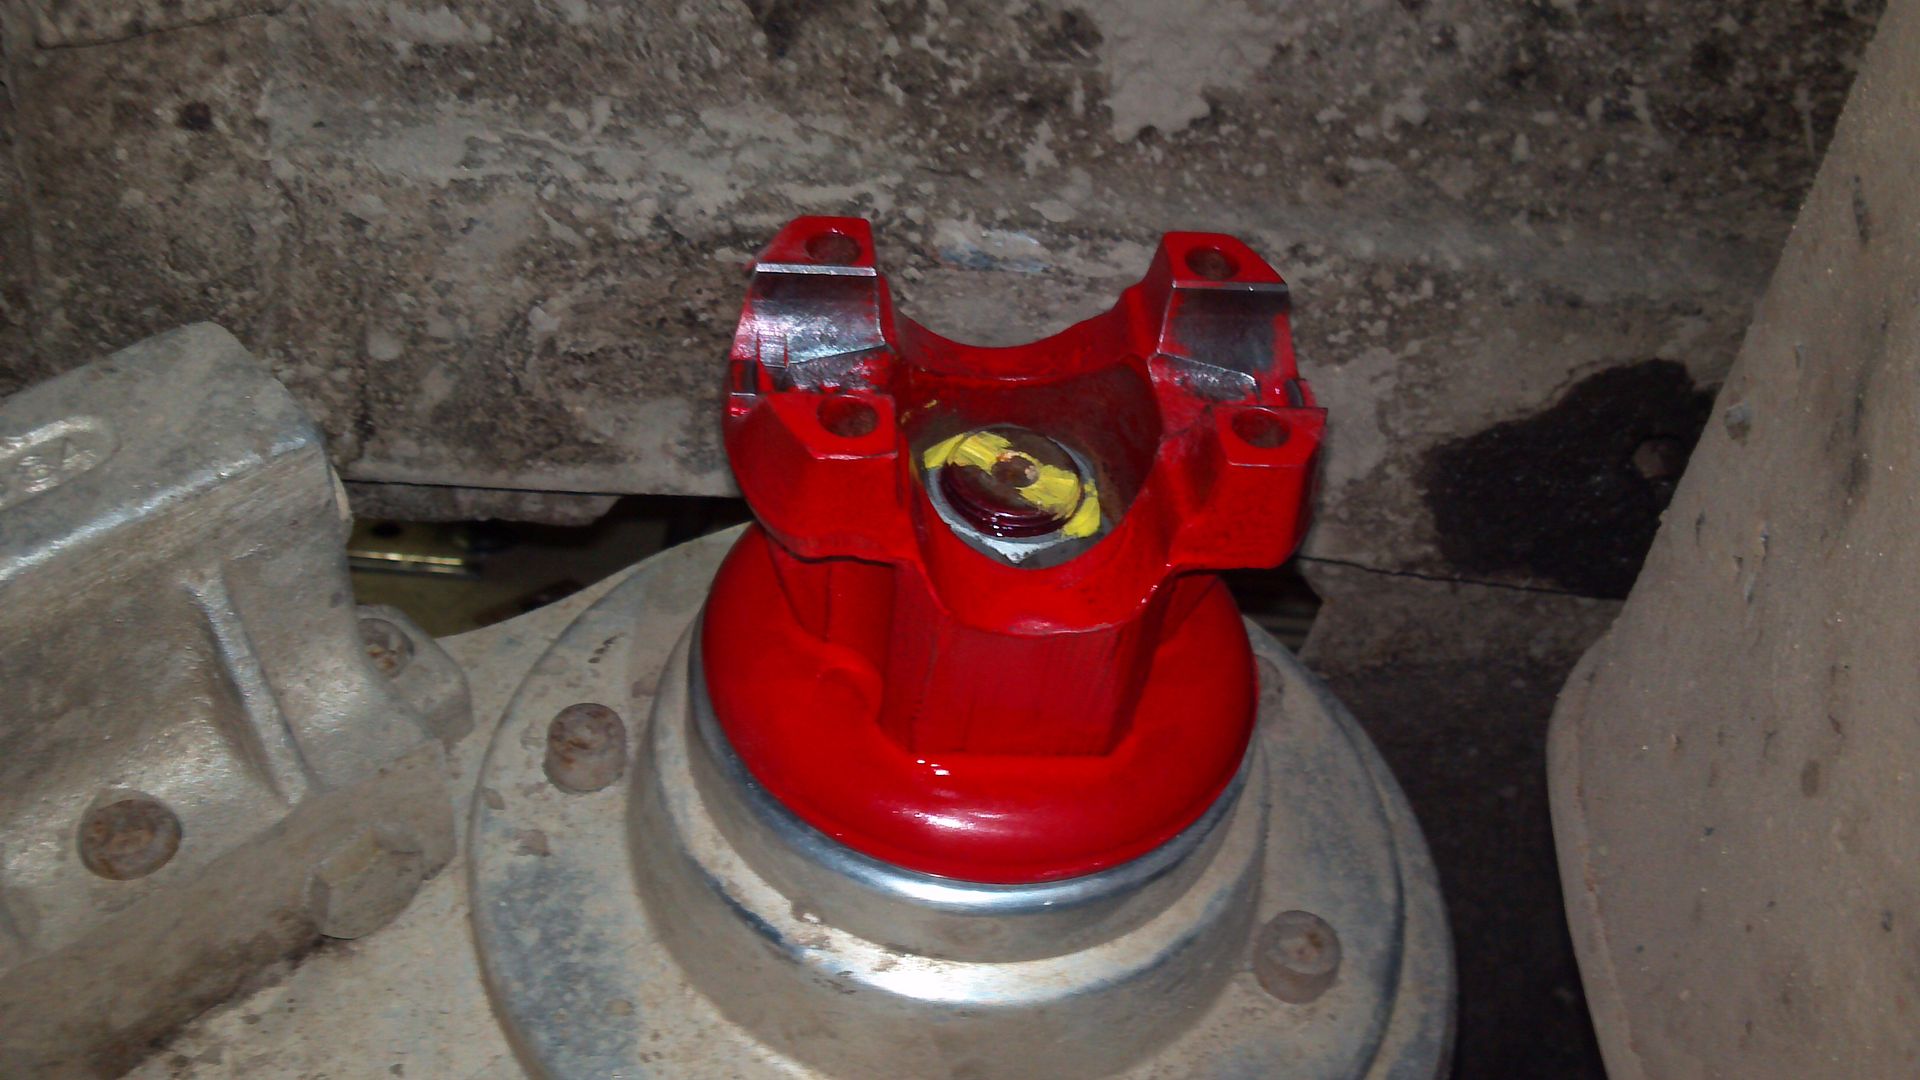
Now for an Atlas update - I seem to be good at blowing shit up and these yolks are not strong enough. I got some yolks from a NP203 and they are a perfect fit, I'm installing the rear right now, just need to finish up my drive shaft tomorrow and I'll be set.
Here are the 3 yolks I have, they are all nearly identical.


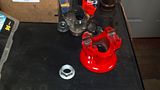
I cleaned up the yolk with the rock shield, gave it a fresh coat of paint and threw it on with a new lock nut and red loc-tite.
I finished it off with a paint pen to see if the nut backs off, my last one did so this is to ensure everything sticks together.

Here are the 3 yolks I have, they are all nearly identical.


I cleaned up the yolk with the rock shield, gave it a fresh coat of paint and threw it on with a new lock nut and red loc-tite.

I finished it off with a paint pen to see if the nut backs off, my last one did so this is to ensure everything sticks together.
Last edited:
OP
OP
KyleQ
Bronco Guru
- Joined
- Apr 24, 2008
- Messages
- 5,480
Well I got my drive shaft back together, I couldn't manage to get the pivot ball out of the CV socket, so I just cleaned it up and pumped it full of grease. The CV got nice and tight and I'm confident it will hold up for a few more years.
I fired up the grinder last night - no going back now

Of course my hydro was in the way, that x-member I added was hitting the bottom of the radiator too, so out everything came-

I test fitted the radiator and hung it with some zip ties and slid the fan into place - there is no doubt in my mind that everything will fit without moving my core support ;D If I want some more room I'll fire up the motor and take the grinder to the threaded water pump, but I don't think it will be an issue. Fan placement will determine if I need to do that or not...
More to come tomorrow-
OP
OP
KyleQ
Bronco Guru
- Joined
- Apr 24, 2008
- Messages
- 5,480
Nice Kyle... Bet it was a blast either way on that run thru the mud... Definitely tore the sheet out of that yoke..
Yeah, I was doing that for hours before it popped. I really wish I could hit that hole in 3rd gear, but it just lugs the motor... I need more power!
OP
OP
KyleQ
Bronco Guru
- Joined
- Apr 24, 2008
- Messages
- 5,480
Well tonight I was able to highly modify my orbital mount so I could get it away from where the radiator sits and improve the angle the steering shaft operates at.

My high pressure line is close to the steering shaft, but it is sleeved and there are no sharp edges on it, so I'm not worried about it.

Tomorrow we are throwing a roll cage building party at my father's place on his newest edition to the fleet (see measuring for shocks). We are going to do an internal cage, install fresh chromoly axles from Wild Horses, we got a frame tie in kit from 4x innovations, a huge plate and fin transmission cooler, slammer tube door latches, dual Flexsteel caption's chairs and a shackle drop in the rear. It's going to be a busy week before Memorial!
I still need to finish up my radiator mounts (I've got some very good and cheap ideas there) as well as get my floor buttoned up and replace the exhaust doughnuts BEFORE I can even check the maintenance stuff.
Lots to come!
Similar threads
- Replies
- 18
- Views
- 5K
- Replies
- 10
- Views
- 1K