• Just a reminder that you won't be able to start new posts or reply to existings posts in the Archive forum.

    This is where all the old posts go so they can still be used for reference and searched.
  • Welcome to ClassicBroncos! - You are currently viewing the forums as a GUEST. To take advantage of all the site features, please take a moment to register. It's fast, simple and absolutely free. So please join our community today!
    If you have problems registering or can't log into your account, please contact Admin.

My 77's restoration....pics inside!!

OP
OP
sellitall

sellitall

Bronco Guru
Joined
Jul 30, 2002
Messages
1,444
Loc.
Malvern, Pennsylva
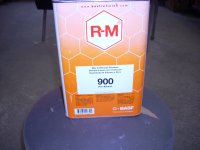
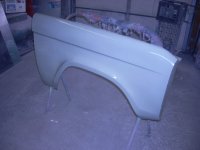
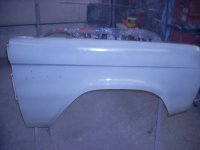
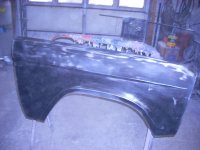
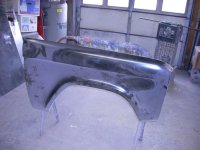
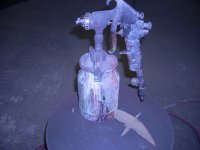
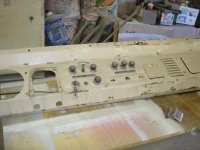
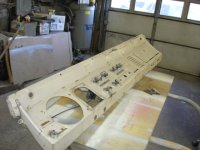
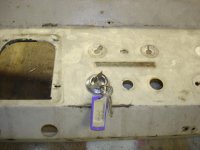
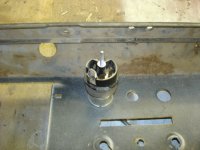
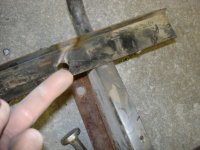
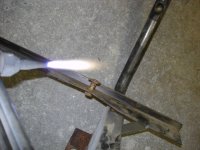
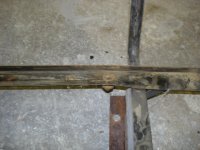
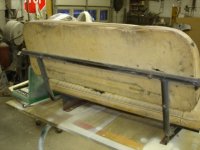
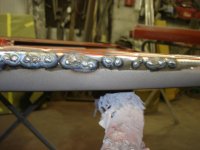
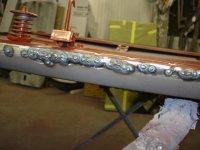
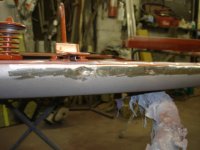
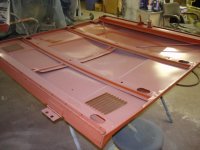
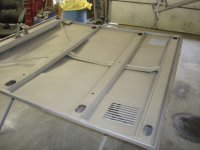
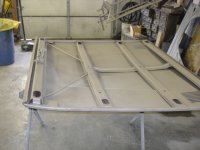
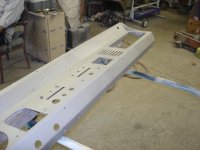
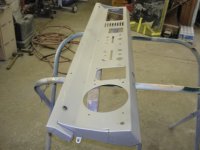
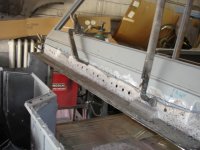
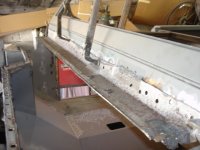
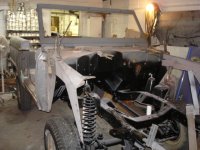
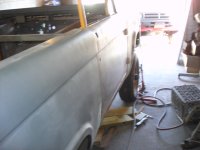
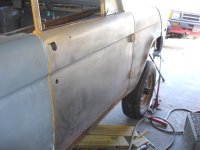
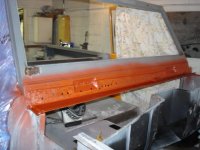
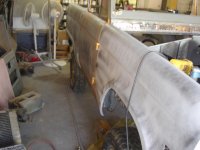
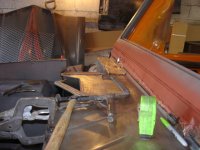
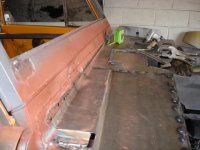
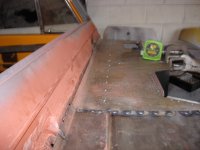
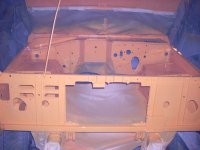
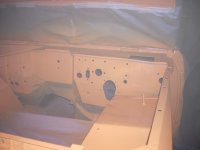
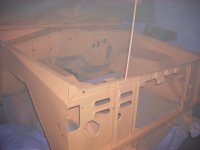
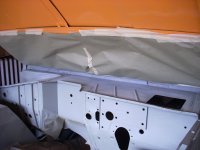
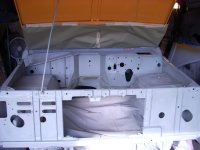
Well, I had some time today to work on my jem. Man, I was losing patience with the ignition switch. I posted a thread in the tech section, but what a PITA. It's still on there. I was getting it ready for the media blaster. If that wansn't enough the rear seat I'm using also gave me a ton of grief. The last bolt on the bottom cushion was just spinning inside the housing which is attached to the wood. I had to bust it out and torch the bolt off. I guess it just wasn't my day.

****Please note the finger I used to emphasize my frustration*****
 

Attachments

  • dooretc 012.jpg
    dooretc 012.jpg
    150.2 KB · Views: 147
  • dooretc 013.jpg
    dooretc 013.jpg
    149.7 KB · Views: 122
  • dooretc 029.jpg
    dooretc 029.jpg
    146.7 KB · Views: 141
  • dooretc 031.jpg
    dooretc 031.jpg
    141.8 KB · Views: 127
  • dooretc 032.jpg
    dooretc 032.jpg
    154.7 KB · Views: 142
  • dooretc 043.jpg
    dooretc 043.jpg
    148.2 KB · Views: 154
  • dooretc 042.jpg
    dooretc 042.jpg
    146.3 KB · Views: 104
  • dooretc 039.jpg
    dooretc 039.jpg
    137.8 KB · Views: 82
  • dooretc 036.jpg
    dooretc 036.jpg
    142.4 KB · Views: 87
  • dooretc 035.jpg
    dooretc 035.jpg
    132.8 KB · Views: 88

reynard101

Bronco Guru
Joined
Aug 19, 2006
Messages
1,098
I feel for you. I've had issues with the ignition switch too. Not getting it out but putting a new one in. Keep up the good work. The blue wrench (torch) get used a lot at my house.
 
OP
OP
sellitall

sellitall

Bronco Guru
Joined
Jul 30, 2002
Messages
1,444
Loc.
Malvern, Pennsylva
Stopped by the media blaster AGAIN with a pickup full of parts AGAIN!!! Fortunately, I only have a hardtop and some miscellaneous small parts left to be blasted. I tried this new epoxy primer from RM which goes on really well, but what I don't like about it is that it dries with a clear finish. You have to sand the hell out of it to give it some tooth in order to apply the fill primer. The hood had a tiny bit of blow through, but nothing major.

I put the body back on the frame so I can square up the frontend sheetmetal. Once I get that all pounded out I'll remove it again, and get it ready for paint. It's like I can see the smallest spec of light in this vast tunnel I've put myself in.
 

Attachments

  • elcamino&bronco 116.jpg
    elcamino&bronco 116.jpg
    132.7 KB · Views: 177
  • elcamino&bronco 114.jpg
    elcamino&bronco 114.jpg
    140.7 KB · Views: 256
  • elcamino&bronco 113.jpg
    elcamino&bronco 113.jpg
    135 KB · Views: 169
  • elcamino&bronco 112.jpg
    elcamino&bronco 112.jpg
    133.7 KB · Views: 104
  • elcamino&bronco 107.jpg
    elcamino&bronco 107.jpg
    154.2 KB · Views: 73
  • elcamino&bronco 106.jpg
    elcamino&bronco 106.jpg
    132.5 KB · Views: 80
  • elcamino&bronco 105.jpg
    elcamino&bronco 105.jpg
    133.6 KB · Views: 80
  • elcamino&bronco 104.jpg
    elcamino&bronco 104.jpg
    155.4 KB · Views: 87
  • elcamino&bronco 128.jpg
    elcamino&bronco 128.jpg
    155.6 KB · Views: 173
  • elcamino&bronco 127.jpg
    elcamino&bronco 127.jpg
    140.4 KB · Views: 214
  • elcamino&bronco 121.jpg
    elcamino&bronco 121.jpg
    151.8 KB · Views: 260
OP
OP
sellitall

sellitall

Bronco Guru
Joined
Jul 30, 2002
Messages
1,444
Loc.
Malvern, Pennsylva
Sorry for neglecting the post for so long. I'm still working on this bastard!! I've got the whole front end done. Every piece of sheetmetal fits with decent lines. I didn't try the grille because it was already painted so I'm saying my prayers at night when it comes time to put it on. Anyway, these pics are a little dated, but I got the whole cowl licked and seam sealed/primed alond with 95% of the front sheetmetal. My digi camera is broke so bear with me.
 

Attachments

  • 69pickup 056.jpg
    69pickup 056.jpg
    142.6 KB · Views: 95
  • 69pickup 057.jpg
    69pickup 057.jpg
    133.8 KB · Views: 108
  • 69pickup 063.jpg
    69pickup 063.jpg
    157.3 KB · Views: 137
  • 69pickup 062.jpg
    69pickup 062.jpg
    159.3 KB · Views: 173
  • 69pickup 061.jpg
    69pickup 061.jpg
    156.8 KB · Views: 146
  • 69pickup 058.jpg
    69pickup 058.jpg
    138.1 KB · Views: 92
  • 69pickup 054.jpg
    69pickup 054.jpg
    158.1 KB · Views: 156
  • 69pickup 085.jpg
    69pickup 085.jpg
    136.9 KB · Views: 139
  • 69pickup 087.jpg
    69pickup 087.jpg
    150.1 KB · Views: 157
  • 69pickup 088.jpg
    69pickup 088.jpg
    137.9 KB · Views: 174
OP
OP
sellitall

sellitall

Bronco Guru
Joined
Jul 30, 2002
Messages
1,444
Loc.
Malvern, Pennsylva
WOW, it's been awhile since I've added any info on how the EB's going! I just painted the front end the other day and here are the pics. I just ordered some durabak for it, and I'll hopefully be ready to do that next weekend. It looks good with color on the front, and after all the hard work getting that front lined up, I'm happy with the turnout. I'll be pulling the body back off the frame in a bit to put the drivtetrain in it, but I have to wait until Uncle Sam gives me a fraction of the money he stole from me throughout the year, but I'm now a man on a mission.
 

Attachments

  • windowcranks 016.jpg
    windowcranks 016.jpg
    229.4 KB · Views: 124
  • windowcranks 014.jpg
    windowcranks 014.jpg
    228.5 KB · Views: 94
  • windowcranks 012.jpg
    windowcranks 012.jpg
    230.5 KB · Views: 98
  • windowcranks 009.jpg
    windowcranks 009.jpg
    230.1 KB · Views: 89
  • windowcranks 007.jpg
    windowcranks 007.jpg
    235.6 KB · Views: 113
OP
OP
sellitall

sellitall

Bronco Guru
Joined
Jul 30, 2002
Messages
1,444
Loc.
Malvern, Pennsylva
I got around to priming the doors with RM's epoxy series primer EP589. I still prefer PPG's DP line, but the price is a little (not much) lower. It's amazing how straight the body on this thing was. It came from a farm in Louisianna and I'm assuming it didn't have too many trees around. Hopefully, I'll post some pics of them painted over the weekend. Like I said earlier, I'm a man on a mission.
 

Attachments

  • 77ebresto 008.jpg
    77ebresto 008.jpg
    229 KB · Views: 61
  • 77ebresto 007.jpg
    77ebresto 007.jpg
    224.8 KB · Views: 76
  • 77ebresto 002.jpg
    77ebresto 002.jpg
    227.9 KB · Views: 69
  • 77ebresto 001.jpg
    77ebresto 001.jpg
    231 KB · Views: 71
OP
OP
sellitall

sellitall

Bronco Guru
Joined
Jul 30, 2002
Messages
1,444
Loc.
Malvern, Pennsylva
I wet sanded the doors with 600 grit and they turned out great. It is still amazing to me just how dent/ding free the body was. The rust on the other hand.................. I'm planning on spraying the doors next Thurs. so I'll shoot you some pics of the progress then. After that I'm going to take the doors off, durabak the tub and take it back off the frame to get ready to install the drivetrain. I just ordered the centech wiring harness last night. I'm going to be dropping the motor off for rebuild in about a week or two. It's finally starting to take shape.

The pic of the primer gun is one my father has owned for 25 years. When they say that they don't make them like they used to this couldn't be more than a perfect example. He has never had to even take it apart to clean it in all those years. We just throw some laquer thinner in the cup, spray it out, and leave a little left in the cup with the nozzle removed. Even with these crazy epoxy primers it still sprays like a charm. DevilBiss is no joke!!

The other pic is the grease and wax remover I like. It covers really well, and when the used rag containing the solvent accidentally catches fire from a torch, it takes about two have drunk a@#holes to put it out. That's what I heard anyway ;)
 

Attachments

  • 77ebresto2 005.jpg
    77ebresto2 005.jpg
    229.8 KB · Views: 107
  • 77ebresto2 009.jpg
    77ebresto2 009.jpg
    226 KB · Views: 56
  • 77ebresto2 007.jpg
    77ebresto2 007.jpg
    222.9 KB · Views: 85
  • 77ebresto2 006.jpg
    77ebresto2 006.jpg
    231.4 KB · Views: 83
  • 77ebresto2 004.jpg
    77ebresto2 004.jpg
    230.7 KB · Views: 109
  • 77ebresto2 003.jpg
    77ebresto2 003.jpg
    230 KB · Views: 51
  • 77ebresto2 002.jpg
    77ebresto2 002.jpg
    236.4 KB · Views: 64
  • 77ebresto2 001.jpg
    77ebresto2 001.jpg
    234.9 KB · Views: 100
  • 77ebresto2 010.jpg
    77ebresto2 010.jpg
    230.4 KB · Views: 92

grauerfam

Sr. Member
Joined
Nov 20, 2002
Messages
477
Loc.
Owings Mills,MD
Hey Brian, are you doing anything to the inside of the doors to help inhibit or stop any rust already there? Did you get a stock bumper yet? Larry
 
Top