


Community
Message Forum
Photo Gallery
Event Calendar
Book Reviews
Bronco Wallpaper
Bronco FAQ
Link Back to CB!
Photo Gallery
Event Calendar
Book Reviews
Bronco Wallpaper
Bronco FAQ
Link Back to CB!
Buy / Sell


Bronco Tech
3 Arm Wiper Setup
Fix Motor Mount
Roll Cage Braces
Throttle Body 65mm
Wheel Alignment
Heat Riser Replacement
Vent Window Repair
Center Console Mount
Straighten Bumper
Ford 6R80 6 spd
More Tech...
Fix Motor Mount
Roll Cage Braces
Throttle Body 65mm
Wheel Alignment
Heat Riser Replacement
Vent Window Repair
Center Console Mount
Straighten Bumper
Ford 6R80 6 spd
More Tech...

Install the app
-
Welcome to ClassicBroncos! - You are currently viewing the forums as a GUEST. To take advantage of all the site features, please take a moment to register. It's fast, simple and absolutely free. So please join our community today!If you have problems registering or can't log into your account, please contact Admin.
You are using an out of date browser. It may not display this or other websites correctly.
You should upgrade or use an alternative browser.
You should upgrade or use an alternative browser.
My new 600 dollar ride.... build
- Thread starter HOJO
- Start date
OP
OP
HOJO
Sr. Member
dave vh
Full Member
great deal. man you're really making time on this
OP
OP
HOJO
Sr. Member
ljspop
Jr. Member
Just read through the whole thread. Nice metal work. Makes me glad I live in a desert tho.
Lee,
Looks good, but pretty tall!
I may be looking to get some new wheels for mine... The wheels i have are 15x8, but have an offset that may tuck the tires back in for you.
Todd
Looks good, but pretty tall!
I may be looking to get some new wheels for mine... The wheels i have are 15x8, but have an offset that may tuck the tires back in for you.
Todd
OP
OP
HOJO
Sr. Member
Td,
It has the 5 1/2" lift and 1" body it not Quite as tall as yours on those 36's lol , but close . I figure the springs should settle some eventually
With full weight, bumpers and winch and gear
It has the 5 1/2" lift and 1" body it not Quite as tall as yours on those 36's lol , but close . I figure the springs should settle some eventually
With full weight, bumpers and winch and gear
Last edited:
I thought mine would drop with the 8274 on the front- maybe 1/2"...
I guess with the little tires- it looks big.
TD
I guess with the little tires- it looks big.
TD
OP
OP
HOJO
Sr. Member
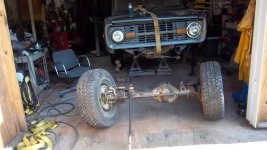
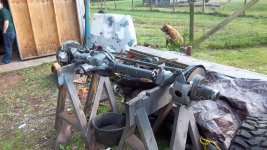
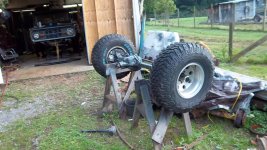
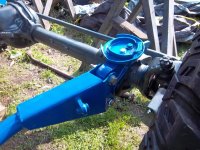
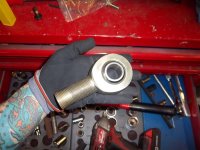
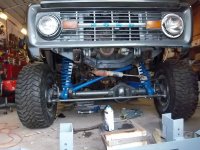
Well I had forgot how much fun it is to tear down an axle and replace everything ...I got all new joints , bearing, seals etc for the front end got it cleaned painted and rebuilt and did the radius arm mounts with new bushing..... what a flaming pain in the arse...lol but after some time doing the x patern and torquing to duffs specs they are ready to mount the coil cups and long arms to them...
Attachments
OP
OP
HOJO
Sr. Member
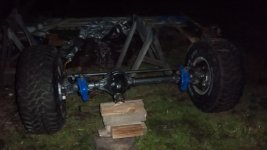
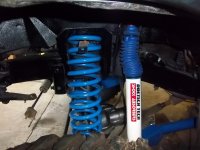
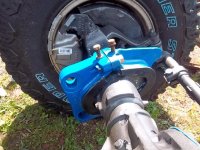
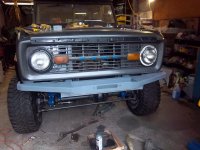
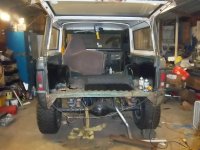
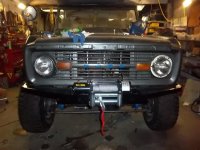
Today was productive ...got all the components installed and the front end back under the bronco ...still have to adjust and build the trac bar but its there and looking pretty good ...;D
Attachments
Looks good! Can't wait to see it in person!!
TD
TD
Rox Crusher
Bronco Guru
- Joined
- Dec 13, 2008
- Messages
- 2,773
looks real nice
one things for sure..........it ain't no 600 dollar rig any longer
;D
one things for sure..........it ain't no 600 dollar rig any longer
;D
OP
OP
HOJO
Sr. Member
Yeah I am well over 4 grand and haven't done the power brakes or steering
And all the detail work and interior. Junk
And all the detail work and interior. Junk
OP
OP
HOJO
Sr. Member
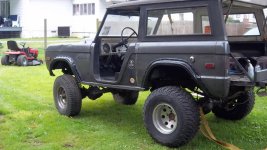
new update pics
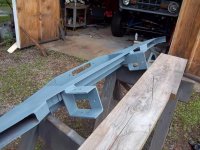
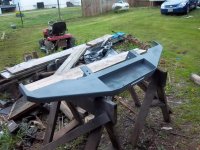
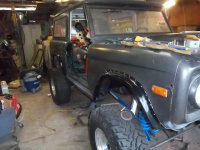
Been a little while since I got pics up I have the pass. sode rocker skii on and the fender flares fitted and started building a bumper ..well have been tinkering with it a while but finally enough to post up in progress pics...
Been a little while since I got pics up I have the pass. sode rocker skii on and the fender flares fitted and started building a bumper ..well have been tinkering with it a while but finally enough to post up in progress pics...
Attachments
KRAWLER
Sr. Member
Looking good Lee.
OP
OP
HOJO
Sr. Member
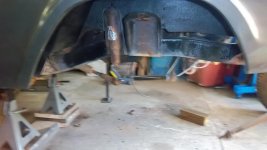
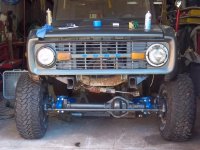
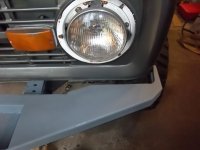
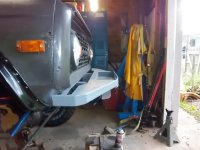
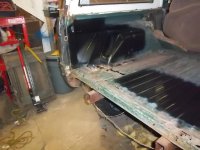
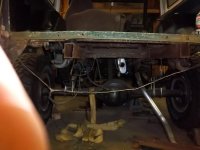
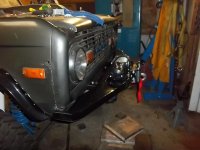
finally got to do a few things this weekend ..got the bumper mounted up with Grade 8 hardware and the winch bolted down and I started on the back Of the beast....
The tailgate is pretty bad gonna need lots o luv ....and the drivers side of the body has a bad drop and the tailegate side is leaned out at the top gonna need some caressing and stiffning to get it lined up right..and I droped the gas tank to work on the underside.... here is a few pics
PS can anyone tell me whats wrong in the picture of the back of the bronco..something i didnt notice till after the tailgate and tank were out...
and Its not all the rust holes ...LOL?:?
Attachments
samamarshall
Full Member
- Joined
- Nov 3, 2008
- Messages
- 216
Body lift on left side and not the right?
Sent from my PC36100 using Tapatalk
Sent from my PC36100 using Tapatalk
blazinchuck
Bronco Guru
- Joined
- Jul 14, 2005
- Messages
- 3,319
nice build!!! how bad do the coils sit due to the axle width?
whats up with the rear frame rails?
kickazz work fo sho!!!
whats up with the rear frame rails?
kickazz work fo sho!!!
OP
OP
HOJO
Sr. Member
The frame rails are the answer they arent the frame rails the PO cut them off and added box tubing and inserted it into the frame and got them very crooked then weled them in solid ...Not going to be a fun fix at all
OP
OP
HOJO
Sr. Member
The coils dont sit bad they do sit out but everyone I have asked here says they are done that way and run fine. I actually redrilled the holes and moved the bases for the coils in ..However if you do this you have to make new pieces for the top of the coils because it rotates the coil around some and it doesnt sit exactly where it did stock ..it is in the top good just rotated some ...I just took some 1" flat stock and bent it up to match and drilled the holes ..welded a nut on one side and it went right back it the stock location..
Lee
Lee
Similar threads
City: Campbell California
Price: $125
- Replies
- 0
- Views
- 251
- Locked
City: Cleveland
Price: $65
- Replies
- 2
- Views
- 430
- Replies
- 38
- Views
- 2K
City: Richmond
Price: $1600
- Replies
- 1
- Views
- 813