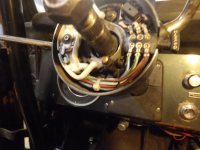
Here's another good one for Viper, as he's very familiar with the different color strain reliefs (yep, that's what they're called, along with "grommet" by many) and Black was one of them. Either yours was a different rating, perhaps had a 6-cylinder in it, had some wiring changes, or you just ran afoul of the wrong listings in the computer.
But the bottom line is (or should be?) that if you have a Blue strain-relief module in there now, you should just be able to buy another Blue one and connect it right up.
Wouldn't hurt to verify the wiring is stock and wired correctly of course, which would take some perusing of the wiring diagrams hereabouts, but if it ran before, a new blue box should work.
In theory...%)
Common issue with stores stocking coils from manufacturers that are lazy. There are coils out there that do have the little t-tips for sliding the stock "horseshoe" connector on, or you can retrofit some special bolt-on contact tips that will slide into it, but getting the correct coil would be better.
Maybe they missed it by a year and you should see if a coil for a '75 has the same part number. If so, just try a different brand. Even MSD makes coils with the correct Ford tips on it.
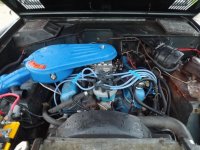
VERY vehicle specific unfortunately. Which is why you don't see enough vacuum diagrams these days. But you can get close with some. Don't have any myself, but there are some on the internet as well as some here on Classic that someone can link to.
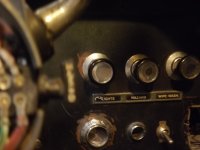
Good luck there. I see you have the air cleaner housing with the vacuum fittings on it, but unless you have an EGR valve and a 2-port distributor advance mechanism, or other things that would take vacuum to control, I would just leave that stuff off for now and connect the front distributor port to the carburetor directly and leave off the air cleaner hoses for the time being.
Do you have smog checks in your area? If so, then you will definitely have to re-connect all of that, and then some. And hopefully you don't need an air pump too.
Damn PO's...

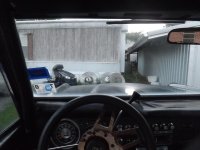
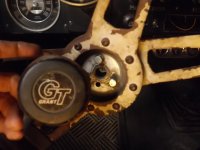
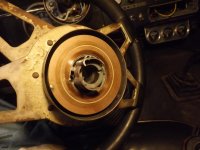
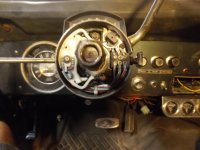
Lucky you. You have one of the transition '74's it sounds like, going between the new and the old setups. Does your horn use a 3-wire relay mounted to the passenger side fender skirt by any chance? Or better yet, if you have the Grant wheel off, does your turn signal switch have 2 of the spring loaded brass horn contacts? Or just 1?
I'm guessing 2, since you do have the column mounted switch, but in the early days there were more choices in turn signal switches than there are now, so not sure if there was ever one with both the integrated 4-way hazard switch AND the single contact, but it's possible.
If you have the single contact, you can use the earlier wheels. If you have to dual contacts, you'll either need the later model wheel, or manage to find one of the rare interim wheels.
Or you could modify an early one to work, but I'm not sure how, of if that can be done.
Good luck.
Paul