SavageBurro
Sr. Member
- Joined
- Aug 12, 2013
- Messages
- 589
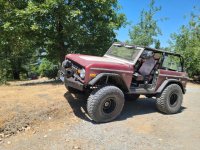
Fiiiinally got the burro running and driving again. Started the tear town in September thinking I'd be done by January. We all know how that goes.
In any case, my bronco now has:
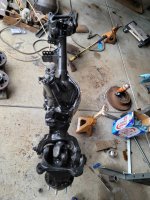
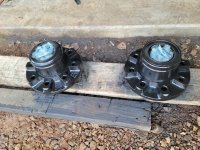
Axles:
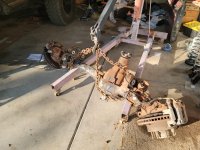
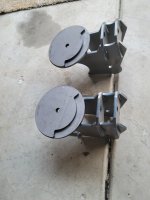
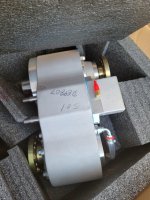
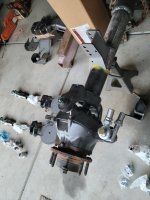
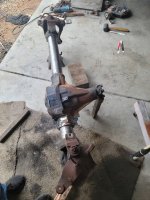
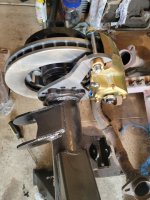
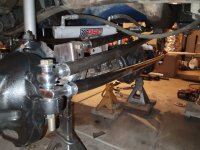
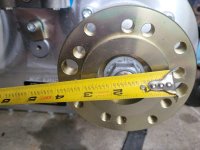
06 Super Duty Dana 60 front axle w ARB and 5.38s, narrowed to 67wms, outside tire measurement is 84". Cut all the stock brackets off and modified Barnes 4x4 brackets to work, along w some homefab brackets. rotated knuckles to get about 10 deg castor at ride height and pinion pointed at tcase output.
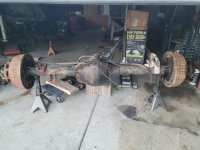
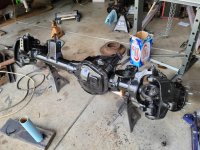
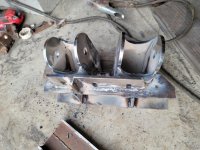
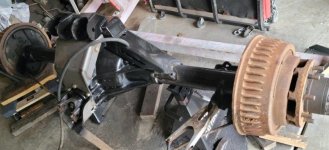
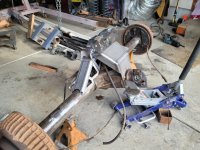
Late 80s GM 14 bolt w ARB and 5.38s, 67 ish wide, outside tire measurement is 83.5 wide. LugNut4x4 rear disc conversion kit w ebrake. 13 bolt shave w Motobilt cover and Barnes pinion guard tied into modified barnes / homefab truss.
Local shop installed the gears and lockers and new ball joints for me. Thanks to Richard Yemen at BD Fab!
Arb single compressor
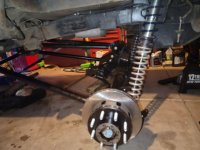
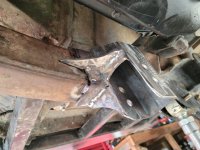
Suspension
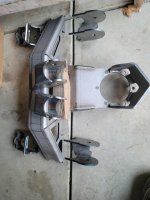
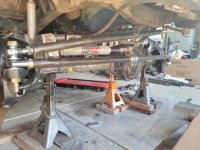
Reused and modified the Toms Offroad prototype 4 link to work with the 14 bolt. Lowered the frame brackets a bit to get good 4 link numbers. Still have about 19" clearance under the brackets to the ground. I hope the ground clearance sacrifice pays off in good handling. Bilstein 12" coilovers
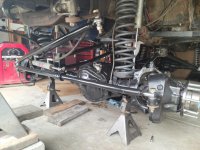
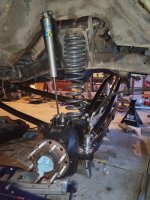
Built my own front 3 link w upper link on inside of frame on passenger side. Kept Toms standard 5.5" coils and Bilstein 5100 shocks up front. Need more seat time but I think its a tad undershocked. Local shop put bends in lower control arms for me. Ballistic joints. Keeps nice castor and pinion angle throughout suspension cycle.
Sits equivalent to 4-4.5" lift. Still need to articulate everything and install bump stops.
Huge thanks to Toms Offroad for their help!
Exhaust
Still need to modify the exhaust a bit more to make room for the rear antirock swaybar.
Exhaust has Toms shorty headers wrapped in heat / header wrap, but rest is complete patchwork of homefab work. Not the prettiest but sounds great and clears all the suspension which was not easy- especially w the front upper arm.
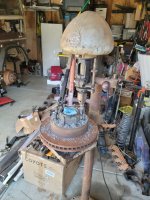
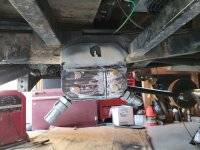
Tcase
Swapped the atlas 3.8 for an atlas 5.0.
Trans
Kept the 4R70w controlled by US Shift 4.
Motor
Kept the 351w w Edelbrock Pro Flo 4. Runs well but I 'think' it needs harmonic balancer. Has idle issues and balancer just 'looks' warn.
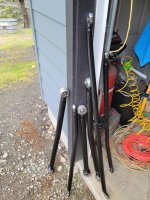
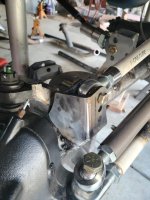
Steering & Brakes
Made my own steering using 1.5" dom, heims and psc ram. Local shop bent the links for me. Drag link and track bar are parallel but drag link is a tad longer. the little bit of driving/testing done so far there is zero bump steer.
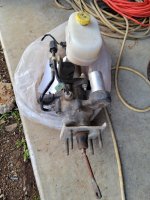
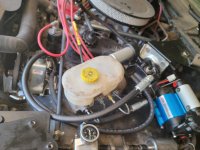
As noted in another page on this forum, brakes are from 2013 ram hydroboost w 2013 ram master cylinder (1 5/16 bore). Had the hb unit hi flowed and rebuilt by Vanco. Local hydraulic supply shop helped build lines. Thanks Motion Flo Using same PSC steering pump (older saginaw style) w upgraded internals for more flow and pressure
All new hard and soft brake lines that were an absolute pain in the rear. I've done several lines in the past, but I think my flare tool developed a slight defect in it causing all the connections to leak. Had to redo several of them. (Older eyesight probably doesn't help)
Wheels & Tires
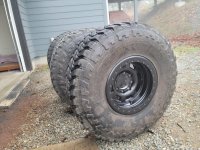
Mounted my 39" toyo mt on sidetracked offroad aluminum beadlocks.
Driveshafts
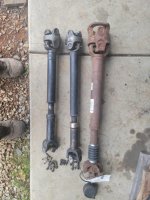
Repurposed front 1410 driveshaft from 2013 ram 3500 for use as rear driveshaft. 1410 flange at tcase, updated to 1410 yoke on rear axle end. After I removed the axle-end flange - local driveshaft shop only had to shorten it about an inch; and the nrebuilt and rebalanced. Thanks Walker Driveline!
Front driveshaft (still not yet built) will be all new long travel 1350 double cardan w flange at tcase and stock 1350 yoke at front axle. Fingers crossed it will clear my homefab trans cross member. Was going to run another 1410 ds in front too but didn't have enough clearance.
Just a few test runs on the property and I think it's going to be sweet. Suspension is a bit 'floaty' but soaks up bumps like crazy. Will take me a bit to get dialed in w sway bars, correct front shocks etc.
In any case, my bronco now has:
Axles:
06 Super Duty Dana 60 front axle w ARB and 5.38s, narrowed to 67wms, outside tire measurement is 84". Cut all the stock brackets off and modified Barnes 4x4 brackets to work, along w some homefab brackets. rotated knuckles to get about 10 deg castor at ride height and pinion pointed at tcase output.
Late 80s GM 14 bolt w ARB and 5.38s, 67 ish wide, outside tire measurement is 83.5 wide. LugNut4x4 rear disc conversion kit w ebrake. 13 bolt shave w Motobilt cover and Barnes pinion guard tied into modified barnes / homefab truss.
Local shop installed the gears and lockers and new ball joints for me. Thanks to Richard Yemen at BD Fab!
Arb single compressor
Suspension
Reused and modified the Toms Offroad prototype 4 link to work with the 14 bolt. Lowered the frame brackets a bit to get good 4 link numbers. Still have about 19" clearance under the brackets to the ground. I hope the ground clearance sacrifice pays off in good handling. Bilstein 12" coilovers
Built my own front 3 link w upper link on inside of frame on passenger side. Kept Toms standard 5.5" coils and Bilstein 5100 shocks up front. Need more seat time but I think its a tad undershocked. Local shop put bends in lower control arms for me. Ballistic joints. Keeps nice castor and pinion angle throughout suspension cycle.
Sits equivalent to 4-4.5" lift. Still need to articulate everything and install bump stops.
Huge thanks to Toms Offroad for their help!
Exhaust
Still need to modify the exhaust a bit more to make room for the rear antirock swaybar.
Exhaust has Toms shorty headers wrapped in heat / header wrap, but rest is complete patchwork of homefab work. Not the prettiest but sounds great and clears all the suspension which was not easy- especially w the front upper arm.
Tcase
Swapped the atlas 3.8 for an atlas 5.0.
Trans
Kept the 4R70w controlled by US Shift 4.
Motor
Kept the 351w w Edelbrock Pro Flo 4. Runs well but I 'think' it needs harmonic balancer. Has idle issues and balancer just 'looks' warn.
Steering & Brakes
Made my own steering using 1.5" dom, heims and psc ram. Local shop bent the links for me. Drag link and track bar are parallel but drag link is a tad longer. the little bit of driving/testing done so far there is zero bump steer.
As noted in another page on this forum, brakes are from 2013 ram hydroboost w 2013 ram master cylinder (1 5/16 bore). Had the hb unit hi flowed and rebuilt by Vanco. Local hydraulic supply shop helped build lines. Thanks Motion Flo Using same PSC steering pump (older saginaw style) w upgraded internals for more flow and pressure
All new hard and soft brake lines that were an absolute pain in the rear. I've done several lines in the past, but I think my flare tool developed a slight defect in it causing all the connections to leak. Had to redo several of them. (Older eyesight probably doesn't help)
Wheels & Tires
Mounted my 39" toyo mt on sidetracked offroad aluminum beadlocks.
Driveshafts
Repurposed front 1410 driveshaft from 2013 ram 3500 for use as rear driveshaft. 1410 flange at tcase, updated to 1410 yoke on rear axle end. After I removed the axle-end flange - local driveshaft shop only had to shorten it about an inch; and the nrebuilt and rebalanced. Thanks Walker Driveline!
Front driveshaft (still not yet built) will be all new long travel 1350 double cardan w flange at tcase and stock 1350 yoke at front axle. Fingers crossed it will clear my homefab trans cross member. Was going to run another 1410 ds in front too but didn't have enough clearance.
Just a few test runs on the property and I think it's going to be sweet. Suspension is a bit 'floaty' but soaks up bumps like crazy. Will take me a bit to get dialed in w sway bars, correct front shocks etc.
Last edited: