• Welcome to ClassicBroncos! - You are currently viewing the forums as a GUEST. To take advantage of all the site features, please take a moment to register. It's fast, simple and absolutely free. So please join our community today!
    If you have problems registering or can't log into your account, please contact Admin.

Power Wheels Bronco build

eBronc2

Contributor
Jr. Member
Joined
Jan 10, 2015
Messages
198
Those of us with kids (and/or grandkids) are probably aware of the "Power Wheels" (actually KIdsTrax) ride-on Bronco that was sold in Walmart a while back. They're turning up on CL and FBM these days pretty cheap ($50 - $100 or so) and are usually in great shape, unless they got left outside in the weather for the last few years.

My grandson is over a year old now, running all over the place, he'll be big enough in a few months to handle driving one, I think. I hope so, anyway, since I picked one up on FBM that was like new, and am doing a little converting/customizing of it and plan to give it to him for Christmas.

Ok, tech specs:

It's styled after a '69 Bronco, door inserts, 46" long, bumper to bumper (roughly 1/3 scale of a real early Bronco). 6 volt battery and motor, ONE wheel drive - yep, it only drives the right rear wheel - slowly, since it's only 6 volts. No suspension, hard plastic wheels, LED headlights, and a horn. Neither the hood or the tailgate open. I decided to upgrade a few things. Not going to to go crazy with the mods, since he's still young, and small. Keep it simple, but make it better. I have ideas for a bigger, faster, more modified Bronco down the road, in a few years - 4wd (the motor/gearboxes fit the front axle and wheels), golf cart/atv wheels and tires, coilover suspension, more batteries, etc.

IMG_1880.JPG IMG_1881.JPG IMG_1882.JPG

I modified the hood and the tailgate so they both open. The hood was easy, it only had a few screws and some clips holding it to the body. Once I removed it, the "frunk" beneath it is pretty large, will be useful to store things in. I'll use some black plastic panels cut to fit to create a storage area, (where cardboard panels are in the photos) and hinge the hood at the windshield. The tailgate required some careful cutting, with a cutoff wheel in an angle grinder, a reciprocating saw, a Dremel, and a file to clean up the edges. I'll have to fabricate some panels to close off the open areas at the back of the body.

IMG_3358.JPG IMG_3360.JPG

Since the battery, wiring and motors are beneath the seat, there is room behind them for another storage area, under the bed floor. I'll hinge the bottom of the tailgate where it meets the top of the rear bumper, use some thin cables to support the tailgate when it's open, and magnetic latches to hold it closed.

IMG_3361.JPG

I upgraded it from 6, to 12 volts, and dual motors/gearboxes to drive both rear wheels. No fabrication needed, just remove the old 6 volt motor/gearbox from the rear axle, slide new 12 volt motor/gearboxes onto each end of the axle, and attach the wheels. Remove the old skinny 6 volt battery, drop in the larger, heavier, higher capacity 12 volt battery, and plug in the "Y" adapter harness to power both new motors. The "Y" harness also has a low speed/high speed switch, so I can control how fast he drives it.


IMG_3371.JPG IMG_3364.JPG

I decided not to paint the body - less maintenance, and it looks ok in black. I did remove the grille and will paint it white, and both bumpers will be bright silver/chrome.
 
Last edited:

Yeller

Contributor
Bronco Guru
Joined
Mar 27, 2012
Messages
6,100
Loc.
Rogers County Oklahoma
Keep an eye out for a Grave Digger monster truck model. Those have 2 wheel drive, suspension and a motor that actually goes somewhere, especially when you put 18v to it😂

Won’t be for this year but when he’s ready for more power its a good fit for the bronco body.
 
OP
OP
eBronc2

eBronc2

Contributor
Jr. Member
Joined
Jan 10, 2015
Messages
198
Keep an eye out for a Grave Digger monster truck model. Those have 2 wheel drive, suspension and a motor that actually goes somewhere, especially when you put 18v to it😂

Won’t be for this year but when he’s ready for more power its a good fit for the bronco body.
Back about 25 years ago, I built a "Bigfoot" Power Wheel for my son - trailing arm rear suspension with coilovers made from old gas struts and hardware springs, front coils on the stock spindles, and a lawn tractor12v battery wired to the 2 stock 6v motors. That thing would scoot pretty good. He learned he could reverse it at full speed, then flip the switch to forward, and the weight transfer would yank the front wheels off the ground and carry them for several feet. Didn't do the plastic drive gears much good, though.

This Bronco I'm keeping pretty tame for my grandson, but I do plan to build a larger, stronger, cooler version a few years down the road - looking at golf cart, atv's, and Utv's for inspiration and ideas.
 

FordBronc

Contributor
Bronco's, yea I have a couple.
Joined
Dec 26, 2010
Messages
1,436
Loc.
Polk County, Missouri
And even cooler one to check out (stickily for the running gear and coil spring suspension), plus it has a stand alone separate remote control option to assist the kid that can also take right back over self controlling. Yea wrong body on top (heep), but we do body swaps all the time. Right?

Lowe's has a Kobalt blue 40V battery one. And that battery can be used in lots of other Kobalt elec tools. A plus is the rubber track in the middle of the tires for better traction.
https://www.lowes.com/pd/Kobalt-Riding-Toys/5000907761
 
OP
OP
eBronc2

eBronc2

Contributor
Jr. Member
Joined
Jan 10, 2015
Messages
198
And even cooler one to check out (stickily for the running gear and coil spring suspension), plus it has a stand alone separate remote control option to assist the kid that can also take right back over self controlling. Yea wrong body on top (heep), but we do body swaps all the time. Right?

Lowe's has a Kobalt blue 40V battery one. And that battery can be used in lots of other Kobalt elec tools. A plus is the rubber track in the middle of the tires for better traction.
https://www.lowes.com/pd/Kobalt-Riding-Toys/5000907761
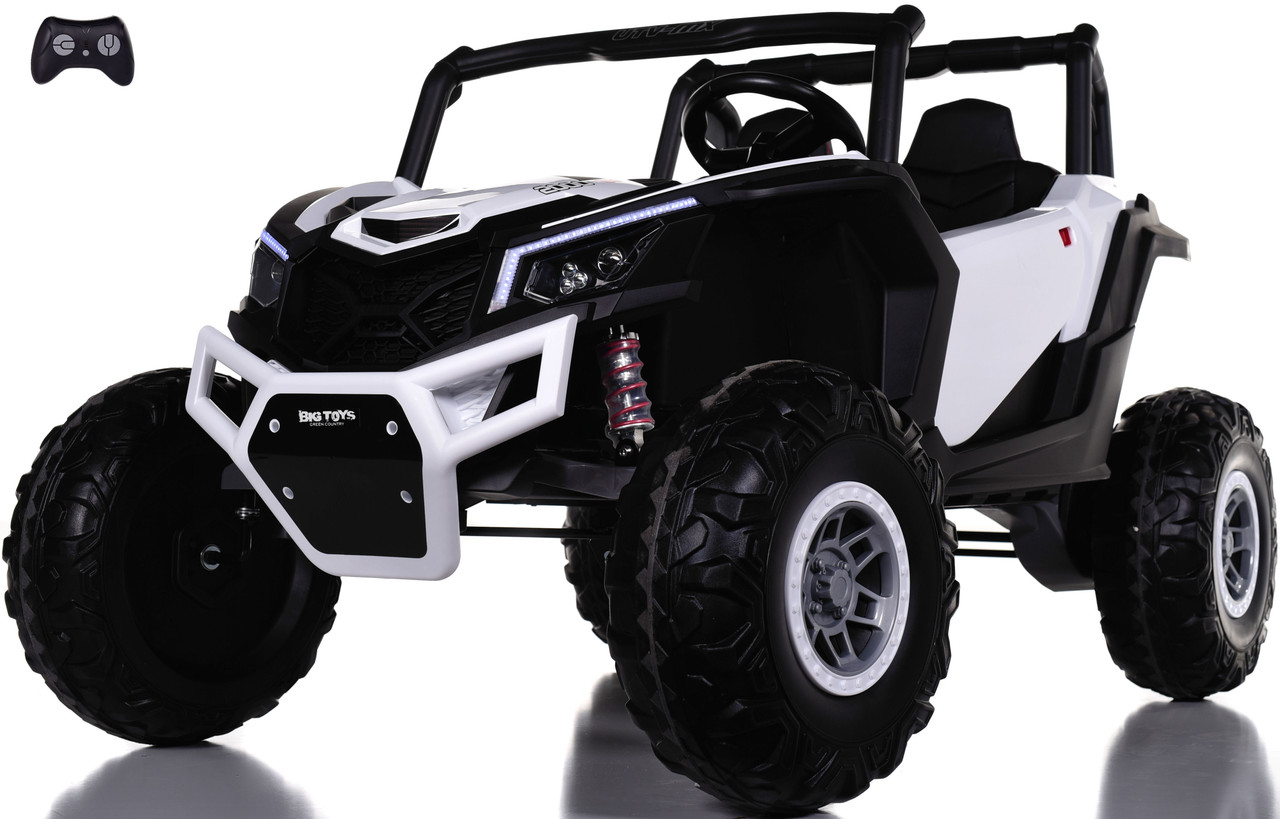
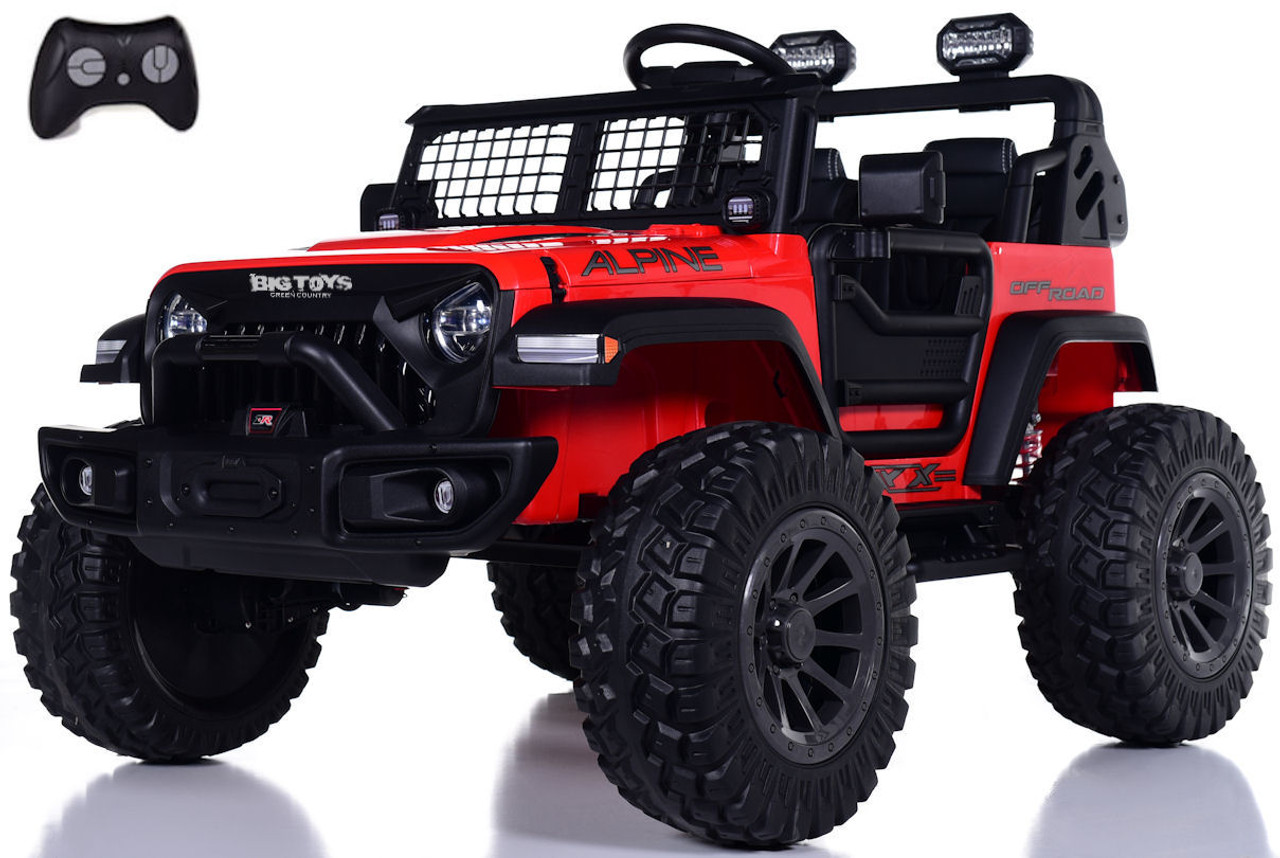
I've seen these advertised - larger overall, 4wd, suspension, radios, remotes, etc. Not cheap ($600+,....but gives me ideas.

White_4__33145.1690211622.jpg


Red_2__20194.1690824023.jpg
 

FordBronc

Contributor
Bronco's, yea I have a couple.
Joined
Dec 26, 2010
Messages
1,436
Loc.
Polk County, Missouri
The grand daughter was 3 when we got it for her and the gas pedal and steering wheel (needing to steer the vehicle) was at 1st to much. So having the ability to "remote control" was awesome. She now can mash the gas and steering with the best of them. Now day she also likes to get out and drive by remote "the GIANT Jeep". I only wish it had a Bronco body.
 

Bitch'nBronco

Contributor
Loose Cannon
Joined
Dec 1, 2005
Messages
3,380
Loc.
Havre De Grace, MD
What parts/where did you get the 12v conversion stuff? Love the build, my boys are getting a little too big for the 6v power and could use some more juice!
 
OP
OP
eBronc2

eBronc2

Contributor
Jr. Member
Joined
Jan 10, 2015
Messages
198
What parts/where did you get the 12v conversion stuff? Love the build, my boys are getting a little too big for the 6v power and could use some more juice!

Or, just look around on your local CL. FBM, or garage sales - there's always plenty of kids' ride-on toys for $50 or so. Good sources for parts.

Most of the motor/gearbox assemblies are pretty generic, regardless of the brand (Power Wheels, Kidtrax, etc). The low end, cheap cars have the 6v systems, but you can run those on 12 volts..at least until the motor burns out or strips the gears in the portal gearbox. Best way to upgrade is find a used, cheap Power Wheels Jeep or UTV/ATV that already has 2 of the 12v motors, and cannibilize it for parts. Most of the low end cars have the space for the extra motor, just slide it over the axle and wire it up. You can always step up even further to 18v (using cordless power tool batteries), but that kind of power will strip gears and break stuff if the tires get any real traction. The stock plastic wheels/tires usually save the gearboxes because they just spin so much.
 

Bitch'nBronco

Contributor
Loose Cannon
Joined
Dec 1, 2005
Messages
3,380
Loc.
Havre De Grace, MD
[/URL]

Or, just look around on your local CL. FBM, or garage sales - there's always plenty of kids' ride-on toys for $50 or so. Good sources for parts.

Most of the motor/gearbox assemblies are pretty generic, regardless of the brand (Power Wheels, Kidtrax, etc). The low end, cheap cars have the 6v systems, but you can run those on 12 volts..at least until the motor burns out or strips the gears in the portal gearbox. Best way to upgrade is find a used, cheap Power Wheels Jeep or UTV/ATV that already has 2 of the 12v motors, and cannibilize it for parts. Most of the low end cars have the space for the extra motor, just slide it over the axle and wire it up. You can always step up even further to 18v (using cordless power tool batteries), but that kind of power will strip gears and break stuff if the tires get any real traction. The stock plastic wheels/tires usually save the gearboxes because they just spin so much.
I just happen to have an F150 powerwheels that my kids don't use as much as the Bronco, my oldest son pets the hood of the Bronco ad he walks into the house lol.

To the garage I go! Lol thanks
 
OP
OP
eBronc2

eBronc2

Contributor
Jr. Member
Joined
Jan 10, 2015
Messages
198
12v Harley sportster battery fits perfect in the tray for the 6v battery
Just make SURE to have either a fuse or a circuit breaker in the cable from the battery. And be aware, if the vehicle was orignally 6v, some of the accessories may not live very long when 12 v is applied to them. Usually the switches, wiring, and connections are fine with a few more volts - it's AMPERAGE that melts things.

The radio/Mp3 player in my Bronco squealed, then went POP when the 12v battery was first hooked up. No great loss, everything else works fine.

And make sure both rear wheels spin the same direction when you hit the pedal - if not, just swap the wires on one of the motors.
 

Bitch'nBronco

Contributor
Loose Cannon
Joined
Dec 1, 2005
Messages
3,380
Loc.
Havre De Grace, MD
Planning to add a 40A breaker. Wonder if it'd be worth putting the 6v battery in the Frunk to run the lights and radio and power it off a separate switch. Doesn't really solve the drive/reverse switch or main power though. I've got some switches from the full size powerwheels I could swap in should I nuke the oe 6V switches
 
OP
OP
eBronc2

eBronc2

Contributor
Jr. Member
Joined
Jan 10, 2015
Messages
198
Hood now opens to allow access to the frunk. 16" black piano style hinge screwed to the base of windshield frame and rear of hood.

IMG_3397.jpg


Frunk finished out with black plastic panels cut and trimmed to fit.

IMG_3399.jpg


Bumpers painted bright silver, grille now bright white. Bronco #2 in background, my '71 Bronco behind that.


IMG_3401.jpg


This is Bronco #2. Found it on FBM locally for $25, in excellent shape, everything works. Test fit some old atv wheels and tires to see how they fit. I like it! I think I'll keep looking on CL and FBM for a set of aluminum golf cart wheels and off road tires, they're usually matched sets of 4, and the proportions will probably work with the Power Wheels Bronco better. New, they're expensive, but lots of guys upgrade and sell off the used stuff pretty cheap.


IMG_3396.jpg


Guess I'll have to get working on a suspension.


IMG_3395.jpg
 
Last edited:
OP
OP
eBronc2

eBronc2

Contributor
Jr. Member
Joined
Jan 10, 2015
Messages
198
I wanted to beef up the rear bumper to stiffen the hinge mounting for the tailgate, and to support the weight of kids sitting or climbing on it. So, I rounded up some scrap metal and did a little fabricating. Basically just a piece of angle iron inside the bumper, and some strap cut and bent to fit. The stock plastic rear bumper screws into the plastic body in both locations, so I'll drill matching holes in the metal and use bolts and nuts instead of the stock tiny screws. Considering adding a scale receiver hitch as well, tucked up under the bumper. You never know when he might need to tow a trailer around.

(Bronco is upside down in this photo.)

IMG_3409.jpg
 

NewDog

Contributor
Full Member
Joined
Oct 30, 2018
Messages
187
Loc.
Surrey BC
Looks like fun! You've got some great ideas going. Question - is the roll bar on backwards on your Bronco #1?
 
OP
OP
eBronc2

eBronc2

Contributor
Jr. Member
Joined
Jan 10, 2015
Messages
198
Looks like fun! You've got some great ideas going. Question - is the roll bar on backwards on your Bronco #1?
It is, I noticed it earlier - but installed the way it is, there's more headroom for kids sitting in the seat. Installed the "correct" way, the top of the roll bar is right up against and higher than the back of seat, right where the back of a kid's head would whack it during acceleration and/or rough driving. So, I think I might just leave it like it is.
 

rydog1130

Sponsor/Vendor
Bronco Guru
Joined
Jun 19, 2014
Messages
4,031
Just make SURE to have either a fuse or a circuit breaker in the cable from the battery. And be aware, if the vehicle was orignally 6v, some of the accessories may not live very long when 12 v is applied to them. Usually the switches, wiring, and connections are fine with a few more volts - it's AMPERAGE that melts things.

The radio/Mp3 player in my Bronco squealed, then went POP when the 12v battery was first hooked up. No great loss, everything else works fine.

And make sure both rear wheels spin the same direction when you hit the pedal - if not, just swap the wires on one of the motors.
I did this too and the radio died, but mine also cuts out intermittently loosing power to the motors. Any idea how to correct this?
 
Top