• Welcome to ClassicBroncos! - You are currently viewing the forums as a GUEST. To take advantage of all the site features, please take a moment to register. It's fast, simple and absolutely free. So please join our community today!
    If you have problems registering or can't log into your account, please contact Admin.

Project: 76, Orange Special Decor

OP
OP
gnsteam

gnsteam

Contributor
Bronco Guru
Joined
Jan 29, 2010
Messages
3,695
Loc.
Lincoln NE
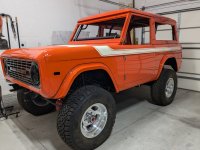
Thanks everyone. Yes very excited to have it home. You all are welcome to come over and help me finish it. Plenty to do, to keep me busy over the winter.
 
OP
OP
gnsteam

gnsteam

Contributor
Bronco Guru
Joined
Jan 29, 2010
Messages
3,695
Loc.
Lincoln NE
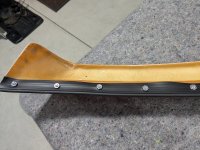
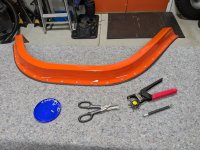
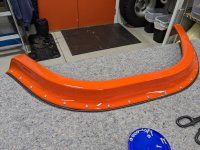
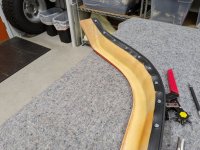
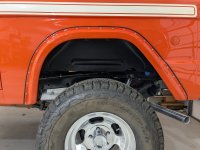
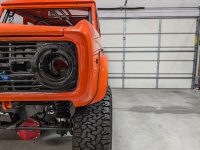
Well my Bronco has been home from the restoration shop for over a month. And I finally found some time to work on it. So I started pre-fitting the welting to the flairs. I used a leather punch (1/8 punch) through the mounting hole in the flair to locate and punch through the welting. Then pull the welting back and open up the 1/8" hole with the largest 11/64" punch. It worked out really well. It took about 45 minutes per flair. Next up, mounting the flairs to the body.
 

Attachments

  • PXL_20241118_021152832.jpg
    PXL_20241118_021152832.jpg
    176.9 KB · Views: 36
  • PXL_20241118_021206573.jpg
    PXL_20241118_021206573.jpg
    256.1 KB · Views: 33
  • PXL_20241118_021231288.jpg
    PXL_20241118_021231288.jpg
    258 KB · Views: 34
  • PXL_20241118_021212928.jpg
    PXL_20241118_021212928.jpg
    294.5 KB · Views: 31
  • PXL_20241118_021159996.jpg
    PXL_20241118_021159996.jpg
    248.6 KB · Views: 29
  • PXL_20241118_021235866.jpg
    PXL_20241118_021235866.jpg
    289.9 KB · Views: 28
  • PXL_20241118_021238567.jpg
    PXL_20241118_021238567.jpg
    262 KB · Views: 33
OP
OP
gnsteam

gnsteam

Contributor
Bronco Guru
Joined
Jan 29, 2010
Messages
3,695
Loc.
Lincoln NE
Here is a little follow up to the flair prep. I installed the driver side flairs tonight. The passenger side my get installed tomorrow night. Enjoy the pictures.
 

Attachments

  • PXL_20241121_024819374.jpg
    PXL_20241121_024819374.jpg
    152.8 KB · Views: 45
  • PXL_20241121_024644411.jpg
    PXL_20241121_024644411.jpg
    151.7 KB · Views: 42
  • PXL_20241121_024743123.jpg
    PXL_20241121_024743123.jpg
    169.9 KB · Views: 41
  • PXL_20241121_024733517.jpg
    PXL_20241121_024733517.jpg
    158 KB · Views: 38
  • PXL_20241121_024622210.jpg
    PXL_20241121_024622210.jpg
    198.4 KB · Views: 33
  • PXL_20241121_024659775.jpg
    PXL_20241121_024659775.jpg
    153.3 KB · Views: 44
  • PXL_20241121_024839803.jpg
    PXL_20241121_024839803.jpg
    187.2 KB · Views: 43
  • PXL_20241121_024828883.jpg
    PXL_20241121_024828883.jpg
    193.5 KB · Views: 43
  • PXL_20241121_024750650.jpg
    PXL_20241121_024750650.jpg
    171.2 KB · Views: 48
OP
OP
gnsteam

gnsteam

Contributor
Bronco Guru
Joined
Jan 29, 2010
Messages
3,695
Loc.
Lincoln NE
Yesterday, while working on the driver door lower weather striping. I happen to notice that the windshield frames, internal nuts for the dash bolts were missing. I did find one of the nuts loose in frame near the driver side. But the other one is missing. Good thing I noticed the issue before I was farther along. Otherwise loosening the hard top to lower the windshield would have been more of a hassle. Upon further investigation. The passenger side nut position does not have an internal feature to hold a nut in place, like the driver side does. The nut that I do have. Fits in the retainer on the driver side. And I can make a similar not for the passenger side. Any suggestions as to how to hold it in place? Here are a few pics.
 

Attachments

  • IMG_0040.JPG
    IMG_0040.JPG
    122.7 KB · Views: 28
  • IMG_0042.JPG
    IMG_0042.JPG
    94.7 KB · Views: 31
  • IMG_0039.JPG
    IMG_0039.JPG
    100.3 KB · Views: 29

904Bronco

Contributor
Bronco Guru
Joined
Sep 28, 2004
Messages
5,926
Loc.
San Martin, CA
I was going to suggest that the Nut pad (can't remember if you can get into the windshield frame to install) could be made longer.

Longer than the contact marking shown... You could secure the pad in place with a nut / washer and then use a drill, to outside then contact area, drill through the frame and nut pad and then run a self tapping screw/bolt to hold it position. The self tapping screw would need to have a flat head to not conflict with the seal or windshield frame.

Random thought, clear as Mud?
 
OP
OP
gnsteam

gnsteam

Contributor
Bronco Guru
Joined
Jan 29, 2010
Messages
3,695
Loc.
Lincoln NE
Yep, that thought crossed my mind. But I'm having a tough time bring myself to drilling into the new paint. I know I will have to at some point. So I guess that time is now. Thanks for the suggestion.
 

Bruners4

Newbie
Joined
Jul 22, 2019
Messages
55
Loc.
1/2 way to everywhere
I think that the 'nut' needs to move to align with the windshield knobs to thread in properly. So, it needs to be able to move around in its slot to achieve this. To keep the floating nut from falling out or moving out of its designed area, it just needs something to stop it. This could be a dab of something in the channel to a rivet at each end of its travel. Could also be as simple as a dent in the channel to stop it from moving too far.
 
OP
OP
gnsteam

gnsteam

Contributor
Bronco Guru
Joined
Jan 29, 2010
Messages
3,695
Loc.
Lincoln NE
I think that the 'nut' needs to move to align with the windshield knobs to thread in properly. So, it needs to be able to move around in its slot to achieve this. To keep the floating nut from falling out or moving out of its designed area, it just needs something to stop it. This could be a dab of something in the channel to a rivet at each end of its travel. Could also be as simple as a dent in the channel to stop it from moving too far.
I agree, I think the nut needs to be able to shift around a little. Anyone know what was originally inside the windshield frame. On the passenger end to hold the nut in place? Was the nut a different style than the one picture above?
Another issue with the situation. Is the ability to insert a nut much different than the one pictured. The only entry point into the windshield frame. Is to far left (driver) end of the windshield frame. And its just big enough to accept that nut. Then the nut must be pushed thru the frame to the passenger side. A piece of 1/4" clear tubing with a small magnetic pressed into the end of the tubing, worked well. Next problem. How to get the nut to stay against the inside inner surface of the frame channel. Maybe a night to sleep on it will help.
 
OP
OP
gnsteam

gnsteam

Contributor
Bronco Guru
Joined
Jan 29, 2010
Messages
3,695
Loc.
Lincoln NE
I agree, I think the nut needs to be able to shift around a little. Anyone know what was originally inside the windshield frame. On the passenger end to hold the nut in place? Was the nut a different style than the one picture above?
Another issue with the situation. Is the ability to insert a nut much different than the one pictured. The only entry point into the windshield frame. Is to far left (driver) end of the windshield frame. And its just big enough to accept that nut. Then the nut must be pushed thru the frame to the passenger side. A piece of 1/4" clear tubing with a small magnetic pressed into the end of the tubing, worked well. Next problem. How to get the nut to stay against the inside inner surface of the frame channel. Maybe a night to sleep on it will help.
If anyone is interested. Here is the solution that I came up with to fix the missing nut and nut retainer. Inside the passenger side, of the lower windshield frame. I made a sprung nut assembly and slid it into position inside the windshield frame. Sorry, I got in hurry when inserting the nut assembly. And forgot to take some pictures to better explain the process. However, I attached a drawing of the sprung nut assembly with directions for how to insert it, into the windshield frame. If anyone would like detailed dimensional prints and part numbers for the components I can provide them as well.
 

Attachments

  • windshield-nut.pdf
    1 MB · Views: 26
  • PXL_20241207_235727565.jpg
    PXL_20241207_235727565.jpg
    161.6 KB · Views: 17
Last edited:
OP
OP
gnsteam

gnsteam

Contributor
Bronco Guru
Joined
Jan 29, 2010
Messages
3,695
Loc.
Lincoln NE
I haven't posted in awhile. But I have been making some progress. With the help of fellow Bronco owner and CB member Bruners4. David has been coming over on Thursday evenings to help with my project. So far we have installed the rear liftgate, with a gas struts kit.
06e5283a-1c49-4a08-91a1-edfb33e85f8a-1_all_4708.jpg

The chrome grill trim.
06e5283a-1c49-4a08-91a1-edfb33e85f8a-1_all_4705.jpg


The James Duff hood struts.
06e5283a-1c49-4a08-91a1-edfb33e85f8a-1_all_4707.jpg


Then we started mocking up the mounting of the windshield washer/radiator fluid tank. Using the bracket designed br JSmall.
06e5283a-1c49-4a08-91a1-edfb33e85f8a-1_all_4706.jpg

We also set the upper intake phenom in position to check hood clearance. Which looked really good. And David was kind enough to bring one of JSmall's explorer throttle cable brackets. I'm reverse engineering it to create one of my own. Tonight, I spent some time measuring key point on the throttle body.
06e5283a-1c49-4a08-91a1-edfb33e85f8a-1_all_4715.jpg
 
Top