• Just a reminder that you won't be able to start new posts or reply to existings posts in the Archive forum.

    This is where all the old posts go so they can still be used for reference and searched.
  • Welcome to ClassicBroncos! - You are currently viewing the forums as a GUEST. To take advantage of all the site features, please take a moment to register. It's fast, simple and absolutely free. So please join our community today!
    If you have problems registering or can't log into your account, please contact Admin.

Project "Lethal White" (2.5 years and back on the road at last)

cgbexec

Bronco Guru
Joined
Sep 19, 2006
Messages
2,071
Loc.
Naples, FL
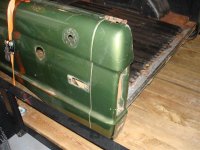
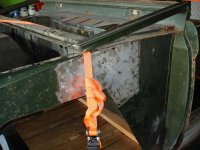
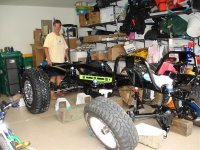
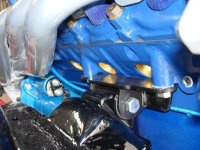
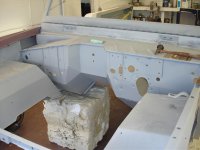
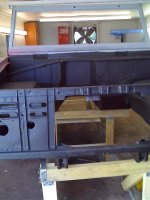
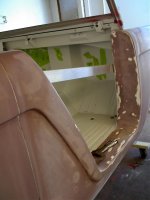
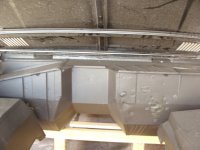
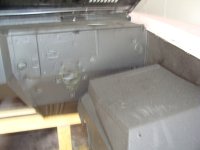
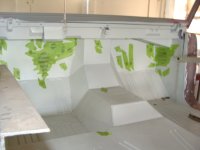
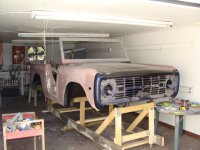
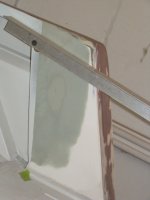
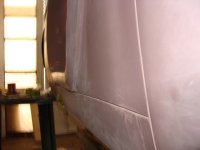
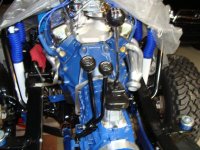
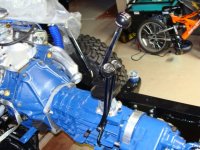
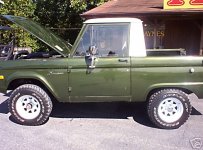
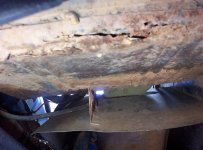
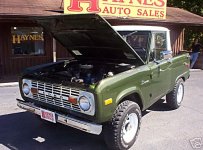
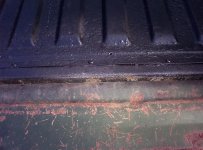
Ok, so I believe to be heading down the final stretch of this project. ;D I hope to have a drivable Bronco by June or July.%) I purchased the truck in July or August of 2006 from a car dealer (Haynes Autosales) in Kentucky. Overall they acurately represented it about 80%. The mild rust on the drivers side floor turned out to be major cancer throughout drivers and passanger side floor boards. The bed was lined with a spray in bed liner and the entire thing was rusted out all along the edges. The engine ran well but had a nice lifter knock. The last item glazed over was the power brakes. While the brakes worked, there was not much power about them. The booster was filled with oil. So with all that said my 72 year old (at the time) father picked up the truck and drove it back to his house in Chatsworth Ga. He then drove it a month later to Stuart Florida. Total drive for 72 year old man in a manual 3 on the tree no power steering and no air-conditioning 30 year old Bronco was about 700 miles. He did tell me that he received numerous thumbs up and a couple of offers to purchase the truck along the way. The good news about all of this is I was planning a complete frame off restoration so much o this was not a big deal.
 

Attachments

  • 76Bronco-DriversSide.jpg
    76Bronco-DriversSide.jpg
    50.2 KB · Views: 206
  • 76Bronco-UnderFloorboardrust.jpg
    76Bronco-UnderFloorboardrust.jpg
    97.9 KB · Views: 166
  • 76Bronco-quarterprofile.jpg
    76Bronco-quarterprofile.jpg
    50 KB · Views: 167
  • 76Bronco-InnerFenderrust.jpg
    76Bronco-InnerFenderrust.jpg
    189.6 KB · Views: 123
  • 76Bronco-Bedrust.jpg
    76Bronco-Bedrust.jpg
    152.4 KB · Views: 121
  • 76Bronco-Cab.jpg
    76Bronco-Cab.jpg
    42.2 KB · Views: 136
Last edited:
OP
OP
cgbexec

cgbexec

Bronco Guru
Joined
Sep 19, 2006
Messages
2,071
Loc.
Naples, FL
I drove the Bronco around Stuart for a long weekend showing it off to family. Most loved it and some said what are you doing with that old thing. Many remembered my 75 that I had when I was just graduating highschool. It didn't drive quite like I remebered. My 1975 had been a converted Roadster with compete soft top and removable doors. This was an original U15 that someone converted to a half cab with a fiberglass top & bulk head with bench seat. I was fairly sure that I would be converting it to a roadster with bucket seats, soft top and two piece removable doors.. After driving it, I was sure that was what I needed to do.

I drove it back to Naples (200 more miles) at 60 mph and the engine screaming to maintain that speed. I filled up before leaving Stuart and I had to fill up in Ft. Lauderdale (90 miles). Upon reaching Naples the tank was mostly empty. My friend showed up immediately for his first ride. We drove it around the neighborhood and most of neighbors gave me the thumbs up. Two neighbors came over to talk in depth about it. The next day a worker in the neighborhood asked if I was interested in selling. I didn't even have it home for 24 hours and they were swarming over it.
 
OP
OP
cgbexec

cgbexec

Bronco Guru
Joined
Sep 19, 2006
Messages
2,071
Loc.
Naples, FL
My buddy Dave helped me break the truck down into individual nuts and bolts. I was very surprised how much room an old truck takes up when you tear it completely down. We braced the body and took it out to my body guy to have the floors replaced. Jeff's Bronco Graveyard supplied all of the sheetmetal and a lot of other parts we will get into later. My body guy did not like the front clip and wanted to brace it with more sheet metal. I agreed. The suspension system came from Jeff's as well. I chose the 3.5" Bullit Proof System with their extended raduis arms. I would recommend the extended arms for anyone going with 33" tires or larger. I am not sure who makes Jeff's arms, but they are certainly beefy and well built. We cut off any un neede parts from the frame and welded on some of the new parts in preperation for powdercoating.
 

Attachments

  • DSC00062.jpg
    DSC00062.jpg
    207.1 KB · Views: 159
  • DSC00069.jpg
    DSC00069.jpg
    99.4 KB · Views: 168
  • Frame.jpg
    Frame.jpg
    213.3 KB · Views: 150
  • Rearquarter.jpg.jpg
    Rearquarter.jpg.jpg
    103 KB · Views: 166
  • Frontclip.jpg.jpg
    Frontclip.jpg.jpg
    139.2 KB · Views: 217
  • Weld.jpg.jpg
    Weld.jpg.jpg
    97.9 KB · Views: 148
  • Weld2.jpg.jpg
    Weld2.jpg.jpg
    113.4 KB · Views: 159
OP
OP
cgbexec

cgbexec

Bronco Guru
Joined
Sep 19, 2006
Messages
2,071
Loc.
Naples, FL
We broke the axels completely down cleaned them as best we could and sent out the casings for powdercoat. I also sent the Frame out for powdercoat along with many of the suspension components. At the same time when the floors and bed of the bronco were replaced with new metal the body was sent to blasting and epoxy primer. When I got the body back it went back to the body guy and the axels went along with complete new rebuild kits, 4:56 Gears (trac-loc front end and limited slip rear), bearings and complete new brake componants went to the axel shop. As parts began coming back from powdercoat things started going together. I ordered a new (rebuilt engine) from Tuff Dawg engines. The stats are 328 H.P. with a similar torque number. That is a far cry from the stock H.P. figures for 1976. After watching all of the crazy horse episodes of Trucks, I decided to go with the NV3550 Trans and twin stick shifter kit from Wild Horses. I also ordered shorty ceramic coated headers and some other related parts, bits and pieces. I went with a high torque mini starter, 1 wire 170 amp alternator, HEI distributor and a complete new power steering system with flaming river shaft and polished stainless steering colum from IDIDIT.
 

Attachments

  • ExtendedRadiusArms.jpg.jpg
    ExtendedRadiusArms.jpg.jpg
    110.7 KB · Views: 216
  • Frame3.jpg.jpg
    Frame3.jpg.jpg
    146.9 KB · Views: 233
  • Frame4.jpg.jpg
    Frame4.jpg.jpg
    153.7 KB · Views: 256
  • Engine.jpg.jpg
    Engine.jpg.jpg
    167 KB · Views: 366
  • Frame2.jpg.jpg
    Frame2.jpg.jpg
    184.6 KB · Views: 525
  • Motormount.jpg.jpg
    Motormount.jpg.jpg
    139.6 KB · Views: 209
  • NV3550.jpg.jpg
    NV3550.jpg.jpg
    142.4 KB · Views: 288

Dan76

Sr. Member
Joined
May 17, 2006
Messages
895
Wow dude so clean! The 5th picture in your last post makes me want to cry, looks amazing!
 
OP
OP
cgbexec

cgbexec

Bronco Guru
Joined
Sep 19, 2006
Messages
2,071
Loc.
Naples, FL
Now onto the body. The one good thing about this truck was the body panels were original are relatively rust free except for the bottom edge of one door (which I am not using) and the floors of course which at this point have been replaced.

Yes I cut it. My plan was 35's and you can't really run them on an uncut. I do like the looks of uncut, but I wanted 35s, so I will leave the uncut for a future project and yes I have plans for a future Bronco. My son turns 16 in 9 years, so I will have to get cracking on the next one soon! ;D

So here are some shots of the body at the body shop. He has had the body for a year. He is doing this on the side and obviously is taking his sweet time on it. Hopfully it won't be too much longer.
 

Attachments

  • EngineCompartment.jpg.jpg
    EngineCompartment.jpg.jpg
    81.5 KB · Views: 160
  • Floorpans.jpg.jpg
    Floorpans.jpg.jpg
    57.5 KB · Views: 188
  • Frontclip.jpg.jpg
    Frontclip.jpg.jpg
    88.8 KB · Views: 124
  • PsngrFender.jpg.jpg
    PsngrFender.jpg.jpg
    81.7 KB · Views: 199
  • TailgateOutside.jpg.jpg
    TailgateOutside.jpg.jpg
    75.8 KB · Views: 107
OP
OP
cgbexec

cgbexec

Bronco Guru
Joined
Sep 19, 2006
Messages
2,071
Loc.
Naples, FL
My body guy was getting ready to quit over those door inserts. I wanted them faired in and mounted permanantly. He did a wonderful job, but he told me that he would never do it again. I feel kind of bad because I know that he never expected to have that many hours in the inserts. If it turns out really nice, I may have to give him a bonus. I would be all to glad to give it to him if it looks like I envision. So far all the work he has done has exceeded my expectations.

He has done a lot of work recently so here are some updated body pictures. We did the entire interior and undercarriage with a stone guard finish. Very similar to what OEMs use on rockers and even interiors under the carpet. It can be painted glossy but has a texture to hide imperfections. It is supposedly very tough and should resist nicks and stone chips and prevent future rust.
 

Attachments

  • CoorSupport.jpg.jpg
    CoorSupport.jpg.jpg
    75 KB · Views: 155
  • Firewall.jpg.jpg
    Firewall.jpg.jpg
    39 KB · Views: 153
  • Aft2.jpg.jpg
    Aft2.jpg.jpg
    57.3 KB · Views: 124
  • Transtunnel.jpg.jpg
    Transtunnel.jpg.jpg
    55.5 KB · Views: 240
  • DoorInsert2.jpg.jpg
    DoorInsert2.jpg.jpg
    57.8 KB · Views: 260
  • Interior-Undercoating.jpg
    Interior-Undercoating.jpg
    224.3 KB · Views: 371
OP
OP
cgbexec

cgbexec

Bronco Guru
Joined
Sep 19, 2006
Messages
2,071
Loc.
Naples, FL
Now we are getting close to paint. I chose to go with High Performance White (Ford 2005 - 2008 Mustang Color) above the body style line and in the interior. I also will be doing the fender flares in white. Below the body style line will be Ford Sonic Blue Metalic Pearl Coat (Also a 2005 - 2008 Mustang Color). The Corbeau Seats are blue and black, black carpet very much like my 2007 Roush Mustang which is Performance White with blue stripes and black carpet with black and blue leather seats.

He epoxied the door inserts in and cut seems to relieve the stress so they won't crack. He is fairing them in with fiberglass body filler as opposed to standard filler. It is looking amazing.

I stopped out to the body guys place and he told me he is going to be moving the body to the paint booth and spraying it this weekend or very early next week. I can only hope this is true. We are going with a base coat / clear coat PPG. I hope this turns out like I envision it in my head!:eek:
 

Attachments

  • EngineBay.JPG
    EngineBay.JPG
    251.3 KB · Views: 98
  • EngineBay3.JPG
    EngineBay3.JPG
    211.9 KB · Views: 120
  • InteriorFirewall.JPG
    InteriorFirewall.JPG
    212.3 KB · Views: 99
  • QuarterFClip2.JPG
    QuarterFClip2.JPG
    226.8 KB · Views: 213
  • QuarterRClip.JPG
    QuarterRClip.JPG
    201.3 KB · Views: 114
  • LInteriorInsert.JPG
    LInteriorInsert.JPG
    187.2 KB · Views: 138
  • RInteriorInsert.JPG
    RInteriorInsert.JPG
    185.7 KB · Views: 122
  • RExteriorInsert.JPG
    RExteriorInsert.JPG
    184.3 KB · Views: 142
OP
OP
cgbexec

cgbexec

Bronco Guru
Joined
Sep 19, 2006
Messages
2,071
Loc.
Naples, FL
I forgot to mention that all of the body panels are original with the exception of the floors of course and the hood. The hood is brand new from Jeff's Bronco Graveyard. The fit is perfect. The original hood didn't have any rust, but had some waves in it and there was no way to get them out without copius amounts of body filler. The grill was in great shape with just some small annoying dents. My body guy got it to where I thought it was new. For a minute I thought I must have ordered a new one and forgot. Now that it is coming together I am getting very anxious. :eek:
 

tjstack

Jr. Member
Joined
Jul 16, 2007
Messages
125
Loc.
NY
looks great. color combo sounds sweet. looking forward to seeing it.
 
OP
OP
cgbexec

cgbexec

Bronco Guru
Joined
Sep 19, 2006
Messages
2,071
Loc.
Naples, FL
Please Tell me Your leaving the half cab cause it is cool look. Sweet build man

I still have the fiberglass half cab and bulkhead. I purchased a brand new Bestop with two piece soft doors. I plan on running it topless most of the time. This will most likely be my weekend buggy garage kept while the stage 3 mustang stays outside.

I will probably sell the top and bulkhead when I get the truck together and running. I don't want to sell anything until I finish the project.

I am going to have a hard time sleeping tonight I am so stoked!;D
 
OP
OP
cgbexec

cgbexec

Bronco Guru
Joined
Sep 19, 2006
Messages
2,071
Loc.
Naples, FL
Ok, last post of the night. I purchased the Hurst Short Throw shifter because I was having some clearance issues with the stock Heep shifter. The Hurst had some clearance issues as well, but I was able to bend everything just enough so that everything shifts smoothly with no interfearance. Sweet!!!!

Also note the mountain of parts waiting to be assembled. Everything is either brand new or completely rebuilt. I hope this creates a reliable dependable truck.
 

Attachments

  • HurstShifter.jpg
    HurstShifter.jpg
    250 KB · Views: 268
  • Hurst-TwinStick.jpg
    Hurst-TwinStick.jpg
    238.7 KB · Views: 189
  • ShifterBase.jpg
    ShifterBase.jpg
    225 KB · Views: 136
  • BroncoParts.jpg
    BroncoParts.jpg
    229.8 KB · Views: 170

trailpsycho

Bronco Guru
Joined
Dec 11, 2003
Messages
4,856
Looks really, really nice. You will really get a kick out of it when you get it back on the road. Keep us updated.
 
OP
OP
cgbexec

cgbexec

Bronco Guru
Joined
Sep 19, 2006
Messages
2,071
Loc.
Naples, FL
My old 75 had a 3" or so Rancho lift on it, 33" BFG AT's with 4 wheel drum brakes and power steering. Driving the 76 around with no power steering and the stock suspension was just no fun. I hope that Jeff's Bullit Proof 3.5" lift with soft springs will ride nice and soft. I am sure it will. The power steering is going to be the real kicker. That is really going to make it an enjoyable ride.
 

trailpsycho

Bronco Guru
Joined
Dec 11, 2003
Messages
4,856
I am using the Cage arms, but with the JBG Deaver springs (cage shocks and shock mounts). It rides pretty amazing really. I search for potholes now...there is no short supply after a midwest winter. They are soaked up like a chamis to a spill on an info-mercial. Far from the jarring ride of the past. Like I said, you will be very pleased and happy when its back on the road. I cant wait to see your paint scheme.
 

SC74

Contributor
Bronco Guru
Joined
May 24, 2004
Messages
3,413
WOW that is one clean job you are doing! Looks awesome and I can't wait to see it painted - sounds like a great color combo you chose. Keep up the good work!
 
Top