Community
Message Forum
Photo Gallery
Event Calendar
Book Reviews
Bronco Wallpaper
Bronco FAQ
Link Back to CB!
Photo Gallery
Event Calendar
Book Reviews
Bronco Wallpaper
Bronco FAQ
Link Back to CB!

Buy / Sell


Bronco Tech
3 Arm Wiper Setup
Fix Motor Mount
Roll Cage Braces
Throttle Body 65mm
Wheel Alignment
Heat Riser Replacement
Vent Window Repair
Center Console Mount
Straighten Bumper
Ford 6R80 6 spd
More Tech...
Fix Motor Mount
Roll Cage Braces
Throttle Body 65mm
Wheel Alignment
Heat Riser Replacement
Vent Window Repair
Center Console Mount
Straighten Bumper
Ford 6R80 6 spd
More Tech...

Install the app
-
Welcome to ClassicBroncos! - You are currently viewing the forums as a GUEST. To take advantage of all the site features, please take a moment to register. It's fast, simple and absolutely free. So please join our community today!If you have problems registering or can't log into your account, please contact Admin.
You are using an out of date browser. It may not display this or other websites correctly.
You should upgrade or use an alternative browser.
You should upgrade or use an alternative browser.
"The Turd" build Thread...
- Thread starter 76MaBronco
- Start date
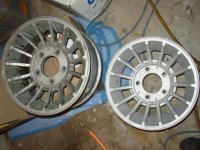
Maybe I should have kept them Franko! All kidding aside, those look great, and thanks for the feed back on the glass media. I have a bag I have wanted to try in my blaster and have another set of the same rims. 
76MaBronco
Bronco Guru
THANKS .... for the rims !!!!
You are more than welcome!! Thanks for the contributor status!!!
Those look awesome!! Great job!!
76MaBronco
Bronco Guru
Well, just as an update, I'm waiting for parts to finish up the mechanical aspect of it all...I've ordered and recieved my new exhaust manifolds (stock Explorer ones) and have the seats out. The rear is going to be recovered to match the Explorer seats I'm putting in (Oooooo, power seats). I'll be ordering the reverse rotation water pump today and a timing chain so I can freshen up the front while still using my newer stock-style aluminum radiator. Once I get the trans adapter, I'll finish up the mechanical part and concentrate on the electrical part (also known as the nightmare portion). I'll keep you guys updated and will post pics once I get going again.
76MaBronco
Bronco Guru
The trans adapter showed up on Wednesday!!! Hopefully I'll be installing the transfer case to the 4R70W this weekend, fabbing up my cross member and getting it all buttoned up mechanically...then comes the wiring nightmare...
pics to follow!!!
pics to follow!!!
76MaBronco
Bronco Guru
I may not be...changing a cracked exhaust manifold on a '94 Jeep with 205k down at the shop (not my garage). The motor has never been touched and I just KNOW I'm going to snap each and every bolt...(SNNNNNNAP!!!!!) drill, sharpen the bit, drill, sharpen the bit, drill, sharpen the bit, tap...repeat 11 more times...
I'll let you know though. I'll definitely be working on it on Sunday.
I'll let you know though. I'll definitely be working on it on Sunday.
76MaBronco
Bronco Guru
You don't owe me anything Jay, You gave what you could, stayed a second day and I gave what I could...We're good in my book!!
And now...(drum roll please) The trans install!!!!
And now...(drum roll please) The trans install!!!!
bronco loco
It never ends
what shifter are you using? column or floor?
76MaBronco
Bronco Guru
Okay, so the trans is in. Kind of a pain without a trans jack, but not impossible with some help (thanks to my Jeep buddy and fellow BYOB volunteer, Jamie).
First of all, the AA instructions are better used as recyclable printer paper (remove the staple first) ;D But I have to say that the instructions were made for a ZF and not a 4R70W.
The adapter comes nicely machined and with all required hardware.
Some pointers:
- Press the bearing onto the shaft first. The press fit on the shaft is tighter than in the aluminum housing (at least in my case it was). Try to press the bearing on the race that its mating to (inner race for the shaft, outer race for the housing) this limits the side pressure that the balls exert on the race.
- Insert the snap rings, one for the bearing, and one for the reused gear on the new shaft (you have to reuse that one, so take care in removing it).
- Clean all the surfaces (I used acetone) and apply a liberal coating of blue RTV silicone to the o-ring groove and spread it around. Make sure that the roller bearings don't fall in when you tap the smaller housing into the transfer case.
- The gasket between the larger housing and the transfer case needed to be trimmed - the center hole was too small in my case. Make sure the transfer case spins as freely as it did with the old adapter.
- Install the larger housing over the smaller one. The small drill point on the larger housing indicates "TOP" (no mention of this in the instructions, I thought that was valuable info).
- Try not to mar the surfaces, as they are closely matched to the trans. One little dimple and you'll have trouble getting it on the trans.
- Trim the shaft on the trans down about 1/2" (I did it enough to almost eliminate the center pilot hole)
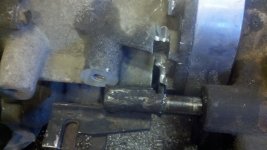
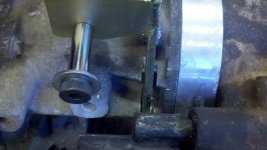
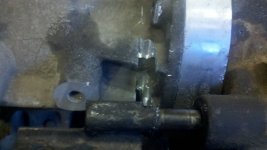
- Trim the webs on the trans as shown in my pics in order to use the included T-shift adapter (the J-shift won't work, another thing you don't find out until you open the less-than-informative-instructions)
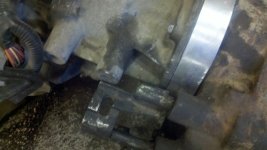
- You'll also need to cut a round boss off the drivers side of the trans to let the transfer case rear output shift into low range.
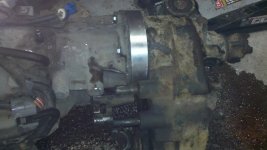
- Bolt it all up and you're done!! I used the center hole in the series of three clocking positions and the transfer case came out clocked close to original.
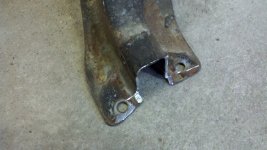
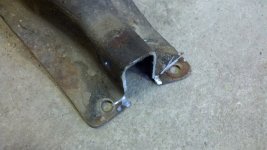
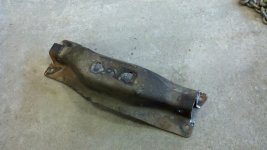
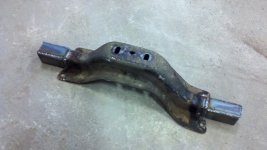
Now for the crossmember. I saved both the original and the Explorer thinking I was going to be able to Frankenstein one up...no dice. I took the original Explorer one and added 3-1/2 inches to each end after squaring up the ends with a cutoff tool. Welded up some 1/8" stock to extend it, flipped the original cross member frame brackets on the frame and now it'll bolt right up with a couple new holes...
Here's the pics!!!!!
1. Smaller housing installed
2. Larger housing installed
3. Gap before shaft trimming
4. Shaft before trimming
5. Shaft after trimming
6. All bolted up
7. Shift rail interference
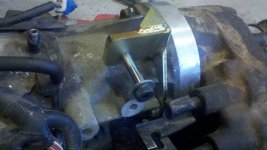
8. Cut, drilled and clearanced for their bracket
9. Another view of pic 8
10. Bracket installed
11. Another view of 10
Attachments
-
 2011-03-20_08-32-27_601.jpg100.9 KB · Views: 134
 -
 2011-03-20_08-20-30_981.jpg91.5 KB · Views: 134
 -
 2011-03-19_19-15-52_128.jpg96.7 KB · Views: 141
 -
 2011-03-19_18-45-00_311.jpg84.7 KB · Views: 137
 -
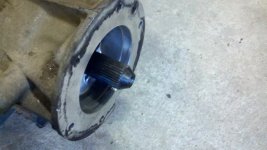 2011-03-19_18-17-58_162.jpg99.1 KB · Views: 139
 -
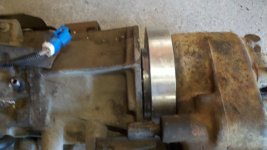 2011-03-19_18-09-16_908.jpg93.7 KB · Views: 153
 -
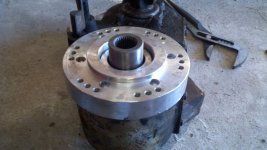 2011-03-19_18-05-32_639.jpg107.1 KB · Views: 150
 -
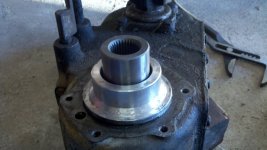 2011-03-19_18-04-46_22.jpg100.9 KB · Views: 150
 -
 2011-03-20_08-37-18_870.jpg101 KB · Views: 127
 -
 2011-03-20_08-36-30_603.jpg107.2 KB · Views: 142
 -
 2011-03-20_08-32-38_164.jpg84.3 KB · Views: 131
bronco loco
It never ends
are you planning to use the stock bronco manifolds?
76MaBronco
Bronco Guru
More pics...
1. Explorer cross member trimmed
2. Other side
3. Whole Enchalada
4. Additional metal welded on (but not finished)
1. Explorer cross member trimmed
2. Other side
3. Whole Enchalada
4. Additional metal welded on (but not finished)
Attachments
76MaBronco
Bronco Guru
what shifter are you using? column or floor?
I have a floor now, I plan on keeping it, just relocating it. I'd like to go column, but that's more money than I want to spend right now...
are you planning to use the stock bronco manifolds?
I had to buy new stock manifolds as the originals were toast (and they were only $50-60 each). I plan on using the entire exhaust system including the cats and the new muffler Tasker had put on a little while ago. If it wasn't so new, I'd be putting a Flowmaster Super 40 on it, but again, I have it and it's free, so I'm using it...
Trying to skimp at this stage as some rather large items need to be purchased (including a car for me and a new refrigerator %))
Similar threads
- Replies
- 23
- Views
- 4K
- Replies
- 6
- Views
- 913


