• Welcome to ClassicBroncos! - You are currently viewing the forums as a GUEST. To take advantage of all the site features, please take a moment to register. It's fast, simple and absolutely free. So please join our community today!
    If you have problems registering or can't log into your account, please contact Admin.

Tin and Tar - First Time 68 Bronco Resto

74 Bronco Billy

Contributor
Sr. Member
Joined
Jul 4, 2016
Messages
791
So inspiring, just finished reading. I’m motivated again, thanks for your time putting in the build updates. :cool:
Your truck looks awesome! ;D
 
OP
OP
rydog1130

rydog1130

Contributor
Bronco Guru
Joined
Jun 19, 2014
Messages
4,121
So inspiring, just finished reading. I’m motivated again, thanks for your time putting in the build updates. :cool:
Your truck looks awesome! ;D

Thanks! It’s been a pretty rewarding experience! You def have to have a love for this stuff! Hang in there and hope you get your truck done!
 
OP
OP
rydog1130

rydog1130

Contributor
Bronco Guru
Joined
Jun 19, 2014
Messages
4,121
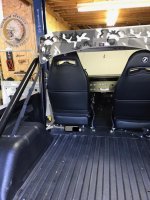
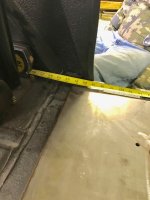
I spent all last week testing out paints and making parts for the store I didn't have time to work on the truck. This week I have all the steel, actuators, wires etc to start building my transfer seat. Im going with a 4 link style system that pivots on a 1.25" dom tubing driven by a 1000lb electronic actuator. It will be mounted/welded to 3/16" base plate that will also replace my seat bracket. I sketched up a few "rough" plans because I quite can't remember the dimensions of the other steel I bought but here are a few pics. It'll probsbly make more sense once its in the truck and I can get some pics but I'm hoping to crank this project out this week along with all my other things on the list!

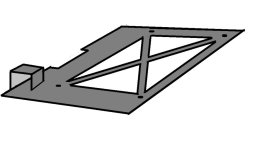
base plate, the box on back is to raise my lap belt box/mount out of the way for the drive axel/rod that will rotate when pushed by the actuator
base plate.jpg

going to steal this transfer seat platform design so I can flip it back along the quarter panel so that its out of the way
IMG_0719.jpg

Just a rough sketch of the 4 link hinge system that will keep the transfer seat parallel as it lowers/raises
lift.jpg

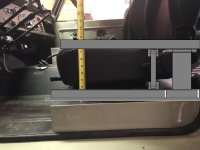
This just shows how the actuator will sit back behind the seat far enough that I don't loose my ability to slide my seat back and fourth on the tracks
back lift.jpg
 
OP
OP
rydog1130

rydog1130

Contributor
Bronco Guru
Joined
Jun 19, 2014
Messages
4,121
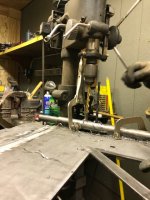
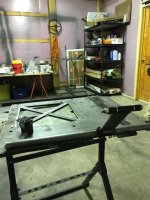
I started constructing my transfer seat/mechanical sliding board this past week and its been a challenge. Mostly due to the people helping me out. A few wrong measurements here and there really set the progress back when you have to add metal or run back and fourth in to town to get the right hardware.

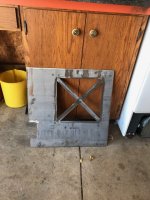
First we mapped out all the bolt holes and traced the old sear bracket on to the new seat plate that will hold the entire system. Luckily all those measurements were right...sorta
IMG_1872.jpg IMG_1880.jpg

As you can see the base plate needed to be about 4" longer than what was cut, sort of my fault for not catching that when my buddy was helping me measure things out. Oh, well zipped off a 4x19" strip and welded it together.
IMG_1988.jpg IMG_2005.jpg

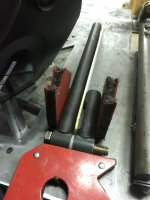
I had my dad measure the dom tubing for my top hinge before heading to the hardware store and he said 1/2" od x 5/16"id....I think his eyes are going bad because it was really 3/4" od x 3/8" id. Sooo had to run back into town and swap out for bigger bolts for my hinges.
IMG_2023.jpg IMG_2027.jpg

I was able to get the main drive shaft complete along with the main support and hinge. I may make a few mods like lengthening my hinge on the right side and also figuring out a heavy duty hinge that will allow me to flip the transfer seat platform back in between the roll bar and seat when not in use. hopefully next week i'll have something that resembles my plans...lol
 
OP
OP
rydog1130

rydog1130

Contributor
Bronco Guru
Joined
Jun 19, 2014
Messages
4,121
Took me awhile to figure this out but I think it will work. I took the precious moments of down time at work to do some tech/spec drawings at work on MS Paint of the rest of my parts I'll need to fab up for this thing to hopefully work.

This will be my hinge just behind the seat platform that will allow me to flip it back in between the seat/rollbar and quarter panel area when not in use
seat hinge.jpg

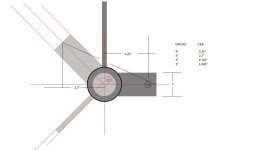
This is my mounting tab that connects the actuator to the drive shaft on the lift. I had to figure out that when the lift is fully down how big/long I could make this tab as it will travel into the little open nook of the fuel filler panel and striker post brace
STROKEVSTABLENGTH.jpg

This was the hardest part which was designing the 4 link bar that will keep the seat level as it travels up and down
one inch side view.jpg

If you see anything that may not work let me know lol...like my profile says "amateur engineer"
 
OP
OP
rydog1130

rydog1130

Contributor
Bronco Guru
Joined
Jun 19, 2014
Messages
4,121
did a little CAD (cardboard assisted design) and realized this design will not work. Once it gets past being parallel with the ground it will bind because the main pivot arm won't be long enough

IMG_2071.jpg IMG_2072.jpg


I did a redesign though and I think I'll be good with this design!
sideview revised.jpg

I'll keep you posted!
 

bronkenn

Contributor
Bronco Guy
Joined
Apr 27, 2017
Messages
2,688
Loc.
Southeast Ohio
That is a good looking challenge you got going there. It is nice to be able to start something from scratch and seeing the finished result. Good idea to use the "CAD" method to mock it up. I'm sure it is going to work great when your done. Ken
 

chuckyb

Contributor
Sr. Member
Joined
Oct 25, 2016
Messages
952
Hi Ryan- as hard as you are working on this, I know you will get it right when it’s all said and done. I believe what you are documenting here is really going to help someone else down the line that is looking for this type of set up. Keep up the good work!!
 
OP
OP
rydog1130

rydog1130

Contributor
Bronco Guru
Joined
Jun 19, 2014
Messages
4,121
Thanks guys, I've always enjoyed building things so this has been fun and challenging at the time. Hopefully ill have something that resembles a seat this upcoming week.
 

sprdv1

Contributor
REBEL
Joined
Mar 8, 2007
Messages
81,985
Thanks guys, I've always enjoyed building things so this has been fun and challenging at the time. Hopefully ill have something that resembles a seat this upcoming week.

You got this brother....
 
OP
OP
rydog1130

rydog1130

Contributor
Bronco Guru
Joined
Jun 19, 2014
Messages
4,121
Ok, so as promised I was able to get some work done on this thing and come up with a name for it. Well, as you can see my one linkage arm looks funky, lol! Well that's because when laying out the numbers I forgot 3/16" on both ends when figuring out the total length, so instead of the holes being 7.5" on center, my neighbor with the shop cut it bout 3/8" short. This lift is now dubbed the "M2C2 Bronco Lift" short for Measure twice, cut twice ha! Anyways, I made his quick mod just to make sure the 4 link was still going to work, which it did and I had a new one made!

IMG_2108.jpg IMG_2119.jpg

These are my seat arms and hinge so when Im in I can fold my transfer platform in half then fold this back towards the seat and roll bar.
IMG_2122.jpg IMG_2116.jpg

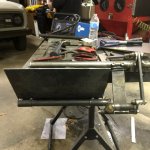
Here's the backbone of all the pieces together working smoothly
IMG_2124.jpg IMG_2126.jpg

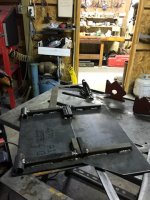
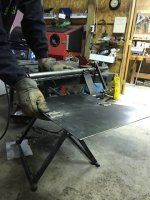
This is half of the transfer seat platform and as you can see it will be able to fold up once the lift is in the up position. You can also see how the transfer plate arm will fold back as well
IMG_2131.jpg IMG_2143.jpg

Got my transfer seat platform done and it will e be completed with some thin dense foam and a leather cover to hide the hinges.
IMG_2175.jpg IMG_2176.jpg

Really all that's left is to weld in the stop points on the folding parts so they stay at a set position when weight is applied and hook up the actuator. Hoping it will hold my fat ass (fingers crossed!"
 
OP
OP
rydog1130

rydog1130

Contributor
Bronco Guru
Joined
Jun 19, 2014
Messages
4,121
You get your seat mocked up in the bronco yet?
It’s close Ben, I was having some issues with it riding smoothly and level on it’s intended path of travel. It’s almost there though. Once that’s set to hi I’ll throw some paint on it and upholster it. I’ll jeep you all posted
 

LUBr LuvR

Contributor
Bronco Guru
Joined
Dec 31, 2015
Messages
2,078
It’s close Ben, I was having some issues with it riding smoothly and level on it’s intended path of travel. It’s almost there though. Once that’s set to hi I’ll throw some paint on it and upholster it. I’ll jeep you all posted


Ryan, did you just say “Jeep” in a Bronco post.....? (dang that auto correct%))
 
Top