• Welcome to ClassicBroncos! - You are currently viewing the forums as a GUEST. To take advantage of all the site features, please take a moment to register. It's fast, simple and absolutely free. So please join our community today!
    If you have problems registering or can't log into your account, please contact Admin.

Tin and Tar - First Time 68 Bronco Resto

OP
OP
rydog1130

rydog1130

Sponsor/Vendor
Bronco Guru
Joined
Jun 19, 2014
Messages
4,091
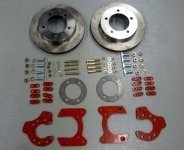
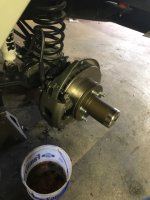
Project disc brake is almost done. I was able to get new bearings pressed on at the local shop. I replaced the seals and took advice by adding some high temp red rtv sealant before seating the seals. I also pulled the rear diff apart and checked the carrier and it looks great.
IMG_8686.jpg
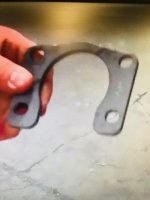
Cleaned out all the old oil and replaced the gasket and got it all bolted back together. I was concerned with the rear disc kit as a you tube video I watched stated you don't need the factory bearing retaining plate but this U shape one provided in the kit. I started to freak out because my kit didn't have that part and I had the bearings pressed without the factory style plate. It took about 20 minutes of tearing the garage apart looking for those parts when I decided maybe I should read the directions instead of soley relying on the video.
IMG_8674.jpg IMG_8673.jpg

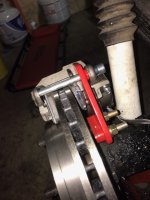
Well, to my relief the main red bracket that bolts on to the retaining plate bolts doubles as the bearing retaining plate. Once I got that figured out it was breeze, ended up using 83 front monte carlo calipers (parking brake delete option). I had to rotate the bracket to get the calipers at a 45 degree to the axel. If I was running el dorado calipers w/ the ebrake I could have left it at a 90 shown in the first pic below! Just need to cut and reflare my stainless lines and I'm good to go on the rears

IMG_8704.jpg IMG_8807.jpg IMG_8820.jpg

I was admiring my disc conversion when something caught my eye on the fronts. I see if you can guess whats wrong....
IMG_8830.jpg IMG_8838.jpg


yup, those are both Right front calipers. Luckily I noticed it and took it off before heading to Detroit for the weekend. Jeffs is on the way and even though they would've sent me a new one on the house it gave me an excuse to pop in and say Hello to jeff and his son in law Pat. I'm hoping next week Wednesday and Thursday to be wrapped up with this. It's taken a lot longer then expected. I also found a better and FASTER 1000 lb electronic actuator for my lift seat! That should be here Monday so I'll have to relocate the brackets as the new actuator is a little longer than the previous one!
 
OP
OP
rydog1130

rydog1130

Sponsor/Vendor
Bronco Guru
Joined
Jun 19, 2014
Messages
4,091
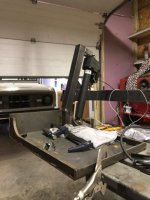
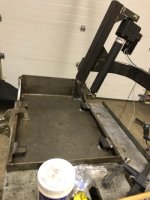
This last week was pretty busy with wrapping up the brake issues and moving forward on this transfer seat project. I got the new 1000 lb actuator installed and I'm already thinking I may need to shorten the length of my brackets so they don't hit the rocker panel. Its going to be close.

IMG_9468.jpg

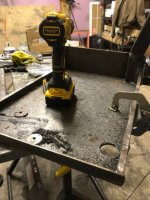
Cut access holes to allow for wrench room to mount the seat slides
IMG_9604.jpg IMG_9626.jpg

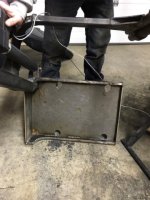
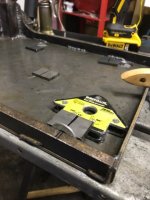
Mounting tabs for the seat slides welded in
IMG_9635.jpg IMG_9655.jpg

I added one more reinforcement on the main arm. I was getting a small amount of twist when weight was applied to the platform. This should solve it plus my seat can still recline.
IMG_9697.jpg IMG_9708.jpg

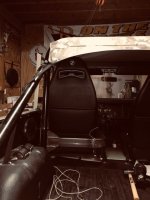
Heres a few pics of it in the truck. It's not bolted in to the roll bar here as I ran into the seat belt bracket issue but hopefully next week we'll have it all figured out. I'll need to make a bracket that mounts to my wheel tub which will hold the actuator that will push and pull the seat out and in of the vehicle.
IMG_9727.jpg IMG_9728.jpg

I am going to need to flip my bracket for my seat belt. This will give me enough room for my seat tray, the new longer actuator tabs are interfering here with the bolt.
IMG_9732.jpg
 
OP
OP
rydog1130

rydog1130

Sponsor/Vendor
Bronco Guru
Joined
Jun 19, 2014
Messages
4,091
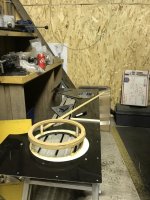
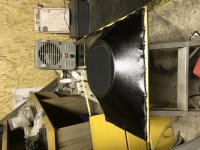
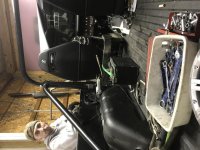
Yesterday got some work done, have the seat back in the car. I was worried the new brackets were going to interfere with the rockers but theres plenty of room. I also started on glassing a new speaker enclosure on my inner quarter fiberglass panel. Anyone that wants to see the latest video on the seat with the new actuator heres the youtube link https://www.youtube.com/watch?v=hXmDOkCJiJQ

IMG_0164.jpg IMG_0171.jpg

Today since I'm snowed out of getting to the work shop I've been trying to figure out how to mount my actuator that will swing the lift in and out. Definitely struggling yesterday!
IMG_0176.jpg

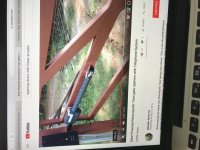
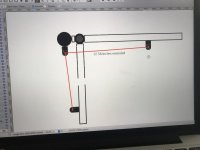
After watching a few youtube videos i think I got it...We were trying to mount it to to the wheel tub but it needs to be on the roll bar. Going to get back at it tomorrow and hopefully figure it out. The drawing is something I did to kill time since its to windy to try and fish...
IMG_0188.jpg IMG_0248.jpg
 

Howard2x4x4

Contributor
Bronco Guru
Joined
Apr 19, 2014
Messages
2,465
Ryan, you have amazing problem solving skills and perseverance! Keep at it, Amigo!
 

kylakekevin

Contributor
Bronco Guru
Joined
Jan 11, 2017
Messages
1,292
Rydog It is coming along nicely! Once you get the driver side figured out start thinking about the passenger side. I know one little lady that would quit complaining about the bronco setting so high if she had one of those seats. I see a market for these.;D
 
OP
OP
rydog1130

rydog1130

Sponsor/Vendor
Bronco Guru
Joined
Jun 19, 2014
Messages
4,091
Rydog It is coming along nicely! Once you get the driver side figured out start thinking about the passenger side. I know one little lady that would quit complaining about the bronco setting so high if she had one of those seats. I see a market for these.;D

Yeah I thought about the idea of making them available but the frame is pretty heavy i bet its about 80lbs ...shipping would get you and def some fabrication skills needed on the other parties end to put it together.
 
OP
OP
rydog1130

rydog1130

Sponsor/Vendor
Bronco Guru
Joined
Jun 19, 2014
Messages
4,091
Here is the latest update, actuators are all in place and remote was hooked up to see how it works. Seat swings out and lowers like it should. I need to fix the angle of the actuator bracket on the roll bar as I feel its causing that creaking noise which didn't start until after the 6 time we ran it in and out and shot the video. Really all that's left is to route and bundle the wiring to the remote and mount it behind the fiberglass panel, mount the latch that will help secure the seat, tie the roll bar in the frame, cerakote it, then reinstall it!
Latest VIDEO: https://www.youtube.com/watch?v=kXzDdVu6Aec

Last things overall to do is get my sub mounted, change out my c4 dual port vac modulator to a single port, change my speedo gear, and get my sending unit to work, and fit my rampage soft top....THEN IM DONE....should be ready to show off at super cell!
 
Top