Below are my notes on the install of the vintage air 751150 that I finished this weekend. System blows cold and looks very nice. I will be happy to expand on any of the items if needed.
Installation of the new VA ac system (kit 751150) for a bronco. Overall the quality of unit looks good. I immediately ran into an issue when I learned the compressor bracket will not work if you have power steering. I needed additional brackets, This is not noted on the VA web site or install manual. So I moved to the inside and started installing the evaporator unit and what a PAIN. Spent many hours trying to get the evaporator in but gave up after many hours and pushed it off to the next day. Please note I was installing with the dash in due to having a full roll cage that I did not want to remove for the a/c install. In my previous bronco I installed a classic air system Summer 2012. The install of evaporator was much easier and much more thought out.
To get the VA evaporator bolted up, I used one of the nuts/washer from the original heater and put it on the stud of the evaporator bracket while it was out. I then took a nylon string and put a knot over the stud and behind the nut/washer and tighten the nut down. I threaded the string through the hole where the stud goes and pulled it tight. I used an longer screw (about twice the length VA provide). Once I got the screw started into the bracket I pull the string until the stud made through the hole . Then tightened everything down.
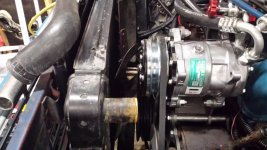
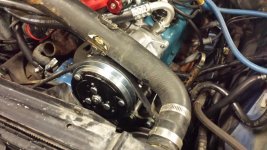
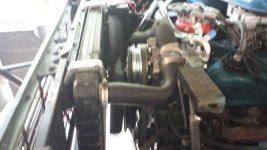
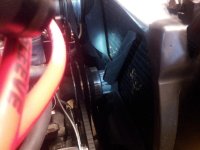
Compressor install, the VA system puts the compressor on the driver’s side and requires an additional bracket (not included) if you have power steering. Once I received the additional brackets, they went on easy but I quickly ran into issues. With the compressor on the driver side the stock radiator hose, fan and fan shroud do not fit .. First the stock fan hit the compressor, so I put washers behind the fan to push it closer to the radiator and away from the compressor. That fixed the fan hitting the compressor but it push the fan to far forward and now the fan hits the shroud, shroud is now in pieces. The stock radiator hose was obviously not a consideration for the VA engineers. Nowhere is it documented that you will need to fabricate your own hose. So I was off to the parts house, third trip that day.. The parts people graciously lets me rummage through their radiator hoses and I get lucky. I found a hose that I can easily modify to work, It took the hose I found, a 1.5 in to 1.5 in coupler and the original hose now modified. The hose is very similar to what you need for the explorer serpentine conversion. Fit 2 of the 3 issues, but i did not have a spare fan shroud to fix the 3rd issue.
Pros
Brackets for condensing coil bracket better thought out then classic air
Hoses come ready to use (crimped)
Like the looks of the under the dash venting, it does not appear that with be any issue for legs.
Electronic controls are very nice
Blows cold.
Unfortunately at this point there are more cons then pros.
Cons
1.Installation of the evaporator is way too difficult.
2. The evaporator brackets need to be reshaped to fit to the evaporator. The front also needed reshaping to bolt to the bronco.
3. Running the heater and ac hoses through the stock air vent is a very bad idea, it is impossible to get the hoses on the evaporator then get the evaporator to line up for installation and get the hose back in the vent.
4. Control knobs are cheesy, I do not like putting stickers on the dash
5. New glove box is very small (useless)
6. Regular din size radio requires very special attention to the plenum install. The instruction have you using some of the original holes to mount. In my case that did not work, I had to push the plenum back as far as possible, drill new holes and carefully arrange the cables. It is a very tight fit.
7. VA does not include all of the needed engine brackets if you have power steering and it id not documented.
8. Compressor hit factory fan shroud.
9. Factory fan hit compressor
10. need to fabricate a radiator hose to work.
Issues.
Wiring color chart was not correct, shows drk blu to compressor (the wiring is lt blue), diagram shows lt blu to relay from ecu, it is drk blu.
Instructions, there is not an overall start here for instructions. The instructions are broke down into many sections which leads to one figuring out a true step by step process. Many things are overlooked in the instructions, like, the fan, radiator hose, steps to get the evaporator installed. In short VA leaves a lot of room for interpretation and omits a lot of information.
VA needs to add language to the Notes on the VA web page to include additional brackets needed if you have power steering
http://www.vintageair.com/6677fordbronco.asp
VA need to address the, fan, fan shroud and radiator hose issue if they want to call this a kit.
From the VA install page
NOTES:
1. Some installations may require additional engine pulleys not
included with kits.You must provide pulleys, v-belts, heater hoses and refrigerant.
2.Bronco Note: Contact your sales rep for specific Bronco chassis/engine combinations.
3.We recommend using our heavy duty fan blade and shroud
32066-LFF 1966-77 Bronco 6cyl. Fan Shroud
32067-LFF 1966-77 Bronco V8 Fan Shroud
As mentioned I installed a classic air system (summer 2012) in an early bronco. Much of the comparison is based on that install.


