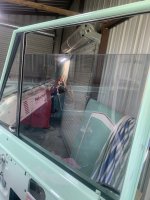
Its been a labor of love, wait till you see the green ranger interior that is going in it!Wow, thanks for bringing her back to life. I love the color and where you are going with this!
Community
Message Forum
Photo Gallery
Event Calendar
Book Reviews
Bronco Wallpaper
Bronco FAQ
Link Back to CB!
Photo Gallery
Event Calendar
Book Reviews
Bronco Wallpaper
Bronco FAQ
Link Back to CB!

Buy / Sell


Bronco Tech
3 Arm Wiper Setup
Fix Motor Mount
Roll Cage Braces
Throttle Body 65mm
Wheel Alignment
Heat Riser Replacement
Vent Window Repair
Center Console Mount
Straighten Bumper
Ford 6R80 6 spd
More Tech...
Fix Motor Mount
Roll Cage Braces
Throttle Body 65mm
Wheel Alignment
Heat Riser Replacement
Vent Window Repair
Center Console Mount
Straighten Bumper
Ford 6R80 6 spd
More Tech...

Install the app
-
Welcome to ClassicBroncos! - You are currently viewing the forums as a GUEST. To take advantage of all the site features, please take a moment to register. It's fast, simple and absolutely free. So please join our community today!If you have problems registering or can't log into your account, please contact Admin.
You are using an out of date browser. It may not display this or other websites correctly.
You should upgrade or use an alternative browser.
You should upgrade or use an alternative browser.
Out of paint and time to ASSEMBLE!
- Thread starter trailerjack
- Start date
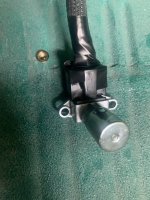
My work schedule has been crazy so didn’t get out to the shop but for 20 minutes today. I tested all the lights and wasn’t getting headlights but had power to the dimmer switch. Turns out the switch that came with my painless harness was bad. Switched it out with another one I had and problem solved. Also i bought these little files on Amazon and have been carefully cleaning up the holes for the trim and emblems. They work pretty well.
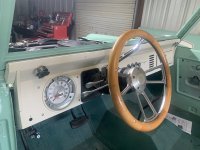
Also here’s a pic of the dash for anyone interested.
Also here’s a pic of the dash for anyone interested.
Attachments
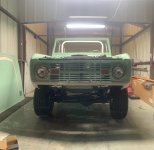
We got lights.
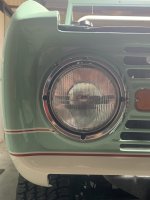
Also I got some questions about why u wrapped the ranger stripes around to the front. Just wanted to try something and had the top ones terminate where the chrome headlight ring goes. Prob not for everyone but I think it looks pretty clean.
Also I got some questions about why u wrapped the ranger stripes around to the front. Just wanted to try something and had the top ones terminate where the chrome headlight ring goes. Prob not for everyone but I think it looks pretty clean.
Attachments
mhinchliffe
Jr. Member
- Joined
- Dec 21, 2018
- Messages
- 110
Quick question..........How long has this project taken? Finished product look GREAT!
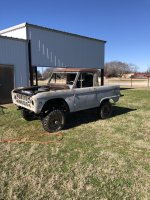
Thanks so much. So here’s a pic of it the day I got it in January 2019. I did a bunch of work on it, replaced a lot of the body panels. Then COVID hit and I was working all the time (ICU nurse) and it sat. Then I sent it to a body shop where it was sprayed with epoxy primer and then sat for a year and a half. I picked it up after getting tired of waiting, rewired it, did all the body work myself and then had another guy paint it. Hasn’t been the easiest journey but we’re getting close. Man my kids were so small back then!Quick question..........How long has this project taken? Finished product look GREAT!
Attachments
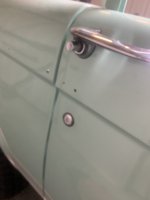
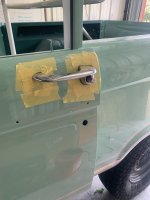
Was able to install the door handles and locks today and not those were a booger! They did not want to fit correctly and I had to “tap” the inside of the door to get the drivers handle to go in all the way. The locks work and i had to use a bunch of different rods to make them work. Thankfully i had saved all my old parts.
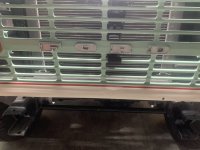
Also the FORD letters on the front- Do you think they need some color - maybe red?
Also the FORD letters on the front- Do you think they need some color - maybe red?
Attachments
Red will definitely make the letters pop more. I think they look good that wayWas able to install the door handles and locks today and not those were a booger! They did not want to fit correctly and I had to “tap” the inside of the door to get the drivers handle to go in all the way. The locks work and i had to use a bunch of different rods to make them work. Thankfully i had saved all my old parts.
Also the FORD letters on the front- Do you think they need some color - maybe red?
Was able to install the door handles and locks today and not those were a booger! They did not want to fit correctly and I had to “tap” the inside of the door to get the drivers handle to go in all the way. The locks work and i had to use a bunch of different rods to make them work. Thankfully i had saved all my old parts.
Also the FORD letters on the front- Do you think they need some color - maybe red?
I think the red will look real sharp.
Also the FORD letters on the front- Do you think they need some color - maybe red?
red would look nice and complement the pinstripe and red on the bronco sport badge. i used red testors paint to fill my original letters in. it worked great
I think the red will look real sharp.
X3 on the red letters. Will go nice with the pin stripe.
red would look nice and complement the pinstripe and red on the bronco sport badge. i used red testors paint to fill my original letters in. it worked great
Red letters it is! @Shimmy answered my question on what paint to use! Thanks everyone!
OK, so this is been kind of a mess trying to figure out. My doors are 1968 doors with the removable window frames. When I went to install the new window felt kit they would not work with the frames. I ended up having to shave down the window felt notch that goes in and was able to set, the screw through both sets of threads, however, I think it will probably be a better idea to drill out the threads on the track and run a bolt all the way through with a nut on the other side.
These little things take such time and I should’ve marked up the frames earlier, but I didn’t have the money for the Felts back then so I just pushed ahead.
These little things take such time and I should’ve marked up the frames earlier, but I didn’t have the money for the Felts back then so I just pushed ahead.
Attachments
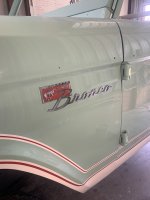
With my limited time before work I was able to get the Bronco badges on today. I used these little def tapping nuts because those other clips seemed like it was gonna be real tight and i like the idea of being able to take rhem off easier.
Attachments
Today I summed up the energy to install the door glass and OH MY GOSH what a pain it was and unfortunately I ended up scratching the window frame a bit.
The window is an absolute beast to roll up and down so I’m not sure what the deal is but will lube up everything and try to diagnose tomorrow.
The window is an absolute beast to roll up and down so I’m not sure what the deal is but will lube up everything and try to diagnose tomorrow.
Attachments
Is it possible that the new weatherstripping is putting excessive pressure on the glass that the old weatherstripping was worn enough that the window went up and down easier? Just a thought.Today I summed up the energy to install the door glass and OH MY GOSH what a pain it was and unfortunately I ended up scratching the window frame a bit.
The window is an absolute beast to roll up and down so I’m not sure what the deal is but will lube up everything and try to diagnose tomorrow.
Randy
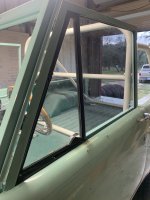
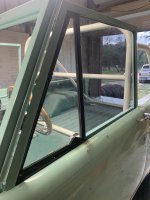
Vent windows in. Much easier to put in with the lift off window frames.
Also sprayed all the internals with lithium grease and the window tracks with this silicone and it’s all flowing real nice!!!
Also sprayed all the internals with lithium grease and the window tracks with this silicone and it’s all flowing real nice!!!
Attachments
Yeah I think you are spot on. Some silicone spray helped a ton.Is it possible that the new weatherstripping is putting excessive pressure on the glass that the old weatherstripping was worn enough that the window went up and down easier? Just a thought.
Randy
Similar threads
- Replies
- 1
- Views
- 195
- Replies
- 53
- Views
- 3K
City: Tampa
Price: $215000
- Replies
- 16
- Views
- 1K
- Replies
- 0
- Views
- 208


