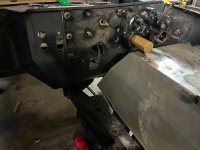
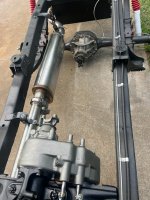
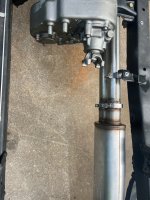
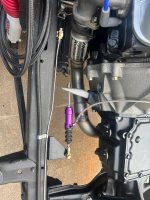
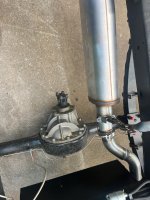
Mocked up Hydroboost. Moved it over 11" from stock MC location. Sits over driver's side fender now. Made a cad drawing of 1/4" plate to support it all on the firewall and had it burnt out on a burn table. Modified the pedal assembly with longer shaft and pinned the brake pedal boss to the shaft with a hardened pin. clutch pedal floats on the shaft, so still able to use clutch pedal and rod. Still need to add bronze bushing in the support at the end of the shaft, lengthen the HB actuator rod, and weld the lever to the shaft. Got the idea from a couple members on here, Spaggyroe and Madgyver.


Community
Message Forum
Photo Gallery
Event Calendar
Book Reviews
Bronco Wallpaper
Bronco FAQ
Link Back to CB!
Photo Gallery
Event Calendar
Book Reviews
Bronco Wallpaper
Bronco FAQ
Link Back to CB!

Buy / Sell


Bronco Tech
3 Arm Wiper Setup
Fix Motor Mount
Roll Cage Braces
Throttle Body 65mm
Wheel Alignment
Heat Riser Replacement
Vent Window Repair
Center Console Mount
Straighten Bumper
Ford 6R80 6 spd
More Tech...
Fix Motor Mount
Roll Cage Braces
Throttle Body 65mm
Wheel Alignment
Heat Riser Replacement
Vent Window Repair
Center Console Mount
Straighten Bumper
Ford 6R80 6 spd
More Tech...

Install the app
-
Welcome to ClassicBroncos! - You are currently viewing the forums as a GUEST. To take advantage of all the site features, please take a moment to register. It's fast, simple and absolutely free. So please join our community today!If you have problems registering or can't log into your account, please contact Admin.
You are using an out of date browser. It may not display this or other websites correctly.
You should upgrade or use an alternative browser.
You should upgrade or use an alternative browser.
Finally getting started
- Thread starter hunter1
- Start date
Finally rolling! Brought it out of the garage this morning after a few months of putting axles in it, disc brakes and fitting a hydroboost mod in it. Sits a little high, but hope it settles enough to my liking. have adjusted body gaps some more and installed hood gas struts. Put some old wheels and tires on it (32 11.50 15) to see how it would sit. Plan on 33 9.50 15's. I believe they'll be OK under it.
![IMG_1519[1].jpg IMG_1519[1].jpg](https://classicbroncos.com/forums/attachments/img_1519-1-jpg.915792/)
Finally rolling! Brought it out of the garage this morning after a few months of putting axles in it, disc brakes and fitting a hydroboost mod in it. Sits a little high, but hope it settles enough to my liking. have adjusted body gaps some more and installed hood gas struts. Put some old wheels and tires on it (32 11.50 15) to see how it would sit. Plan on 33 9.50 15's. I believe they'll be OK under it. View attachment 915792
- Joined
- Jan 6, 2009
- Messages
- 239
Finally rolling! Brought it out of the garage this morning after a few months of putting axles in it, disc brakes and fitting a hydroboost mod in it. Sits a little high, but hope it settles enough to my liking. have adjusted body gaps some more and installed hood gas struts. Put some old wheels and tires on it (32 11.50 15) to see how it would sit. Plan on 33 9.50 15's. I believe they'll be OK under it. View attachment 915792
Looks like it's coming along nicely
Looking good Hunter1.
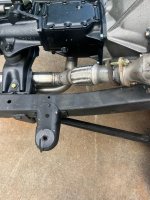
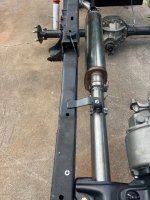
Thanks! This was not a kit, just straight sections and bend pieces together and made to work. The muffler is about 25” I believe, pretty long but fit nicely. The flex pieces were bought separately as well. Curious to see if it will be too loud.
Been awhile but finally getting some paint on the tub. Painted the bottom and engine bay and got the tub back on the frame. I’m so ready to get this thing done. Been 5 long years getting this far along.


Got the radiator and shroud mounted, the steering column and shaft, and the hydroboost and the clutch master cylinder installed and bled today. I really like the feel of the clutch pedal. It is firm from the minute you push down on it. Looks like plenty of stroke as well, which I was initially worried about. I had the wife push the pedal down while I was underneath seeing if the clutch disengaged, which it did. Also, anyone have pics of how you routed the throttle cable, and did you go through the original linkage hole?


Worked on it a little this weekend and got the throttle cable installed, and the pedal modified, all my HB hoses made and installed into the new PS reservoir, most of the engine compartment wiring done and the dash modified with flip down hinges and switches and wiring installed.


After a 5-1/2 year ground up build, the Bronco moved under power today in the garage. Was raining here today or I would have taken it down the road and back. Installed the steering column, shifter linkage, adjusted the track bar, located the drag link saddle and welded it in place, adjusted the toe, secured the air box location, and re-routed the fuel supply hose. Fired it up and shifted into first and reverse and it moved!

Still need to finish wiring the tail end and get the temp sending unit changed. I had an old one hear and it will not work. Guage works when I ground it, but not hooked to the sending unit. Same thing for the oil pressure gauge, though I did buy a new sending unit for it. Engine is grounded in two different spots, so pretty sure it's the sending units. Also, couldn't get the turn signals to work although the emergency flashers did. must be in the column?
Excellent. It’s always exciting when you get to the point it will move on its own.
Been pretty busy with work and the Holidays but found a little time the last couple of days to get some stuff done. Installed the leaf spring shims and installed the rear disc brake kit I got last month. Pretty straight forward install although I had to take the pass side parking brake lever off and screw the shaft out a little to get the piston in far enough to get the caliper over the disc. Will need to get a spacer and new bolts for the shocks where I had to move them inside the bracket to clear.


California Orange. Closest thing I could find to Tennessee Vols orange.Looking good, what color orange is that?
Looking good! starting and moving always a good motivator 
FYI: There is now a 33x9.50-15 available once again Kenda has them in their RT line. I've had my hands on the tire unmounted, they are not just another cheap import tire, they are really nice, made by from what I have a seen, a company with integrity, not just a flash in the pan putting out a crappy product or rebadging something and selling it, they are doing their own development.
FYI: There is now a 33x9.50-15 available once again Kenda has them in their RT line. I've had my hands on the tire unmounted, they are not just another cheap import tire, they are really nice, made by from what I have a seen, a company with integrity, not just a flash in the pan putting out a crappy product or rebadging something and selling it, they are doing their own development.
Similar threads
- Replies
- 2
- Views
- 263


