• Welcome to ClassicBroncos! - You are currently viewing the forums as a GUEST. To take advantage of all the site features, please take a moment to register. It's fast, simple and absolutely free. So please join our community today!
    If you have problems registering or can't log into your account, please contact Admin.

1970 Bronco Wheeler

pocketlock

Contributor
Jr. Member
Joined
Oct 29, 2022
Messages
134
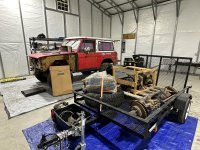
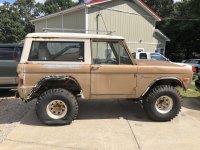
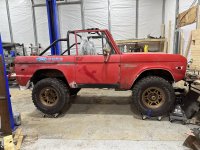
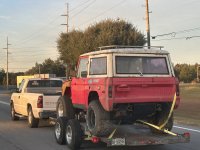
Figured I would post my progress on this 1970 Bronco. It belonged to @NC-Fordguy before he passed away and I had been working with him on it when he wanted to turn it into a daily/weekend warrior.
IMG_9711.jpeg
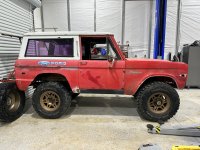
In keeping with his ideals, I needed a wheeling rig since I determined my 1986 Bronco with an LS, one tons and 40s would be too big for any trails in ENC. So that is what this is going to be. Not a perfect rebuild or restomod. It is a wheeling rig. Plan is to get it on the trails and upgrade as we go. Plan is front 44/ rear 9", 35x12.50x17 tires. 1" Body lift, 3.5" lift, 302/NP435/Np203/Dana 20 and eventually 4.88 gearing. I got it home and started cleaning it and looking through the parts pile that was left after we had been in the process of repairing it before Ed got bad off.
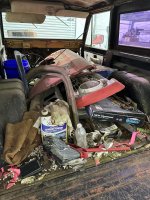
IMG_3348.jpeg IMG_3344.jpeg
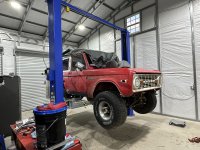
Once I got it cleaned up and assessed I decided it would be best to finish PORing the frame that we had started. I used my nice new lift to pull the body and got the frame all cleaned up. Swapped in a Dana 44 while I was at it.
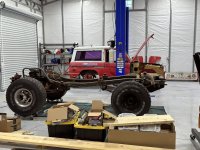
IMG_3540.jpeg IMG_3487.jpeg
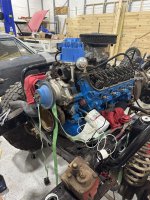
Got the frame put back together and started putting the drivetrain in. Ed had purchased this NP435/NP203/Dana 20 setup from a member here with plans to build an "ultimate adventure" capable rig. Since his wife didn't have plans to use it in her rigs, she sold it to me with the Bronco. I got some 35s and some fancy wheels put on. I replaced the Passenger side kick panel but cutting out the rust and plug welding the new panel to the existing panel to strengthen everything again. (Again this is a wheeling rig not a restoration, my goal was to make it strong and not spend too much trying to make it perfect). I still need to replaced the drivers side kick panel but need to get an air setup in my shop to use the diegrinder to locate the spot welds. Since I am in a holding pattern with that I put the top of the engine back together and installed the fuel tank Ed had for this bronco. I plumbed everything with AN6 lines so that the lines were in place if I ever wanted to upgrade to EFI and all I would need to do is swap out pumps.
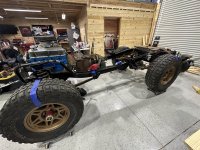
IMG_4008.jpeg
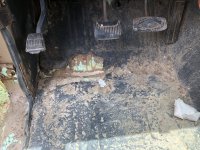
I got that all put together and worked on getting the body put back on the bronco. The shifters were a tight fit so I modified the floor to lift the body straight off the shifters. I will be patching the trans cover once everything is finalized to add some strength back in. I bought some Corbeau Baja RS seats for it after feeling how comfortable they were in a buddies jeep TJ. My wife likes them too which was a major selling point.
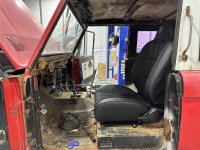
IMG_3750.jpeg
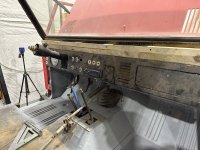
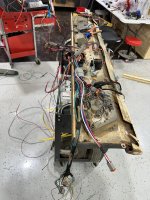
After I got that done I pulled the body back off and decided to start working on replacing the wiring Harness with a universal painless harness (10202). It isn't a perfect replacement but I will be able to swap out connectors and make it work with what the bronco needs.
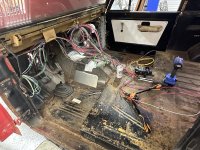
IMG_4010.jpeg
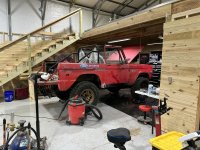
Still plenty of work to be done but it's been a lot of progress in 3 months or so while also getting the new shop setup. Still needs a brake system, steering wheel rebuild, exhaust and finishing the cooling system. Eventually I would like to run P/S and a long arm suspension kit, but for now we will wheel on the helper springs and lift block in the rear with a newer 3.5" spring in the front to replace the coil spreaders it currently has on it.
 

Attachments

  • IMG_3984.jpeg
    IMG_3984.jpeg
    279.8 KB · Views: 124

Speedrdr

Contributor
Not so wise OLD owl
Joined
Nov 27, 2017
Messages
1,523
Loc.
Paris, MS
I’m impressed with your continued work on your friend’s project after his death. Says a lot about your character!!! I need to get busy with mine before my son ends up having to finish it.
Carry on with the good work!

Randy
 
OP
OP
P

pocketlock

Contributor
Jr. Member
Joined
Oct 29, 2022
Messages
134
I’m impressed with your continued work on your friend’s project after his death. Says a lot about your character!!! I need to get busy with mine before my son ends up having to finish it.
Carry on with the good work!

Randy
Thank you, while it’s not 100% his plan, he never wanted it to be a pavement princess either so it being a dedicated wheeling rig would be right along with something he would have enjoyed.

Been working on the wiring harness some more. Bought a Deutsch connectors kit from Amazon ($200 or so) and the crimper for it (another $30). I’ve used these before and they make a great watertight seal. I’m using this to make the harness serviceable/removable without needing to disconnect the headlights, taillights, etc. and making the dash removable without needing to remove the wiring harness. The painless harness has had great instructions so far and even walked me through repinning the headlight harness so I didn’t need to have butt splices everywhere. Got the coils swapped out as well. Sitting a hair high in the front which will hopefully settle a bit, but better than it was before. The rear springs are still stock ones so not much help for now but they have a lift block that should get me by until we can afford a better lift. Threw the body on again so I could check clearance on the shifters and transmission again before I start to tack and patch the tunnel and work on a small center console to cover the shifters. I will work on a little of the trans tunnel tonight and a bit more of the harness (likely making the removable harness for the cluster). Time flies when you’re having fun as they say.
 

Attachments

  • C48B2F09-F7A0-4048-B2C7-263985D5B539.jpeg
    C48B2F09-F7A0-4048-B2C7-263985D5B539.jpeg
    275.2 KB · Views: 35

1969

Contributor
Sr. Member
Joined
Feb 28, 2022
Messages
711
I really like it. Keep up the good work! Much better and more character than all the resto mod 6 figure builds that don’t leave the garage.
 

Speedrdr

Contributor
Not so wise OLD owl
Joined
Nov 27, 2017
Messages
1,523
Loc.
Paris, MS
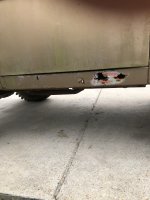
As you can see on my 77, there’s some rot to repair. Trying to get front fenders off to start with so I can figure out where to start.

Randy
 

Attachments

  • AB240735-1E80-455B-8C4F-9CA8BDBE2D4A.jpeg
    AB240735-1E80-455B-8C4F-9CA8BDBE2D4A.jpeg
    198 KB · Views: 48
  • FE4118EF-8909-4EB6-8ECE-18C1BD312A5F.jpeg
    FE4118EF-8909-4EB6-8ECE-18C1BD312A5F.jpeg
    304.1 KB · Views: 47
  • 25B85039-6DAB-41DF-86EC-02BFE8F1B96C.jpeg
    25B85039-6DAB-41DF-86EC-02BFE8F1B96C.jpeg
    253 KB · Views: 45
OP
OP
P

pocketlock

Contributor
Jr. Member
Joined
Oct 29, 2022
Messages
134
As you can see on my 77, there’s some rot to repair. Trying to get front fenders off to start with so I can figure out where to start.

Randy
This one got new floors pans and rockers before I got it thankfully. So most of the rust isn’t terrible.
 

Speedrdr

Contributor
Not so wise OLD owl
Joined
Nov 27, 2017
Messages
1,523
Loc.
Paris, MS
The PO had decided to paint about an inch (yep, a full inch) of bedliner in the tub… up to the windows and top of the firewall. Guess he figured if he couldn’t see the ground, it was fixed. <sigh> it’s a bear to get out.

Randy
 
OP
OP
P

pocketlock

Contributor
Jr. Member
Joined
Oct 29, 2022
Messages
134
The PO had decided to paint about an inch (yep, a full inch) of bedliner in the tub… up to the windows and top of the firewall. Guess he figured if he couldn’t see the ground, it was fixed. <sigh> it’s a bear to get out.

Randy
I can imagine, I've had to clean some up before and it was not fun.

This week i've had the harness in and out a few times. Got the front coils replaced and started to work on patching the trans tunnel for the NP435. The NP203 and Dana 20 twin stick will have removable covers to allow them to drop out from below when I pull the body off. I replaced the drivers side kick panel, not my best work but plenty of weld should keep it strong, I may come back through with some panel bond before I seam seal for peace of mind. Pulled the body back off to finish some of the wiring, Threw an oil filter on and some oil in the engine, leaked oil everywhere because the valve covers gaskets didn't seal like they should have, welded a socket onto the old points distributor and primed the oil pump. Getting a solid 60 PSI, should be good. The priming tool I ordered online didn't seem to want to engage the pump so I had to go the distributor route. Dropped the new HEI distributor in to make sure it would clear my hose fitting and temp sender. Rebuilt the steering column and picked up a universal joint that will hopefully connect the steering shaft and box with a more solid connection that the bell joint or rag joint. I've been working on making my own wiring harness diagram that I can have if I ever need to troubleshoot this custom harness in the meantime. We have some things to payoff in the next few months but hoping I can sneak a few more purchases in to get this on the road. Still need to get brake lines (planning to do stainless/teflon hoses for most of the lines), a power brake kit from TBP, brake prop valve, drop pitman arm, adjustable track bar and headers. Then the last step will be getting my driveshafts modified. Not much, but it feels insurmountable at times. Getting there though, hard to believe we've only had this a little over 4 months.
 

Attachments

  • 805E089D-AB37-4144-885E-4F9709CF9287.jpeg
    805E089D-AB37-4144-885E-4F9709CF9287.jpeg
    202.3 KB · Views: 71
  • 6CB56118-9411-46DB-B5ED-1AD740F2190D.jpeg
    6CB56118-9411-46DB-B5ED-1AD740F2190D.jpeg
    162.8 KB · Views: 66
  • 3A4767BB-267B-447F-AD02-44E58F489A73.jpeg
    3A4767BB-267B-447F-AD02-44E58F489A73.jpeg
    184.8 KB · Views: 73
  • IMG_4063.jpg
    IMG_4063.jpg
    290.2 KB · Views: 70

bronkenn

Contributor
Bronco Guy
Joined
Apr 27, 2017
Messages
2,681
Loc.
Southeast Ohio
Nice work. I might suggest that since you want to save some money to think about using NiCop tubing for your brake lines. Much easier to work with and will save some cash for other work.
 
OP
OP
P

pocketlock

Contributor
Jr. Member
Joined
Oct 29, 2022
Messages
134
Nice work. I might suggest that since you want to save some money to think about using NiCop tubing for your brake lines. Much easier to work with and will save some cash for other work.
I've thought about it and may do the main run from the prop valve to the axle drop in NiCop, but my local hydraulic supplier usually cuts me a really good deal on the hoses and I trust his work more than mine haha.
On another note, i'm going to be installing the distributor once the timing mark comes in next weekend. Just to make sure I have this order of operations correct. I set the engine to TDC combustion stroke, verify it's at 0 on the balancer/indicator. Then advance it to 10 degrees before TDC according to the balancer and drop the distributor in with the relcuctor and contact lined up on whichever spot on the cap I want to be cylinder 1 (not sure if this HEI has it marked or not), then clamping it down should put me at 10 degrees before TDC and I will just need to wire the distributor up in sequence 1-5-4-2-6-3-7-8. Does that sound correct for initial startup? Or do I clamp it down at 0 with the reluctor and contact lined up and adjust the timing once it's warmed up and running with the vacuum advance capped? This is the first time i've set a distributor in with nothing to refernce for position so I just want to make sure I do it correct.
 
Last edited:
OP
OP
P

pocketlock

Contributor
Jr. Member
Joined
Oct 29, 2022
Messages
134
Getting ever closer to cranking it up for the first time to make sure everything sounds like it’s working fine. Picked up a cage for it the other day, nothing amazing but better than the hardtop that could barely support it’s own structure. I had kept the hardtop on to try to maintain the trucks shape while the body was off (and it barely did that). Got the rear lights and fuel wiring done. Finishing up the headlight wiring (some of the wiring is a bit confusing, a lot of piggybacking and grounding off of other fixtures instead of separate ground wires but it’s coming along). Made a spacer for the alternator and a bracket to repair/replace the factory tray for the battery. Simply a plate that I could bolt to what was left of the original that a plastic tray could then bolt to. Nothing amazing but enough to keep a battery in place. Got the front end bolted together with a few rivnuts to replace speed clips and hard to reach nuts. Mocked up the flares for the front but couldn’t quite tell exactly how they needed to go on (just didn’t seem to mold to the body very well). They are fiberglass so I didn’t push them too hard, I may need to end up getting some of the rubber/poly style ones in the future if these don’t seem to work out. All in all not much left, buttoning things up and still need brakes/driveshafts but hoping to fire it up and check how it sounds this week if all goes well.
 

Attachments

  • C3A7AC19-7392-412B-A89E-9938CB2CAF02.jpeg
    C3A7AC19-7392-412B-A89E-9938CB2CAF02.jpeg
    292.7 KB · Views: 30

DirtDonk

Contributor
Bronco Guru
Joined
Nov 3, 2003
Messages
48,743
I set the engine to TDC combustion stroke, verify it's at 0 on the balancer/indicator.
And you are 180% certain that it’s on the compression stroke. Correct?
Just checking…😉
Then advance it to 10 degrees before TDC according to the balancer and drop the distributor in with the relcuctor and contact lined up on whichever spot on the cap I want to be cylinder 1 (not sure if this HEI has it marked or not)
You’re lining up the rotor tip with whichever spark plug terminal you want to be number one.
Then you’re rotating the body of the distributor to line up the reluctor with the stater.

Don’t forget part of this otherwise simple dropping-in procedure is making sure the hex components line up with each other.
That is the oil pump driveshaft in the engine and the matching recess in the distributor shaft.
Probably knew that, but I just wanted to make sure to mention it.
then clamping it down should put me at 10 degrees before TDC
Yeah, no… 🙄
You are basically correct in that presumption, but actual practice in the real world environment usually ends up being at least slightly off from your expectations.
Once the engine is up and running it, you MUST connect the timing light to verify your timing. In fact, I usually just recommend connecting the timing light before you even crank the starter so that just in case you have a helper handy, they can watch the ignition firing even while the engine is cranking.
Saves time…

No matter how many times you might have done this in the past, a new engine with a new distributor is usually a learning process.
You might have to do it 5, 10 or maybe even 15 times before you can simply drop it in and be assured of the ignition timing without a timing light.
In other words, don’t be surprised if you’re 10 or 15° off of your setting this first time!
and I will just need to wire the distributor up in sequence 1-5-4-2-6-3-7-8.
Did you put a new camshaft in it? Did you verify the firing order of the camshaft?
Yes, the old 302 would have been that firing order you posted. But later models, including potentially any with a replacement camshaft, could be the 351 firing order of 13726548 instead.
Does that sound correct for initial startup? Or do I clamp it down at 0 with the reluctor and contact lined up and adjust the timing once it's warmed up and running with the vacuum advance capped?
You are still better off trying to get it a little before top dead center initially so that it starts up easier and runs well while are you are trying to get the timing light connected and timing checked.
And until you have played with this distributor you don’t know if the Ignition fires exactly when the reluctor is visibly centered on the pickup coil, or at some point just slightly before or after.
It should follow normal theory. But you won’t know that until you get it fired up.
Hence the advice of setting it up slightly advanced first.
You’ll know if it’s too far advanced if the starter struggles to crank the engine.

You can see why it’s difficult to do it precisely when setting it statically by eye.
You have three things to line up, well four actually, if you consider the shaft while inserting the distributor. But once it’s actually installed, you have to remove the rotor usually and visibly identify the trigger points. The stator and reluctor.
Once you line those up and reattach the rotor you then have to line the rotor’s tip up with the spark plug contact point by rotating the distributor body.
But by rotating the distributor body you have essentially moved all of these points you had just lined up yet again.
It’s a dance really. Just like setting a carburetor.🙄😩😱
 
OP
OP
P

pocketlock

Contributor
Jr. Member
Joined
Oct 29, 2022
Messages
134
And you are 180% certain that it’s on the compression stroke. Correct?
Just checking…😉

You’re lining up the rotor tip with whichever spark plug terminal you want to be number one.
Then you’re rotating the body of the distributor to line up the reluctor with the stater.

Don’t forget part of this otherwise simple dropping-in procedure is making sure the hex components line up with each other.
That is the oil pump driveshaft in the engine and the matching recess in the distributor shaft.
Probably knew that, but I just wanted to make sure to mention it.

Yeah, no… 🙄
You are basically correct in that presumption, but actual practice in the real world environment usually ends up being at least slightly off from your expectations.
Once the engine is up and running it, you MUST connect the timing light to verify your timing. In fact, I usually just recommend connecting the timing light before you even crank the starter so that just in case you have a helper handy, they can watch the ignition firing even while the engine is cranking.
Saves time…

No matter how many times you might have done this in the past, a new engine with a new distributor is usually a learning process.
You might have to do it 5, 10 or maybe even 15 times before you can simply drop it in and be assured of the ignition timing without a timing light.
In other words, don’t be surprised if you’re 10 or 15° off of your setting this first time!

Did you put a new camshaft in it? Did you verify the firing order of the camshaft?
Yes, the old 302 would have been that firing order you posted. But later models, including potentially any with a replacement camshaft, could be the 351 firing order of 13726548 instead.

You are still better off trying to get it a little before top dead center initially so that it starts up easier and runs well while are you are trying to get the timing light connected and timing checked.
And until you have played with this distributor you don’t know if the Ignition fires exactly when the reluctor is visibly centered on the pickup coil, or at some point just slightly before or after.
It should follow normal theory. But you won’t know that until you get it fired up.
Hence the advice of setting it up slightly advanced first.
You’ll know if it’s too far advanced if the starter struggles to crank the engine.

You can see why it’s difficult to do it precisely when setting it statically by eye.
You have three things to line up, well four actually, if you consider the shaft while inserting the distributor. But once it’s actually installed, you have to remove the rotor usually and visibly identify the trigger points. The stator and reluctor.
Once you line those up and reattach the rotor you then have to line the rotor’s tip up with the spark plug contact point by rotating the distributor body.
But by rotating the distributor body you have essentially moved all of these points you had just lined up yet again.
It’s a dance really. Just like setting a carburetor.🙄😩😱
Thanks for the advice! I really do appreciate it! I know I am on compression stroke, by placing my finger over the spark plug hole and feeling it pushing air out of it. Got my timing mark on today and just about dead between 0 and 10 BTDC. So I spun it over so that it was about at 12 BTDC. I know that it will get off a few degrees as the distributor drops in, but hoping to get close enough to get it running so I can warm it up and get it adjust correctly. Just wanted to make sure I was along the right tracks because there aren't many solid start to finish with pictures or video of doing this. It's still a stock cam to my knowledge, my buddy had just stripped the engine down to paint it, redo gaskets, water pump, etc. and it sat around for a few years before I got to it. I know to crank it with the vacuum removed from the advance at first and set it from there, just been quite a while since i've messed with timing a distributor or setting up a carb so wanted to get all my ducks in a row before I started. I appreciate all of the advice! I plan to pull the cap off of the distributor once I'm ready to stab it in so I can keep an eye on the reluctor and stator to see how off it gets and help in getting it lined up right out of the gate before startup. Still some more stuff to do and not trying to rush, but I am ready to hear this thing fire up again.
 
OP
OP
P

pocketlock

Contributor
Jr. Member
Joined
Oct 29, 2022
Messages
134
Did not know of his passing. My condolence to you and his family..
Thank you! He was like a father to me when I got into the rock crawling scene. He took me in, showed me the ropes and really drove the fire behind learning how to do all of this stuff. I always had an interest in cars/trucks/motors/etc, but he actually took the time to teach me most of what I know and drove me to do research and teach myself how to do even more, welding, suspension, wiring, fabrication, etc. I'm no expert but I can admit I am where I am because of him.
 
OP
OP
P

pocketlock

Contributor
Jr. Member
Joined
Oct 29, 2022
Messages
134
Been a busy few days. Got the wiring finished up beyond some tape and clamps to make it intuitive and pretty. Got the starter installed so I could test the ignitions switch, got 1/4 rotation and nothing. So I pulled the starter and sure enough, the rock auto starter was DOA. Returned it and order a high torque starter off a 1993 f-150. Turned over beautifully. Had to diagnose an issue with the fuel pump not cutting on. 2 of my wires fell out of the ignition switch. Got that repaired and my pins fell out of my ignition cylinder. One thing after another I swear. Ordered a new one and everything was cutting on correctly, fuel pump, stereo, etc. Was finally able to get my hands on a used set of long tubes and after removing the clutch linkage and wrestling them in. I got fire! Had to wiggle the timing a little and it’s running rough on the out of the box Chinese carb, but it’s more than it’s done in 8 years or more. I didn’t have a second person with me to turn the starter so I pulled the fuel pump fuse so I could crank from the engine bay without fear of a fireball if things went south. Finally got it cranked in this video and it does when it runs out of fuel in the bowl. Buttoned up the coolant hoses and started to fill with coolant today, found some leaks when I cranked it up again, but it cranked up and idled down pretty well today! Definitely needs some tinkering but it’s getting there! Looking into building my own winch mount that I can later build a bumper off of soon. In the meantime working on torquing suspension and planning my brake routing.
 

Attachments

  • IMG_4128.MOV
    49.7 MB
  • A34940E0-AA69-491C-BE0F-BE1A97CA466B.jpeg
    A34940E0-AA69-491C-BE0F-BE1A97CA466B.jpeg
    284.7 KB · Views: 35
OP
OP
P

pocketlock

Contributor
Jr. Member
Joined
Oct 29, 2022
Messages
134
Got her fired up and running! Chasing out some leaks now, tightening up coolant hoses. Found a leak that is either the rear oil pan or rear main. Nothing crazy, but I will keep an eye on it until i'm ready to tear it apart again next year. Have the timing around 13-15 BTDC. Took the amazon special MC2100 and turned my idle air screws in all the way, then backed them out 2.5 turns. It will idle great, until I hook up the vacuum advance, at which point it's backfiring through the carb on startup. Going to get a larger hose, I was struggling with the one I was trying to use, but wondering if there's anything else i'm missing in the meantime. Thanks in advance!
 
OP
OP
P

pocketlock

Contributor
Jr. Member
Joined
Oct 29, 2022
Messages
134
Where are you connecting the vacuum advance? At idle there would be no change in the way it runs if connecting it to the ported fitting.
Sounds like you’re connecting it to the full vacuum fitting. It can run that way, if designed to do so, but more often than not it’s happier with the ported vacuum.
Connecting to the port directly beneath my choke on the carb which I thought was the vacuum advance fitting.
 

DirtDonk

Contributor
Bronco Guru
Joined
Nov 3, 2003
Messages
48,743
Might be. I can’t remember where the correct one is on the stock carburetor. Someone here will know.
If that’s the correct one, then it shouldn’t change at idle.
Might mean your throttle blades are open too far.
 
Top