• Just a reminder that you won't be able to start new posts or reply to existings posts in the Archive forum.

    This is where all the old posts go so they can still be used for reference and searched.
  • Welcome to ClassicBroncos! - You are currently viewing the forums as a GUEST. To take advantage of all the site features, please take a moment to register. It's fast, simple and absolutely free. So please join our community today!
    If you have problems registering or can't log into your account, please contact Admin.

68 Sport body off build thread, Updated...4/10 New pipes

Sac '68 sport

Bronco Guru
Joined
Apr 9, 2004
Messages
1,176
Loc.
Orangevale
Well I figure I'm far enough along to finally start a build thread and put some documentation out there for posterity’s sake.
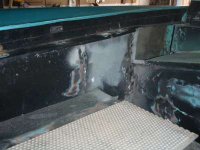
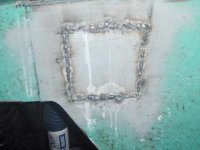
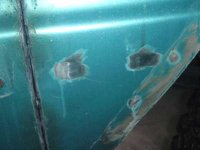
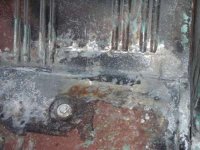
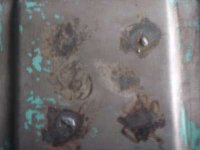
I originally got the Bronco in October 1994. I had a Honda prelude that I drove in High School, but moved up to the Sierras for college and needed a 4x4. Being a car guy and always wanting to get a project for him and I to do my Dad found this little 68 bronco sport in Reno NV for $3200. It was in great shape. It had the factory sea foam green paint with no rust and very few dents. It had a 302 in it, but I’m not sure if it was swapped in at some point in place of the 289 or if it was just a late build date in 68 and was a factory 302 but with 289 badges. Either way the heads said 302 on them. It had rear flares laying in the back, a new carpet kit, dealer installed AC, and some really ugly mustang seats that had been recovered to match the sea foam green paint. I put a stereo in it and drove it like that for a few years. Around 1996 the paint was starting to show it’s age so on Dad and I started on Resto #1. We sanded it all down, did the body work and had it sprayed. Unfortunately being only 19 and not knowing any better I had used silicone sealant everywhere I could to try and stop my feet from getting soaked every time it rained or snowed. As I’m sure you can imagine that didn’t work out so well for the new paint job. Fish eyes everywhere. The poor painter had primed it twice and sprayed it twice (all for only $600). He got it looking pretty good, but tt still had the fish eyes. We threw in some seats my dad got from his neighbor’s street rod and had the rear seat recovered to match. This is how I drove it all through college. I have to say I had the sweetest ride at Chico State from 1997 to January 2000. Couldn’t of had a better ride for a small college town. I’m pretty sure it’s what set the hook on the current misses. (Yes if your adding it up it took me from 94 to 2000 to get through college. I had some fun…) I got my first real job in my chosen field over on the coast in Fort Bragg CA. It was great only being a ¼ mile from the ocean but it rapidly started taking its toll on my beloved Bronco. The seams were starting to rust all over. I couldn’t have that so I changed jobs and moved back to the dry Central Valley air. I saved up a little out of every check from my first job out of school and bought a stock height Duff suspension. Bit of a mistake. I went with the dual shocks all around and it rode worse than a 1 ton truck. Oh well. Kept it pretty much like that since about 2002, took it to lots of Hot August Nights shows in Reno and was pretty happy. Starting in about 2003 I started squirreling money away for the big resto. when ever I could between buying a house, getting married and having 2 kids. There were a few incidents in the between time that wound up getting me some insurance monies to use for the restoration so that was helpful and the payments are what really got me started.
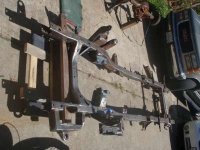
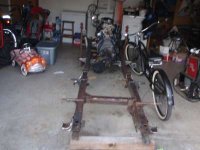
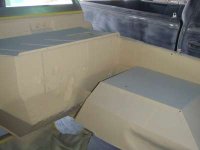
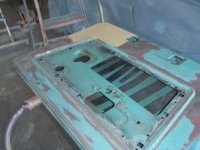
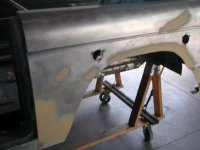
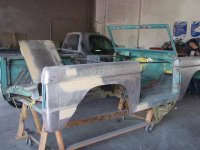
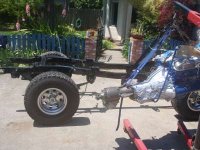
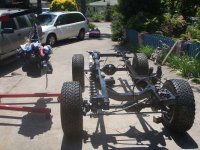
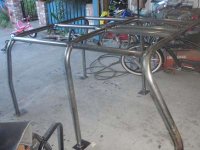
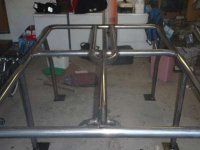
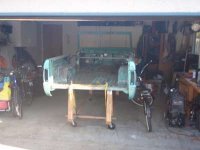
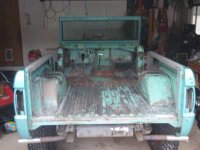
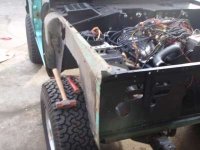
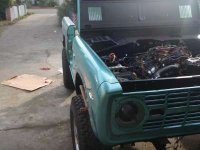
I started the tear down in mid December 2009. I did as much as I could do but I was having some elbow issues that I wound up having to have surgery for in April 2010. I took advantage of the time off and sent the body in for paint while I was out. It’s tough taking things apart with only one arm. Thank goodness for air tools.
So without further adue Pictures...
 

Attachments

  • P1020380-400.jpg
    P1020380-400.jpg
    21.1 KB · Views: 127
  • P3260580-400.jpg
    P3260580-400.jpg
    12.1 KB · Views: 98
  • P2190497-400.jpg
    P2190497-400.jpg
    14.2 KB · Views: 99
  • P1020389-400.jpg
    P1020389-400.jpg
    15.8 KB · Views: 109
  • P1020383-400.jpg
    P1020383-400.jpg
    14.6 KB · Views: 109
  • P1020381-400.jpg
    P1020381-400.jpg
    23.9 KB · Views: 120
  • P3260591-400.jpg
    P3260591-400.jpg
    10.3 KB · Views: 96
  • P3260595-400.jpg
    P3260595-400.jpg
    18.3 KB · Views: 109
Last edited:
OP
OP
Sac '68 sport

Sac '68 sport

Bronco Guru
Joined
Apr 9, 2004
Messages
1,176
Loc.
Orangevale
More tear down pics
 

Attachments

  • P5010790-400.jpg
    P5010790-400.jpg
    18.3 KB · Views: 73
  • P4260759-400.jpg
    P4260759-400.jpg
    17.3 KB · Views: 67
  • P4260758-400.jpg
    P4260758-400.jpg
    19.1 KB · Views: 67
  • P4010608-400.jpg
    P4010608-400.jpg
    19 KB · Views: 88
  • P4010605-400.jpg
    P4010605-400.jpg
    14.2 KB · Views: 73
  • P1020393-400.jpg
    P1020393-400.jpg
    16.8 KB · Views: 85
  • P4010603-400.jpg
    P4010603-400.jpg
    20.1 KB · Views: 76
OP
OP
Sac '68 sport

Sac '68 sport

Bronco Guru
Joined
Apr 9, 2004
Messages
1,176
Loc.
Orangevale
Rust cracks and holes
 

Attachments

  • PC290414-400.jpg
    PC290414-400.jpg
    12.7 KB · Views: 53
  • PC290427-400.jpg
    PC290427-400.jpg
    12.2 KB · Views: 48
  • PC290398-400.jpg
    PC290398-400.jpg
    19 KB · Views: 49
  • PC260386-400.jpg
    PC260386-400.jpg
    14.2 KB · Views: 46
  • PC190211-400.jpg
    PC190211-400.jpg
    16.2 KB · Views: 51
  • PC190212-400.jpg
    PC190212-400.jpg
    14 KB · Views: 54
  • PC190208-400.jpg
    PC190208-400.jpg
    12.3 KB · Views: 55
  • PC190209-400.jpg
    PC190209-400.jpg
    13.9 KB · Views: 54
OP
OP
Sac '68 sport

Sac '68 sport

Bronco Guru
Joined
Apr 9, 2004
Messages
1,176
Loc.
Orangevale
My motivation to get this done. All the parts are going in the boat. Can't fish until it's empty, but it's still getting fuller...
 

Attachments

  • PC290411-400.jpg
    PC290411-400.jpg
    9.4 KB · Views: 33
  • PC290410-400.jpg
    PC290410-400.jpg
    13.4 KB · Views: 42
  • PC290409-400.jpg
    PC290409-400.jpg
    13.9 KB · Views: 40
  • PC290408-400.jpg
    PC290408-400.jpg
    18.7 KB · Views: 41
OP
OP
Sac '68 sport

Sac '68 sport

Bronco Guru
Joined
Apr 9, 2004
Messages
1,176
Loc.
Orangevale
Time to fill some holes. I hadn't welded since Jr. High. I had about 50 holes to fill from roll bars, seats etc. My last 3-4 looked really good. I got good enough that I even filled the reflecter holes in the fenders and quarters. Inner fenders were rusted so I made some patches for them and the hole in the floor. The drivers inner fender had to be reworked and re-welded to clear crazy power stearing the PO put in out of a 70's big Merc.
 

Attachments

  • P3260589-400.jpg
    P3260589-400.jpg
    15.3 KB · Views: 60
  • P3260588-400.jpg
    P3260588-400.jpg
    17.7 KB · Views: 58
  • P3260585-400.jpg
    P3260585-400.jpg
    12.4 KB · Views: 51
  • P3260584-400.jpg
    P3260584-400.jpg
    12.1 KB · Views: 55
  • P2190508-400.jpg
    P2190508-400.jpg
    11 KB · Views: 62
  • P2190504-400.jpg
    P2190504-400.jpg
    10.4 KB · Views: 45
  • P2190502-400.jpg
    P2190502-400.jpg
    18.7 KB · Views: 48
  • P2190500-400.jpg
    P2190500-400.jpg
    9 KB · Views: 47
OP
OP
Sac '68 sport

Sac '68 sport

Bronco Guru
Joined
Apr 9, 2004
Messages
1,176
Loc.
Orangevale
Not being really experienced with body work and normally short on pacience I elected not to do the major body work my self. I did pull out a few dents, ground off my booger welds and scraped out every bit of seem sealer with a propane tourch and a little pick set. And off to paint she goes. Took it to Maaco, had them strip to metal so I didn't have to relive the fish eyes. More on the Maaco soon...
 

Attachments

  • P4150696-400.jpg
    P4150696-400.jpg
    8.6 KB · Views: 77
  • P4150693-400.jpg
    P4150693-400.jpg
    13.7 KB · Views: 67
  • P4150697-400.jpg
    P4150697-400.jpg
    11.3 KB · Views: 71
  • P4150692-400.jpg
    P4150692-400.jpg
    7.9 KB · Views: 76
  • P4150694-400.jpg
    P4150694-400.jpg
    14.7 KB · Views: 78
  • P4150698-400.jpg
    P4150698-400.jpg
    9.2 KB · Views: 66
OP
OP
Sac '68 sport

Sac '68 sport

Bronco Guru
Joined
Apr 9, 2004
Messages
1,176
Loc.
Orangevale
Went in for Elbow surgery while the body was in the shop.
Before we both went under the knife I preped the frame, motor and lots of little parts for Por 15 and paint since I figured I could do a lot of that with one hand. After a two week break to make sure I could keep the swelling down I was back at it lefty style.
 

Attachments

  • P5020804-400.jpg
    P5020804-400.jpg
    15.8 KB · Views: 60
  • P5020802-400.jpg
    P5020802-400.jpg
    16.1 KB · Views: 59
  • P5010779-400.jpg
    P5010779-400.jpg
    15.7 KB · Views: 59
  • P5010773-400.jpg
    P5010773-400.jpg
    15 KB · Views: 58
  • P4260761-400.jpg
    P4260761-400.jpg
    14.3 KB · Views: 60
  • P4260757-400.jpg
    P4260757-400.jpg
    12.1 KB · Views: 53
OP
OP
Sac '68 sport

Sac '68 sport

Bronco Guru
Joined
Apr 9, 2004
Messages
1,176
Loc.
Orangevale
After a month and a half the body came back. Uhoh...Maaco...Over all it looked good but there were some issues. They had a dirty gun or didn't strain the paint or something. There's some junk in the paint, they missed some spots and the paint they did in the engine compartment was a mess with dust all in it.
 

Attachments

  • P5280901.jpg
    P5280901.jpg
    132.5 KB · Views: 99
  • P5280896.jpg
    P5280896.jpg
    152.7 KB · Views: 123
  • P5280887.jpg
    P5280887.jpg
    157.3 KB · Views: 116
  • no paint on door jamb.jpg
    no paint on door jamb.jpg
    117 KB · Views: 135
  • P5280894-400.jpg
    P5280894-400.jpg
    17.8 KB · Views: 125
OP
OP
Sac '68 sport

Sac '68 sport

Bronco Guru
Joined
Apr 9, 2004
Messages
1,176
Loc.
Orangevale
Didn't see most of the issues untill it got home so I went back and had a chat with them. They agreed to fix it all. They said just bring it back. Problem was my little wood rack wasn't going to survive another trip on the tow truck so I decided to keep on pluging and get it back on the frame before I took it back to them.
So Por 15 in all the seems, then seem sealer. Por up everywhere I could reach underneith and in the rear wheel wells. Also sanded down and did a little body work myself on the inner fenders to get them looking better
 
OP
OP
Sac '68 sport

Sac '68 sport

Bronco Guru
Joined
Apr 9, 2004
Messages
1,176
Loc.
Orangevale
Por 15, fender body work and epoxy primer all around in the tub and under tub
 

Attachments

  • P6141136-400.jpg
    P6141136-400.jpg
    9.3 KB · Views: 64
  • P6141135-400.jpg
    P6141135-400.jpg
    7.3 KB · Views: 67
  • P5101057-400.jpg
    P5101057-400.jpg
    16.9 KB · Views: 75
  • P5101056-400.jpg
    P5101056-400.jpg
    17.7 KB · Views: 82
  • P5101054-400.jpg
    P5101054-400.jpg
    11.4 KB · Views: 85
  • P5101050-400.jpg
    P5101050-400.jpg
    13.4 KB · Views: 91
  • P5101047-400.jpg
    P5101047-400.jpg
    15.3 KB · Views: 94
  • P5101046-400.jpg
    P5101046-400.jpg
    13 KB · Views: 88
OP
OP
Sac '68 sport

Sac '68 sport

Bronco Guru
Joined
Apr 9, 2004
Messages
1,176
Loc.
Orangevale
Raptor time. Black on the inner fenders and under tub. Self tint gray in the tub. Both came out great. The self tint was a little soft at first and I even sanded down the bed rails and redid them. It harded up nice in time. Highly recomended for a DIY liner.
 

Attachments

  • P6141129-400.jpg
    P6141129-400.jpg
    13.8 KB · Views: 98
  • P6141141-400.jpg
    P6141141-400.jpg
    13.2 KB · Views: 87
  • P6141130-400.jpg
    P6141130-400.jpg
    10.6 KB · Views: 77
  • P6141122-400.jpg
    P6141122-400.jpg
    11.6 KB · Views: 70
OP
OP
Sac '68 sport

Sac '68 sport

Bronco Guru
Joined
Apr 9, 2004
Messages
1,176
Loc.
Orangevale
Got the chassis all ready, drive train back in, body on and now shes back to paint. Hopefully all goes well there.
 

Attachments

  • P5090826-400.jpg
    P5090826-400.jpg
    18.8 KB · Views: 65
  • P5090825-400.jpg
    P5090825-400.jpg
    19.7 KB · Views: 79
  • P5090824-400.jpg
    P5090824-400.jpg
    16.7 KB · Views: 56
  • P5090822-400.jpg
    P5090822-400.jpg
    19.1 KB · Views: 62
  • P5090820-400.jpg
    P5090820-400.jpg
    20.5 KB · Views: 61
  • P5090819-400.jpg
    P5090819-400.jpg
    21.8 KB · Views: 57
  • P5090818-400.jpg
    P5090818-400.jpg
    21.5 KB · Views: 64

Heus33

Bronco Guru
Joined
Jun 1, 2005
Messages
7,408
Wow - love these stories, a true lifetime vehicle - that sucker should be sealed up great now!
 
OP
OP
Sac '68 sport

Sac '68 sport

Bronco Guru
Joined
Apr 9, 2004
Messages
1,176
Loc.
Orangevale
New goodies for the build. 4 RS9000XL's and I picked up the new family cage. It was made for me by a guy right down the street in Fair Oaks CA.
 

Attachments

  • P7091147-400.jpg
    P7091147-400.jpg
    15.9 KB · Views: 57
  • P7091146-400.jpg
    P7091146-400.jpg
    12.3 KB · Views: 72
  • P7091148-400.jpg
    P7091148-400.jpg
    12.8 KB · Views: 66
  • P7091144-400.jpg
    P7091144-400.jpg
    13.4 KB · Views: 63
  • P7041129-400.jpg
    P7041129-400.jpg
    11.9 KB · Views: 39
  • P7041127-400.jpg
    P7041127-400.jpg
    12.9 KB · Views: 47
OP
OP
Sac '68 sport

Sac '68 sport

Bronco Guru
Joined
Apr 9, 2004
Messages
1,176
Loc.
Orangevale
Well it’s been a while since I posted anything up. Been busy sanding, painting and polishing all the little parts and got a few things put in. Spare tire carrier and all it’s parts, fender flares, column, coils, T-shift lever are all primed and almost ready to paint. I want to finish the cage and paint it all together. Still need to add the seatbelt bungs for the shoulder belts and add some way to put turnbuckles to the windshield, drill mounting holes then paint. The boat is still very full...
 

Attachments

  • PC220186.jpg
    PC220186.jpg
    118.6 KB · Views: 18
  • PC220185.jpg
    PC220185.jpg
    121.5 KB · Views: 22
  • PC220184.jpg
    PC220184.jpg
    118.3 KB · Views: 20
  • PC220183.jpg
    PC220183.jpg
    128.3 KB · Views: 23
OP
OP
Sac '68 sport

Sac '68 sport

Bronco Guru
Joined
Apr 9, 2004
Messages
1,176
Loc.
Orangevale
Got the main gas tank painted up and put in. Decided after the body got back on to go to F250 shock mounts. Got those on and POR 15ed. Rear RS9000’s are in. I had dual shock mounts front and rear so I decided to go with the drivers facing back and pass going to the front. Partly because newer vehicles do this and it seems to work, and partly because the rear facing upper mount had broken off at the bolt and was rewelded at some point so I’m just not going to use it.…
 

Attachments

  • PC220169.jpg
    PC220169.jpg
    137.2 KB · Views: 41
  • PC220168.jpg
    PC220168.jpg
    112.3 KB · Views: 40
  • PC220167.jpg
    PC220167.jpg
    154.2 KB · Views: 40
  • PC220165.jpg
    PC220165.jpg
    141.5 KB · Views: 41
OP
OP
Sac '68 sport

Sac '68 sport

Bronco Guru
Joined
Apr 9, 2004
Messages
1,176
Loc.
Orangevale
PO had cut a hole in the pass. fender to put an ammo box in. Pretty convenient but not the nicest thing to look at so when I put the new motor and converted to a C-4 a few years back, I blocked it off with some sheet metal riveted to the fender and put the Derale trans cooler there. This time around I got my hands on some perforated aluminum sheet. Busted out the sand paper and buffing wheel and went to work. Got the plate and the mounts blingin and put it all on with new SS socket cap and button head screws with SS nylock nuts.

Also started in on the soft top frame. That was a PITA. After going polishing the trans cooler plate and mount, then the tail gate part of the soft top frame with the whole treatment from 220 up to 2000 then buffing with the compounds I gave up, sort of. It was taking way too long. The rest of the soft top stuff I just hit with the buffer with some aluminum polish and turned out pretty good. There are still some lines from when the alum was cut but it is still nice and shinny. I still need to do the soft top hoops and valve covers but I’m going to take a break from the buffing for a while.
 

Attachments

  • P3260587.jpg
    P3260587.jpg
    130.6 KB · Views: 52
  • PC220177.jpg
    PC220177.jpg
    140.2 KB · Views: 52
  • PC220174.jpg
    PC220174.jpg
    57.4 KB · Views: 59
  • PC220178.jpg
    PC220178.jpg
    114.3 KB · Views: 58
Top