• Just a reminder that you won't be able to start new posts or reply to existings posts in the Archive forum.

    This is where all the old posts go so they can still be used for reference and searched.
  • Welcome to ClassicBroncos! - You are currently viewing the forums as a GUEST. To take advantage of all the site features, please take a moment to register. It's fast, simple and absolutely free. So please join our community today!
    If you have problems registering or can't log into your account, please contact Admin.

Another adjustable front bumper build thread

OP
OP
bsquared

bsquared

Contributor
Sr. Member
Joined
Dec 4, 2010
Messages
971
Almost finished with the bumper. Front plate cover is mounted. Did some fitting of the lights, but need to do a little more finishing of the holes to be sure the light covers will fit. Welds are much better, but still no "stack 'o dimes".

I differed from the instructions a bit (sorry Steve) to have my receiver pin holes in the front area behind the cover plate for easy access on the trail. Then used a 1/4" pin with a spring retainer behind the bumper to hold the cover plate in place. Going to look for a shorter pin so it won't hang down below the bumper.

Should be going to the paint shop later this week. ;D
 

Attachments

  • 23Welds.jpg
    23Welds.jpg
    101.4 KB · Views: 100
  • 24Mounts.jpg
    24Mounts.jpg
    92.5 KB · Views: 82
  • 25PlateMount.jpg
    25PlateMount.jpg
    92.1 KB · Views: 107
  • 26PlateFinished.jpg
    26PlateFinished.jpg
    97.2 KB · Views: 107
OP
OP
bsquared

bsquared

Contributor
Sr. Member
Joined
Dec 4, 2010
Messages
971
Learned a couple of things getting the lights adjusted before painting. Steve's design is meant to work with a specific light (PIAA LP530) and man, is it close!

Metric bolt sent w/ kit is a little over 3/4" long, so I'm going to local supply and find a 1/2" long bolt. That should fix a lot of things to help the lights fit better.

I would HIGHLY recommend that you pick your lights ahead of time and pre-drill that mount hole. Pretty steep angle otherwise.
More to come after paint!
 

Attachments

  • 33FinishedforPaint.jpg
    33FinishedforPaint.jpg
    95.2 KB · Views: 87
  • 32FrontHitch.jpg
    32FrontHitch.jpg
    85.3 KB · Views: 65
  • 31BoltTab.jpg
    31BoltTab.jpg
    95.6 KB · Views: 77
  • 30BendTab.jpg
    30BendTab.jpg
    89 KB · Views: 66
  • 27Lights.jpg
    27Lights.jpg
    108.2 KB · Views: 63
Last edited:
OP
OP
bsquared

bsquared

Contributor
Sr. Member
Joined
Dec 4, 2010
Messages
971
Got the bumper back from paint and got the lights and winch installed. Winch is all done but I still have to wire up the lights. Trying to figure a place to put the switch without cutting anything.

Bumper is beefy as hell and I think it turned out pretty good. Cheers, B2
 

Attachments

  • 34PaintedCoverOut.jpg
    34PaintedCoverOut.jpg
    88.6 KB · Views: 63
  • 35PaintedCoverIn.jpg
    35PaintedCoverIn.jpg
    88.2 KB · Views: 81
  • 38Finished1.jpg
    38Finished1.jpg
    124.1 KB · Views: 94
  • 39Finished2.jpg
    39Finished2.jpg
    111.7 KB · Views: 73
  • 40Finished3.jpg
    40Finished3.jpg
    120 KB · Views: 77

76MaBronco

Bronco Guru
Joined
May 21, 2007
Messages
4,219
Loc.
Massachusetts
Excellent work, Bill. Be proud of your welding too. Looks superb!

Thanks again for the kudos on the kit. I'm glad it all worked out and that you're happy with the end result!
 
OP
OP
bsquared

bsquared

Contributor
Sr. Member
Joined
Dec 4, 2010
Messages
971
Thanks Steve,
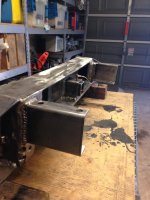
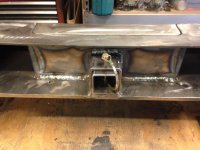
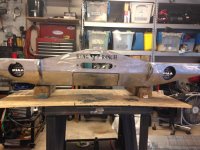
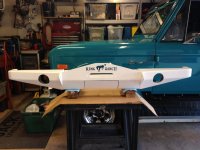
Here it is with the LED's lit up. I like the kit because it gives the garage mechanic a snowball's chance (hell, leap forward) on building a good bumper. Matches the Bailie in the back pretty well and I had the fun of lots of welding and grinding. (garage/beer time, right?)

Last pic w/ the lights on. I really enjoyed the way this bumper went together. If anyone wants one like this, it's fun starting with good materials!

Cheers, B2
 

Attachments

  • 42Night2.jpg
    42Night2.jpg
    63.9 KB · Views: 39
Top