


Community
Message Forum
Photo Gallery
Event Calendar
Book Reviews
Bronco Wallpaper
Bronco FAQ
Link Back to CB!
Photo Gallery
Event Calendar
Book Reviews
Bronco Wallpaper
Bronco FAQ
Link Back to CB!
Buy / Sell


Bronco Tech
3 Arm Wiper Setup
Fix Motor Mount
Roll Cage Braces
Throttle Body 65mm
Wheel Alignment
Heat Riser Replacement
Vent Window Repair
Center Console Mount
Straighten Bumper
Ford 6R80 6 spd
More Tech...
Fix Motor Mount
Roll Cage Braces
Throttle Body 65mm
Wheel Alignment
Heat Riser Replacement
Vent Window Repair
Center Console Mount
Straighten Bumper
Ford 6R80 6 spd
More Tech...

Install the app
-
Welcome to ClassicBroncos! - You are currently viewing the forums as a GUEST. To take advantage of all the site features, please take a moment to register. It's fast, simple and absolutely free. So please join our community today!If you have problems registering or can't log into your account, please contact Admin.
You are using an out of date browser. It may not display this or other websites correctly.
You should upgrade or use an alternative browser.
You should upgrade or use an alternative browser.
Brake system air induction; was: Odd HydroBoost (?) Problem
- Thread starter ntsqd
- Start date
OP
OP
ntsqd
heratic car camper
As an aside, ball-socket exhaust joints are not my favorite. None of the exhaust shops open yesterday could flare the head-pipe a little bit more, they were all buried in work or claimed to be. Has me wondering how long some Ultra Copper might last there.....
OP
OP
ntsqd
heratic car camper
Problem is the ball-sockets are the connection between the iron exhaust manifolds and the head pipe, and this all falls under EPA/CARB control. Merely changing the connector can cause it to fail the visual part of emissions testing. Makes no sense at all, but that's a bureaucracy for you.
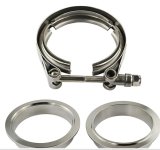
I've used V-Band connectors and in the right place nothing is better although there is at least one equal. One thing that I don't like about them is no rotational fix until the band is tight. That can be a good thing, but most of my experience has been not so good. In one, very atypical use, I made a partial notch in the mating surface of one flange and drilled and tapped for a small Low Head Socket Capscrew in the matching face of the other flange to 'key' the assembly so that it only went together in one orientation.
MISF came up with a design that I have gotten down to a science fabricating. I have someone like SendCutSend cut out the flanges and make these:

The flanges are cut with the two different ID sizes that are needed. Buying an exhaust tube expander means that I can make everything else, and the expander has actually made the whole process remarkably easy. If you take the time to make sure that the flanges are flat with no bumps or high spots they seal without a gasket or any RTV sealer. G5 bolts with AN flat washers and brass nuts are what I use to clamp each of these together. Never had one leak, and I've never had one be difficult to take apart.
As a bonus I use those flange bolts for attaching the exhaust hangers. That way the whole system bolts together.
I've used V-Band connectors and in the right place nothing is better although there is at least one equal. One thing that I don't like about them is no rotational fix until the band is tight. That can be a good thing, but most of my experience has been not so good. In one, very atypical use, I made a partial notch in the mating surface of one flange and drilled and tapped for a small Low Head Socket Capscrew in the matching face of the other flange to 'key' the assembly so that it only went together in one orientation.
MISF came up with a design that I have gotten down to a science fabricating. I have someone like SendCutSend cut out the flanges and make these:
The flanges are cut with the two different ID sizes that are needed. Buying an exhaust tube expander means that I can make everything else, and the expander has actually made the whole process remarkably easy. If you take the time to make sure that the flanges are flat with no bumps or high spots they seal without a gasket or any RTV sealer. G5 bolts with AN flat washers and brass nuts are what I use to clamp each of these together. Never had one leak, and I've never had one be difficult to take apart.
As a bonus I use those flange bolts for attaching the exhaust hangers. That way the whole system bolts together.
Wild horse 75
Sr. Member
I’ve had plenty of success running a bead of ultra copper on ball sockets. It can be a bit messy sometimes depending on access. I use to swap out cats on fox body mustangs constantly for people to pass emissions and every install I ran a small bead never had a comeback.
OP
OP
ntsqd
heratic car camper
This morning's errand was to get exactly that, some Ultra Copper for this. I should have a new tube already, but it's MIA. It is assembled now and waiting on me to finish putting the rest of the system back in the truck (all ~24" of it). I'm waiting for it to cool down in the evening for that. Should be able to drive it to work this week and see how this latest fix works out.
Occurred to me that I have some pics of the exhaust system, and who doesn't like pics?
Can see just how complicated this system is, that larger round thing forward of the braided flex section is the only muffler in the system. With two cats in series it doesn't need much. Unfortunately that one isn't quite enough for Ms. ntsqd. She doesn't complain about it, but she has commented that it can be loud at times. I wouldn't mind if it were a bit quieter myself. It can get old on long drives. Not much room for much more there without getting tricky. I'm pondering a dual in / dual out muffler set lengthwise along the frame rail. The front bungs will be an in and an out so that it exits in the same place, and the rear bungs will either be capped or have a u-turn in them.
Is it done yet? Lol..
All I know is I want that air tank. And yes, you've told me a million times what it is. Please pretty please remind me. Again. The photo resolution isn't good enough that I can zoom in and read the label.
All I know is I want that air tank. And yes, you've told me a million times what it is. Please pretty please remind me. Again. The photo resolution isn't good enough that I can zoom in and read the label.
OP
OP
ntsqd
heratic car camper
Just came in from finishing it up and I started it. No obvious exhaust leaks and I may have been able to cure an occasional rattle. This coming week will give me more feed-back.
Pretty sure that for the $5 difference that I went with the 200 psi version although I may have purchased it from Amazonian Car Camping Supply: https://viaircorp.com/products/2-5-gallon-air-tank?variant=43790063403169
Pretty sure that for the $5 difference that I went with the 200 psi version although I may have purchased it from Amazonian Car Camping Supply: https://viaircorp.com/products/2-5-gallon-air-tank?variant=43790063403169
OP
OP
ntsqd
heratic car camper
Just another ho-hum OJB. ") Shortly after I first got it back on wheels after doing the 8 lug swap:
Shortly after I first got it back on wheels after doing the 8 lug swap:


Shortly after I first got it back on wheels after doing the 8 lug swap:
OP
OP
ntsqd
heratic car camper
As of last night it had the same pedal that it had right after doing the gravity bleed. Which is to say it has a correct pedal feel, firm, short stroke, and with good modulation. When the pedal is good it stops better than any vehicle that I've previously owned! Threshold braking with this pedal is an easy thing to do. ABS, who needs ABS?
However, I'm only ~150 miles into what has previously been a 250-270 mile long degradation, so I've a ways to go before I'll know anything for sure.
However, I'm only ~150 miles into what has previously been a 250-270 mile long degradation, so I've a ways to go before I'll know anything for sure.
OP
OP
ntsqd
heratic car camper
Not really, unfortunately. I'm still within the normal prior degradation curve. It usually feels good-ish up to about 200 miles. I'm at ~175 now. Tomorrow would be the critical day, but I'm off and not driving in to work. I will be driving it tomorrow, just not even close to the commute distance. I expect Friday will be the pivotal day.
OP
OP
ntsqd
heratic car camper
I miss spoke/typed/posted/something. I'm at 150 miles now. Still a good pedal.
You try the scott towel or TP witness paper to see if you cured the leaking? Betting you would have a canary of wetness on paper before pedal degraded in an obvious fashionI miss spoke/typed/posted/something. I'm at 150 miles now. Still a good pedal.
The good gravity bleed was encouraging.
One more idea if the bad pedal does come back. I’ve seen bad wheel bearings cause wobble and introduce air (similar to the bad rotor)
OP
OP
ntsqd
heratic car camper
I have not yet tried it. Mostly because the gravity bleeding was so encouraging that I hoped that I'd finally found the problem.
Oldtimer had me looking at rotor run-out on the first page, and one rotor did have enough run-out to be suspect and get replaced. That wheel hub's flange did not have any run-out, it was all between that rotor's mounting face and the friction surfaces.
FWIW, this is a fresh big brake - 8 Lug conversion, all of the bearings are new Timkens. I use a highly scientific technique <sarcasm> to set the pre-load. Using a std length ratchet in the wheel bearing nut socket I tighten the nut while spinning the hub to as tight as I possibly can get it. Once spinning the hub doesn't cause me to be able to tighten the nut any more I loosen the nut and remove the ratchet. I then tighten the bearing nut using only the socket to as tight as I can get it with just my grip on the socket itself. Been using this technique ever since I had to re-set Patch's RF bearing preload on the side of the NB I5 off-ramp to Kettleman City, CA in '98. I could hear one or both of the races spinning from the pre-load being too low. As my friend Ruben told me after I mentioned that experience to him "Those are big bearings, they can take some preload."
OP
OP
ntsqd
heratic car camper
At ~200 miles, pedal still good.
Occurred to me on the drive home today that a good test will be to gravity bleed it again at, let's say 300 miles, and then again at 500 if no bubbles found at 300. If no bubbles found at 500 I'll call it good until use proves otherwise.
Occurred to me on the drive home today that a good test will be to gravity bleed it again at, let's say 300 miles, and then again at 500 if no bubbles found at 300. If no bubbles found at 500 I'll call it good until use proves otherwise.
- Joined
- Jul 31, 2001
- Messages
- 8,916
Gotta be more optimistic TS!Not really, unfortunately. I'm still within the normal prior degradation curve. It usually feels good-ish up to about 200 miles. I'm at ~175 now. Tomorrow would be the critical day, but I'm off and not driving in to work. I will be driving it tomorrow, just not even close to the commute distance. I expect Friday will be the pivotal day.
I think you've got it!
Similar threads
- Replies
- 31
- Views
- 4K
- Locked
- Replies
- 1
- Views
- 995
- Replies
- 3
- Views
- 1K