• Just a reminder that you won't be able to start new posts or reply to existings posts in the Archive forum.

    This is where all the old posts go so they can still be used for reference and searched.
  • Welcome to ClassicBroncos! - You are currently viewing the forums as a GUEST. To take advantage of all the site features, please take a moment to register. It's fast, simple and absolutely free. So please join our community today!
    If you have problems registering or can't log into your account, please contact Admin.

Can you identify what I did to it?

Mark

Contributor
Bronco Klutz
Joined
Aug 29, 2003
Messages
5,415
Loc.
NW Indiana
Alternate Title: How I spent my summer!
Alternate Title: It is the same Bronco!
Alternate Title: Thanks Flash69!

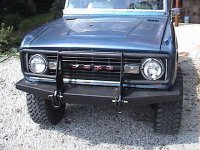
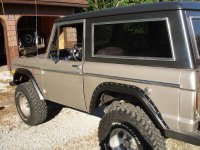
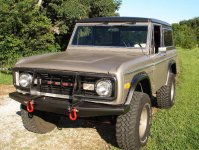
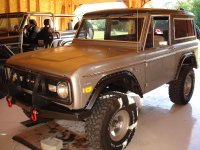
Here is a couple before (June 1st and then August 16th) and after photos.
This is my daily driver so I had to wrap project "steps" up by Sunday evening, and I did little things that I could during the week evenings.

I replaced the rear quarter panels (what a PIA) which I purchase from Flash69 (how long ago was that Farren? 3 years?) - here they are!

I replaced the passenger side striker post.

Installed Guerrilla Warflares

Painted the whole body Hammerite bronze (thanks Scotty Broncoholic for the Hammerite idea).

Cut off the rusted rockers - eh who needs 'em anyway! ;)

My wife can't call my daily driver Bronco "rusted crap" anymore!!
 

Attachments

  • rustcrap2.JPG
    rustcrap2.JPG
    176.5 KB · Views: 243
  • rustcrap1.JPG
    rustcrap1.JPG
    170.4 KB · Views: 305
  • frontbmpr1.jpg
    frontbmpr1.jpg
    85.4 KB · Views: 230
  • flares1.jpg
    flares1.jpg
    223.1 KB · Views: 481
  • flares2.jpg
    flares2.jpg
    174 KB · Views: 508
  • flares3.jpg
    flares3.jpg
    189.7 KB · Views: 295
OP
OP
Mark

Mark

Contributor
Bronco Klutz
Joined
Aug 29, 2003
Messages
5,415
Loc.
NW Indiana
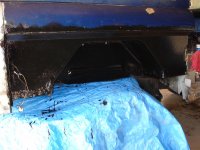
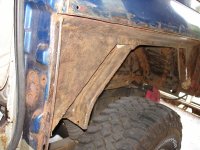
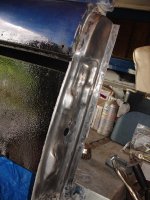
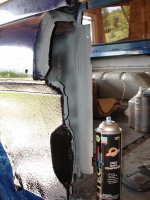
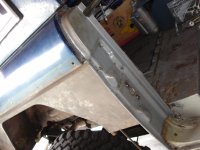
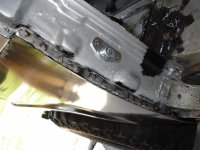
Here's some in progress shots of the rear quarter panel replacement
You can see the passenger striker post was rotted :p
Pretty much just peeled the old quarter off by hand.
Once, that's gone - wow it's easy to get in there with a grinder, clean it up and coat (liberally of course) with POR15!
 

Attachments

  • rustcrapfix7.JPG
    rustcrapfix7.JPG
    119.6 KB · Views: 400
  • rustcrapfix4.JPG
    rustcrapfix4.JPG
    169 KB · Views: 456
  • rustcrapfix3.JPG
    rustcrapfix3.JPG
    143.9 KB · Views: 423
  • rustcrapfix2.JPG
    rustcrapfix2.JPG
    136.4 KB · Views: 466
  • rustcrapfix1.JPG
    rustcrapfix1.JPG
    158.6 KB · Views: 488
  • rustcrap4.JPG
    rustcrap4.JPG
    158.6 KB · Views: 423
  • rustcrap5.JPG
    rustcrap5.JPG
    148.9 KB · Views: 431
  • rustcrapfix12.JPG
    rustcrapfix12.JPG
    141.2 KB · Views: 382
  • rustcrapfix11.JPG
    rustcrapfix11.JPG
    129.3 KB · Views: 432
  • rustcrapfix8.JPG
    rustcrapfix8.JPG
    159.4 KB · Views: 419
  • rustcrap3.JPG
    rustcrap3.JPG
    164.9 KB · Views: 379
OP
OP
Mark

Mark

Contributor
Bronco Klutz
Joined
Aug 29, 2003
Messages
5,415
Loc.
NW Indiana
bigjhoov said:
What's in the garage?
Oooh, that's the Black Cloud you see. ;)
Hope you guys like pictures, cuz I have more...
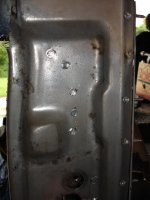
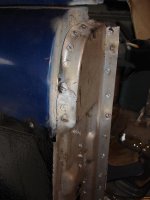
Here's the passenger striker replacement, it was pretty easy. Drill out the spot welds with my favorite spot weld bit, hit the seam with a chisel - "pop" - it comes out creating a mess of rust and scale on the floor.
 

Attachments

  • rustcrapfix17.JPG
    rustcrapfix17.JPG
    158.2 KB · Views: 430
  • rustcrapfix16.JPG
    rustcrapfix16.JPG
    110.2 KB · Views: 491
  • rustcrapfix15.JPG
    rustcrapfix15.JPG
    87.4 KB · Views: 378
  • rustcrapfix14.JPG
    rustcrapfix14.JPG
    85.5 KB · Views: 387
  • rustcrapfix13.JPG
    rustcrapfix13.JPG
    139.5 KB · Views: 433
  • rustcrapfix10.JPG
    rustcrapfix10.JPG
    156.9 KB · Views: 417
  • rustcrapfix9.JPG
    rustcrapfix9.JPG
    154.3 KB · Views: 447
  • rustcrapfix6.JPG
    rustcrapfix6.JPG
    103.7 KB · Views: 494
  • rustcrapfix18.JPG
    rustcrapfix18.JPG
    128.2 KB · Views: 411
  • rustholefix3.JPG
    rustholefix3.JPG
    108.7 KB · Views: 478
OP
OP
Mark

Mark

Contributor
Bronco Klutz
Joined
Aug 29, 2003
Messages
5,415
Loc.
NW Indiana
Here's some of the new rear quarter placement
Hey! I was uncut again (for about 1 hour).
Uncut doesn't work with 33"x12" tires.
Someday I'll have a pristine stocker that I'll leave uncut.
 

Attachments

  • rearqtr5.jpg
    rearqtr5.jpg
    124 KB · Views: 573
  • rearqtr4.jpg
    rearqtr4.jpg
    134.6 KB · Views: 538
  • rearqtr3.jpg
    rearqtr3.jpg
    129.9 KB · Views: 586
  • rearqtr2.jpg
    rearqtr2.jpg
    107.2 KB · Views: 490
  • rearqtr1.jpg
    rearqtr1.jpg
    113.4 KB · Views: 616
OP
OP
Mark

Mark

Contributor
Bronco Klutz
Joined
Aug 29, 2003
Messages
5,415
Loc.
NW Indiana
MI-Bronco said:
My guess is it's either a '77 or a '73
Hmmm, why did you choose those two years?
I'll say that you are right though (the Cloud is a '73).
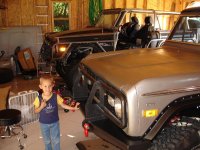
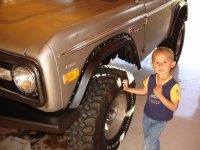
Here's a few more photos. My 4 yo son helped a lot. I am very proud of him!
 

Attachments

  • flares5.jpg
    flares5.jpg
    129.1 KB · Views: 315
  • flares6.jpg
    flares6.jpg
    149.4 KB · Views: 310
  • flares7Anton.jpg
    flares7Anton.jpg
    110.1 KB · Views: 295
  • flares8Anton.jpg
    flares8Anton.jpg
    140.5 KB · Views: 305

NicksTrix

Bronco Guru
Joined
Aug 1, 2001
Messages
6,409
looking good. lots of work there. some of that stuff isn't any fun either. job well done for getting after it. enjoy your daily ride!
 
OP
OP
Mark

Mark

Contributor
Bronco Klutz
Joined
Aug 29, 2003
Messages
5,415
Loc.
NW Indiana
BTW, I know it's a rattle can paint job,
But that is fine with me - I really don't want to be freaking out with a $500 - $1000 paint job when I see a little rust pop up.
Hammerite is a rust encapsulator. If a problem spot shows up - which it will - I live in salt city come winter time (again it's my daily driver), then I can simply sand it down and touch it up and make the paint look seemless again.

Dang, these Broncos are all so personalized, it's just plain FUN working on them! Each one is different.
 

72_EB

Contributor
66to77
Joined
Feb 4, 2003
Messages
4,982
Way to go, Mark. I was waiting for someone to tackle the "lower quarter replacement with keeping the upper complete with pictures" thread. Looking good.

I take it those quarters were from Jeff's? Looks like they lined up pretty good.

Nice mag wheels by the way too. :)
 
OP
OP
Mark

Mark

Contributor
Bronco Klutz
Joined
Aug 29, 2003
Messages
5,415
Loc.
NW Indiana
72_EB said:
Way to go, Mark. I was waiting for someone to tackle the "lower quarter replacement with keeping the upper complete with pictures" thread. Looking good.
I take it those quarters were from Jeff's? Looks like they lined up pretty good.
Nice mag wheels by the way too. :)
Thanks John, yup, I believe those quarters did come from Jeff's (Flash69 will correct me if I'm wrong). They were in the OEM box and were (gulp) made in China :p %) - but they fit fine!!
There were some issues, but we're dealing with 30+ year old rigs and each body will be slightly different when it comes to tolerances. Nothing that a generous use of seam sealer can't clean up though. ;)
 

jmooni02

New Member
Joined
Feb 1, 2005
Messages
22
Loc.
St Louis
"Painted the whole body Hammerite bronze (thanks Scotty Broncoholic for the Hammerite idea)."

I was considering using hammerite on my cage and under the hood where I have alot of surface rust. Any special precautions for prep or application that you found? How does it compare to POR15?

BTW, nice work and great pics. I will be addressing these same issues soon and found your pics informative.
 

Flash69

Bronco Guru
Joined
Jul 21, 2004
Messages
2,429
Loc.
Southwest Va
Mark Troy said:
Thanks John, yup, I believe those quarters did come from Jeff's (Flash69 will correct me if I'm wrong). They were in the OEM box and were (gulp) made in China :p %) ;)
They came from LMC but i think they are all the same. The ones i used on mine were from Duffs and they was exactly the same.
 
OP
OP
Mark

Mark

Contributor
Bronco Klutz
Joined
Aug 29, 2003
Messages
5,415
Loc.
NW Indiana
jmooni02 said:
I was considering using hammerite on my cage and under the hood where I have alot of surface rust. Any special precautions for prep or application that you found? How does it compare to POR15?
Well, prep is easier using the hammerite, just sand, tac, and spray. I bet the POR15 would do a better job, but for an exterior application, since POR15 is UV sensitive, you certainly would want to top coat it so you'd have to put the tie-coat primer down before painting over it.
Myself, I'm not too worried about exterior rust. Once I see it, I'll attack it with sand paper or a grinder, then I'll paint the treated area.
 
Top