• Welcome to ClassicBroncos! - You are currently viewing the forums as a GUEST. To take advantage of all the site features, please take a moment to register. It's fast, simple and absolutely free. So please join our community today!
    If you have problems registering or can't log into your account, please contact Admin.

Clifford... Big Red Bronco

OP
OP
904Bronco

904Bronco

Contributor
Bronco Guru
Joined
Sep 28, 2004
Messages
6,017
Loc.
San Martin, CA
Easiest way to move the axle back 1" or 1 1/2" is to use Zero Rates. I've been running them for years without issue. They do add 1" lift to the axle. (Pretty sure this is the offset spacer DirtDonk mentioned.)
I know I bought these in the past... I still get email sales flyers from the company.
But I didn't use them for reasons I can't remember. And I don't know what became of them?
Thanks Scoop, for the option, actually the reminder...
 

Oldtimer

Contributor
Jr. Member with Sr. moments
Joined
Feb 4, 2005
Messages
1,224
Loc.
Sunnyvale, CA
Doug,
When you use the offset holes in spring perch and clamp plate, you may need to add offset holes in the spring liners (if your springs have them), or you end up with this.
1740975019732.png


I also redrilled wedge.
1740975205867.png
 
OP
OP
904Bronco

904Bronco

Contributor
Bronco Guru
Joined
Sep 28, 2004
Messages
6,017
Loc.
San Martin, CA
Hi Doug, I used the same Ruff Stuff perches. The U bolt plate has matching offset spring pin holes. Here are a few pictures off my set up. And I think the plates are from James Duff.
That's what I needed to see, pictures tell the story.
I actually did a search on the Site and found enough commentary to see that the U-bolt plate would need to be offset as well. As you can tell this will be a first for me... I actually read through Duffy Mahoney's old thread when he did this mod on his 77.

I am hesitant to order those plate from Duffs, the shipping cost is terrible across the Country, but it remains an option.
Thanks for post Gnsteam.
 
OP
OP
904Bronco

904Bronco

Contributor
Bronco Guru
Joined
Sep 28, 2004
Messages
6,017
Loc.
San Martin, CA
I haven't bought springs yet, still scraping undercoating... But good to see that there is additional things that need to be done to do the change right. I am, admittingly AR about the things I do...

Would that be a WH's U-bolt plate? I was looking at them and thinking they could be re-drilled to work... Nice to see that the 6* wedges can still be used.

Thanks for sharing. OT
 
OP
OP
904Bronco

904Bronco

Contributor
Bronco Guru
Joined
Sep 28, 2004
Messages
6,017
Loc.
San Martin, CA
Drill a corresponding hole in the bolt plate or buy a set with 3 holes.

(y)

Get the single hole plate, run a proper sized bolt through the center perch hole and the plate... then mark appropriate location and Drill...

Amazing how when you wake up in the middle of the night and your brain kicks into gear, what you think of...
 

ntsqd

heratic car camper
Joined
Jan 30, 2005
Messages
3,851
Loc.
Upper SoKA
Dunno where you are in the process of removing the undercoating, but I have read of people hitting it with CO2 (presumably liquid, but don't know) and more or less freezing it loose. Supposed to be the cleanest, least labor intensive method known. If you have or know something with a CO2 tank & regulator it might be worth trying.
 
OP
OP
904Bronco

904Bronco

Contributor
Bronco Guru
Joined
Sep 28, 2004
Messages
6,017
Loc.
San Martin, CA
Dunno where you are in the process of removing the undercoating, but I have read of people hitting it with CO2 (presumably liquid, but don't know) and more or less freezing it loose. Supposed to be the cleanest, least labor intensive method known. If you have or know something with a CO2 tank & regulator it might be worth trying.

I think I am done with the frame. The easy to get to area's have been done and all that remains is areas of the factory welds that need cleaned out and/or areas I can't get to. It was a long day today and I basically filled a paper shopping bag with what was scraped off over the last few days.
A lot of the U-coating popped right off and the rest I had to work over.
Next I will separate the frame from the body do a tear down, and hit everything not touched with a scraper and wire wheel. It will be a week or so before I get back to it. Going to make a run up to Boise, ID for the Boise Roadster show and to visit Family and friends.

I had to sweep the floor this afternoon...
 

Attachments

  • IMG_20250303_163420279[1].jpg
    IMG_20250303_163420279[1].jpg
    178.5 KB · Views: 29

Yeller

Contributor
Bronco Guru
Joined
Mar 27, 2012
Messages
6,823
Loc.
Rogers County Oklahoma
Clean up is never the fun part. Have fun in Boise and tell Steve we are still enjoying the explorer😎 it’s about to make a trip to Moab and enjoy its latest mods😊
 
OP
OP
904Bronco

904Bronco

Contributor
Bronco Guru
Joined
Sep 28, 2004
Messages
6,017
Loc.
San Martin, CA
Clean up is never the fun part. Have fun in Boise and tell Steve we are still enjoying the explorer😎 it’s about to make a trip to Moab and enjoy its latest mods😊

Will do, he is on my list of folks to see... As is Justin, who is a salesman for WH's that works remotely there...
 
OP
OP
904Bronco

904Bronco

Contributor
Bronco Guru
Joined
Sep 28, 2004
Messages
6,017
Loc.
San Martin, CA
So just a few updates... Took a break and went to Idaho.

The Rebuilt power steering box showed up just before I left.
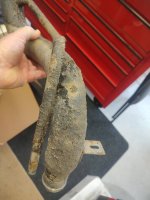
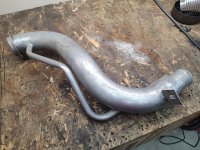
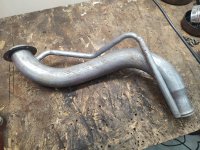
Good success looking through the wreaking yards, got that missing Explorer dipstick tube/d-stick that I needed. As well as many other pieces...
Found a factory dual battery tray (drivers side) for my 79 Bronco.
Got a call from my Buddy that my resealed D20 is ready for pick-up.
Stopped at Wild Horses on my way home and went into debt for new parts!
We are going to have heavy rain for the next few days, so not sure there will be a lot of shop time :(
 
Last edited:
OP
OP
904Bronco

904Bronco

Contributor
Bronco Guru
Joined
Sep 28, 2004
Messages
6,017
Loc.
San Martin, CA
I tried the Easy-off oven cleaner, a couple of applications... Under coating won. so back to the heat gun with a scraper on the bench. Followed that up with a brake clean wipe down. Very happy with the outcome, but there was some time invested to get there.
 

Attachments

  • IMG_20250227_161853800_MP.jpg
    IMG_20250227_161853800_MP.jpg
    145.8 KB · Views: 23
  • IMG_20250313_160901915.jpg
    IMG_20250313_160901915.jpg
    326.2 KB · Views: 23
  • IMG_20250313_160909157.jpg
    IMG_20250313_160909157.jpg
    338.7 KB · Views: 22
OP
OP
904Bronco

904Bronco

Contributor
Bronco Guru
Joined
Sep 28, 2004
Messages
6,017
Loc.
San Martin, CA
We had separation today... Only one body mount bolt snapped off.

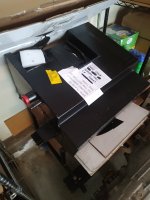
And the Aero EFI tank arrived. It will accept a stock Explorer fuel pump assembly.

I picked up the rebuilt 4R70W from the Transmission shop.

I wish it would stop raining so I could roll out the chassis and start cleaning it :(
 

Attachments

  • IMG_20250314_180037792.jpg
    IMG_20250314_180037792.jpg
    135.3 KB · Views: 26
  • IMG_20250314_175859092.jpg
    IMG_20250314_175859092.jpg
    109.4 KB · Views: 27
  • IMG_20250314_175622982.jpg
    IMG_20250314_175622982.jpg
    214.5 KB · Views: 26
OP
OP
904Bronco

904Bronco

Contributor
Bronco Guru
Joined
Sep 28, 2004
Messages
6,017
Loc.
San Martin, CA
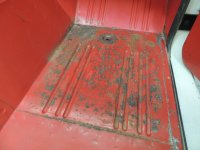
Debating whether to Raptor line (with red tint) the flat surfaces of the entire bronco floor or just the foot wells... The bed is in really good shape with the original color, yes some small amount of paint has left the seem areas, but no rust.
I am liking the minimalist approach this time, and I have done the entire inside before on my 67, 69, 71.
 

Attachments

  • DSCN6321.JPG
    DSCN6321.JPG
    205.2 KB · Views: 27
  • DSCN6322.JPG
    DSCN6322.JPG
    161.6 KB · Views: 23
  • DSCN6324.JPG
    DSCN6324.JPG
    199.7 KB · Views: 21
  • DSCN6325.JPG
    DSCN6325.JPG
    157.9 KB · Views: 25
  • DSCN6326.JPG
    DSCN6326.JPG
    145.8 KB · Views: 28
  • IMG_20180713_165135210.jpg
    IMG_20180713_165135210.jpg
    117.3 KB · Views: 28
  • IMG_20180727_121801012.jpg
    IMG_20180727_121801012.jpg
    213.2 KB · Views: 30

ntsqd

heratic car camper
Joined
Jan 30, 2005
Messages
3,851
Loc.
Upper SoKA
Bedliner doesn't seem to be a very good insulator or noise damper. It does do both things, just not nearly as well as other products. The inside of the Wagon was lined with something that's not very thick and is going to be a mess to remove. It's not a great data point, most of my experience and observation is from the YJ from Hell which was Rhino-Lined. If the liner would adhere to something like LizardSkin I'd be really tempted to apply their thermal and noise products first, then apply the liner over them.

Before I did any of that I'd make sure that anything that needed to be welded to the underside had been done. Things like brackets for heat shields, etc. One of the YJ from Hell's most basic failings was that the floors up front got really hot. Hotter than they should given the air gap that existed. The Rhino-Liner was nearly useless for insulating against the exhaust heat. Had we more time I'd have been adding heat shields, but with the owner's passing his widow needed it together enough to be sold.
 

eb-nutt1

Sr. Member
Joined
Apr 17, 2006
Messages
635
Don't know if when you went into debt at WH, spring plates was one of your purchases, but Tom's sells the heavy duty plates, and the hole for the spring pin nut is slotted about 3" for adjustability, instead of drilling new holes.
 
Top