


treihesse
Bronco Guru
- Joined
- Aug 1, 2008
- Messages
- 1,459
I have decided to do diy beadlocks due to price. I have owned mrt beadlocks in tTakepast so lets see if there comparable. I decided on total metal innovation beadlocks for my kit for a couple reasons. Number 1 there customer service is great. Number two the cost was very reasonable. I ordered a 5 wheel kit with hardware. There hardware was cheaper than my local vendors. The cost before shipping for 5 was about 300 dollars. I have a 17" rim as well.https://totalmetalinnovations.com/i...id=368&zenid=7148314c003690ba6f64f5e0a422097c
Another reason I went with them is there built in anti coning inner ring. Why do I want this? When you torque diwn the bolts it makes it less concerning to torque only 12lbs and it keeps warping to a minimum.
1. Prep your wheels for the inner ring. Take a die grinder ir a flap wheel and clean up the metal rear good. Only the lip and shoulder.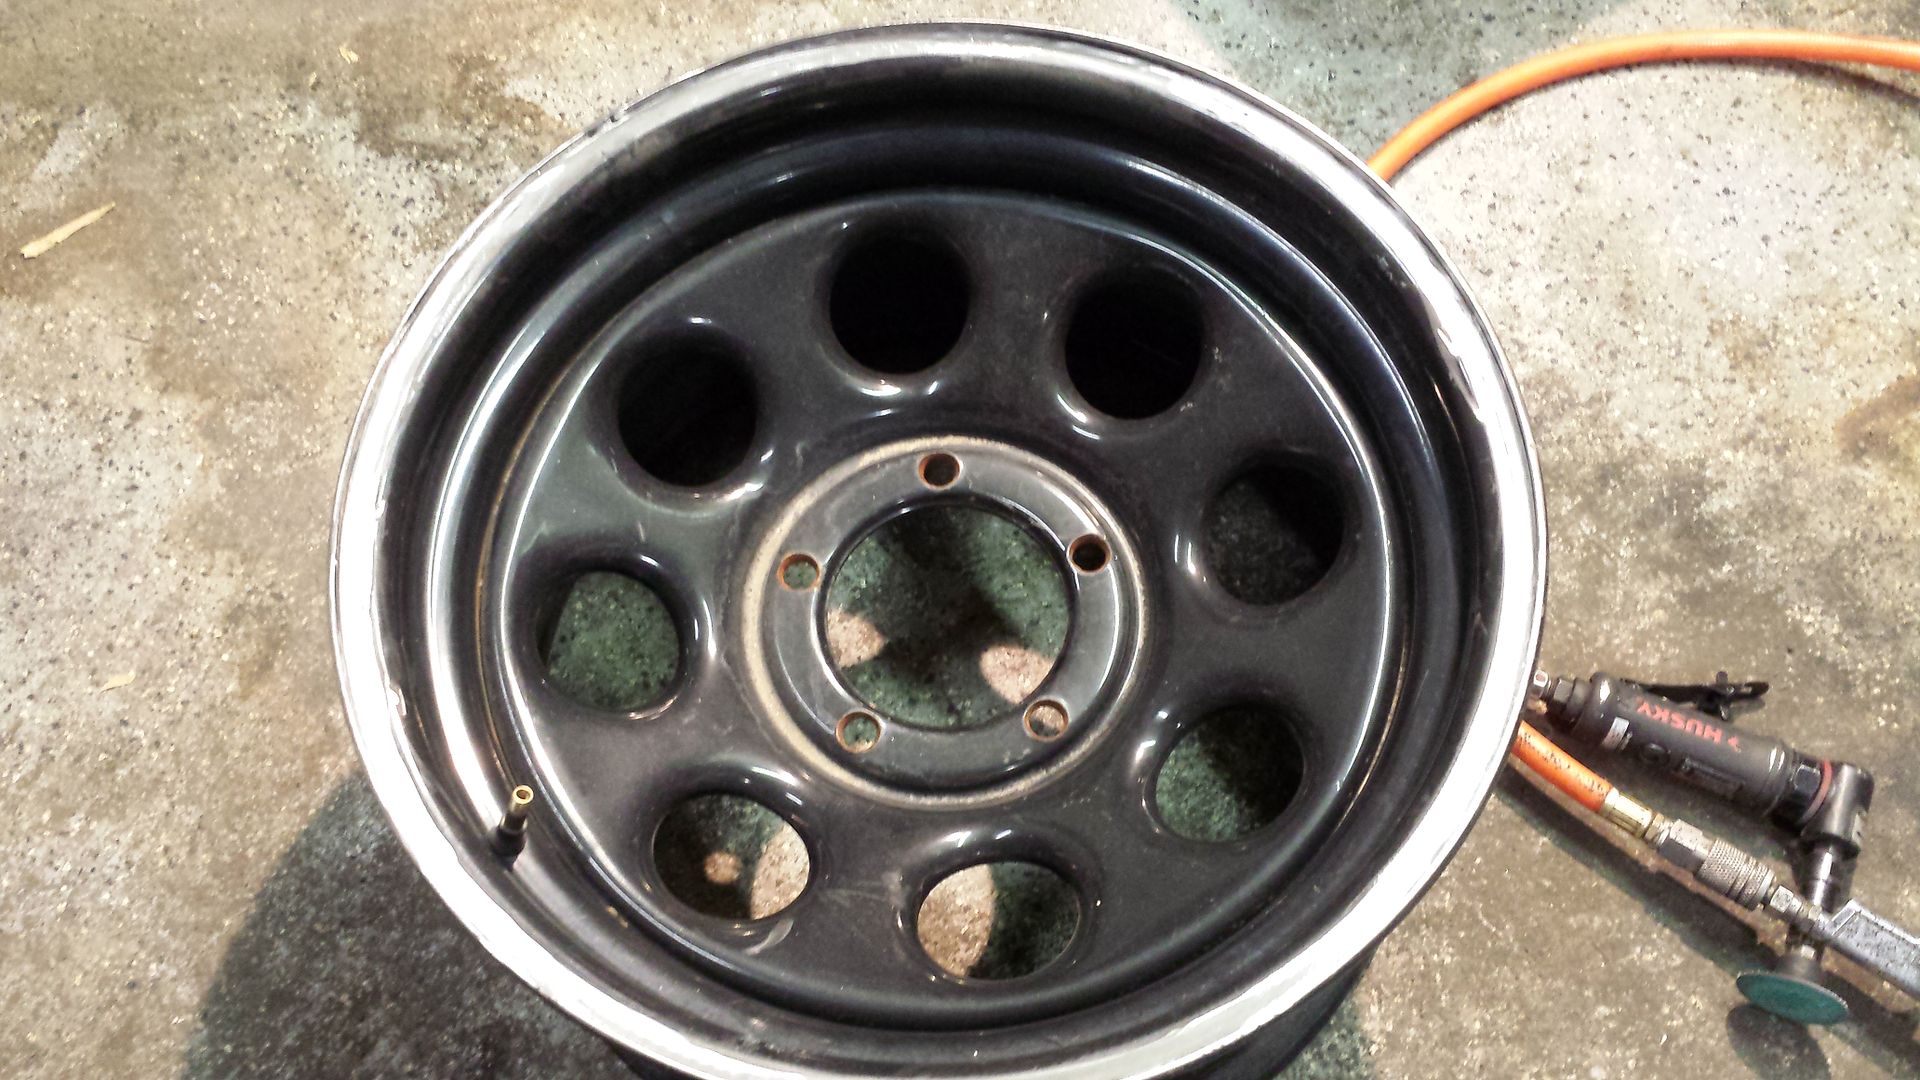
2. Once all the wheels are cleaned up we need to clean up the inner bead a little. Take your angle grinder and clean the edges and top edge no bevel is needed as there is a 1/8 gap all the way around. Drop the inner ring onto the wheel and gap it with sone nickels.
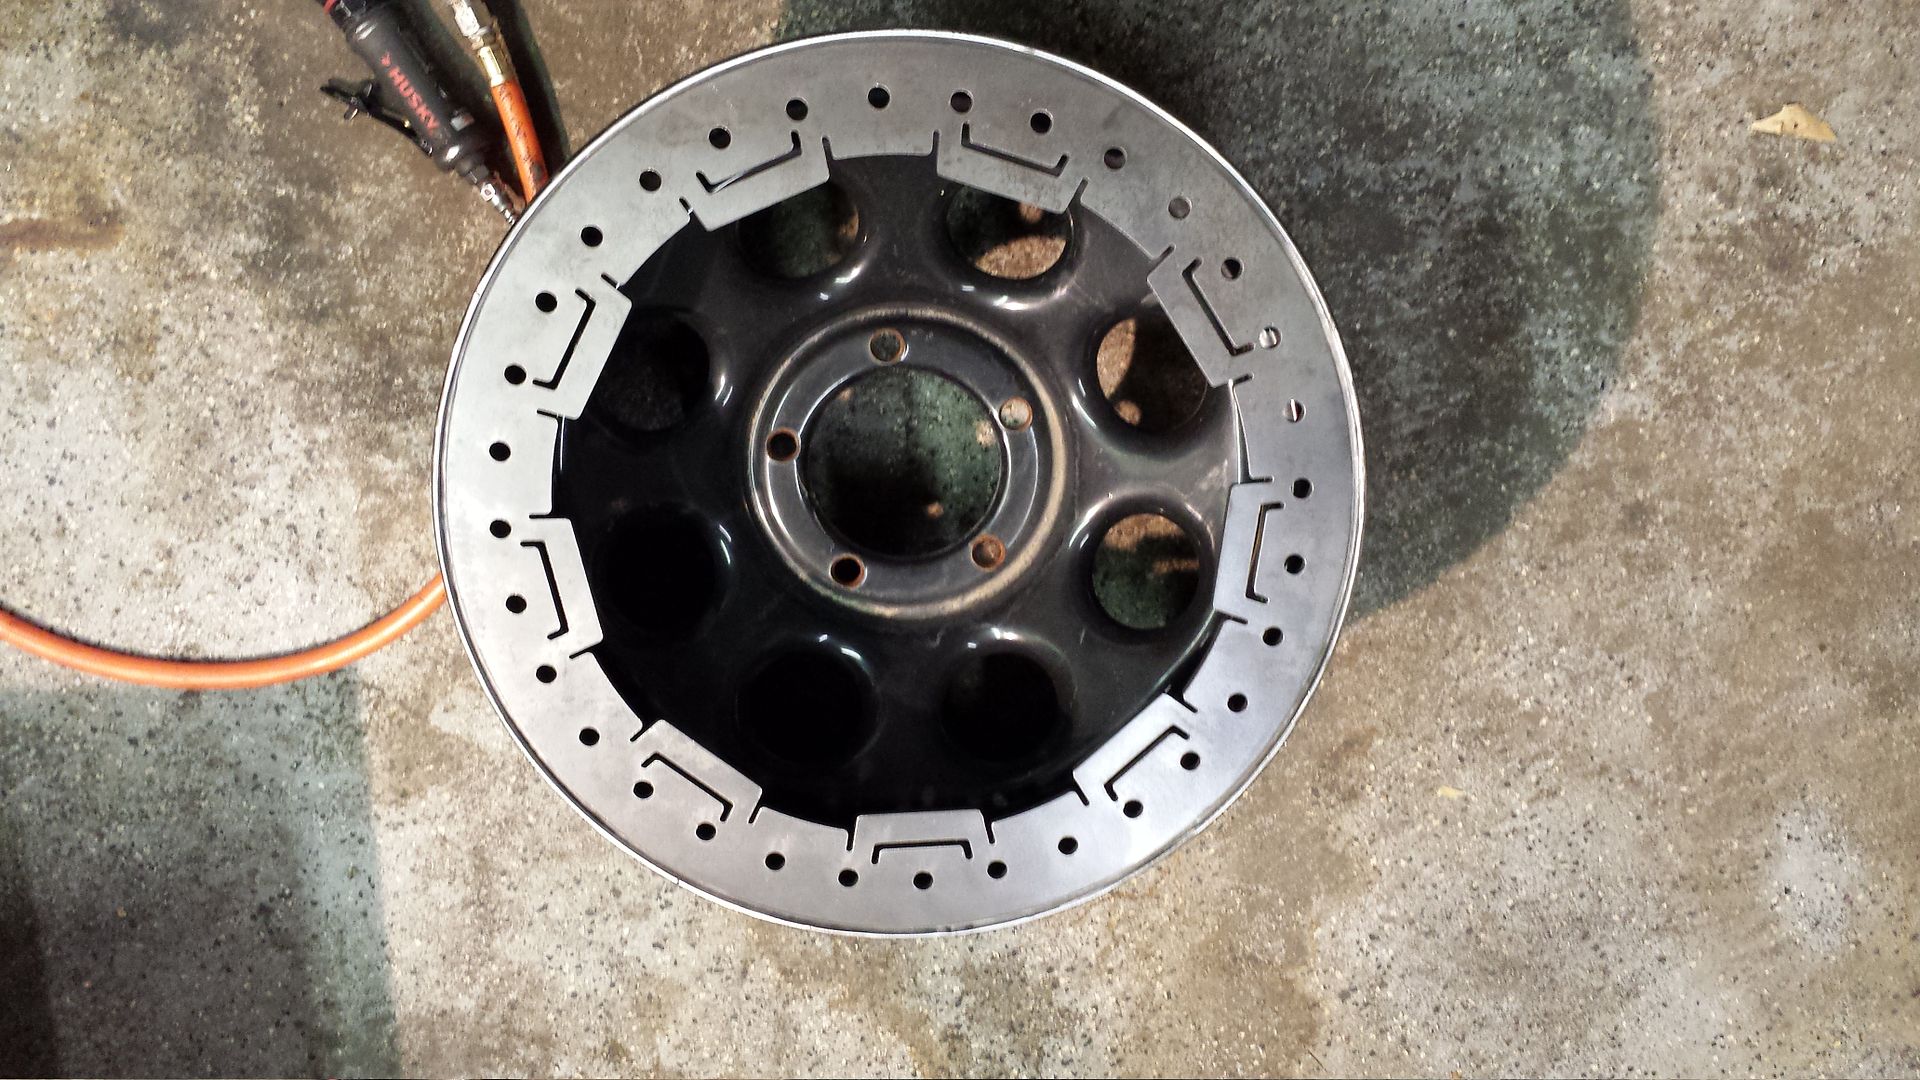
3. We need to tack the inner ring in the wheel flat. Put 4 tacks on it pushing down as you go.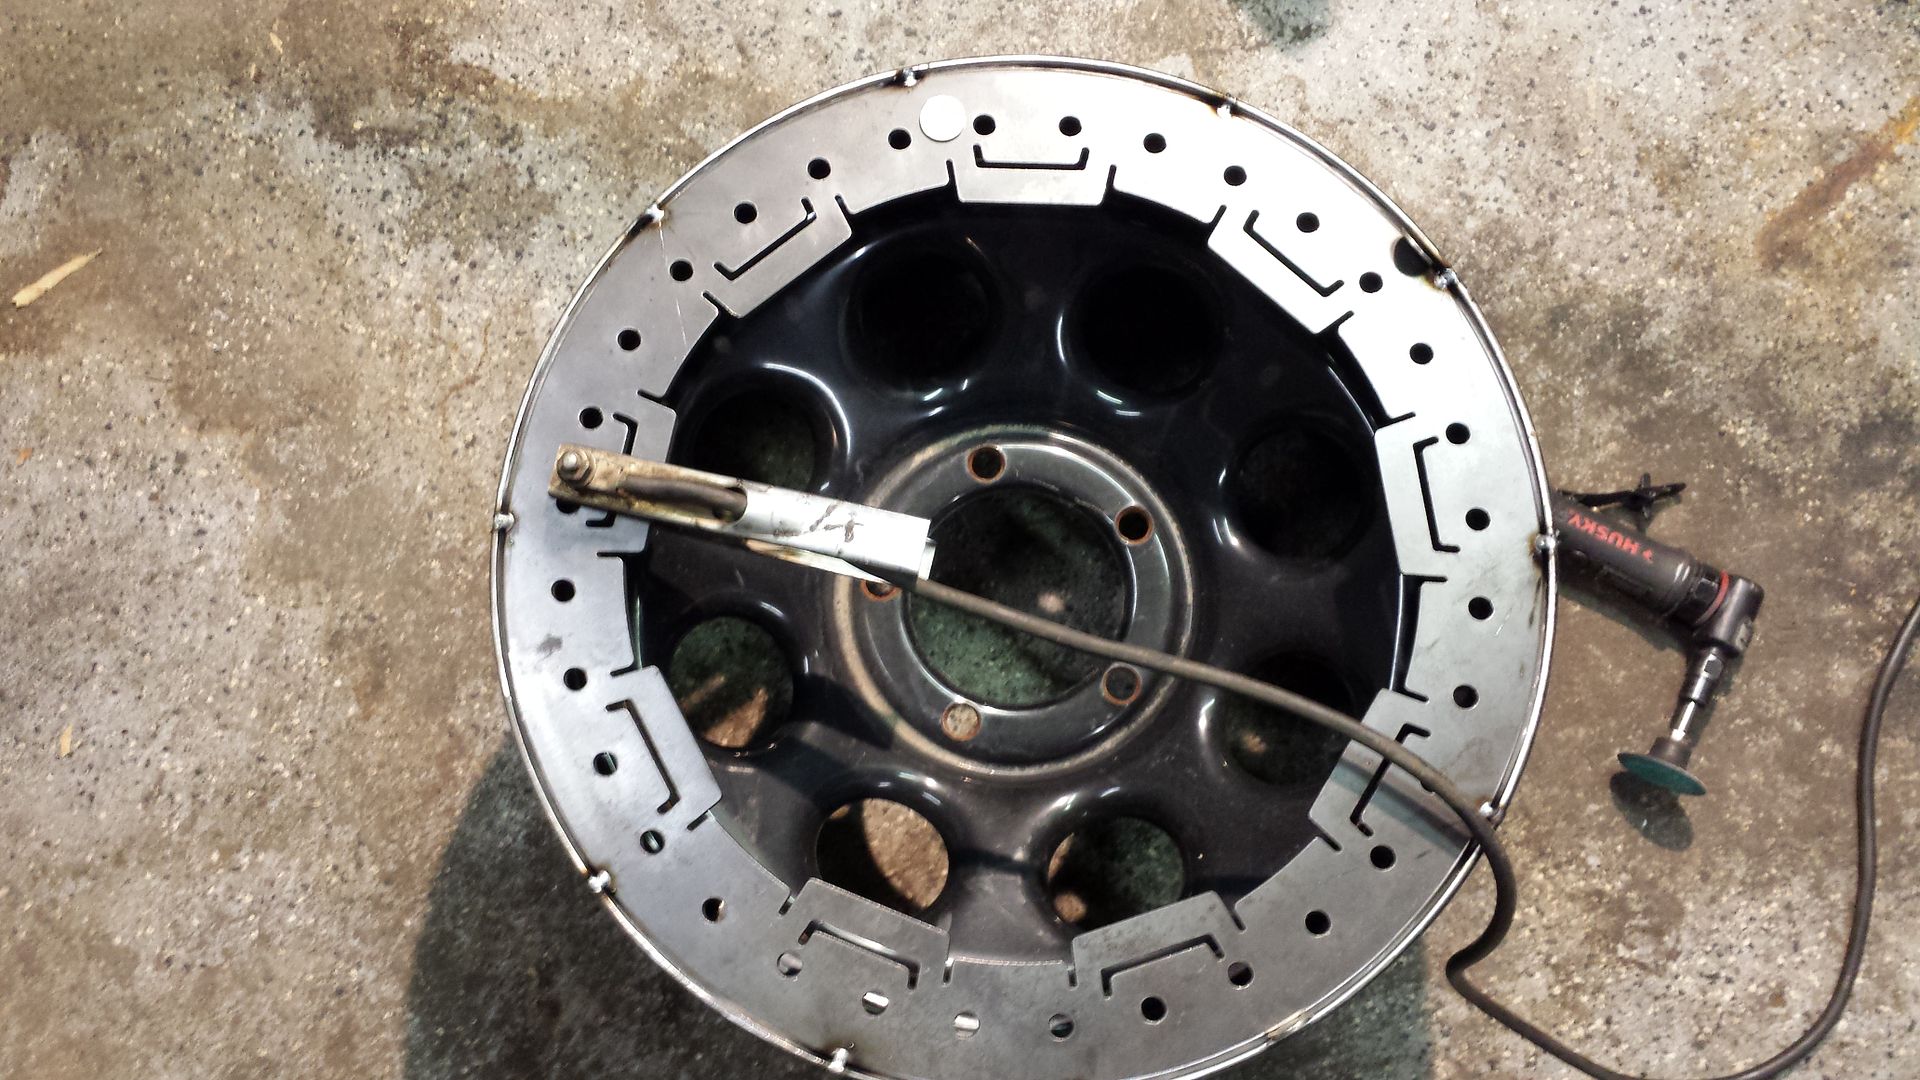
4. Once tacked we need to stitch weld all the way around alternate side to side. Make sure you start on the exciting weld for a air tight weld.
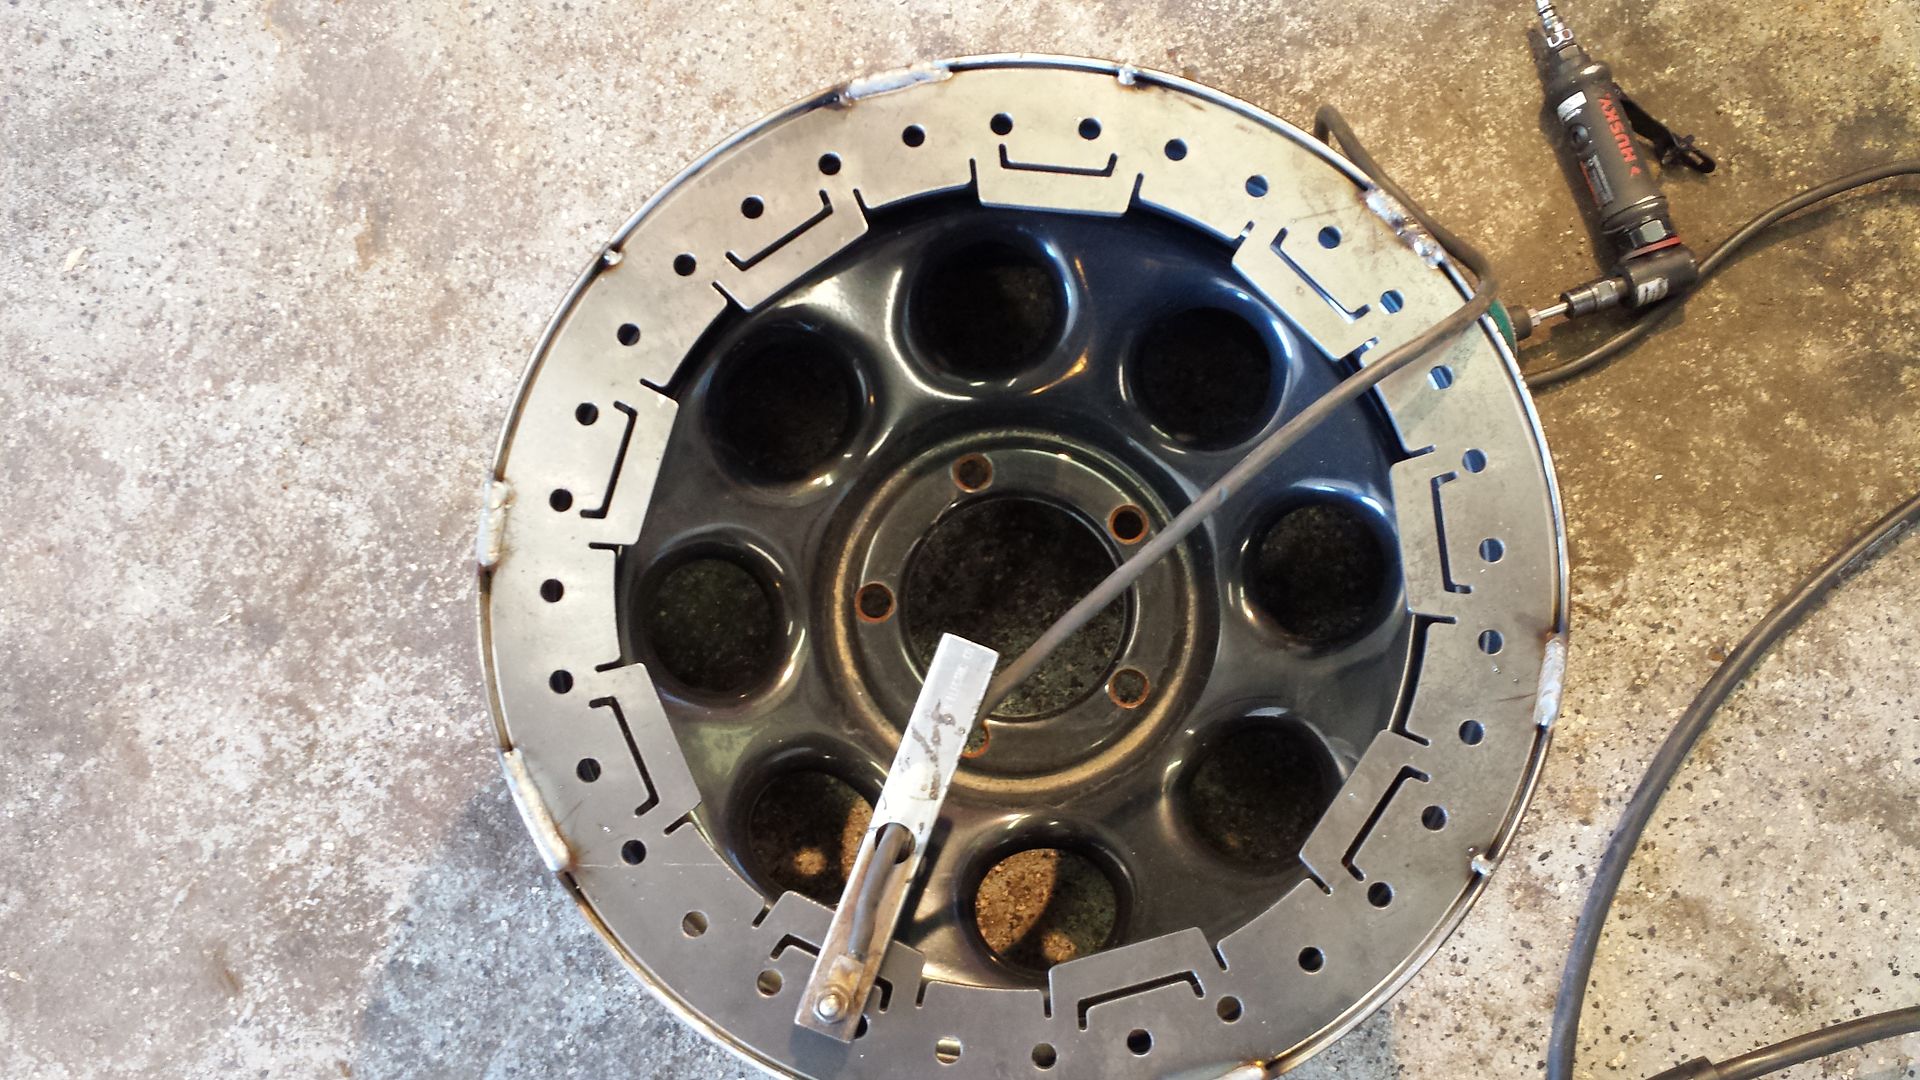
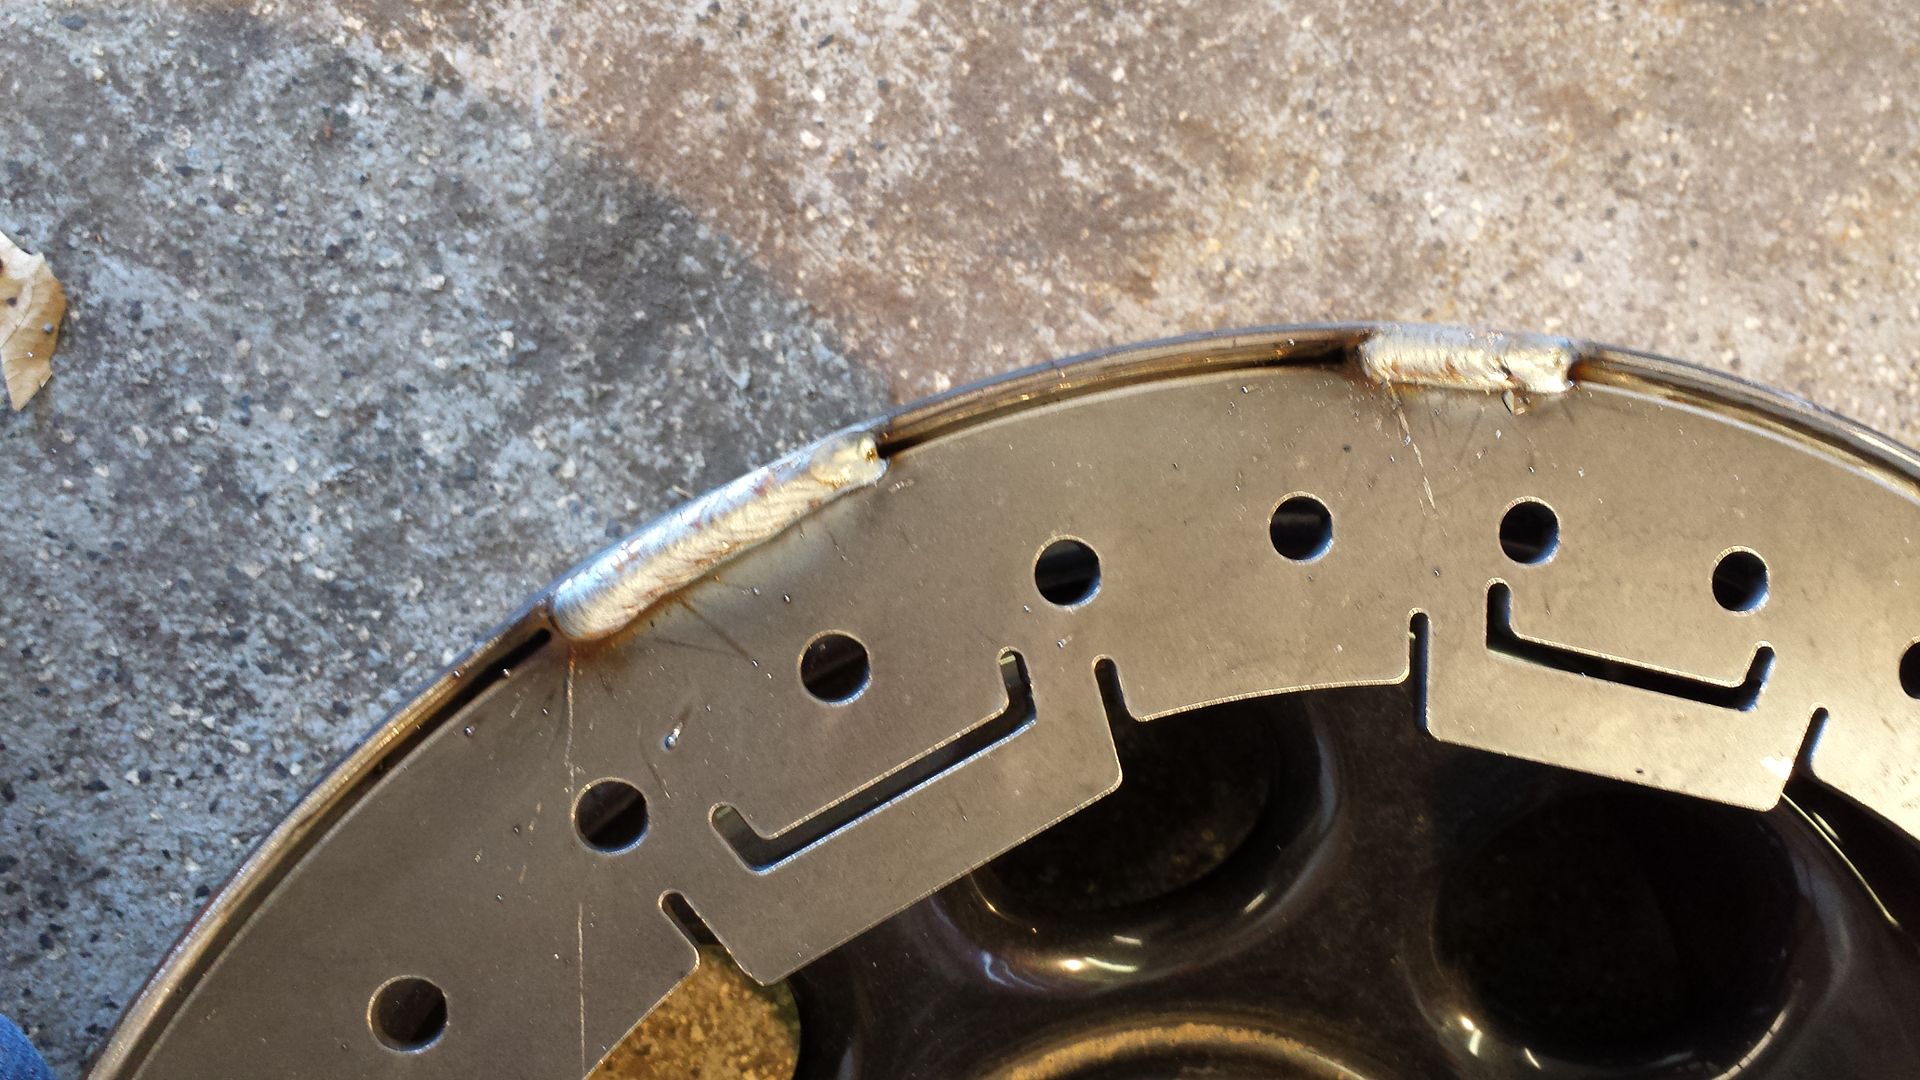
Fully welded.
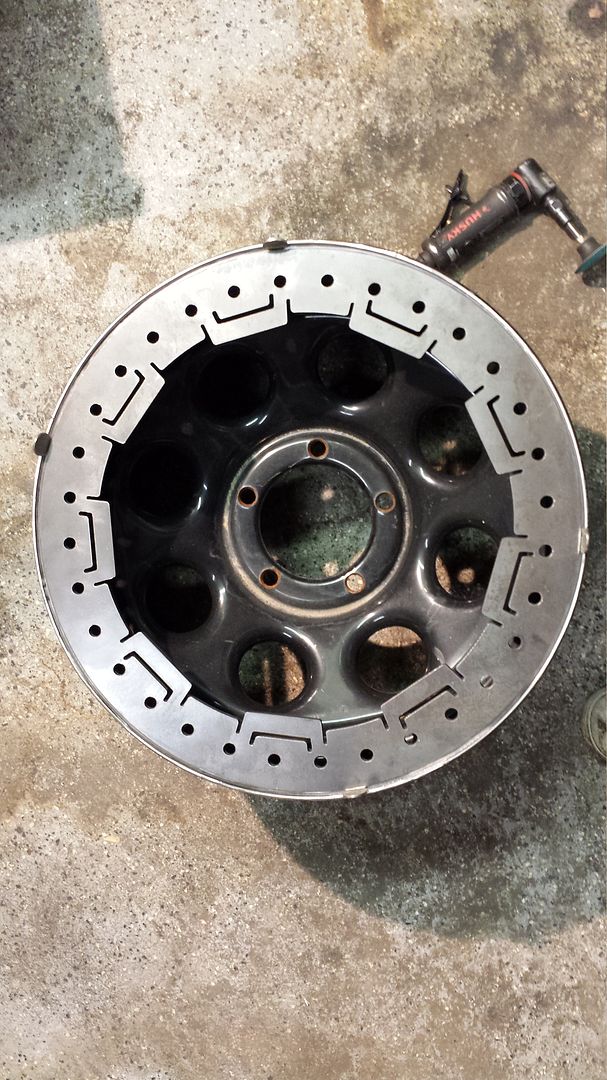
5. Now that is welded bend up the anti coning tabs with a wrench and weld them.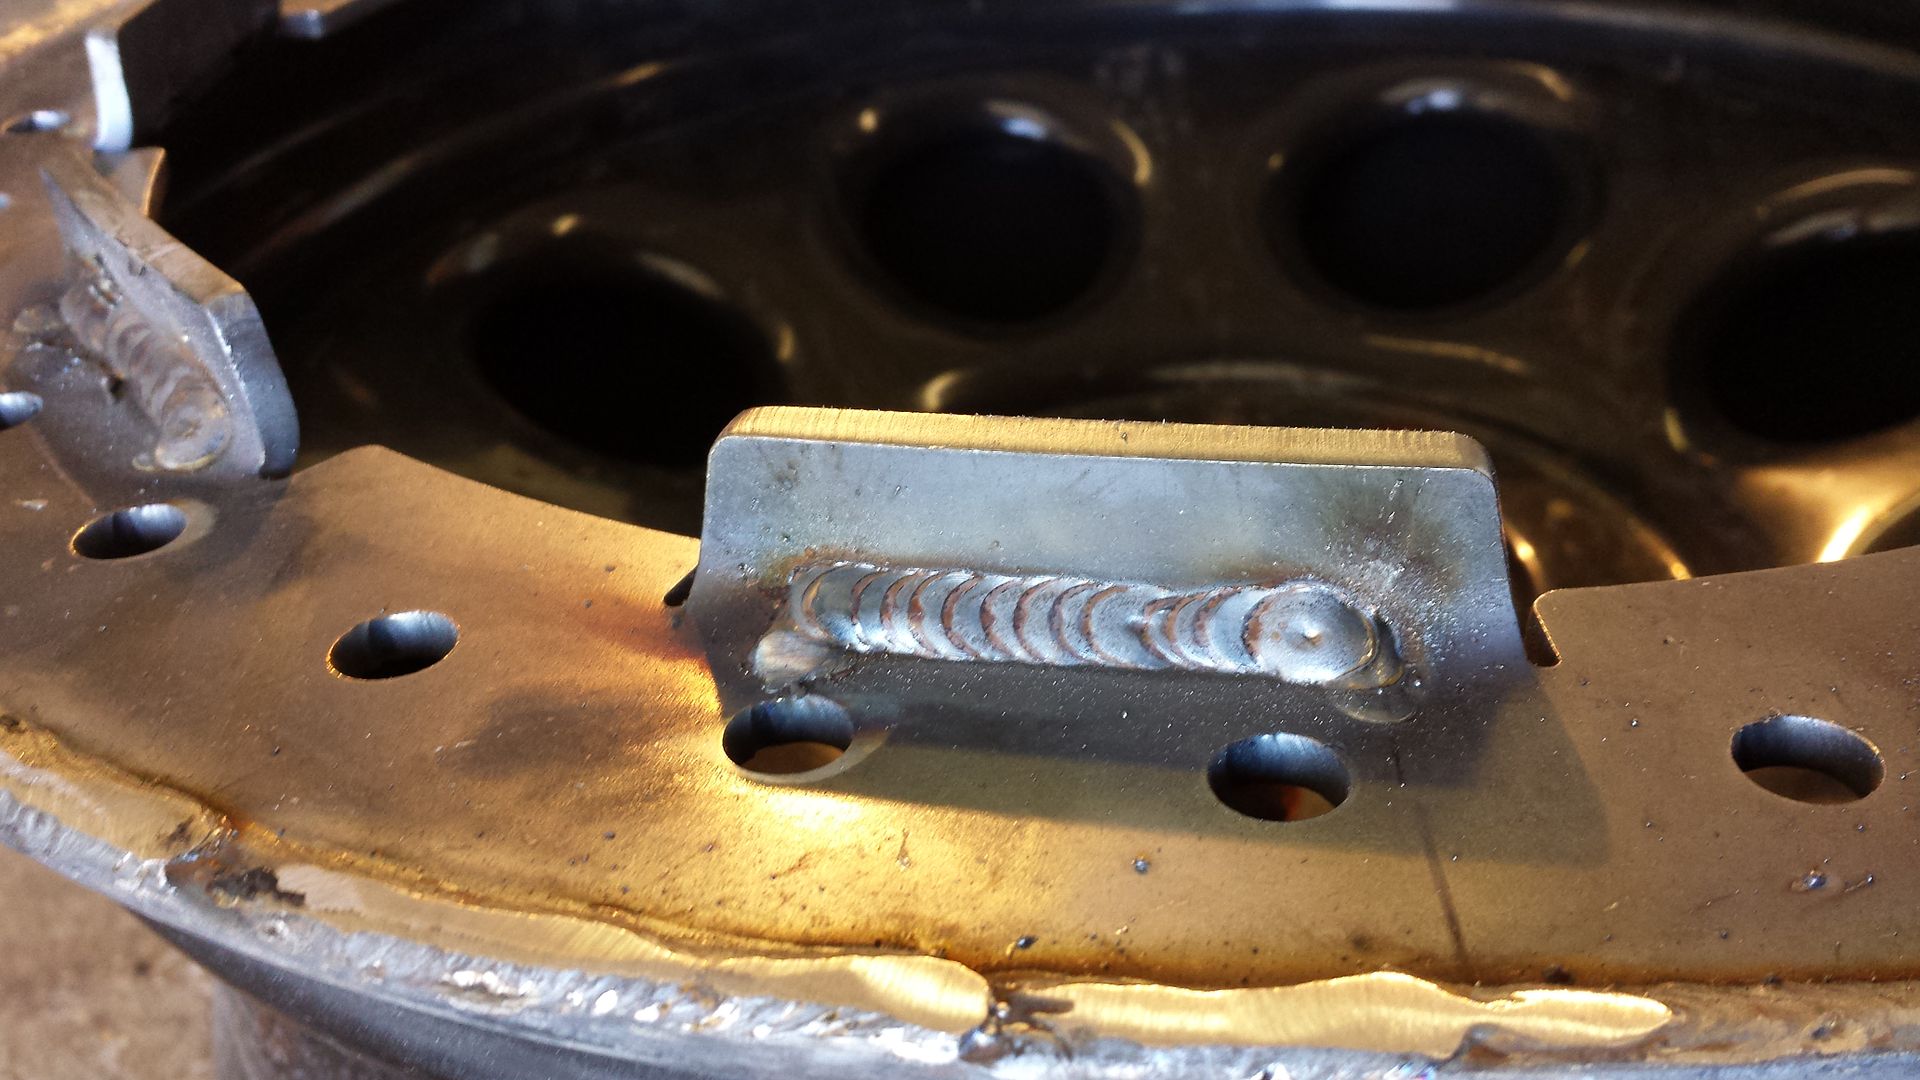
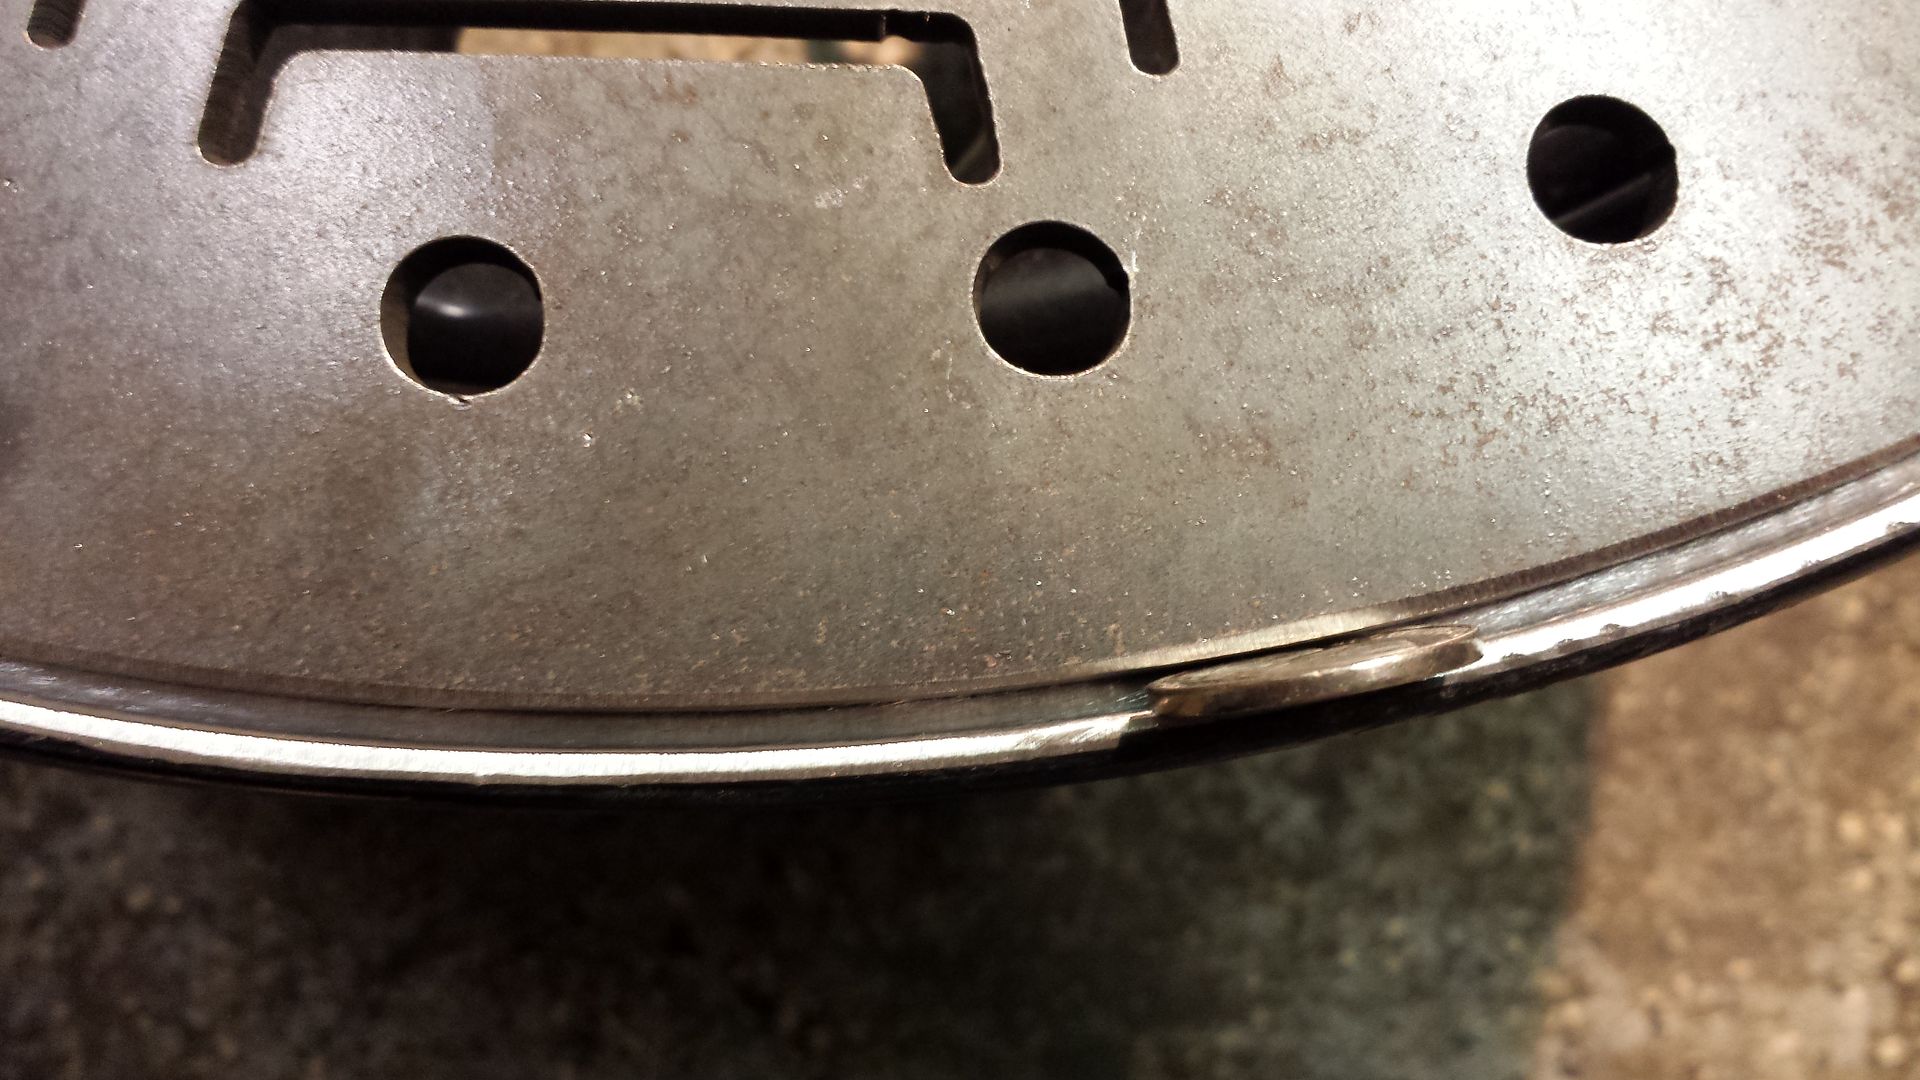
6. Spray a little soapy water on rhe the welds and spray air under and look for bubbles. If non great if yes fix it.
7. Paint the inner ring and outer ring your color of choice.

I opted for silver.
Next put the tire on and leave the tire on the inner lip. Set the outer ring on and fill the holes with bolts and nyol lock nuts. Use a air rachet to set them using a star pattern until they sit on the anti coning tabs.
Put a bead of tire adhesive or 100% silicone on the inner bead for a better seal. Here is a finished tire wheel.
Takes about 2 hours per wheel start to finish.
Another reason I went with them is there built in anti coning inner ring. Why do I want this? When you torque diwn the bolts it makes it less concerning to torque only 12lbs and it keeps warping to a minimum.

1. Prep your wheels for the inner ring. Take a die grinder ir a flap wheel and clean up the metal rear good. Only the lip and shoulder.

2. Once all the wheels are cleaned up we need to clean up the inner bead a little. Take your angle grinder and clean the edges and top edge no bevel is needed as there is a 1/8 gap all the way around. Drop the inner ring onto the wheel and gap it with sone nickels.


3. We need to tack the inner ring in the wheel flat. Put 4 tacks on it pushing down as you go.

4. Once tacked we need to stitch weld all the way around alternate side to side. Make sure you start on the exciting weld for a air tight weld.


Fully welded.

5. Now that is welded bend up the anti coning tabs with a wrench and weld them.

6. Spray a little soapy water on rhe the welds and spray air under and look for bubbles. If non great if yes fix it.
7. Paint the inner ring and outer ring your color of choice.

I opted for silver.
Next put the tire on and leave the tire on the inner lip. Set the outer ring on and fill the holes with bolts and nyol lock nuts. Use a air rachet to set them using a star pattern until they sit on the anti coning tabs.
Put a bead of tire adhesive or 100% silicone on the inner bead for a better seal. Here is a finished tire wheel.

Takes about 2 hours per wheel start to finish.