• Welcome to ClassicBroncos! - You are currently viewing the forums as a GUEST. To take advantage of all the site features, please take a moment to register. It's fast, simple and absolutely free. So please join our community today!
    If you have problems registering or can't log into your account, please contact Admin.

Fireball's '76 build thread - "Piece by Piece" - PAINTED, ASSEMBLED & ON THE ROAD!

allenfahey

Bronco Guru
Joined
Mar 18, 2004
Messages
2,672
Product is PPG Envirobase color and Deltron DC3000 and 4000 clear. I don't know anything about paint, but from what I am told this is a middle end product, maybe middle-high end. Allen, et al., feel free to chime in and correct that statement if needed.

It's looking great Ben!

Nothing wrong at all with PPG water! My brother uses it at his shop and says it sprays much like solvent. I prefer Spies waterbourne for the color matching and 1 1/2 coats wet on wet application :)

The biggest thing with hinges like on a Bronco is the buildup from primers and previous paint jobs. Moving it while it's still wet is just added insurance.

Remember when you reassemble it that 1 1/2" tape is your friend. Tape all the edges of the door, fender, tailgate ect. to prevent chipping the edges.

Do you think you'll be able to bring it to the Wrench and Roast next month?
 
OP
OP
Fireball05

Fireball05

Bronco Guru
Joined
Oct 7, 2012
Messages
1,822
Fireball's '76 build thread - "Piece by Piece" - GETTING PAINTED!

Anyone have any ideas for the license plate wiring?

Painless loom is too thick to fit through the 3 rubber grommets.

My electrical tape job doesn't look the best.

Do they sell heat shrink by the roll ? I've only seen it in few inch long strips. Would need 18" or so. That would probably look the best. ImageUploadedByTapatalk1373861112.212964.jpg
 

DirtDonk

Contributor
Bronco Guru
Joined
Nov 3, 2003
Messages
48,576
Your tape actually looks pretty good from here.
But yeah, they do sell shrink tubing in not only rolls, but better yet, 2, 3, 4 and probably even more foot-lengths.
Around here you can get it at the big electronic suppliers like Fry's Electronics, so it might be available and places like Grainger and MSC and the like.
Search for some local suppliers like that and see what you come up with.

I have always wanted to run my wiring down the side, rather than through the external grommets. I don't even know if it's possible, but I'm going to play with the concept when I get to that point.

Paul
 

JohnJohn

Contributor
Bronco Guru
Joined
May 6, 2005
Messages
2,165
Loc.
Richmond
Looking nice Ben.
I had a 4 foot roll of shrink tubing I got from a friend and used it to cover the license plate wires just like you were suggesting. It worked out great for the small holes.
 

.94 OR

Contributor
Bronco Guru
Joined
Jul 5, 2009
Messages
1,790
If you have a Harbor Freight near by, they carry a grab stack of rolled shrink tubing. A guy gave me two stacks for helping on a project. I think they are in 1/4", 3/8", 1/2", 3/4", 1". Not bad for about $5.

Once you have it, you'll find all sorts of used for the bigger stuff too.
 
OP
OP
Fireball05

Fireball05

Bronco Guru
Joined
Oct 7, 2012
Messages
1,822
Fireball's '76 build thread - "Piece by Piece" - GETTING PAINTED!

Thanks for the info guys, looks like I asked another dumb question! Didn't realize it was so common, I've only ever seen it in short 6 inch or so pieces, But I've never really looked for in rolls either.

Need to stop at Lowe's today for some other stuff so we'll see what they have and if not the harbor freight is not too far away.
 
OP
OP
Fireball05

Fireball05

Bronco Guru
Joined
Oct 7, 2012
Messages
1,822
Fireball's '76 build thread - "Piece by Piece" - GETTING PAINTED!

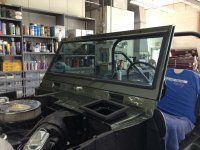
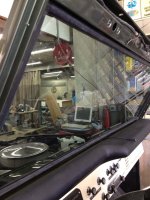
A little more progress today. Got the windshield in. Replacement glass with 50 percent ceramic film to keep the heat out and glare down on sunny days.
ImageUploadedByTapatalk1373939859.055930.jpg
ImageUploadedByTapatalk1373939871.980873.jpg

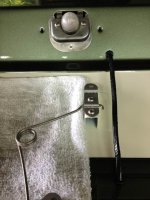
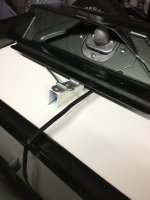
Got some heat shrink tubing for $1.99 at harbor freight and redid the license plate lamp wiring. Looks much better!
ImageUploadedByTapatalk1373939934.362557.jpg

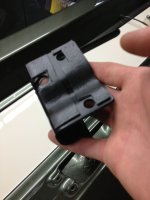
Also found some adhesive backed thin padding material at HF which I plan on using for some of the parts that make metal to metal contact.
ImageUploadedByTapatalk1373940002.040338.jpg

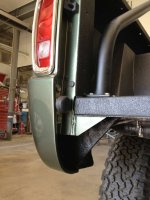
Did a little touch up with the raptor liner on the rear quarters and put the taillights in.
ImageUploadedByTapatalk1373940072.223070.jpg

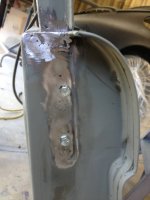
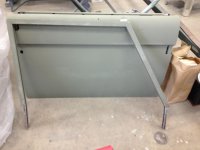
Also we (body man and me) finally got the doors and frames separated, patched, drilled, and nuts welded and ready for paint. I read that this was pretty easy to do but those people are big fat liars! You can't cut the welds out perfectly so there's a lot of welding and shaping and massaging to get everything looking good again once cutting apart.
ImageUploadedByTapatalk1373940265.878153.jpg ImageUploadedByTapatalk1373940284.173598.jpg
 

broncoitis

Bronco Guru
Joined
Jul 23, 2010
Messages
4,449
Windows came out really good. Having that option is gonna make putting them back together alot easier. Lookin good Ben!
 

fatboy

Contributor
Glad to be here.
Joined
May 15, 2006
Messages
7,025
Loc.
New Hampshire
Ben that will totally change the look of the truck when you take them out vice when they are in. Looking fantastic.
 

Blue Bastard

Bronco Guru
Joined
May 14, 2012
Messages
2,161
Fireball's '76 build thread - "Piece by Piece" - GETTING PAINTED!

Any updates?


Blue

Sent from my iPhone using Tapatalk 2
 

Broncitis

MEB Founder
Joined
May 18, 2004
Messages
5,267
Are you going to be able to debut it at the Wrench & Roast this coming weekend?
 

Broncitis

MEB Founder
Joined
May 18, 2004
Messages
5,267
My dad and I got to see it Friday when Ben came up for the pre-event help for the Wrench & Roast.

Ben has done a GREAT job with this and it really looks sweet!
 
OP
OP
Fireball05

Fireball05

Bronco Guru
Joined
Oct 7, 2012
Messages
1,822
The slow crawl to the end

It's been a bit of a slow crawl to the end here....got the Bronco out of the bodyshop and onto the road for the first time last Friday, and made it out to the Wrench and Roast.

Here's a photo Thursday at the body shop getting the fenders fitted and the lights, gas caps, etc:


And here is the official first glamour shot, sitting in AJ's yard, me busy practicing my poor photography skills while others were diligently working on the project Bronco!


It rained Saturday so didn't make it back out, but Sunday was beautiful and was able to get the bikini top on, the wipers installed and a few other things buttoned down.


You can see the new Bilstein 7100s peeking through the front fender opening in this photo. I put the 2.5" kit on from JBG with the deaver springs, and the included BDS shocks were much too soft for street use. Lots of floating in the front, like driving a waterbed. The Bilsteins are awesome! I also bought a pair of RS9000s, so sometime in the next few weeks I'll be doing my own little mini front shock shoutout in an effort to provide some useful comparative info for folks.


Overall I grossly underestimated the time money and effort a complete repaint would take! And for that matter almost every other aspect of the project. But I'm super happy to have it out on the road and be able to drive it around and enjoy it.


My only concern now is that the doors weren't completed so will have to be painted sometime in the next few weeks. Worried that the color won't match perfectly, but the body man has been spot on so far, so no need to doubt him at this point I guess. And that being said, I've also been toying with the idea of running some of the roadster inserts. What does everyone think? Half doors or roadster inserts??

Lots of little things left to do....some type of stereo system, modifying the hardtop into a safari top, mounting the tire carrier, etc.

Many thanks to the fine folks on this board for all the help, info and encouragement. This is my first stab at a classic vehicle restoration/renovation/modification/whatever you may want to call it, so I learned a bunch and had lots of fun and appreciate the help and patience given by everyone along the way! ;D
 
Top