• Welcome to ClassicBroncos! - You are currently viewing the forums as a GUEST. To take advantage of all the site features, please take a moment to register. It's fast, simple and absolutely free. So please join our community today!
    If you have problems registering or can't log into your account, please contact Admin.

Frame reinforcement

74 Bronco Billy

Contributor
Sr. Member
Joined
Jul 4, 2016
Messages
786
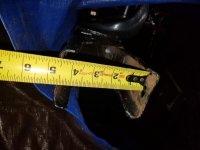
Have you reinforced your frame at the junction to the bumpers? What did you use? 4x2 3/16" or 4x2 1/4" or What? How deep did you go? DId you remove the rivets for the front body mounts and sleeve in deeper and reweld the body mounts? Any pictures would be appreciated.

Thanks,

Forrest ;D
 

Attachments

  • frame.jpg
    frame.jpg
    72.5 KB · Views: 169

ptwist

Full Member
Joined
Jun 27, 2018
Messages
154
Really interesting post. What is your goal for reinforcing the frame? I would expect that doing something like this would/could improve the torsional stiffness of the truck. I quickly calculated it a while back and though that the original frame has between 1300-1600 FTlbs/deg. of torsional stiffness. For whatever thats worth, LOL.
 
OP
OP
74 Bronco Billy

74 Bronco Billy

Contributor
Sr. Member
Joined
Jul 4, 2016
Messages
786

Thanks Steve, all welding techniques that I have applies in the past, but a great refresher. You have a lot of great info hidden in the Supermotors links.
But the question remains and I'd like to see some pictures of how guys did their repairs of the front horns. If you sleeve it, that could become a problem if your bumper has a large steel box to insert in the bumper horns....

Really interesting post. What is your goal for reinforcing the frame? I would expect that doing something like this would/could improve the torsional stiffness of the truck. I quickly calculated it a while back and though that the original frame has between 1300-1600 FTlbs/deg. of torsional stiffness. For whatever thats worth, LOL.

I think this may be high, but I'm not trying to reinforce the whole frame, just the ends where the bumpers connect.

It's not nearly that high. I have a bare eB frame, and it's about as flimsy as a bare '93 Bronco frame. I can make either wobble by hand.

Really? I hadn't tried this. Yikes!


So do these go on the sides? Pics man, I need pics please! :cool:;D

Thanks all,
F
 

Broncobowsher

Total hack
Joined
Jun 4, 2002
Messages
35,391
This is more of a bumper reinforcement than a frame reinforcement. Anyway what I did for a winch bumper that worked very well.

Just shoved the 2x4 into the frame until it bottomed and pulled back a hair. Drill and tap the insert at the factory holes to hold it in place. Now go in and drill a half dozen 1/4" holes through the frame and the insert. Now pull the insert out and drill the correct size hole and tap all the holes for 5/16" bolts. Go back to the frame and open all the holes up to 11/32".

This is the aircraft approach to making a structural joint. A lot of little fasteners to spread the load.

There is no point in trying to do large fasteners, the frame rail is too light. A 5/16" bolt is stronger then the frame. Sticking a huge 3/4" bolt through the frame will just rip the frame rail as it pulls the single point load out. By using a bunch of little fasteners it is connected everywhere. I think I used 3/16" wall because that is what I had. Plenty of meat for the threads to hold. Text book perfect, far from it. But as strong as the frame rail you are attaching to. In the end it all comes down to the weakest link.
Doing this is also easy, no sleaving needed.

Once I had both inserts installed and cut to length, build the bumper to them. Yes there are a lot more fasteners. But done right they hold great.
 

Glass Pony

Contributor
Bronco Guru
Joined
Feb 13, 2012
Messages
1,851
Loc.
Sussex County Delaware
So do these go on the sides? Pics man, I need pics please! :cool:;D

Thanks all,
F
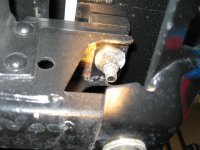
They don't go on the sides, they go inside the frame horns to reinforce the area around the bumper mounting bolt holes on the frame.
In the pic the reinforcement tab is in between the thick flat washer and the frame.

Now that I see the picture it looks like I was a little stingy on the paint on that one weld.:-[
 

Attachments

  • 2019-02-03 15.01.36.jpg
    2019-02-03 15.01.36.jpg
    86.2 KB · Views: 109
OP
OP
74 Bronco Billy

74 Bronco Billy

Contributor
Sr. Member
Joined
Jul 4, 2016
Messages
786
This is more of a bumper reinforcement than a frame reinforcement. Anyway what I did for a winch bumper that worked very well.

Just shoved the 2x4 into the frame until it bottomed and pulled back a hair. Drill and tap the insert at the factory holes to hold it in place. Now go in and drill a half dozen 1/4" holes through the frame and the insert. Now pull the insert out and drill the correct size hole and tap all the holes for 5/16" bolts. Go back to the frame and open all the holes up to 11/32".

This is the aircraft approach to making a structural joint. A lot of little fasteners to spread the load.

There is no point in trying to do large fasteners, the frame rail is too light. A 5/16" bolt is stronger then the frame. Sticking a huge 3/4" bolt through the frame will just rip the frame rail as it pulls the single point load out. By using a bunch of little fasteners it is connected everywhere. I think I used 3/16" wall because that is what I had. Plenty of meat for the threads to hold. Text book perfect, far from it. But as strong as the frame rail you are attaching to. In the end it all comes down to the weakest link.
Doing this is also easy, no sleeving needed.

Once I had both inserts installed and cut to length, build the bumper to them. Yes there are a lot more fasteners. But done right they hold great.

This is another good idea of how to get it done. For me, I might just well it in. DO you have any pictures of this?

They don't go on the sides, they go inside the frame horns to reinforce the area around the bumper mounting bolt holes on the frame.
In the pic the reinforcement tab is in between the thick flat washer and the frame.

Now that I see the picture it looks like I was a little stingy on the paint on that one weld.:-[

Ah, this makes a lot more sense. I thought they were 4" x 6" plates that went outside to weld to the frame and reinforce it....but I see this is for the old style bumpers, not what I had in mind. Thx for posting.

F
 

Steve83

Bronco Guru
Joined
Jul 16, 2003
Messages
9,090
Loc.
Memphis, TN, USA, Earth, Milky Way
...I'd like to see some pictures of how guys did their repairs of the front horns.
This & the NEXT several show what I did:


(phone app link)


This & the NEXT are the "before" pics:


(phone app link)


If I wanted to securely mount a bumper, I'd start with 2 2x2" square tubes stacked inside each frame horn, weld them together (NOT necessarily flush at their rear/inside ends, and NOT to the frame), drill every factory hole that hits either tube, weld a nut inside for each drilled hole (or just tap the hole if the tube wall is thick enough), and then bolt them tightly to the frame. Then I'd weld the new bumper to the fronts of those inserts.

I wouldn't change anything on the frame (unless it was already damaged), or add holes, or weld anything to the frame. But I might notch/contour the rear/inner ends of my inserts to fit around things so they'd reach more factory holes for drilling/bolting.
 

5001craig

Contributor
Bronco Guru
Joined
Nov 3, 2013
Messages
1,180
Mine look a little different than most. I saw something similar to what I did on here in another thread and liked it. This is tacked-up. No booger weld jokes--I am a work in progress...

cBMW-8Satie-ZfX8eFtj7TEgs6rT4KgTkzwgNCsFdzngDhbJ490EsPhwKhgf2pQrLDqCV9ggS1VSZaP0uEhZZoiMUj8zzUg5X-RHZzAq84Qgja12HzIqT4hlLwZWgdp0a9w6wG2hcRTb9v94fYx0PRzzfdEXooh53e_47lmbVaoN72SZhw3mQJFgTm-yIxOSvm07aAW1l9aBMPPeycTakJFw542AgMijsc4KP1vXQmgROK47wKg7PtWFQGNcfLBZbQ_NVmJnnvx-gIEctGhGPxtMnY3N9dGTp7Hw61NqkJDgq1kbOD0o-4h6Q72goB3Zt7ei-9xVkRwIswHISg31Ulm54kuCZxpBJE_R-qcgCgcsYNT1PITHcJ0xjGaY0Tji7dw0AlwmmH8x8zjevUjZxtBQerToiFISIYCMX9wa5l42bIo-ww0_9tJ-34M1iZTI0VtMNkhCplyMewtNbHs9yWNJe_IW3Yekf6DXLX0yRPZcxoed1lNbWzxbp7f5izskScr-NQfwV0NgRfZo-PqXrtlSuIbeU-ywej72iPtR569-F4Th-VGy1yVKV8ZRMi-8jubv-FWMkGsrSBpbdGRztK1awC0UKLRNNEdJMjIbC6ad8aM33gqy2rAQ6omburnZHNSWogWpgZYrtfA1bbCWI_ZxhfZsQuXx=w540-h959-no


KKlDTY5zmxR1799jv6rAPRiSCqUtLtjPufG0_3knGN0ne_1WoCoXYOEN9p3NVWxMbgPmYPlzxrauuUIY2G5LWMq2yAVQGBAWjLMi8QBOk0_5fW01OfH17q36u591qMjIixonQBHusqManAuykddIrVTdOZHJTZ-o-Az2qddXSoJtQMFSn_Paep5cOTPd1uFHHtJSGCfwUXI5m_W6X5ke4ny_M69HoAsBPD-HwlUaUOUNX584M8Z20McpjUsfpSsAQ-EtwfaV8NefCEf3DiTrkIPJXadoUQMkE5YvbGt3jLvalUa3VvjvHUN6PvQ9KrcBIHxb3e5gX4XJG_HHaT4T6ggkM05Fh2IKX5DWYKSEvFb2GU8j2JJmgJDU55KrCf3UUBig4Jef8Jx_fPkw9hEn0JNs1VqKrdoU8eJGn0fyAekVBSiv-gaMTbNiYrLqsCwZLIQ6o2CI0QPkzlL_u3yGFNSdIyJOT3d0LXdz7SVwBMsSfIVlrMc6tvd61h6OMXymvIv_4eoijhwZs33yGGjDbP7BxxjiC4CN1C-ghDcdTw1wskIKtk1claNT6P1cf5lqS8qfYKoL22Hf-sB9RbUI2TlY4Hc9xb_Vg4MX4l-VQOGyG9H7lagThhcABhMYi7aG96zrZ6ZtSs-o4-VBUIlrsGWyALFCKEmV=w1279-h960-no
 
OP
OP
74 Bronco Billy

74 Bronco Billy

Contributor
Sr. Member
Joined
Jul 4, 2016
Messages
786
This & the NEXT several show what I did:


(phone app link)


This & the NEXT are the "before" pics:


(phone app link)


If I wanted to securely mount a bumper, I'd start with 2 2x2" square tubes stacked inside each frame horn, weld them together (NOT necessarily flush at their rear/inside ends, and NOT to the frame), drill every factory hole that hits either tube, weld a nut inside for each drilled hole (or just tap the hole if the tube wall is thick enough), and then bolt them tightly to the frame. Then I'd weld the new bumper to the fronts of those inserts.

I wouldn't change anything on the frame (unless it was already damaged), or add holes, or weld anything to the frame. But I might notch/contour the rear/inner ends of my inserts to fit around things so they'd reach more factory holes for drilling/bolting.

Thanks Steve

Mine look a little different than most. I saw something similar to what I did on here in another thread and liked it. This is tacked-up. No booger weld jokes--I am a work in progress...

cBMW-8Satie-ZfX8eFtj7TEgs6rT4KgTkzwgNCsFdzngDhbJ490EsPhwKhgf2pQrLDqCV9ggS1VSZaP0uEhZZoiMUj8zzUg5X-RHZzAq84Qgja12HzIqT4hlLwZWgdp0a9w6wG2hcRTb9v94fYx0PRzzfdEXooh53e_47lmbVaoN72SZhw3mQJFgTm-yIxOSvm07aAW1l9aBMPPeycTakJFw542AgMijsc4KP1vXQmgROK47wKg7PtWFQGNcfLBZbQ_NVmJnnvx-gIEctGhGPxtMnY3N9dGTp7Hw61NqkJDgq1kbOD0o-4h6Q72goB3Zt7ei-9xVkRwIswHISg31Ulm54kuCZxpBJE_R-qcgCgcsYNT1PITHcJ0xjGaY0Tji7dw0AlwmmH8x8zjevUjZxtBQerToiFISIYCMX9wa5l42bIo-ww0_9tJ-34M1iZTI0VtMNkhCplyMewtNbHs9yWNJe_IW3Yekf6DXLX0yRPZcxoed1lNbWzxbp7f5izskScr-NQfwV0NgRfZo-PqXrtlSuIbeU-ywej72iPtR569-F4Th-VGy1yVKV8ZRMi-8jubv-FWMkGsrSBpbdGRztK1awC0UKLRNNEdJMjIbC6ad8aM33gqy2rAQ6omburnZHNSWogWpgZYrtfA1bbCWI_ZxhfZsQuXx=w540-h959-no


KKlDTY5zmxR1799jv6rAPRiSCqUtLtjPufG0_3knGN0ne_1WoCoXYOEN9p3NVWxMbgPmYPlzxrauuUIY2G5LWMq2yAVQGBAWjLMi8QBOk0_5fW01OfH17q36u591qMjIixonQBHusqManAuykddIrVTdOZHJTZ-o-Az2qddXSoJtQMFSn_Paep5cOTPd1uFHHtJSGCfwUXI5m_W6X5ke4ny_M69HoAsBPD-HwlUaUOUNX584M8Z20McpjUsfpSsAQ-EtwfaV8NefCEf3DiTrkIPJXadoUQMkE5YvbGt3jLvalUa3VvjvHUN6PvQ9KrcBIHxb3e5gX4XJG_HHaT4T6ggkM05Fh2IKX5DWYKSEvFb2GU8j2JJmgJDU55KrCf3UUBig4Jef8Jx_fPkw9hEn0JNs1VqKrdoU8eJGn0fyAekVBSiv-gaMTbNiYrLqsCwZLIQ6o2CI0QPkzlL_u3yGFNSdIyJOT3d0LXdz7SVwBMsSfIVlrMc6tvd61h6OMXymvIv_4eoijhwZs33yGGjDbP7BxxjiC4CN1C-ghDcdTw1wskIKtk1claNT6P1cf5lqS8qfYKoL22Hf-sB9RbUI2TlY4Hc9xb_Vg4MX4l-VQOGyG9H7lagThhcABhMYi7aG96zrZ6ZtSs-o4-VBUIlrsGWyALFCKEmV=w1279-h960-no

Craig, that really looks awesome, I like how you incorporated the towing eye for the D-ring. Really clean. Hats off to the previous poster! :cool:;D

F
 
Top