• Just a reminder that you won't be able to start new posts or reply to existings posts in the Archive forum.

    This is where all the old posts go so they can still be used for reference and searched.
  • Welcome to ClassicBroncos! - You are currently viewing the forums as a GUEST. To take advantage of all the site features, please take a moment to register. It's fast, simple and absolutely free. So please join our community today!
    If you have problems registering or can't log into your account, please contact Admin.

Gunmetal Gray Luber No More - Meet "Mallory," My Mallard Green Rig!

OP
OP
ILikeBond

ILikeBond

Sr. Member
Joined
Jan 27, 2009
Messages
908
The driver side rear frame mount hole was rusted out a bit, but it was relatively slight. All the other holes were fine/round.

I'm going to decide on all paint/body issues at the end. That panel also has a rolled fender and chipped paint and the bottom left corner, rear of the door post is pointed out. So that whole panel needs to be addressed. That I'll probably leave to a shop.
 

garberz

Bronco Influencer
Joined
Jun 24, 2007
Messages
6,861
Loc.
Conejo Valley, Ca.
I just got caught up on this thread. I remember the weekend you picked this up, you stopped by my place to pick up a couple of things. You told me what happened, that was quite a story, one you and your wife won't soon forget. I'll assume the rest of the drive home went smoothly. It's neat to see all the stuff you've done since then and your future plans.
Welcome to the SoCal Broncos group, hopefully we'll see you at TDS in Mar. or Big Bear In June.

Mark
 
OP
OP
ILikeBond

ILikeBond

Sr. Member
Joined
Jan 27, 2009
Messages
908
Hey, Mark. Yeah, I think you gave me a spare tire carrier you had while I drooled over your rig. Hope to see you out there soon!
 
OP
OP
ILikeBond

ILikeBond

Sr. Member
Joined
Jan 27, 2009
Messages
908
It was one of those magical days when the WildHorses Fairy visited. Sweet!

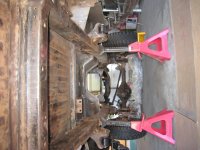
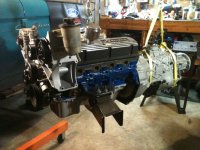
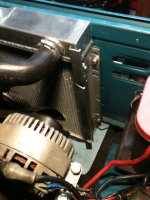
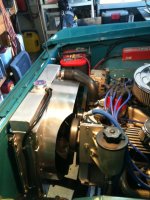
Goodies included Sherman EFI tank, 31 spline extreme duty axles, new drums and kit, slick Bronco valve covers, super shackles and some other goodies. I mocked the valve covers up, they look great. Also took a few photos comparing the axles to the stock 28 spliners. I've collected enough parts that keeping everything in random cardboard boxes was becoming a little unorganized, so I got a couple of these 45-gallon tupperwares at WalMart. Perfect. Of course, I can't wait till this stuff ends up where it belongs, instead of tucked away. %)

IMG_1660.jpg IMG_1664.jpg IMG_1668.jpg IMG_1674.jpg IMG_1678.jpg IMG_1680.jpg IMG_1684.jpg

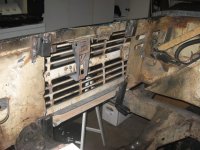
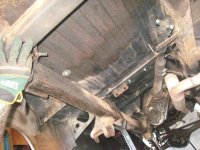
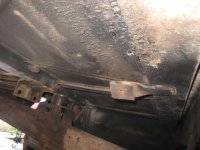
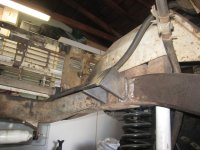
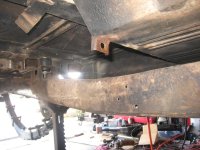
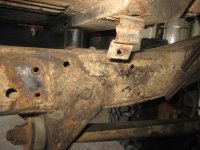
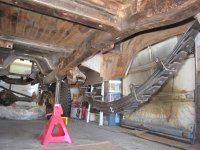
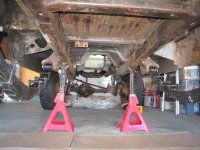
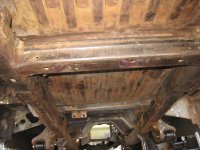
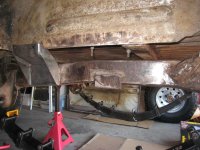
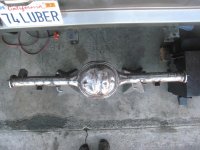
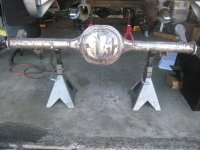
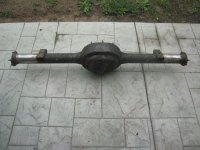
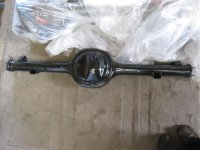
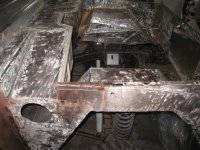
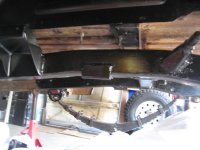
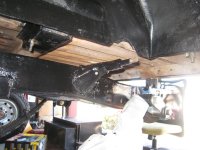
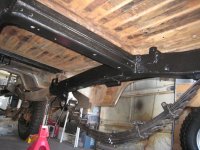
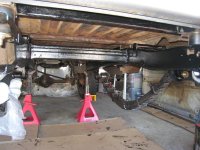
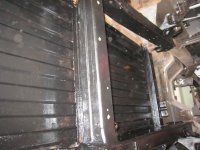
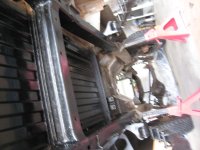
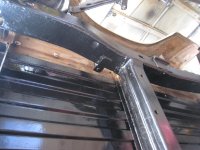
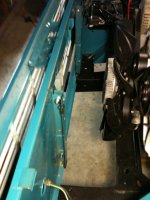
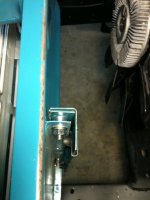
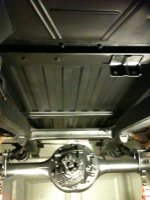
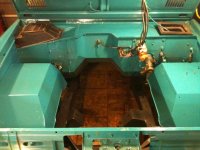
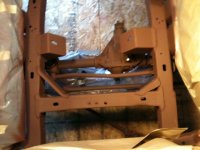
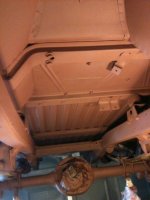
Been mostly working on my 9" lately. Have it down to the housing, the outside is all wire wheeled and clean. This took far more time and effort than I expected. One lower shock mount was thoroughly rusted through and it took days of working with a blowtorch, PB blaster, air tools and a bfh to finally get it free. In retrospect, since I'm using the WH shock jock lower mounts, I could have saved myself some time by just grinding it off, but I did have a satisfying sense of accomplishment when the nut finally budged. The third member was also stuck on a few of the studs for a couple days, but I eventually coaxed it off. Holy hell is that thing heavy.

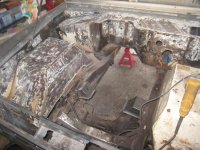
Backing plates are soaking in carb cleaner, then will get rust treatment. Then mock-up, measuring for stocks, shock jock mounts, paint, reassembly, then once the frame and undercarriage are clean and painted, back on the Bronco with all the suspension parts I've been collecting. Hoping to have the rear end done within a couple weeks.
 

bsquared

Contributor
Sr. Member
Joined
Dec 4, 2010
Messages
972
Hey Jack,
Great build thread and keep up the good work / engine porn pics!

My build was VERY similar to yours, although I did it in two phases....engine / 2" body lift / paint undersides for the first phase and 2.5" WH suspension lift for the second.

Once I had the drive train out and 2" body lift in, I wire wheeled the entire underside and frame (as best I could) and sprayed it with Rustoleum primer and flat black. I'm sure other products are better, but it's held up so far and I could spray it with the body on. Wheeling the underside is damn hard on the forearms, so I hope you're built like Popeye! Good luck on the build and I'm subscribed to see the EFI install!

FYI - For my radiator install, I cut off the original I-6 vertical mounts, flipped them and added spacers to be flange out. Went with a Champion radiator that was designed for a 1970 Mustang. It gave me the clearance needed for the serpentine setup and had the inlet and outlet on the correct sides. PM me if you'd like more info on that setup. Cheers, B2
 

Attachments

  • MountSpacers1.JPG
    MountSpacers1.JPG
    109 KB · Views: 146
  • MountSpacers.JPG
    MountSpacers.JPG
    82.6 KB · Views: 143
  • EngineTrans.jpg
    EngineTrans.jpg
    126.3 KB · Views: 188
  • Paint6.JPG
    Paint6.JPG
    115 KB · Views: 166
  • Paint2.JPG
    Paint2.JPG
    114.2 KB · Views: 172
  • Primer3.JPG
    Primer3.JPG
    120.2 KB · Views: 147
  • Primer1.JPG
    Primer1.JPG
    107.2 KB · Views: 142
  • Weld5.JPG
    Weld5.JPG
    105.7 KB · Views: 142
OP
OP
ILikeBond

ILikeBond

Sr. Member
Joined
Jan 27, 2009
Messages
908
Thanks, B2, for the great information and inspiration. You're right, our plans are very similar. I'm doing exactly what you did - wire wheeling the entire underside and frame, then coating it. I decided to go with Chassis Saver (link includes a neat video using the stuff on Ted Nuget's Big Bronco - look around the 2 minute mark) after reading about its similarities to, and advantages over POR 15 (basically, just as good protection, less prep and finishing required). I picked up a gallon of antique satin black the other day.

I will be doing a little reverse of you - working out the suspension first, then will address the drive train. I'm also sort of splitting the Bronco back and front. So far I've removed everying (and I mean everything) from tailgate to transfer case. Going to wire wheel back to those annoying body mounts behind the front seats, then do the rear suspension. Once the rear wheels are back on, I'll start at the front bumper, take the engine, tranny and everythign else out, wire wheel all that, paint it all, then put the suspension all back together. Then finally the engine and tranny.

Thanks again - I may well PM you on the radiator when I get there.
 

bsquared

Contributor
Sr. Member
Joined
Dec 4, 2010
Messages
972
Good scoop there on the Chassis Saver. I'm helping out my future Bro-in-Law with his Gumbo Monster Mudder Bronco in New Orleans and it's going to need a 55 gal drum of that stuff!
Here's a couple more pics of how it mounts vertically like the I-6's do. Just PM me when ready. Keep on bustin' the knuckles and good luck!
 

Attachments

  • Shroud2.JPG
    Shroud2.JPG
    131.4 KB · Views: 159
  • Shroud94.JPG
    Shroud94.JPG
    150.1 KB · Views: 167

72SDBRONCO

New Member
Joined
May 7, 2012
Messages
139
Loc.
San Diego
Looking good, and welcome to SD! We just moved down here this summer too. Looking forward to following your project. Nice work.

John
 
OP
OP
ILikeBond

ILikeBond

Sr. Member
Joined
Jan 27, 2009
Messages
908
Little update here. Been doing a lot of stuff, but not a lot that's too exciting for pictures. Had a big day today though. Bye, bye I6!

enginef.jpg IMG_2076.jpg IMG_2087.jpg IMG_2094.jpg IMG_2095.jpg IMG_2091.jpg
 
OP
OP
ILikeBond

ILikeBond

Sr. Member
Joined
Jan 27, 2009
Messages
908
Removed tranny and mocked up WH Shock Jock mounts yesterday (which included trimming the wheel wells a bit). Once I get the shock mounts and fuel tank brackets welded, I should be close to putting the rear end back together again. Will just need to finish cleaning the fame and underside, then paint.

IMG_2142.jpg IMG_2137.jpg IMG_2110.jpg IMG_2113.jpg
IMG_2120.jpg
 
OP
OP
ILikeBond

ILikeBond

Sr. Member
Joined
Jan 27, 2009
Messages
908
It's been several months, but I finally have some progress worth reporting.

Aside from a 2-month period when the project lay dormant while I worked and traveled for the holidays, I've been spending my time disassembling the Bronco down to the tub and frame, cleaning the frame (wire wheel, degreasers, sanding, etc.), and prepping the engine compartment for paint by sanding.

First, I found a guy on craigslist to help me weld V8 motor and radiator mounts, and shock jocks in the rear.
 

Attachments

  • IMG_2240.jpg
    IMG_2240.jpg
    115.4 KB · Views: 120
  • IMG_2236.jpg
    IMG_2236.jpg
    131.6 KB · Views: 121
  • IMG_2205.jpg
    IMG_2205.jpg
    83.6 KB · Views: 112
OP
OP
ILikeBond

ILikeBond

Sr. Member
Joined
Jan 27, 2009
Messages
908
Then I started tackling the dirt and grime on the frame and undercarriage. This is the kind of stuff I was working against.
 

Attachments

  • IMG_1759.jpg
    IMG_1759.jpg
    126.2 KB · Views: 110
  • IMG_1618.jpg
    IMG_1618.jpg
    112.1 KB · Views: 111
  • IMG_1596.jpg
    IMG_1596.jpg
    112 KB · Views: 111
  • IMG_1594.jpg
    IMG_1594.jpg
    114.8 KB · Views: 110
  • IMG_1593.jpg
    IMG_1593.jpg
    111 KB · Views: 113
  • IMG_1575.jpg
    IMG_1575.jpg
    151.9 KB · Views: 116
  • IMG_1569.jpg
    IMG_1569.jpg
    114 KB · Views: 110
  • IMG_1564.jpg
    IMG_1564.jpg
    109.6 KB · Views: 110
  • IMG_2737.jpg
    IMG_2737.jpg
    103.7 KB · Views: 99
  • IMG_2733.jpg
    IMG_2733.jpg
    100.6 KB · Views: 104
  • IMG_2731.jpg
    IMG_2731.jpg
    111.6 KB · Views: 104
  • IMG_2730.jpg
    IMG_2730.jpg
    115 KB · Views: 114
OP
OP
ILikeBond

ILikeBond

Sr. Member
Joined
Jan 27, 2009
Messages
908
Many hours of wire-wheeling, angle-grinding, detail brushing, and degreasing later, here's what I had.
 

Attachments

  • IMG_2874.jpg
    IMG_2874.jpg
    125.7 KB · Views: 119
  • IMG_2873.jpg
    IMG_2873.jpg
    115.9 KB · Views: 131
  • IMG_2872.jpg
    IMG_2872.jpg
    110.3 KB · Views: 125
  • IMG_2871.jpg
    IMG_2871.jpg
    109.6 KB · Views: 128
  • IMG_2868.jpg
    IMG_2868.jpg
    127.2 KB · Views: 130
  • IMG_2742.jpg
    IMG_2742.jpg
    85.5 KB · Views: 126
Last edited:
OP
OP
ILikeBond

ILikeBond

Sr. Member
Joined
Jan 27, 2009
Messages
908
Pulled the 9" and cleaned up the housing. Painted with Chassis Saver, though I seem to have neglected to take photos. Will do so next time and edit this post to add them later.
 

Attachments

  • IMG_2263.jpg
    IMG_2263.jpg
    115.9 KB · Views: 92
  • IMG_2257.jpg
    IMG_2257.jpg
    113.3 KB · Views: 93
  • IMG_2255.jpg
    IMG_2255.jpg
    117.3 KB · Views: 93
  • IMG_1760.jpg
    IMG_1760.jpg
    106.6 KB · Views: 91
  • IMG_1625.jpg
    IMG_1625.jpg
    139.2 KB · Views: 86
  • IMG_3221.jpg
    IMG_3221.jpg
    104.9 KB · Views: 79
  • IMG_3219.jpg
    IMG_3219.jpg
    99.9 KB · Views: 78
Last edited:
OP
OP
ILikeBond

ILikeBond

Sr. Member
Joined
Jan 27, 2009
Messages
908
Then it was on to the engine compartment. Took everything that was left off, then hit it with the angle grinder and sandpaper.
 

Attachments

  • IMG_2807.jpg
    IMG_2807.jpg
    132.9 KB · Views: 110
  • IMG_2806.jpg
    IMG_2806.jpg
    131.6 KB · Views: 107
  • IMG_2803.jpg
    IMG_2803.jpg
    112 KB · Views: 97
  • IMG_2772.jpg
    IMG_2772.jpg
    118 KB · Views: 95
  • IMG_2777.jpg
    IMG_2777.jpg
    92.3 KB · Views: 105
  • IMG_2808.jpg
    IMG_2808.jpg
    138.1 KB · Views: 113
OP
OP
ILikeBond

ILikeBond

Sr. Member
Joined
Jan 27, 2009
Messages
908
Figured while I was at it, I ought to check what was under the fenders, so I took it down to the front clip and sanded away.
 

Attachments

  • IMG_2843.jpg
    IMG_2843.jpg
    106.1 KB · Views: 97
  • IMG_2842.jpg
    IMG_2842.jpg
    118.5 KB · Views: 110
  • IMG_2844.jpg
    IMG_2844.jpg
    118.8 KB · Views: 103
  • IMG_2845.jpg
    IMG_2845.jpg
    116.3 KB · Views: 101
  • IMG_2841.jpg
    IMG_2841.jpg
    88.2 KB · Views: 106
  • IMG_2840.jpg
    IMG_2840.jpg
    115.3 KB · Views: 115
  • IMG_2839.jpg
    IMG_2839.jpg
    108.1 KB · Views: 109
  • IMG_2836.jpg
    IMG_2836.jpg
    126.1 KB · Views: 120
  • IMG_2856.jpg
    IMG_2856.jpg
    111.7 KB · Views: 95
  • IMG_2852.jpg
    IMG_2852.jpg
    118.6 KB · Views: 97
  • IMG_2848.jpg
    IMG_2848.jpg
    110.8 KB · Views: 94
  • IMG_2846.jpg
    IMG_2846.jpg
    117 KB · Views: 95
OP
OP
ILikeBond

ILikeBond

Sr. Member
Joined
Jan 27, 2009
Messages
908
More pics.
 

Attachments

  • IMG_2862.jpg
    IMG_2862.jpg
    125 KB · Views: 68
  • IMG_2865.jpg
    IMG_2865.jpg
    133.2 KB · Views: 78
  • IMG_2861.jpg
    IMG_2861.jpg
    110.3 KB · Views: 71
  • IMG_2857.jpg
    IMG_2857.jpg
    128.8 KB · Views: 70
OP
OP
ILikeBond

ILikeBond

Sr. Member
Joined
Jan 27, 2009
Messages
908
This weekend, it was finally time to lay down some paint. I started with Chassis Saver on the frame, then started working on the undercarriage.
 

Attachments

  • IMG_2882.jpg
    IMG_2882.jpg
    80.9 KB · Views: 110
  • IMG_2912.jpg
    IMG_2912.jpg
    102.9 KB · Views: 113
  • IMG_2910.jpg
    IMG_2910.jpg
    77.9 KB · Views: 130
  • IMG_2894.jpg
    IMG_2894.jpg
    103 KB · Views: 122
  • IMG_2893.jpg
    IMG_2893.jpg
    109.3 KB · Views: 127
  • IMG_2886.jpg
    IMG_2886.jpg
    112.5 KB · Views: 128
  • IMG_2884.jpg
    IMG_2884.jpg
    125.8 KB · Views: 127
  • IMG_2883.jpg
    IMG_2883.jpg
    121.3 KB · Views: 132
  • IMG_2915.jpg
    IMG_2915.jpg
    108.1 KB · Views: 118
  • IMG_2916.jpg
    IMG_2916.jpg
    100.5 KB · Views: 120
  • IMG_2917.jpg
    IMG_2917.jpg
    92.8 KB · Views: 113
  • IMG_2918.jpg
    IMG_2918.jpg
    100.5 KB · Views: 112
Top