


Community
Buy / Sell


Bronco Tech
3 Arm Wiper Setup
Fix Motor Mount
Roll Cage Braces
Throttle Body 65mm
Wheel Alignment
Heat Riser Replacement
Vent Window Repair
Center Console Mount
Straighten Bumper
Ford 6R80 6 spd
More Tech...
Fix Motor Mount
Roll Cage Braces
Throttle Body 65mm
Wheel Alignment
Heat Riser Replacement
Vent Window Repair
Center Console Mount
Straighten Bumper
Ford 6R80 6 spd
More Tech...

-
Welcome to ClassicBroncos! - You are currently viewing the forums as a GUEST. To take advantage of all the site features, please take a moment to register. It's fast, simple and absolutely free. So please join our community today!If you have problems registering or can't log into your account, please contact Admin.
You are using an out of date browser. It may not display this or other websites correctly.
You should upgrade or use an alternative browser.
You should upgrade or use an alternative browser.
Hellwig 68 Bronco Project
- Thread starter Bknaus
- Start date
OP
OP
Bknaus
New Member
Where did you get those weld-in inserts that you used on the radius arms?
I'm not sure where those exact ones came from, but I know we have ordered them from PolyPerformance before and they were good quality and showed up fast. They have a range of sizes and both left and right hand thread: http://www.polyperformance.com/shop/Synergy-Suspension-Threaded-Weld-In-Tube-Adapter-p-349.html
Any updates with your project?
OP
OP
Bknaus
New Member
Any updates with your project?
Not really, our "To Do" list keeps getting longer without throwing the Bronco into the mix. When we get a few seconds we do some work like last week we tore apart all the heater components, cleaned them up, painted everything and put it back together but nothing big.
We have an intern returning who helped a ton with getting it to the stage before SEMA so he'll take some of the load off and hopefully start knocking things off the list again.
We also have been distracted by a 68 Chevelle build... (for some reason we like 68s)
OP
OP
Bknaus
New Member
We have actual progress!!! Finally...
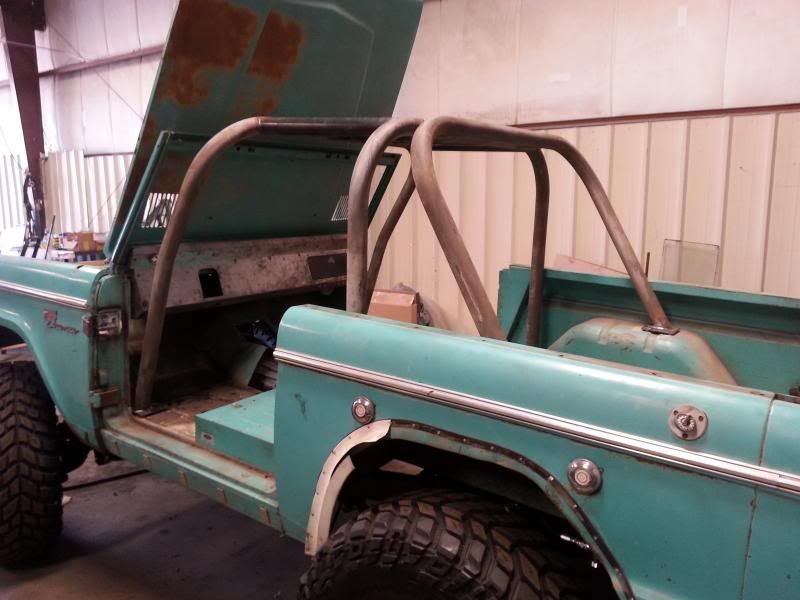
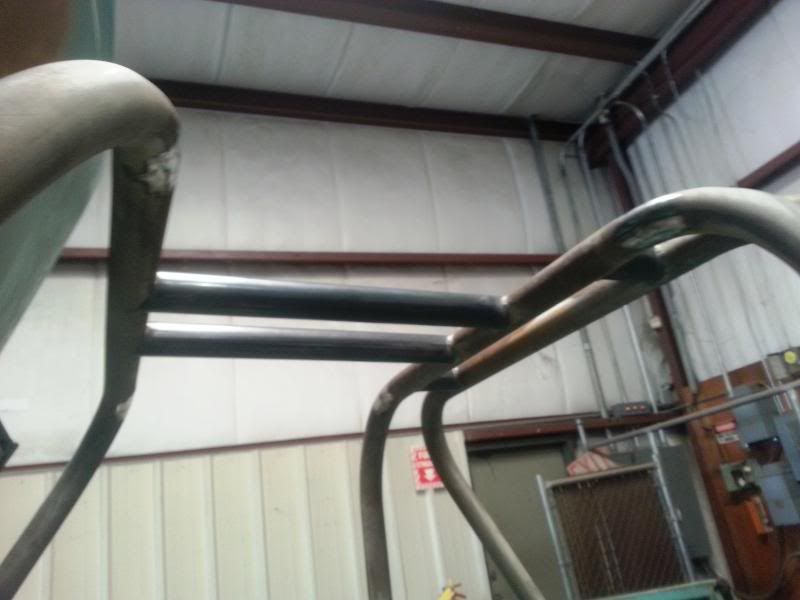
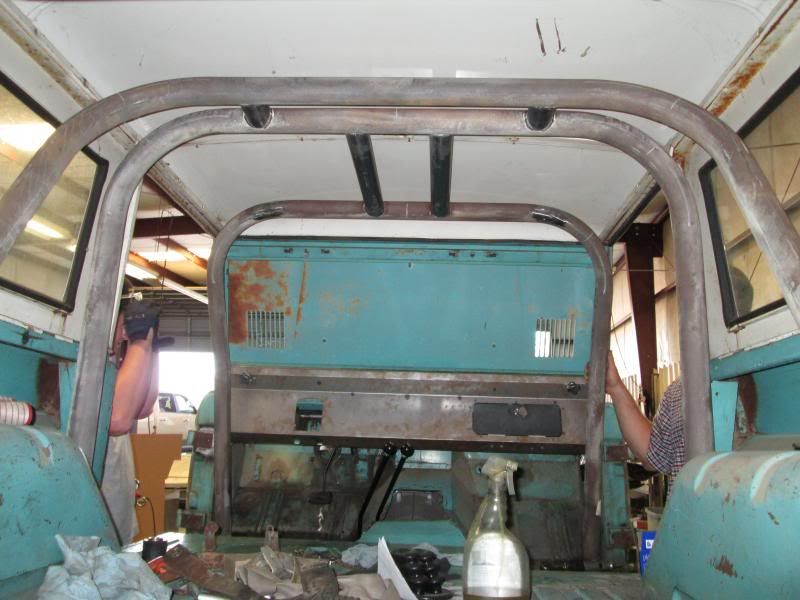
We are test fitting the Baja Custom cage from Wild Horses. Fits in perfectly up top, now we're figuring out sandwich plates, where we want to tie it into the frame, etc etc underneath.
We also swapped out our Eibach coils from 350# to 200# after some calcs. This dropped our ride height some, gave us more droop travel and will let us do more tuning with the valving instead of it just being stiff from the coils (I hear this is what all the cool kids are doing now). A big thanks to PolyPerformance for helping us out with the switch and giving us lots of advice! No real pics of that...
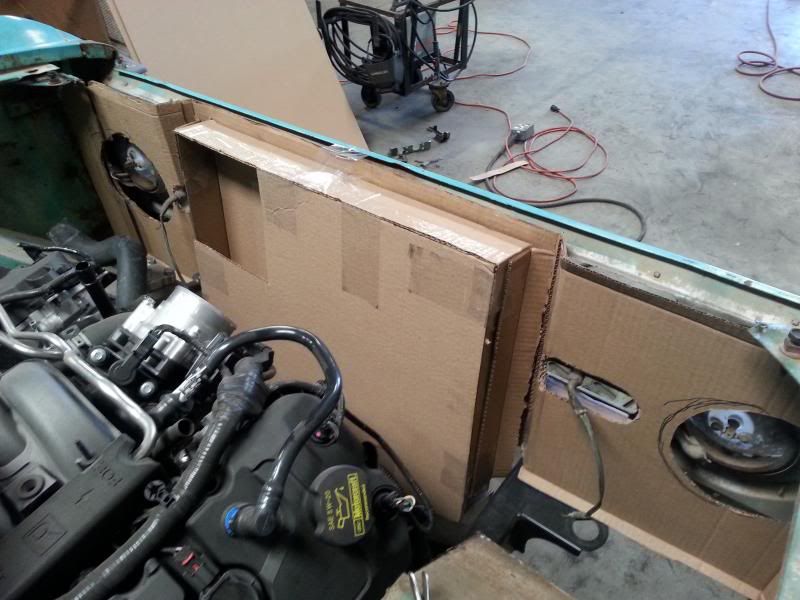
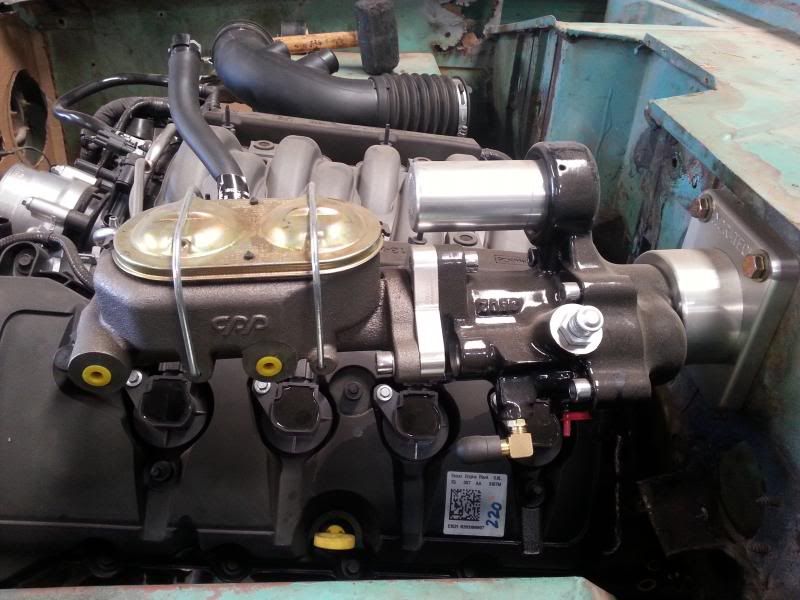
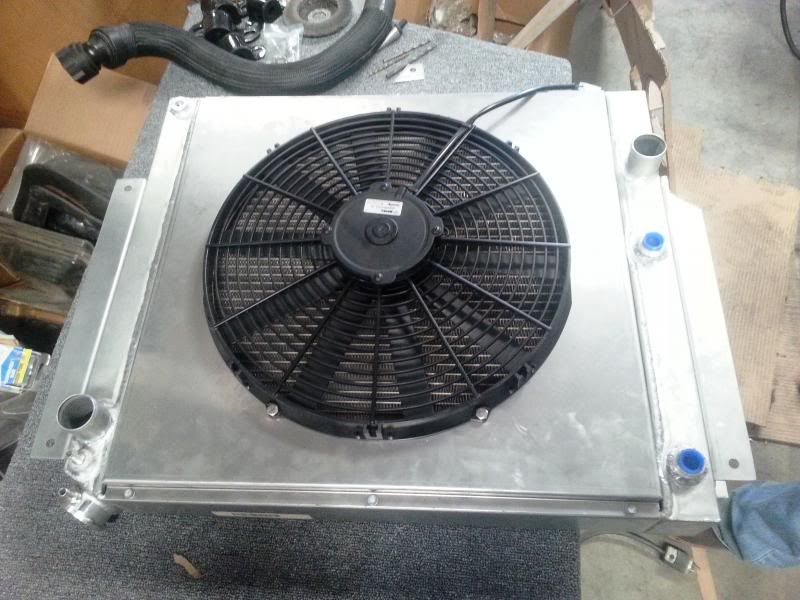
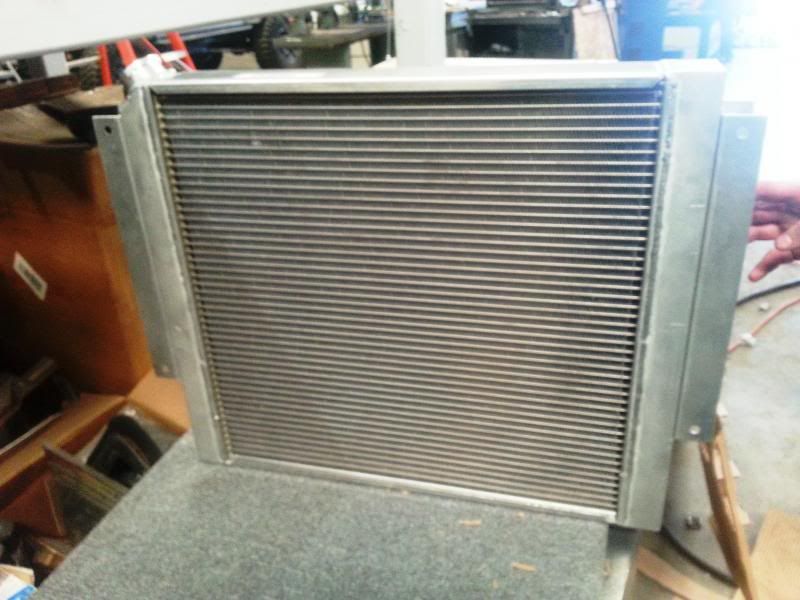
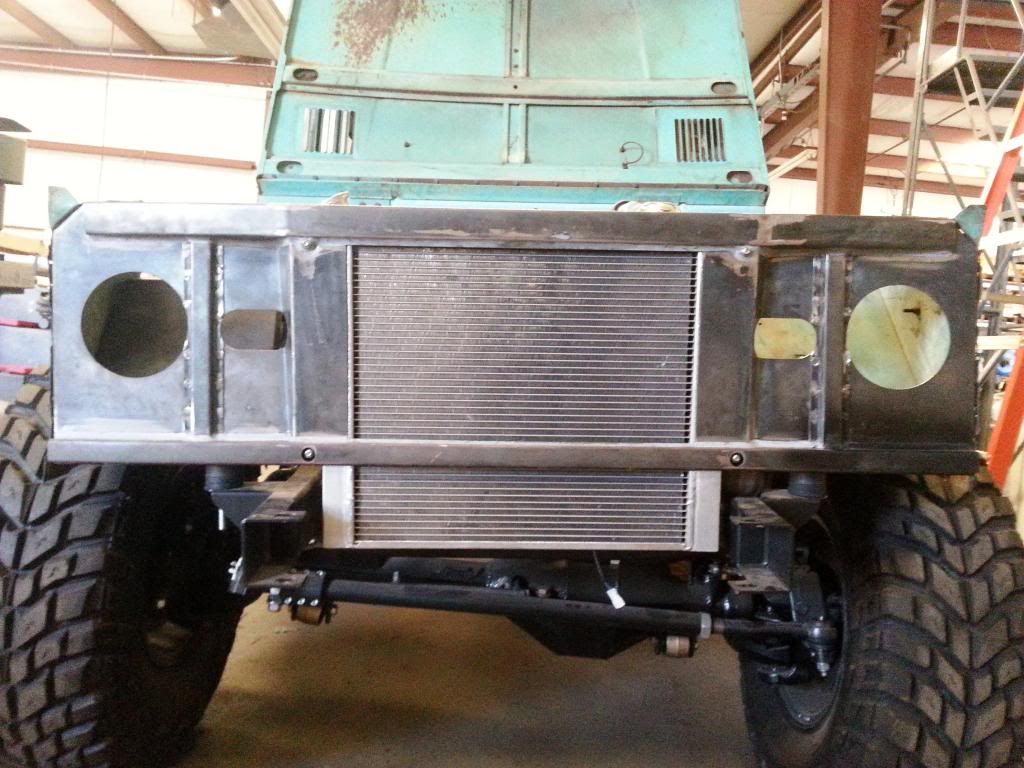
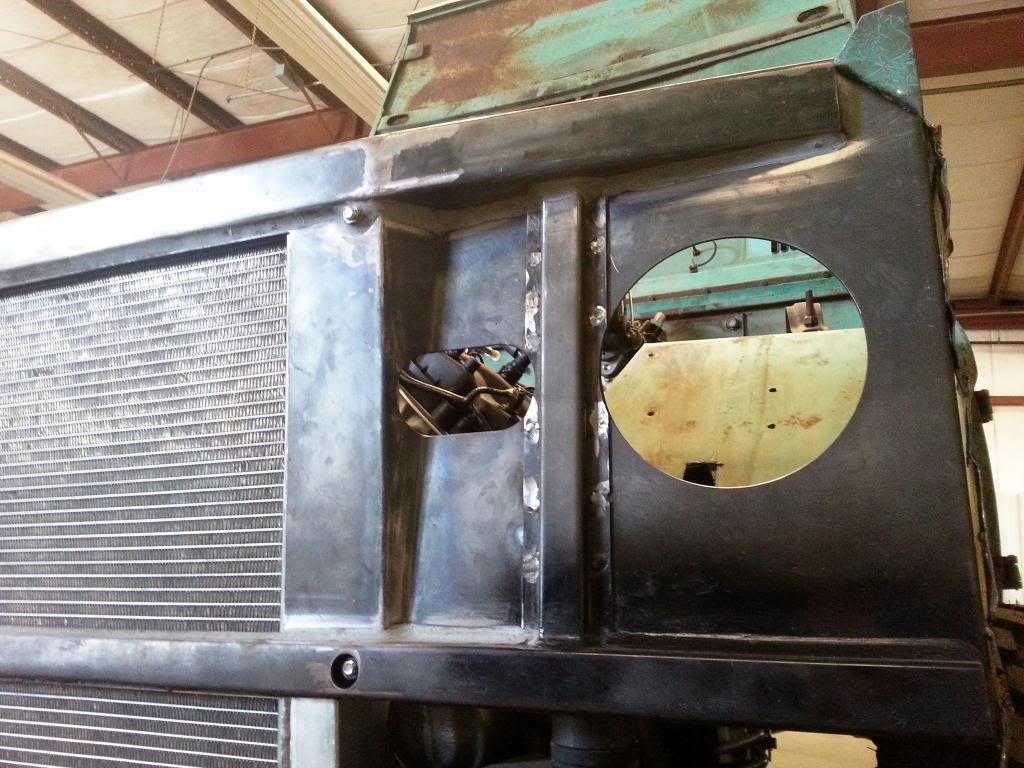
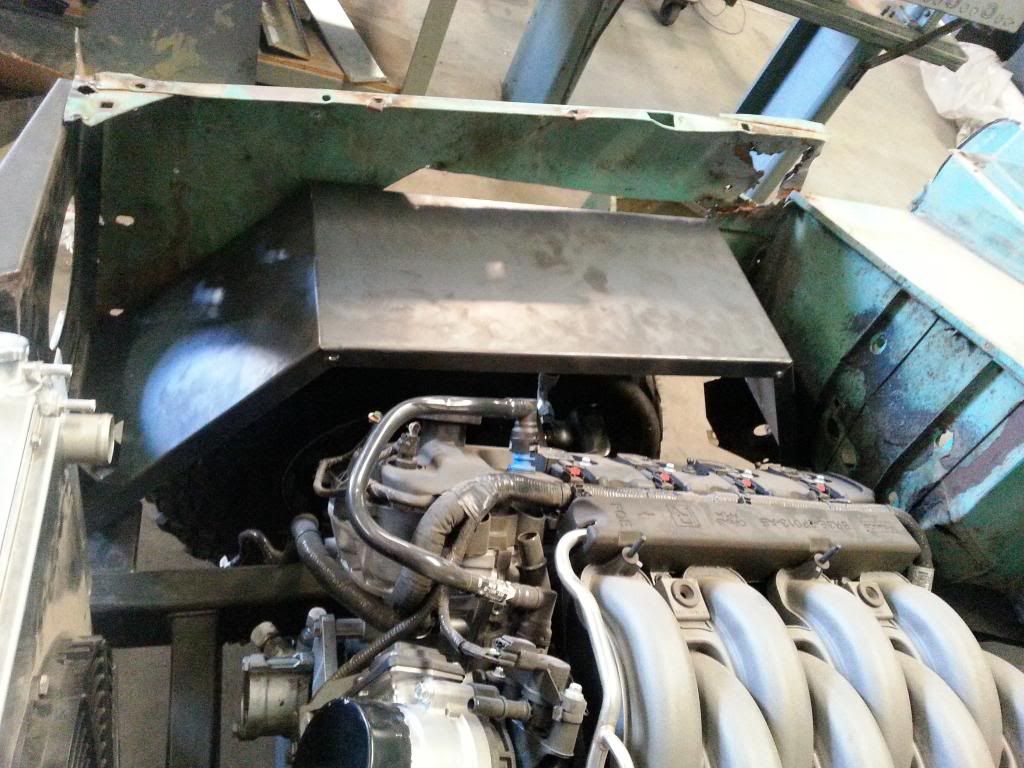
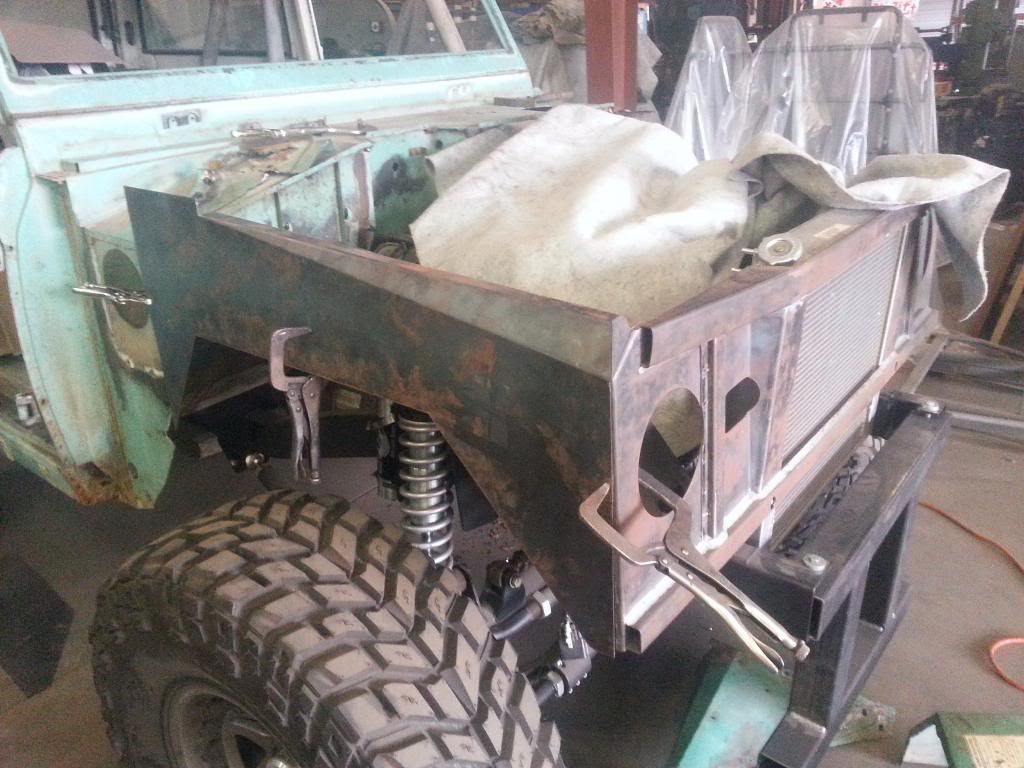
We hacked up the body a little more (sorry to the purists). We were having trouble finding room for the factory air intake between the engine and the radiator. We realized from the factory the core support has a lot of extra space to lean the radiator some and allow for the hood latch mechanism. The answer, cut out the factory core support and make our own! We'll now just use hood pins. We made patterns out of cardboard for the radiator and core support and then built it up in SolidWorks to cut out of 14 gauge on our new CNC Plasma Table. Now you can see we have room for the radiator and the air intake tube.

Removed core support pieces
Arts and crafts

Just clears! (fan will fit below it)
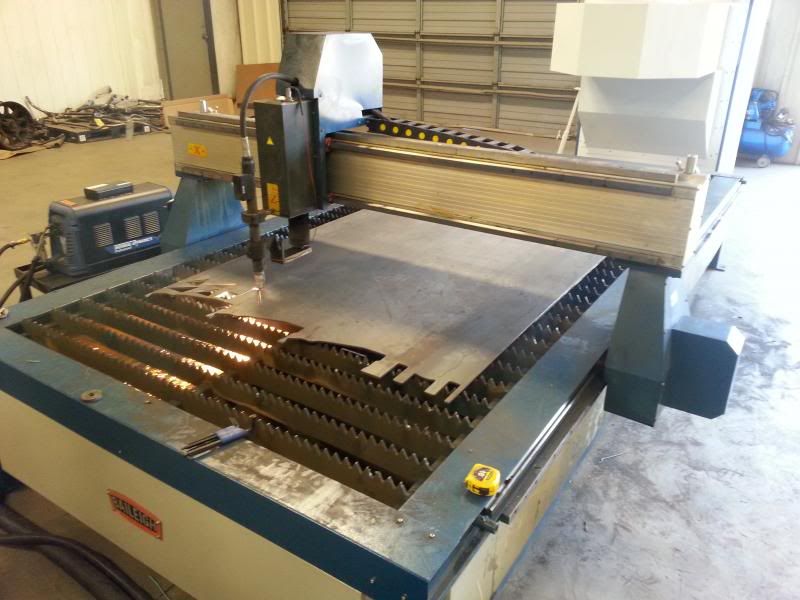
This thing speeds up custom brackets and prototypes from weeks/days to minutes. It's awesome
I also don't think we posted pictures of the Hydroboost setup from WildHorses. We're still on the fence about it hanging so far out but it sure will work and the parts are very well made.
We are test fitting the Baja Custom cage from Wild Horses. Fits in perfectly up top, now we're figuring out sandwich plates, where we want to tie it into the frame, etc etc underneath.
We also swapped out our Eibach coils from 350# to 200# after some calcs. This dropped our ride height some, gave us more droop travel and will let us do more tuning with the valving instead of it just being stiff from the coils (I hear this is what all the cool kids are doing now). A big thanks to PolyPerformance for helping us out with the switch and giving us lots of advice! No real pics of that...
We hacked up the body a little more (sorry to the purists). We were having trouble finding room for the factory air intake between the engine and the radiator. We realized from the factory the core support has a lot of extra space to lean the radiator some and allow for the hood latch mechanism. The answer, cut out the factory core support and make our own! We'll now just use hood pins. We made patterns out of cardboard for the radiator and core support and then built it up in SolidWorks to cut out of 14 gauge on our new CNC Plasma Table. Now you can see we have room for the radiator and the air intake tube.
Removed core support pieces
Arts and crafts
Just clears! (fan will fit below it)
This thing speeds up custom brackets and prototypes from weeks/days to minutes. It's awesome
I also don't think we posted pictures of the Hydroboost setup from WildHorses. We're still on the fence about it hanging so far out but it sure will work and the parts are very well made.
OP
OP
Bknaus
New Member
looks great, glad to see the project progressing
Thanks, and believe me, no one is happier to see some forward progress on this than me!
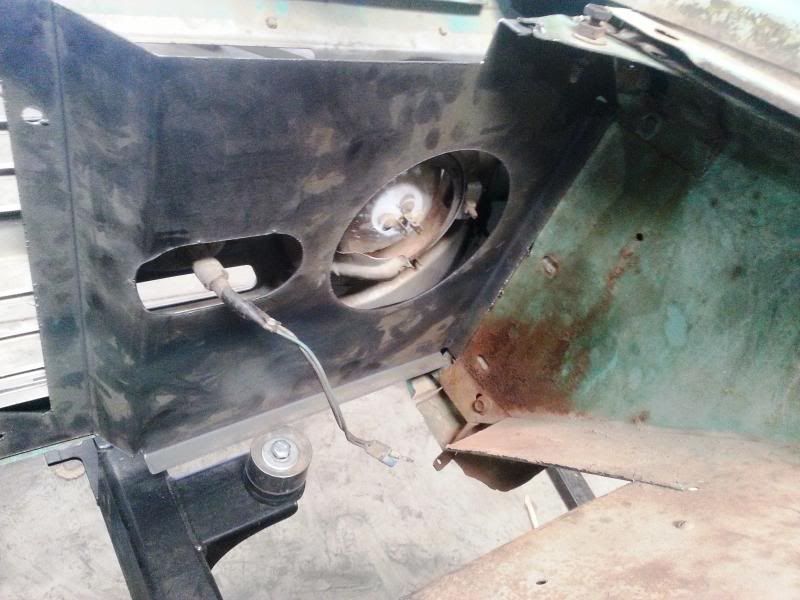
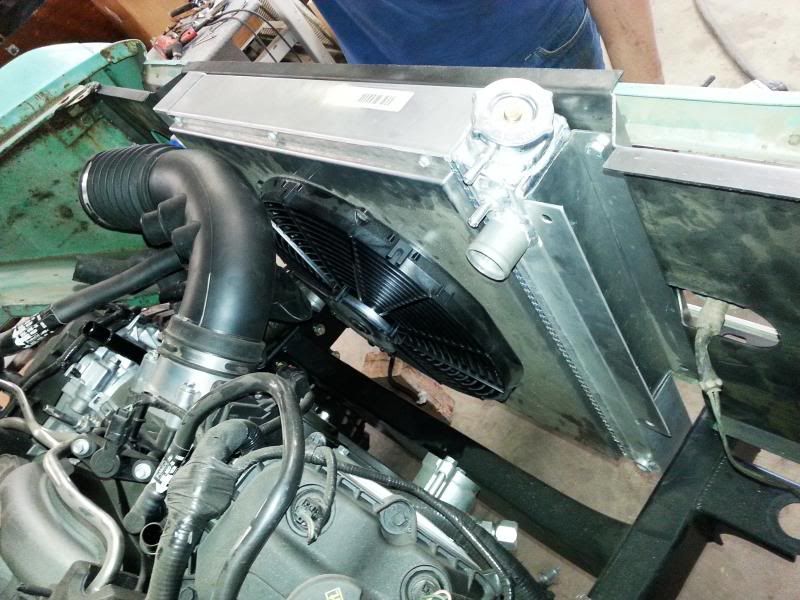
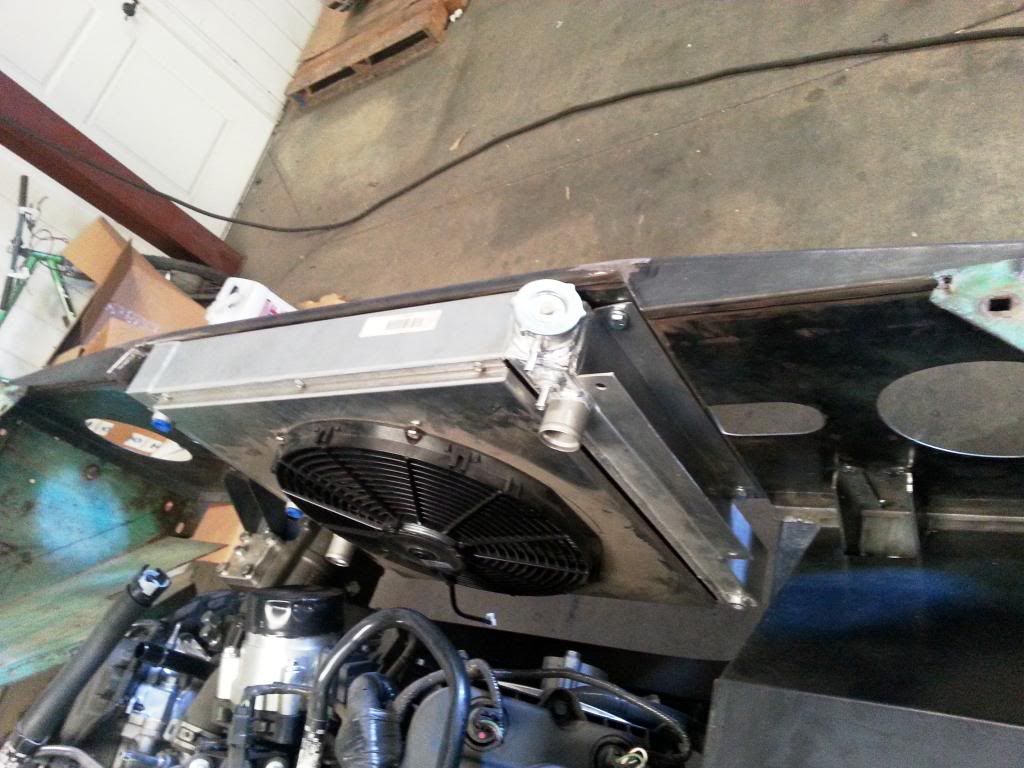
Here's some more progress. Messing with the mounting tabs on the Griffin radiator/e-fan
New core support in, went surprisingly well although we may make another one since now that it's in there we see a few things that would make it better.
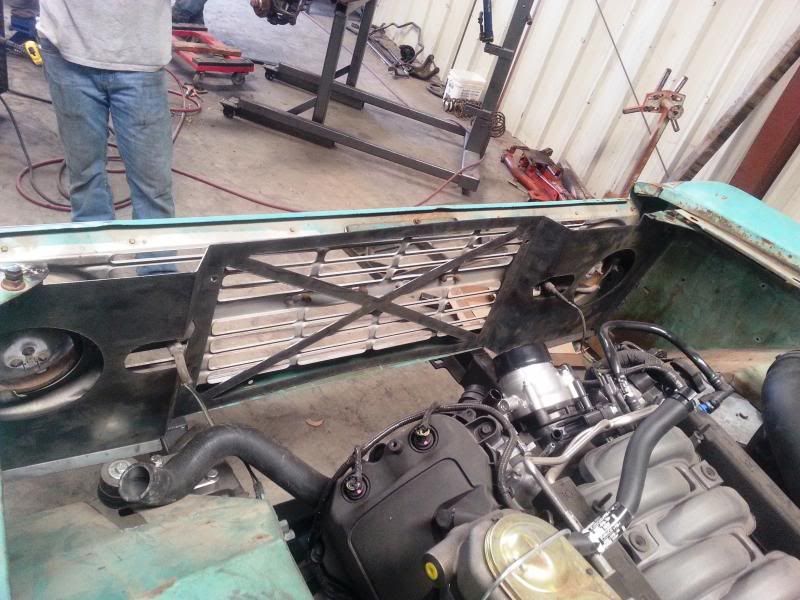
Edges and everything still need to be cleaned up, this is just the quick initial test fit.
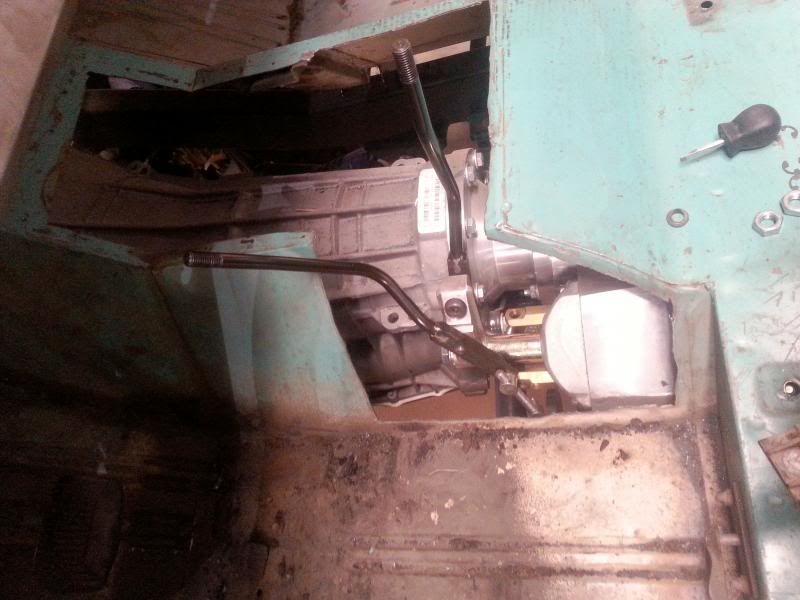
Reinstalled the Atlas shifters. The shifter linkage seemed a little short and was binding slightly so we're making a longer one with new handles to make it an easy reach from the seat
We're tweaking distances on the tubes to maximize head clearance
OP
OP
Bknaus
New Member
Our intern redid the core support and I think it looks badass with the Griffin Radiator peeking out. We adjusted some dimensions from the last core support and got rid of the center "X" since it wasn't doing much. Now he's working on doing a shroud across the top to clean it up and protect some edges and that will be done.
We also extended the shift linkage on the Atlas which makes shifting a TON easier. They were just too short with too much angular change before and were binding, now it's nice. We added a tab to support it off the tranny since it is longer now too so it's nice and stable. Knocked out some new shifter handles too to compensate for the extra length and make better knee clearance (may have to be tweaked a little more once the seats are in)
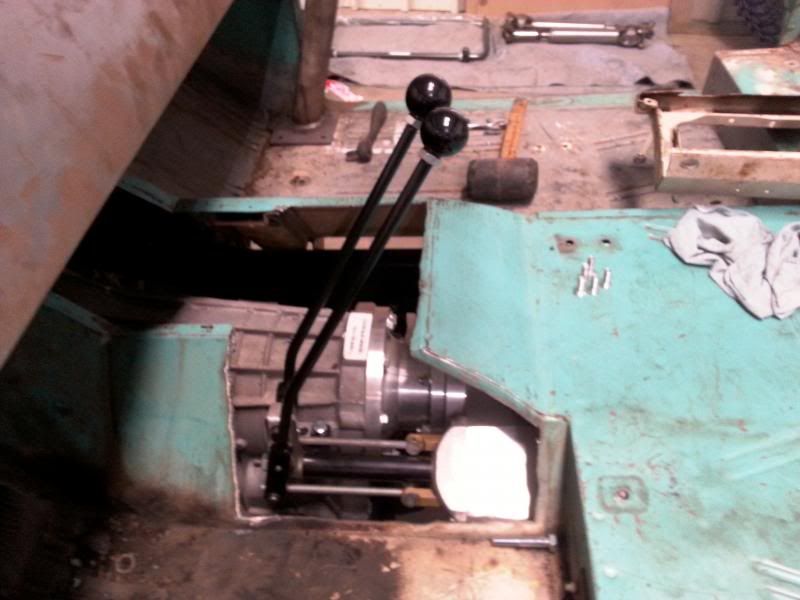
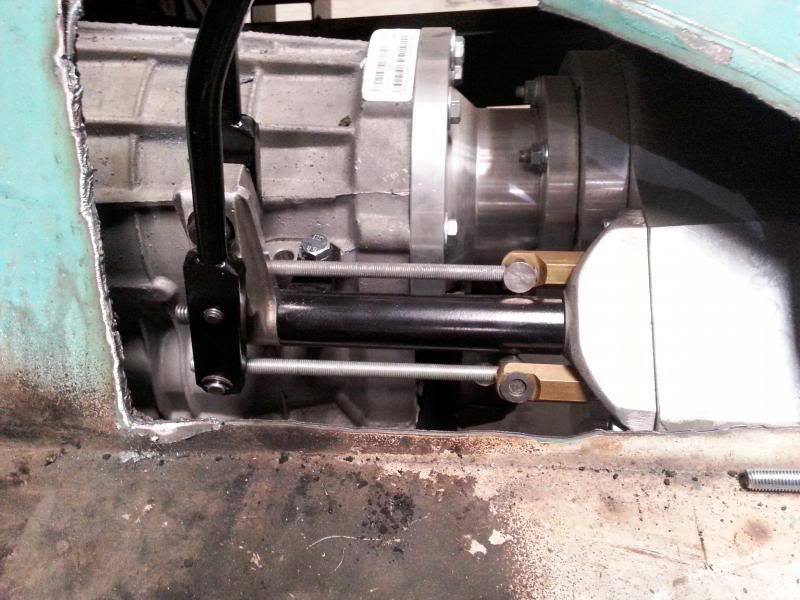
We also extended the shift linkage on the Atlas which makes shifting a TON easier. They were just too short with too much angular change before and were binding, now it's nice. We added a tab to support it off the tranny since it is longer now too so it's nice and stable. Knocked out some new shifter handles too to compensate for the extra length and make better knee clearance (may have to be tweaked a little more once the seats are in)
Colorado75Bronc
Jr. Member
Ya the patina look is awesome!
OP
OP
Bknaus
New Member
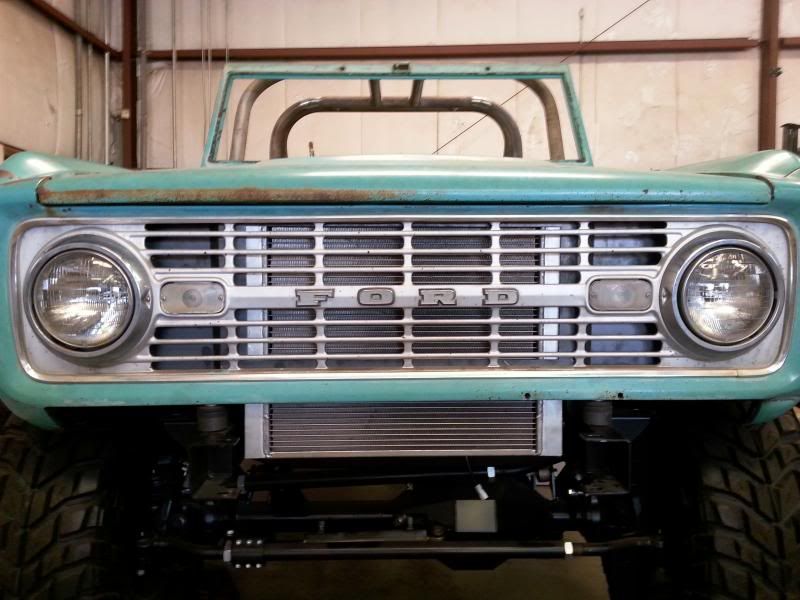
I'm digging the patina with that color, are you guys going to paint it? You should just make the interior like new and clear the outside.
Ya the patina look is awesome!
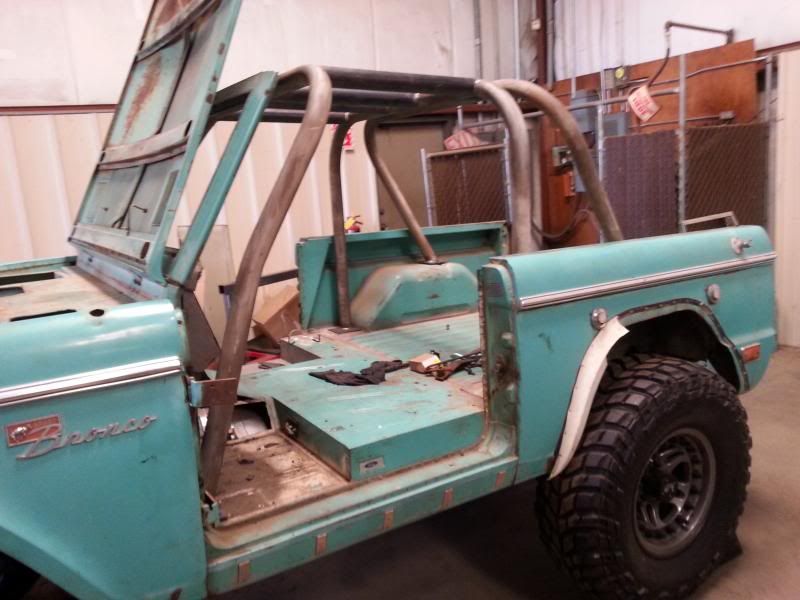
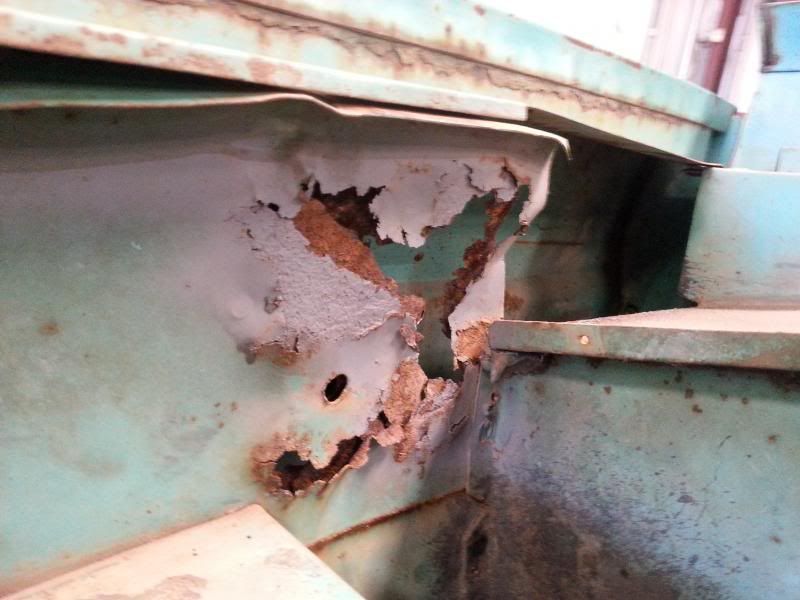
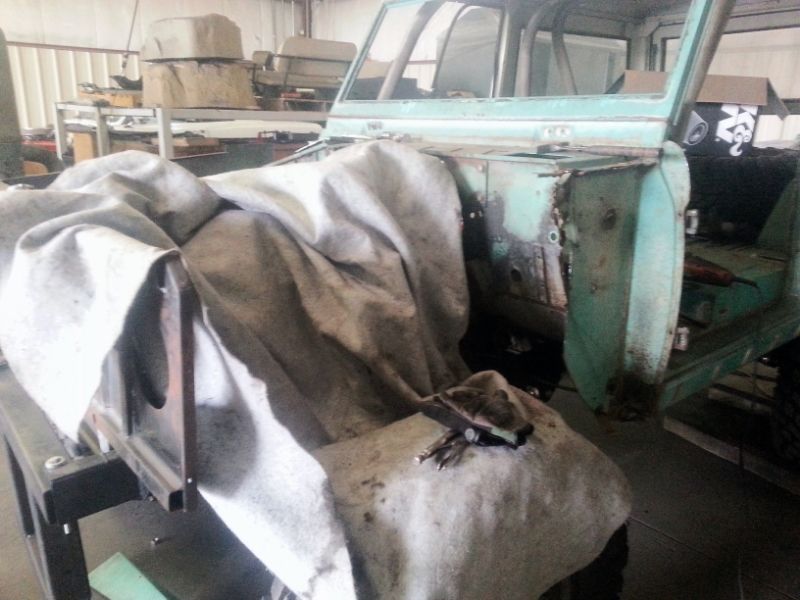
I agree, I love the "patina" and we talked about keeping it new underneath but classic looking on the outside but unfortunately there is too much rust repair for that to work. There are only a couple spots like in the picture that will need patch panels but for the patina to work it has to be all or nothing...
Otherwise, we threw the roof on to check cage clearance and it seems perfect (which is what we expected from Wild Horses). There's a little over an inch gap so even if the roof moves up and down a little it won't rattle against the cage.
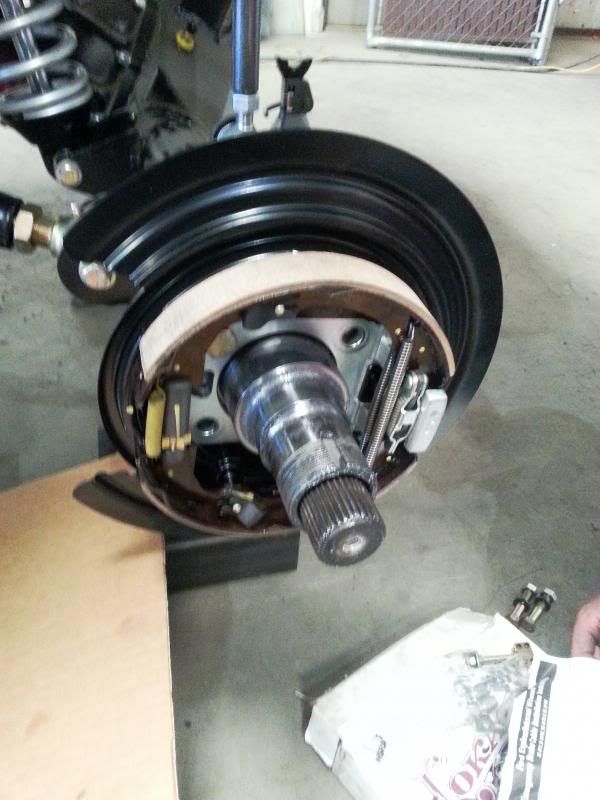
We're also switching the brake calipers on the rear axle from the rear to the front of the axle. This Currie axle has D60 outers with JK brakes and the JK brakes have the e-brake cable pulling out on the front of the axle. Unfortunately that pulls directly into our lower link mount so to get the e-brake to work we have to flip it all 180 degrees. We had to grind down an ABS sensor mount on the back of the axle for this to clear (ours won't have ABS) but otherwise it was just tearing it down and flipping it.
MPG_Bronco
Jr. Member
just starting to watch this thread... awesome build!!! loving every most and pic!!!
Thanks for sharing and keep us updated!!!
Thanks for sharing and keep us updated!!!
Geologist
New Member
I need to win the lottery. . . I can't stop drooling!
OP
OP
Bknaus
New Member
I spent the past week in Detroit for work and when I got back out intern Tyler had finished the core support and it's 100x better than I expected, I really like it and it's a lot nicer than our iteration #1. He also started on the new inner fenders.
BroncKrawler
Full Member
Looking good!!!
Colorado75Bronc
Jr. Member
That looks awesome, I love it!
OP
OP
Bknaus
New Member
Anything to report?
We haven't done a whole lot. Between hiring 10 new employees, starting construction on a 10,000 sqft addition and working 10 hour days we haven't had a lot of time.
We did decide patching up the rust holes in the inner fenders was a waste of time and made our own replacement panels with the CNC plasma and press brake. We're in the middle of fitting and installing them whenever we get a spare second here or there.
Wish we had more to report :-[
Rusty inner fender gone
Rusty inner fender
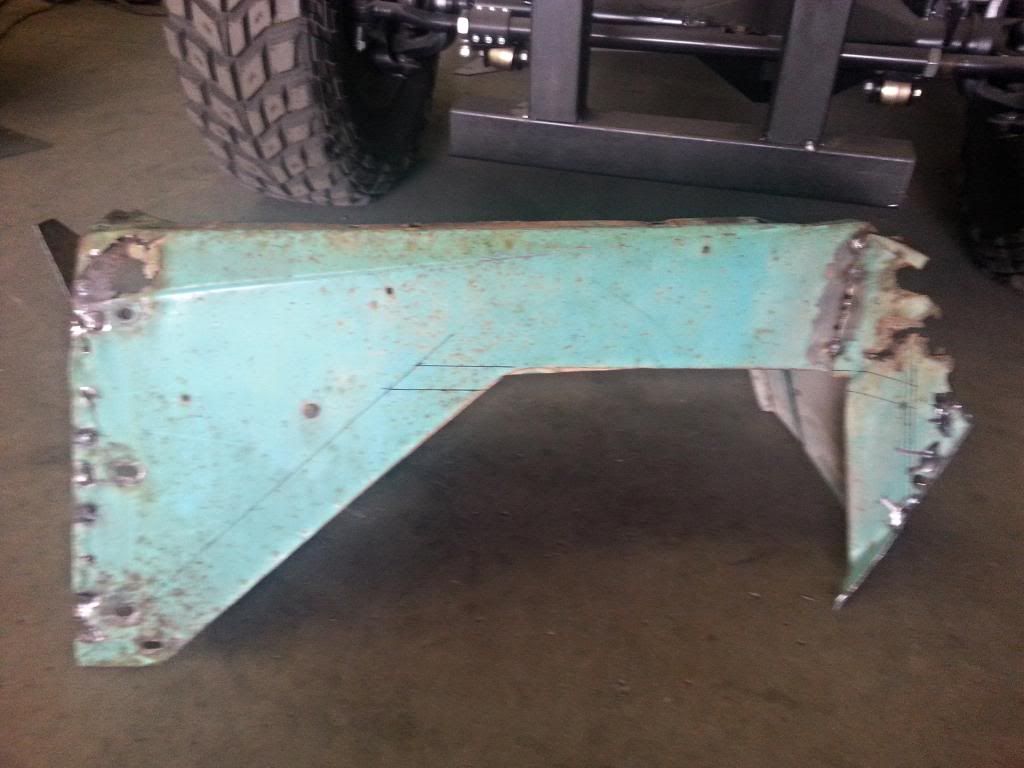
New inner fenders getting fitted
Similar threads
- Replies
- 0
- Views
- 268